- Introduction
- History
History[]
Past[]
Early life[]
In his youth, Kin'emon was an infamous thug who was addicted to gambling. Despite being a childhood friend with Tsuru, he often tried to take her money to pay off his gambling debt. On one occasion 41 years ago, she caught him red-handed and reprimanded him. He later stole a white boar from three men who went to Tsuru's tea house, having overheard how valuable the boar was. In the capital, he also stole money from Hyogoro. Before he could deliver the white boar to the Kurokoma boss, he was chased by some thugs. After meeting up with Denjiro, Kin'emon realized the grave consequences of bringing the white boar to the capital as it was the offspring of the Mountain God. When the Mountain God attacked the capital, Kin'emon feared that he would be responsible for the capital's destruction. Kozuki Oden, having overheard Kin'emon and Denjiro, approached them and asked to give him the white boar.[12]
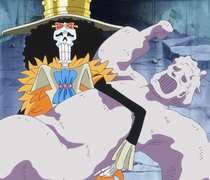
Kin'emon initially refused to hand the boar over, still wanting to use it to pay off his debts. One of the men whom Kin'emon stole the boar from arrived and said that his comrades and Tsuru were devoured by the Mountain God. Kin'emon then let the white boar go and tried to attack the Mountain God, only to be overpowered by the beast. After Oden struck down the giant boar, Kin'emon discovered that Tsuru survived and embraced her. He was going to take responsibility for the Mountain God's rampage, but Oden knocked him out and took the blame himself.

Kin'emon and Denjiro begin to serve Oden.
As Oden left the capital in exile, Kin'emon decided to become his follower. He and Denjiro then followed Oden to Shimotsuki Yasuie's residence at Hakumai.[13] They later followed Oden on his journey to Kuri and made new companions along the way. After Oden became daimyo of Kuri, Kin'emon became one of his retainers.[14]
After Inuarashi, Nekomamushi, and Kawamatsu joined Oden, they were running low on funds. Therefore, he and the other retainers attempted to steal money from Yasuie, but they were caught. Instead of punishing them, Yasuie allowed them to take the money and encouraged them to use it to become better people for the sake of Oden and Wano Country. Following Yasuie's advice, they educated themselves and trained to become dignified warriors. 30 years ago, they visited the Flower Capital with Oden.[15]
After meeting the Whitebeard Pirates, Oden and his retainers were having a feast with them. Oden said that he wanted to join the crew, but Kin'emon, Kanjuro, Raizo, and Denjiro voiced out against it. Kin'emon and Whitebeard both agreed that Oden should not leave the country. After the Whitebeard Pirates left Wano two weeks later, the retainers discovered Oden, Izou, Inuarashi, and Nekomamushi to be missing.[16]
During Oden's absence, Kin'emon and his fellow retainers protected Kuri. When Oden returned to Wano with the Roger Pirates, the retainers greeted him, but before they could say anymore, Toki stopped them from convincing Oden to stay in Wano. Oden chose to continue his journey with Gol D. Roger, making Kin'emon angry.[17]
Around six months before Oden finished his voyage, Kin'emon and his fellow retainers were furious at Kurozumi Orochi for abusing his position as shogun. While Inuarashi and Kawamatsu stayed behind at Oden Castle, the other retainers marched to the Flower Capital to confront Orochi only to discover that a group of Beasts Pirates were in Kuri threatening Oden's family. When Oden returned to Wano after finishing his journey, the retainers (except Denjiro and Ashura Doji, who were elsewhere at the time) welcomed him back and told him about Wano's situation. Oden then ordered his retainers to protect his family and Kuri before charging to the capital by himself.[18]
Fall of the Kozuki Family[]
After Oden failed to kill Orochi, Kin'emon and the other retainers remained loyal to him for the next five years, despite Oden acting like a fool and losing the respect of most of Wano's people. 20 years ago, Oden finally had enough and decided to take down Kaidou. The retainers eagerly followed him and marched with him to Onigashima.[19]
On the way to Onigashima, the group was confronted by Kaidou and his crew in the Udon region. In the ensuing battle, the samurai were joined by Shinobu. Unfortunately, the samurai were overwhelmed in the end. Oden and the Nine Red Scabbards were then imprisoned in the Flower Capital and sentenced to be boiled alive in three days.[20]
All ten prisoners were later brought to the execution site, at which point Oden made a deal with Kaidou. After Oden stepped into the pot of boiling oil, the retainers were about to join him, but Oden grabbed a plank and ordered them to stand on it as he held them over the pot.[21] As Oden endured the hour, he explained to his retainers the reason Wano Country was isolated and requested them to open Wano's borders for him. Oden successfully survived the hour, but Orochi summoned a firing squad to execute Oden and his retainers. Oden once again told his retainers to open Wano's borders before throwing them far away from the pot. The Scabbards fled with tears as Oden met his demise.[22]

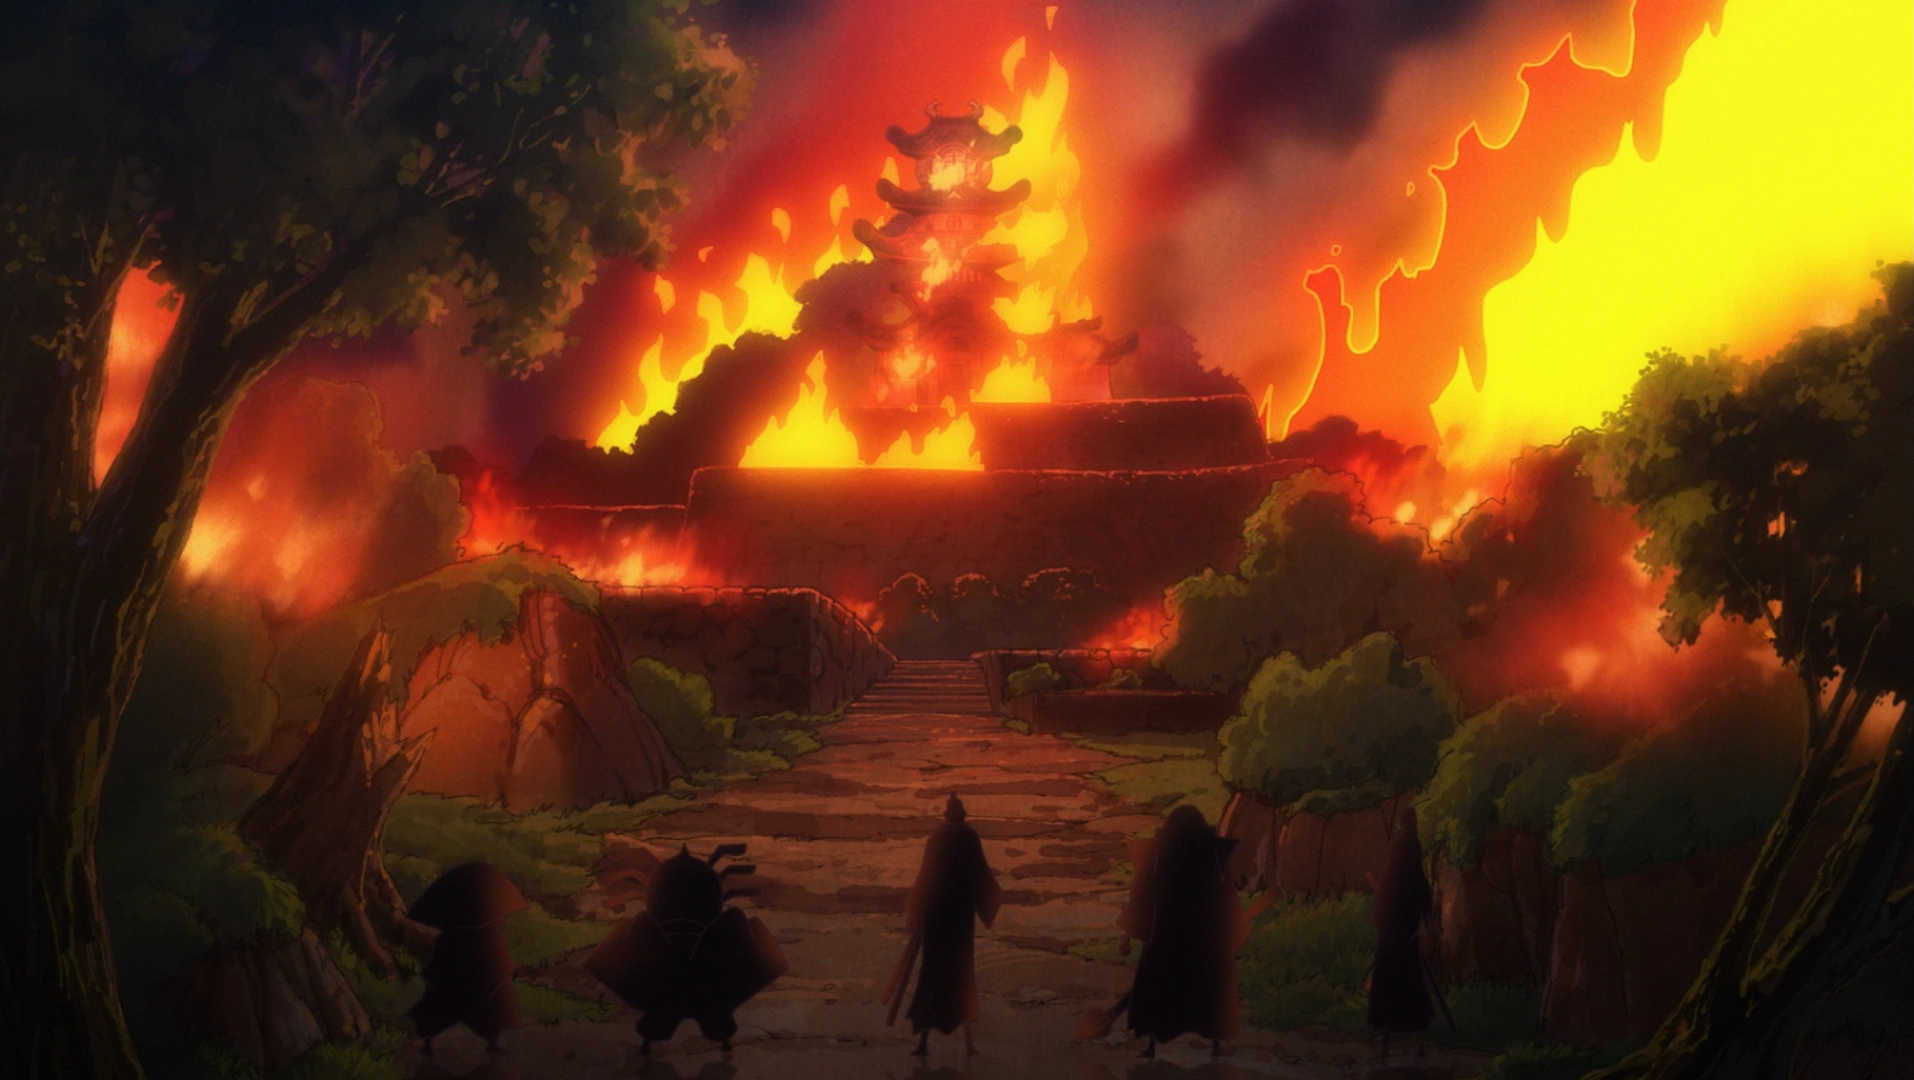
Kin'emon and the other retainers during the destruction of Oden Castle.
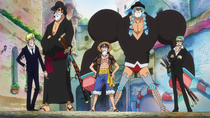
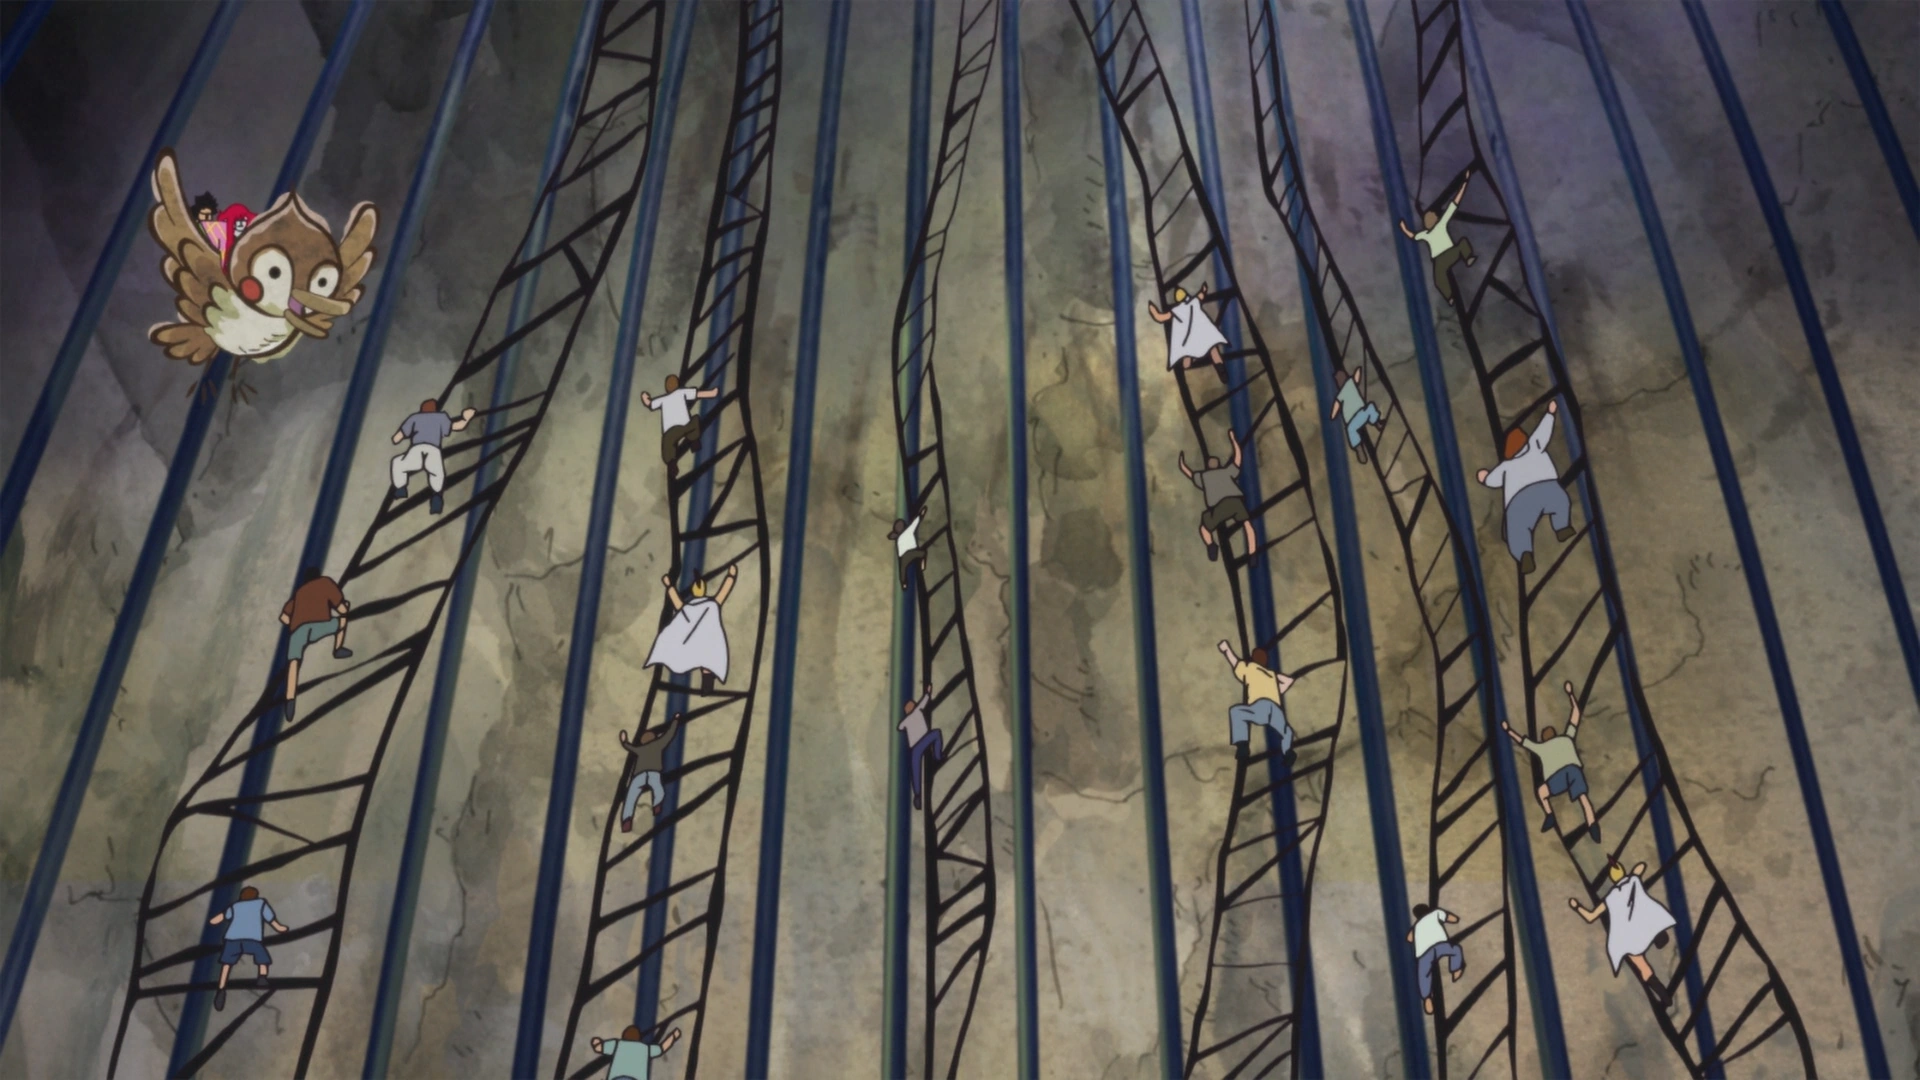
As they were chased by an army of pursuers, Shinobu gave the Scabbards their weapons. On the way back to Oden Castle, Inuarashi and Nekomamushi were captured by the shogun's forces and Denjiro and Ashura split from the group to fight their enemies. By the time the rest of Kin'emon's group reached Oden Castle, it was set ablaze by Kaidou. The retainers went inside the castle and found Momonosuke as well as his sister and mother. Toki then sent Momonosuke, Kin'emon, Kanjuro, Raizo, and Kikunojo twenty years into the future.[23] After arriving at the future, they traveled around Wano and discovered how much it had changed over the years. However, they discovered allies they could still count on and began forming a plan to take back Wano. Kiku remained in Wano while Momonosuke and the three retainers went on a journey to Zou to enlist the aid of the Mink Tribe. Kin'emon posed as Momonosuke's father in order to avoid any unwanted attention, but when they were leaving Wano, they were spotted by the Beasts Pirates.[24]
Journey to Zou[]

Kin'emon leaves Kanjuro to be captured in order to find his "son".
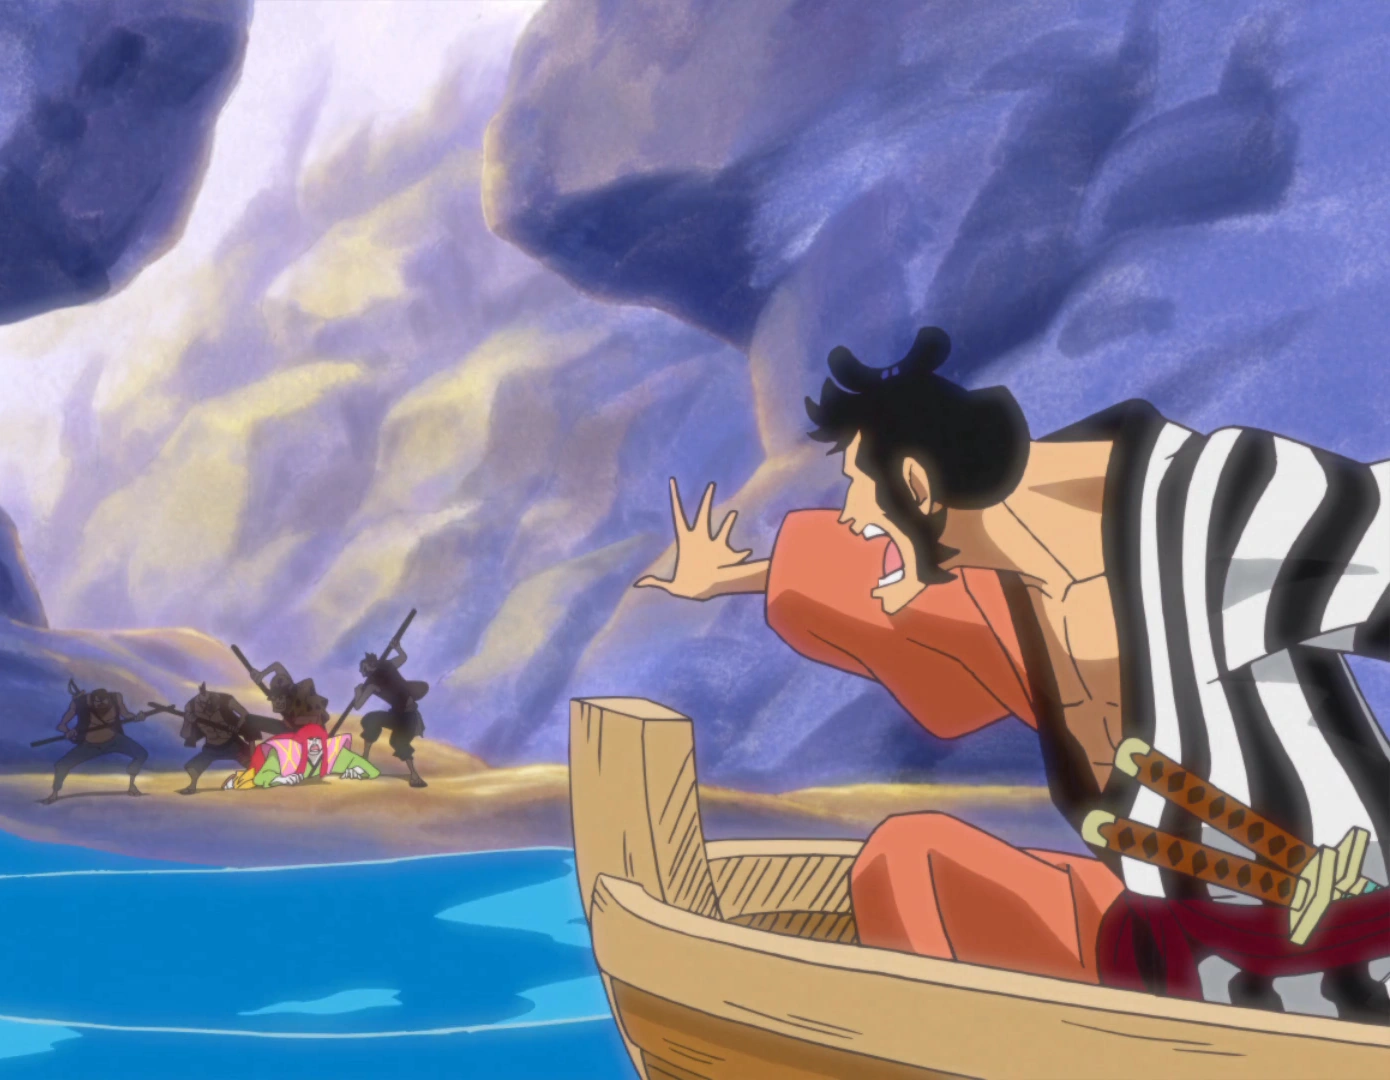
While sailing to Zou, they were shipwrecked, and Raizo got separated. They drifted to Dressrosa where they were pursued by subordinates of Donquixote Doflamingo. Momonosuke hid himself in a ship, which set sail before Kin'emon could reach him. Kanjuro held their pursuers at bay to allow Kin'emon to escape.[25]
Kin'emon went to Punk Hazard to search for Momonosuke. During the journey, he encountered Warlord of the Sea Trafalgar Law, who dismembered the samurai and scattered his body parts all over the island. His legs wandered into the burning side of the island and got stuck on a dragon. His head was sliced into eight pieces and locked in a cell in Vegapunk's former research facility. His torso and arms ended up wandering around the frozen side of the island, cutting down anyone that approached it.[26]
Dressrosa Saga[]
Punk Hazard Arc[]
Kin'emon's legs running away from Luffy.
When the Straw Hat Pirates encountered the dragon that Kin'emon legs are stuck to, Kin'emon questioned them, asking if they were with the Warlord of the Sea. After the dragon was defeated, Monkey D. Luffy pulled the samurai's legs off the dragon. Initially surprised that the person was only a pair of legs (and blaming it on Roronoa Zoro, thinking that he was the one who sliced the samurai), they were further surprised when the legs tried to attack them and then run away. Luffy ran after them, saying he wanted them to be part of his crew.[1] When the pirates captured them, Luffy attached them to his back, called it "Ashimaro", and claimed that he was now a centaur. Together with the pair of legs, the Straw Hats traveled to the frozen side to find their friends.
In the meantime, Kin'emon's head encountered the kidnapped group of the Straw Hats, who were placed in the same cell as he was. He requested that they reassemble the pieces of his head. At first the Straw Hats fooled around with the pieces, but then put him together in the correct order, with the exception of putting his chin on top of his head, and the top of his head where the chin should be. After realizing that he was a severed human head, they were shocked. When Nami started talking to him, he scolded her for her personality and sense of fashion, though after he admitted that he actually liked it, and the samurai got a trashing by Sanji.
After finding out that they were pirates, he expressed his deep dislike for such people, saying that he would have been willing to escape with them if they were not. He was greatly surprised when Franky blew down the door. As the Straw Hats escaped, Sanji picked up the head and rearranged it into its proper self, revealing him to be a samurai from Wano Country. Sanji explained that they came to this island because they had picked up a distress call from one of the samurai's victims. The head claimed that he would never hurt somebody without purpose and that he was there to find his own missing "son". Hearing this, Sanji chose to bring the head along, claiming responsibility.
Kin'emon's torso fighting Brook.
While escaping pursuers, the Straw Hats and Kin'emon's head entered a room full of children.[27] After the samurai got over his initial shock, he asked the children if they know a boy by the name of Momonosuke, scaring the kids while doing so. He continued to scream for his "son", causing Nami to hit him, which started him yelling at the shame of being hit by a woman.[28] As Sanji and Franky fought their pursuers, Kin'emon's head felt the strain of his torso, which happened to be fighting Brook, who put up a good fight but was eventually scared away by the headless and legless torso.[29]
After Sanji and Franky defeated the satyrs, the samurai wished to stay and look for his "son". Sanji started to get frustrated with the head's pride and wished to smash it, but was held back by Franky. Kin'emon said that he refuses to be indebted to pirates by asking for their help, though he has no objection if they wish to find his body for him. The samurai further taunted Sanji, reminding him that the cook chose to be responsible for the head. Sanji then threw a tantrum and beat up the head before taking it with him.
When Kin'emon, Sanji, and Franky caught up with the children, he was forced to go along with Franky's dance routine, stunning the Marines and Law. Once the Straw Hats was who is in front of them, they ran back into the building. Kin'emon wished to stay back since he recognized Law as the one that cut him up, but was rebuffed once they saw that the Warlord did not have his other body parts.[30]
As they ran to the back entrance, the children started suffering due to the cold. Kin'emon told everyone to put a stone or leaf on their heads, and after they did, he managed to clothe them in warm jackets and boots. He explained that he ate an "unusual fruit" which gave him those magical powers. When asked why he did not do this before, the Samurai stated that he was enjoying Nami's body in just a breast band, earning a beating from Nami (who was in Franky's body).
The remaining Straw Hats, with the samurai's legs attached to Luffy's back, joined their kidnapped comrades, after crossing the length of the island to find them. Kin'emon's head was finally reunited with his legs (much to Luffy's dismay) and he was introduced to the rest. Kin'emon still wished to go back into the facility to find his "son", and explained how he had come to be in his current predicament, revealing his special skill of talking with farts. Brook then mentioned that he had encountered the samurai's torso, much to the head's shock. Kin'emon then left the group on his own to find his torso.[31]

Sanji (in Nami's body) rescuing Kin'emon's torso.
While looking for his torso, it ended up in the island's central lake, causing his Devil Fruit weakness to flare up leaving him paralyzed and at the mercy of the Ice Lands. Sanji (in Nami's body), Zoro, and Brook managed to stumble across his half-frozen head and legs while looking for him. The samurai explained that his torso felt like it is submerged in water, so the group figured out that the torso was in the lake and they agreed to help him get his torso back.
Kin'emon was shocked that they would brave the freezing waters just to help him when they are just pirates who he believed would never help anyone. Sanji merely stated that the samurai became their responsibility since they rescued him from the prison and once his body was back together, Sanji would beat him to a pulp. Moved by this sense of selflessness, Kin'emon swallowed his pride and deeply thanked him for the pirates' assistance, which is the first time he admits needing help.
Kin'emon and the three Straw Hats then met a group of centaurs running away from the lake. Instead of stopping, the centaurs chose to run away to their master. Kin'emon and the Straw Hats see a mountain in the distance, which confused them, as there should be no mountain between them and the lake. Kin'emon and the others present watched the Slime as it shot itself across the lake.[32] Brook claimed that he once read a book about the Slime and that it melts away women's clothes, much to Kin'emon's and Sanji's interest.
He then watched with frustration as Sanji remained persistent in reclaiming the samurai's torso, jumping into the lake despite the severe cold and the toxins present in the water due to the Slime.[33] Kin'emon then suddenly started screaming. Apparently, a shark grabbed his torso in his mouth. He continued screaming and even coughed up blood but said that it did not hurt. Sanji rescued his torso and got out of the lake.

Kin'emon swallows his pride and thanks Sanji.
After his body is complete again, Kin'emon started crying and said that he was never as happy before having his body. After Brook commented on how tall he is, Kin'emon finally introduced himself to the group. His name is Kin'emon and his birthplace is Kuri, in the Wano Country. Kin'emon wanted to gratefully thank Sanji but he yelled at him not be so nice to have his body back since he should not forget how he abused the fact he could not do anything and being suspicious of him. Kin'emon then said he will never forget and bowed to Sanji saying he will never forget his kindness in his life and that he is very grateful. He then asked for forgiveness for being suspicious. Sanji then got angry, yelling at him that men do not get on their knees, but Brook interrupted him.
They were surrounded by Slime. Kin'emon then suggested to burn it down and said that people call him Kin'emon of Foxfire and that he can burn through things by cutting with fire. He cut one of the Slimes, which then exploded due to being burnt. The group was, however, surprised to find themselves entirely unharmed. Kin'emon then stated that he cut the explosion and that there is no flame he cannot cut. Zoro then told him he would help him to find his "son" because the samurai's fighting style sparked his interest.[34]

Smiley chasing the Straw Hats and Kin'emon.
After cutting some parts of the Slime, Kin'emon fled from it along with Zoro, Sanji, and Brook. Slime began to transform its shape and attack the group again. Kin'emon questioned Slime's powers with Sanji and Brook and decided that cutting it again is not an option as it is too large. He ran for the research facility in search of his "son" with the others. While running from the Slime, they came across the giant candy left by Caesar for Smiley, and a small dragon made by Vegapunk. They then saw a screen appear with Caesar on it and decided to run again.[35]

Brownbeard and the others crashing into Caesar's lab.
After witnessing the Slime explode, Kin'emon, Brook, Sanji, and Zoro rapidly ran away from the gas cloud. They saw the small dragon flying away from the poisonous cloud, and Zoro proposed the idea to ride on its back and fly away.[36] Struggling to catch up to it, Sanji was able to rush ahead after feeding his perverse nature. He caught the dragon, allowing the group to finally ride it. Eventually meeting up with Nami, Usopp, and Brownbeard, the two groups turned their attention to Caesar's lab where Zoro and Kin'emon were able to cut down the iron shutter, allowing them to enter.[37]
Since cutting the iron shutter would allow the poisonous gas cloud into the base, the G-5 Marines plugged the hole with boards and blamed Kin'emon and Zoro for putting everyone in danger. Law told everyone present about a way off the island but they would have two hours to escape. Everyone broke up into three teams. Kin'emon went with Nami, Usopp, Zoro, Sanji, and Brook to save Momonosuke as well as the other abducted children.[38]
The G-5 Marines attempted to capture the Straw Hats, but Zoro, Brook, and Kin'emon repelled them. One of Caesar's underlings fired a cannon at the wall of Building A, allowing the poison gas to enter. As the exit gate of Building A was closing, Kin'emon and the others made a dash for it and managed to escape to the passageway to Building B before the gate sealed completely.[39]

Kin'emon and Brook cutting down a dragon.
Kin'emon and the Straw Hats rode on Brownbeard while they were going through Building B. The small dragon appeared and attacked them while laying waste to Building B with fire. Kin'emon and Brook debated on who should fight the dragon, but after it was damaged by Nami's Thunder Trap, Usopp's Rafflesia, and Robin's Quarento Fleur Quatro Mano, Brook and Kin'emon finished it off together. After the dragon was defeated, Kin'emon repeatedly kicked the dragon even though the dragon could not fight anymore, which made Brook astounded. He was forced to stop after being called out.[40]
Kin'emon and the group later found Chopper (in Monster Point) trying to prevent the children from getting their candy. Regardless of his efforts, the children beat him down and went past him when the Rumble Ball wore off.[40] Kin'emon, Zoro, Nami, Robin, and Brook quickly came to Chopper's aid and ran after the children to the Biscuits Room. Once they reached there, they encountered Monet.[41]
Brook carrying Kin'emon's body petrified by the poisoned gas.
Kin'emon went with Brook and Usopp to find his "son", and a pair of Seastone handcuffs, which Robin has asked for. Brook used his Devil Fruit abilities to separate his soul from his body so he could find the handcuffs, and Kin'emon had to carry Brook's body.[42] While Usopp went to the secret room, Kin'emon and Brook freed some of the captive children. Kin'emon then learned from a little girl that his "son" had been transformed into a dragon. Filled with regret, he rushed back to find the dragon he fought with earlier believing that one to be Momonosuke.[43] Despite Brook's protests, he ran back towards the direction of the gas and was eventually petrified. Brook then carried his body and fled to Building R with Chopper, Mocha, and the G-5 with them.[44]
They managed to reach Building R safely, and after Brook boarded the rail car with Kin'emon in tow, the still-petrified samurai reunited with his "son".[45]
During the aftermath, Brook shouted out that he broke Kin'emon, feeling remorse despite the samurai already being "dead". Kin'emon's shell began to crack, and the samurai returned to his normal state. Luffy, Sanji, and Brook all screamed at him in shock, and Kin'emon screamed right back at them. Sanji kicked him angrily, asking how he could possibly be alive.
When Brook called Sanji's actions uncalled for, the chef responded that the samurai deserved for not being dead like he was supposed to be. Momonosuke, having returned to his human form, then jumped into his father's arms and the two embraced. Momonosuke was not wearing his clothes, but shortly was given an outfit much like his father's. Shortly after their reunion, Momonosuke fainted, apparently from starvation. He later regained consciousness and the two then ate Sanji's food and party with the others.[46]
He and Momonosuke accompanied Law and the Straw Hat Pirates on the Thousand Sunny as they left Punk Hazard. As Nami informed the group that they were heading to Dressrosa, Kin'emon was surprised, saying that was where he wished to go.[47] He was also shocked when hearing that the target of the alliance was Kaidou, and yet again when he saw Momonosuke after he suddenly reverted to his dragon form. When Luffy asked him if he had any business on Dressrosa, Kin'emon revealed that he has a comrade being held prisoner there.[48] Later that night, Kin'emon demanded a duel from Zoro after recognizing Shusui, which belonged to his country's legendary hero, Ryuma. Zoro denied having anything to do with the removal of Ryuma's body, but Kin'emon was soon distracted when he learned that his "son" was taking a bath with Robin. He, Brook, and Sanji berated Momonosuke for using his youth to his advantage, and Kin'emon demanded that his "son" cut off his top knot to repent. The trio was then chastised by Nami, who took Momonosuke to sleep with her and Robin for the night. Kin'emon then watched in envy as his "son" was carried off to bed.[49]


Kin'emon, along with the crew, sees the newspaper.
When the morning newspaper came, everyone read the news about Doflamingo's resignation from the Seven Warlords of the Sea. They also saw that the paper mentioned Luffy and Law's alliance and the alliance among Eustass Kid, Basil Hawkins, and Scratchmen Apoo.[50]
The following events are Non-Canon and therefore not considered part of the Canon story.
Caesar Retrieval Arc[]
Kin'emon was present on the ship when Breed attacked the Thousand Sunny. He fought against the invaders, and wondered who they were. After the animals escaped back into the water, Kin'emon listened as Breed talked to everybody on the ship. While the ship began to jump into the air due to the attack, Kin'emon squatted onto the ground, in order to keep his foothold on the ship.[51]
Concludes non-canon section.
Dressrosa Arc[]
After Law told Doflamingo to pick up Caesar at Green Bit, Kin'emon had a meal with his "son" and the crew. Kin'emon and his "son" tell the story about how they were shipwrecked and drifted to Dressrosa, how Kin'emon was separated from his "son", and how Kanjuro was captured. The Thousand Sunny soon approached Dressrosa.[25]
Kin'emon and the crew incognito.
After disembarking, the group split into three teams. Kin'emon went with Luffy, Zoro, Sanji, and Franky to destroy the factory and rescue Kanjuro. While exploring, they saw that the country is unique because the citizens reside alongside living toys. After getting disguises, they stopped at a restaurant to get something to eat. There, they found some thugs taking advantage of a blind man and taking away his money in roulette.[52] After Luffy called the thugs' bluff, they witnessed the blind man use an ability to crush the thugs.[53]
After the man left without saying who he was, people in the casino noticed that their possessions had been mysteriously stolen. A bystander claimed that it was the work of fairies. Zoro noticed that one of his swords, Shusui, was missing, causing him and Kin'emon to lose their temper. Zoro managed to spot the thief and immediately gave chase. Kin'emon followed him to ensure that Shusui would not be misused. Kin'emon also declared that once they catch the thief, he would duel Zoro for the sword.[54]
Kin'emon got lost along the way and found himself surrounded by Doflamingo's men, who warned him that something bad would happen to Kanjuro if he attempted to fight back.[55] The samurai then fled with Doflamingo's men in hot pursuit. He eventually ran into Sanji, who proceeded to defeat Kin'emon's pursuers. Having learned that Kanjuro was held at a "toy house", Kin'emon asked Sanji to accompany him.[56]
Kin'emon and Sanji then witnessed Luffy's clash with Chinjao on the video broadcast. Kin'emon wanted to save Kanjuro as soon as possible, but Sanji told him to wait as there are Marines surrounding the Corrida Colosseum.[57] As Luffy's fight with Chinjao went on, Kin'emon cheered Luffy on. When Sanji scolded Kin'emon, the samurai replied with his belief that once a man enters a competition, he must aim for the top to be acknowledged as a real man.[58]
They later ran into Zoro, who was running back to the Thousand Sunny with a dwarf named Wicca, and then learned that Nami's group back at the Sunny was in trouble.[59]
Sanji decided to go save Nami's group while Kin'emon and Zoro stayed behind at the Corrida Colosseum, wondering how to get in.[60] Bartolomeo then spoke to them and offered to help them find Luffy while asking for Zoro's autograph.[61] With Bartolomeo's guidance, Luffy came to them.[62]
Kin'emon took out a Den Den Mushi and the group engaged in a conference call with Sanji and Franky's group. Everyone was then brought up to speed as they learned the true situation in Dressrosa. The three then witnessed the dramatic conclusion of the battle between Law and Doflamingo which raged across Dressrosa and ended right outside the colosseum. They were shocked to see Doflamingo standing above his opponent and then shooting Law three times at close range.[63]

Doflamingo attacks Kin'emon.
Zoro quickly charged at Doflamingo, intent on rescuing their ally, while the samurai quickly informed everyone of what was happening, when Issho suddenly intercepted Zoro. Kin'emon managed to reach Law, but before the samurai could recover him, Doflamingo kicked him back. Luffy tried to help his friends, but realized that the bars in the windows of the colosseum are made of Seastone. The entire crew is shocked to be told by Kin'emon that the blind gambler was actually an Admiral.
Both Doflamingo and Issho float above their opponents using their abilities, taking Law with them and head towards the palace. After the Marines started pursuing Zoro and Kin'emon, they were informed that the Sunny is under attack by the Big Mom Pirates who are after Caesar Clown. As Sanji's group continued on to Zou and Franky's group was left in charge of destroying the SMILE Factory, Luffy decided to head to the palace with Kin'emon and Zoro in order to defeat Doflamingo and recover their ally.[64]


Disguised as animals, Kin'emon, Zoro, and Luffy elude the Marines.
After Luffy finally escaped the colosseum, the trio eluded the Marines by wearing disguises provided by Kin'emon's ability.[65] Kin'emon, Luffy, and Zoro later arrived at the lift that leads to the royal palace alongside the dwarf, Wicca. They then encountered Viola, who offered to guide them to the palace.[66] After getting acquainted with her and learning about her ties with the Riku Family, Kin'emon's group was then led to a secret passage. Once inside the passage, Zoro suggested that they use a basket used for lifting supplies and that Luffy should climb up carrying a rock and hang from the chain to act as a counterweight for the basket to move up. Kin'emon and Zoro then sat in the basket before Luffy reached the top. Kin'emon suggested to Viola that she should step in the basket too.[67]
They later arrived at the palace rampart tower. Viola was about to sneak them in, but Luffy went ahead and smashed his way through the gate. Having alerted the guards, they decided to charge in.[68] Kin'emon apparently separated from the group along the way.[69]

Kin'emon disguises himself as Doflamingo.
Kin'emon moved through the palace disguised as Doflamingo and with Wicca hiding in his pocket. He ran into Gladius while going to the basement to find Kanjuro. Gladius, who was deceived by the disguise, informed him that Kanjuro had disappeared from the scrap house.[70] Kin'emon later left the palace with Wicca and the dwarves who had attacked the palace with Kyros.[71]
Sometime after Doflamingo trapped Dressrosa in his Birdcage, Kin'emon discarded his Doflamingo disguise and reached the underground trade port. He met up with Robin and Usopp and brought Wicca and Kyros' dwarf group to Leo's group. Doflamingo forced everyone on Dressrosa into a survival game and coaxed them into going after some certain people by putting a price on their heads. Kin'emon is included in Doflamingo's hit list. While Usopp and Robin's group fled to the surface, Kin'emon jumped down into a hole that leads to the scrap heap, hoping to find Kanjuro there.[72]
Kin'emon found Kanjuro and rejoiced tearfully, happy to see him again. The two samurais prepared to leave the scrap heap on a bird drawn with Kanjuro's Devil Fruit power, but the trapped citizens and Dressrosa soldiers begged to be taken along.[73]
Kin'emon and Kanjuro help the prisoners escape.
The two samurais then assisted the people in escaping the scrap heap.[74] After leaving the scrap heap, Kin'emon and Kanjuro climbed from the colosseum to the old King's Plateau and met up with Usopp, Viola, and Riku Doldo III. Usopp then reprimanded the two samurai for leaving behind the net for the citizens to climb.[75]
After learning that Sugar was in the palace, Usopp informed Kin'emon of the seriousness of the situation. Kin'emon was then surprised that Usopp planned to snipe at Sugar from an incredible distance, saying that would be impossible. When the Dressrosa citizens reached the top of the plateau, Kin'emon and the others held them back long enough for Usopp to launch his attack. Though Kin'emon and Kanjuro were tied up, Usopp was successful in his efforts.[76]
The Dressrosa citizens then released the samurai and the others, realizing that they were merely playing into Doflamingo's hands if they had continued. Kin'emon was then surprised to see Admiral Fujitora, who decided to put faith in Luffy, like Riku Doldo III had.[77]
After most of the Donquixote Pirates' officers were defeated, Kin'emon, Kanjuro, and Usopp screamed in terror as Pica headed towards the old King's Plateau to crush everyone.[78] Kin'emon was awestruck when Zoro destroyed the Pica statue and defeated Pica.[79]
After Pica's defeat, Zoro was pulled up from a ledge by Usopp. Kin'emon and Usopp then praised him on his display of strength, but Zoro told them to save it for later as Doflamingo was still standing.[80]
As Doldo, Tank Lepanto, and the citizens were leaving the old King's Plateau, Kin'emon heard about Law's defeat from Viola.[81]
When Doflamingo's Birdcage started to shrink, Kin'emon placed his hopes in Luffy.[82] While leaving the old King's Plateau with Kanjuro and Zoro, Kin'emon was informed by Zoro about his intention to stop the Birdcage.[83]

Kin'emon and Kanjuro help Zoro stop the Birdcage.
Once they reached the Birdcage, Kin'emon and Kanjuro were surprised that Zoro made an attempt to push back the Birdcage. The samurais tried to tell Zoro that it would be impossible, but Zoro angrily told them to help instead of doing nothing.[84] The two samurais complied and they were soon aided by Issho.[85] They kept pushing the Birdcage back just long enough for Luffy to deal one decisive blow to Doflamingo. Once Doflamingo had been defeated, they witnessed the collapse of the Birdcage. They rejoiced as Doflamingo's downfall was announced to Dressrosa.[86]
Three days after Doflamingo's downfall, Kin'emon and Kanjuro traveled through the central streets, watching the citizens rebuild the country. They later appeared at Kyros' house, eating a meal with the Straw Hats. They prepared to leave when the Marines were mobilized to pursue Luffy and all those affiliated with him. They fled when the Marines were about to storm Kyros' house.[87] After Luffy separated from the group to take care of unfinished business, Kin'emon's group went to the eastern port. While waiting for Luffy, they saw Issho approaching.[88] When Issho prepared to attack them with all the rubble from Dressrosa, they quickly fled to the escape ship. At that moment, Luffy arrived and attacked Issho.[89]
During the clash, Issho used his gravity ability to blow away Luffy, who was then caught by Hajrudin. They quickly fled across a bridge leading to a gigantic ship in the distance. Issho prepared to drop the rubble on them but was obstructed by the Dressrosa citizens who were pretending to chase after the pirates. They eventually reached Orlumbus' flagship, the Yonta Maria.[90] After the Straw Hat Grand Fleet was formed, the Straw Hats and company held a feast to celebrate their victory over Doflamingo.[91] After the feast, each of the leading allies received Luffy's Vivre Card and parted ways. Bartolomeo then brought the Straw Hats, the samurais, and Law to his ship, the Going Luffy-senpai.[92]
Whole Cake Island Saga[]
The following events are Non-Canon and therefore not considered part of the Canon story.
Silver Mine Arc[]
As the Straw Hats and Barto Club were sleeping for the night, members of the Silver Pirate Alliance suddenly arrived and captured Luffy and Bartolomeo. The Straw Hats and Barto Club attempted to fight back, but were immobilized by a very sticky substance from the cannonballs.[93]
The next day, the Going Luffy-senpai arrived at Silver Mine, and Kin'emon was transported by Law into the underground mine where Luffy and Bartolomeo were. The escapees of the mine were being attacked by a deluge of molten ore, but Kin'emon cut through the ore as he helped Luffy, Bartolomeo, and their allies to escape. After Zoro defeated Peseta, the Straw Hats and Barto Club prepared to head back to the ship, but Luffy and Bartolomeo stayed behind to confront Bill after he cut off their path.[94]
Concludes non-canon section.
Zou Arc[]
During a hail storm, Luffy's group learned that the Barto Club does not have a navigator, lacks experience in sailing, and usually call Gambia's grandmother who gives them useless advice. Therefore, the Straw Hats, the samurais, and Law needed to protect the ship. After one week of traversing through the dangers of the New World, the ship finally arrived at Zou. Kin'emon was amazed at the sight of the island, which is on the back of a giant elephant.[95]
After finding the Thousand Sunny, the Barto Club bid Luffy's group farewell. Proceeding to search for Sanji's group, they climbed the giant elephant's left hind leg with a dragon that Kanjuro conjured. After the samurais explained that they were also searching for their ninja comrade, Raizo, the group saw something dropping towards them.[96]
The thing that was falling towards them happened to be a monkey mink. While Kin'emon and Kanjuro were fooling around, the mink hit them, causing them to fall off the dragon. Despite being separated from the group, the samurai assured the Straw Hats that they were alright and will catch up to them eventually.[97]


Kin'emon, Kanjuro, and a monkey ride Nekozaemon up Zou's leg.
Kanjuro later conjured a cat, which he, Kin'emon, and Bariete used to climb the elephant's leg. As they saw the eruption rain, they panicked as the cat would melt if it made contact with water.[98] Having failed to reach Zou, Kin'emon and Kanjuro returned to the Thousand Sunny and decided to wait until the next day.[99]
On the next morning, they finally reached Zou. Kin'emon asked Bariete about Raizo, but he quickly ran away. The samurais chased after him, not noticing a sleeping Franky, Robin, and Brook.[100]
The minks reveal that they protected Raizo from Jack.
On the way to the Mokomo Dukedom, Kin'emon and Kanjuro reunited with Momonosuke. When they arrived at Kurau City, they were quickly intercepted by the Straw Hats, who tried desperately to keep them hidden. However, when they saw Inuarashi and Nekomamushi fighting with each other, the samurais revealed themselves, much to the Straw Hats' horror. Kin'emon explained that he is a retainer of the Kozuki Family and asked about Raizo. Contrary to what the Straw Hats expected, the Mink Tribe welcomed them and revealed that Raizo is safe as well as having a friendship with Kin'emon's clan.[101]
Kin'emon then revealed the crest of the Kozuki Family on his back to confirm his allegiance. After Momonosuke pleaded for Inuarashi and Nekomamushi to stop their quarreling, Kin'emon revealed that he is not his father and that his true father is the lord of the Kozuki Family. After Inuarashi and Nekomamushi called a truce, they took the samurais and the Straw Hats to a secret area in the Whale Forest where Raizo was hidden.[102]

Kin'emon frees Raizo from his chains.
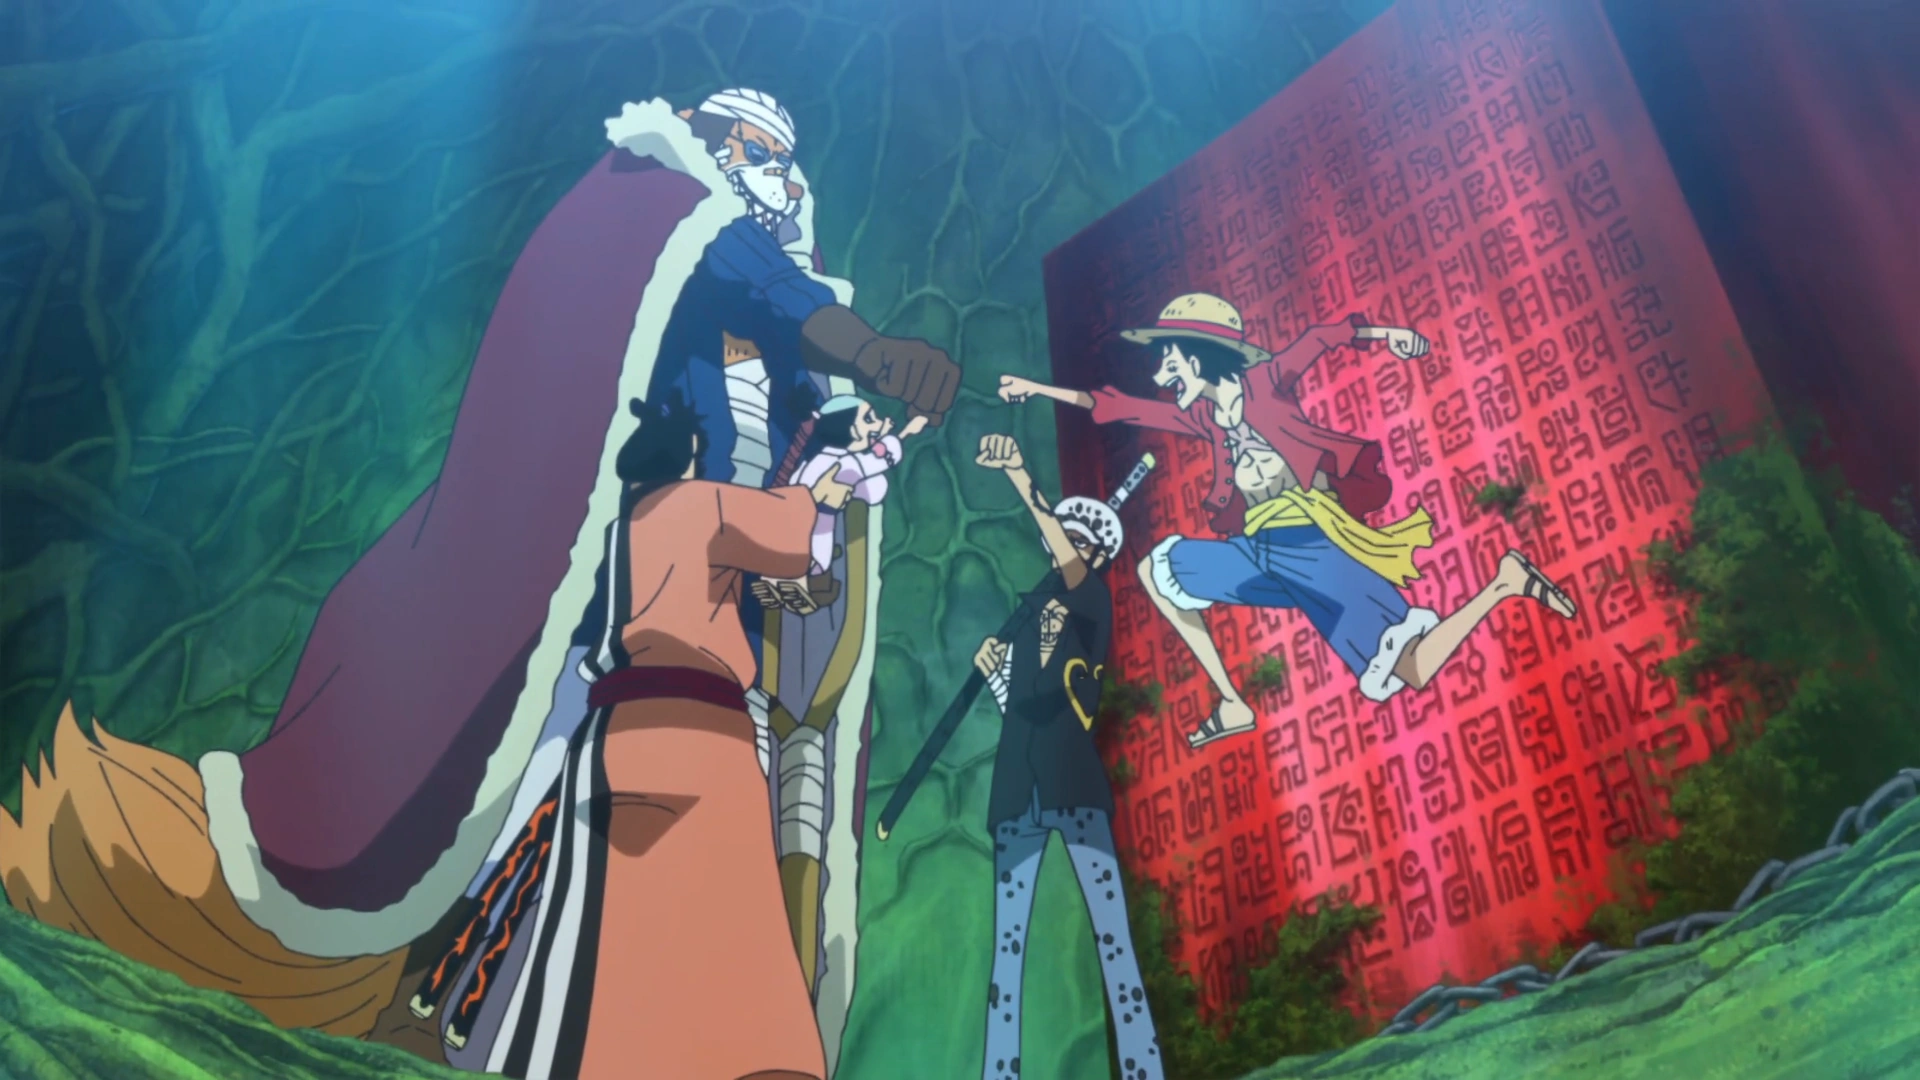
After making their reacquaintance, Kin'emon, Kanjuro, and Raizo were saddened to see the state Zou was in after Jack's invasion. They then went back inside the whale tree once Robin finished deciphering the red poneglyph hidden there. After explaining the history of the Kozuki Family and their connection to the poneglyphs, the samurais and Raizo expressed sorrow in explaining Lord Oden's execution at the hands of Kaidou and the shogun of Wano Country Kurozumi Orochi. Kin'emon revealed that Lord Oden was once part of the Roger Pirates and had been to Laugh Tale with Roger. He also revealed that the Beasts Pirates' are also stationed at Wano Country.[103]
The samurais and the two rulers of Zou revealed Oden's will to open the country of Wano to the world and to defeat Kaidou and Orochi. Kin'emon also explained that they needed allies which was the reason why they journeyed to Zou. Kin'emon then asked for Luffy's help, but Luffy declined, saying that Momonosuke should make the request himself. When Momonosuke humbly did so himself, Luffy accepted and they formed an alliance.[104]

The samurai and minks form an alliance with the Straw Hat and Heart Pirates.
They later left the secret room and the samurais explained that they never went with Oden during his travels as leaving the borders of Wano is a crime. While discussing their plans to defeat Kaidou, the alliance decided to split up and meet up again at Wano Country. Law agreed to take the samurais back to Wano Country in his submarine. Right after they left the Whale Tree, they felt Zou shaking and heard Zunesha crying.[105]
As everything shook around them, they witnessed Luffy and Momonosuke's ability to hear Zunesha's voice. They then heard from Momonosuke that Jack returned to Zou and started attacking Zunesha. On Momonosuke's orders, Zunesha sank Jack's fleet with one blow. With the threat of Jack ended, everyone became calm again. Kin'emon was surprised of Momonosuke's ability to command Zunesha.[106]
After Momonosuke decided to stay on Zou in order to communicate more with Zunesha, Kin'emon and his fellow samurais prepare to go back to Wano with Law and Zoro accompanying them. As the Sanji Retrieval Team departed from Zou, everyone, except for the Straw Hat members left behind, was shocked when Luffy jumped off Zunesha with his party.[107]
Wano Country Saga[]
Wano Country Arc[]
Kin'emon and his group later infiltrated Wano Country. Kin'emon informed Usopp, Franky, Robin, and Zoro that Wano's government officials were associated with Kaidou and warned them to avoid trouble until they were ready to strike.[108] Some time after this, Kin'emon resided at the ruins of Oden Castle where he suffered from bouts of diarrhea. After one such bout, he was reunited with Luffy's group, and revealed to them about his group traveling through time.[109][110]
Kin'emon then went on to explain more about the past, such as Oden's accomplishments in Kuri, the time of his execution, the rumor about Toki, and what Kin'emon's group did after arriving at present time. He then went over a plan to attack Onigashima, the island where Kaidou resided, in two weeks.[111] He explained about the Fire Festival and how the decisive battle would play out. When Sanji explained his intention to compete with Kin'emon for Kiku's affection, Kin'emon explained that he already had a wife and was surprised to hear that Kiku met her. Kin'emon then gave the group new clothes and specific tasks to do and summoned Shinobu to guide them. He also mentioned three allies that they needed to find as soon as possible: Kawamatsu, Denjiro, and Ashura Doji. When Kaidou arrived at the Kuri region, Law alerted Kin'emon and the group.[112]
Kin'emon was surprised to see Kaidou appearing in Kuri so suddenly and he was shocked to hear that Luffy, Zoro, and Law were already exposed. After Luffy ran off to face Kaidou and Law followed him, Kin'emon rushed to Okobore Town to rescue Tsuru.[113] After Kaidou destroyed Oden Castle, Kin'emon went to Okobore Town alone. He then found Tsuru and watched her from afar before noticing Shutenmaru, whom he recognized as Ashura Doji, passing by.[114]
At Mt. Atama, Kin'emon interrupted a fight between Ashura and Inuarashi. Ashura stated that while he admired Oden, he never swore loyalty to his family. However, Kin'emon was determined to make Ashura an ally.[115] At an abandoned village in Kuri, Kin'emon was contacted by Franky, who informed him that the blueprints of Kaidou's mansion were somewhere in Kuri. He then asked Franky to help out with other missions in the capital and wondered who could have the blueprints.[116] Sometime later, the Beasts Pirates found out about Kin'emon's secret message and his supporters, causing Kin'emon great distress as his allies in the capital were getting arrested.[117]
The witnessing members of the Nine Red Scabbards mourn Yasuie's death.
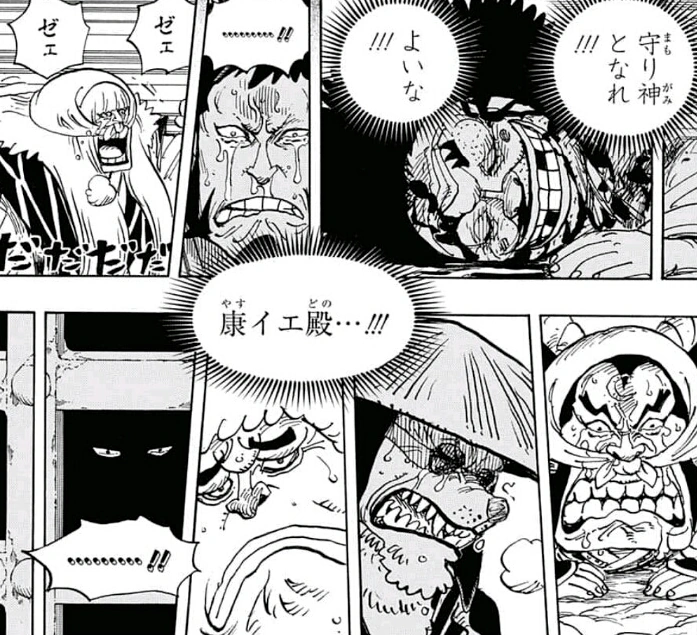
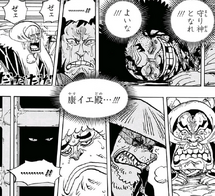
After Mt. Atama was set on fire, Kin'emon and Inuarashi heard that Ashura was going to Bakura Town to confront the Beasts Pirates there and the two went after him.[118] They later entered Bakura Town with Inuarashi and caught up to Ashura. After witnessing Yasuie's execution, Kin'emon mourned his death.[119] After the execution, Ashura asked him and Inuarashi if they knew about the SMILE fruits.[120]
Outside Bakura Town, Ashura learned that Kin'emon framed him for theft. He got angry and knocked Kin'emon to the ground. Kin'emon and Inuarashi apologized and once again asked Ashura to join them. Ashura then told Kin'emon and Inuarashi to follow him, wanting to show them something.[121] Later, Ashura showed them the graves of their dead comrades and explained what had happened to their allies ten years ago. He recounted how they had all lost patience and had tried to fight Kaidou, but were all killed in battle. Afterwards, Ashura decided to rejoin his comrades. Inuarashi and Ashura then rejoiced and bragged to Kin'emon about how they had 20 years more fighting experience than him now. In response, Kin'emon called them a duo of geezers and the three began arguing.[122]
Ashura later took Kin'emon and Inuarashi to an abandoned port and showed them ships that could carry their troops to Onigashima.[123] Ashura also gave Kin'emon the blueprints of Kaidou's residence. Kin'emon was then contacted by Raizo, who informed him of the events that occurred in Udon and Kin'emon was shocked after hearing about the number of allies Raizo's group had gained there. They also discussed about the shortage of weapons and Kin'emon departed for Amigasa Village.[124]
Through a Smart Tanishi, Kin'emon spoke to Kawamatsu for the first time in years. During their conversation, Kawamatsu informed him that he had the weapons needed for the alliance.[125] At Amigasa Village, Kin'emon contacted the yakuza bosses and informed them of Yasuie's last message after receiving it from Nami. After explaining how to read the message, Kin'emon began a strategy meeting with the allies gathered in the village.[126]
Kin'emon was then happy to hear from Kawamatsu and Zoro that Hiyori is alive. After Enma was given to Zoro, Kin'emon witnessed him giving the sword a test run. Three days before the raid on Onigashima, Robin informed Kin'emon about the number of enemies they would be facing. Two days before the raid, Kin'emon tallied the number of warriors on the alliance's side. He was disappointed to hear that those imprisoned in the Flower Capital could not be recruited. He then contacted everyone in the alliance and told them to use the remaining time for preparations. On the day before the raid, Kin'emon spoke to Luffy before heading out. Later, Kin'emon marched to the rebel meeting place with Momonosuke, Kanjuro, Raizo, Kikunojo, Inuarashi, Shinobu, Kawamatsu, and Ashura.[127]
The group eventually arrived at the meeting place, but found none of their ships and allies.[128] In spite of this major setback, the Scabbards were still determined to go through with the raid, knowing that they would not get another chance.[129]
The Scabbards set sail and left Momonosuke at the port. As Kin'emon wondered about the possibility of a traitor among them, Kikunojo urged him to find the mole before Kanjuro revealed that he was the traitor. After Kanjuro explained what he did, Kin'emon angrily beheaded him, only to learn that it was a copy and the real Kanjuro remained on the coast and that he had captured Momonosuke to bring him to Onigashima. As this was happening, the Scabbards' boat was confronted by three Beasts Pirates ships, but the ships were suddenly attacked by the Straw Hats, Heart Pirates, and Kid Pirates. The Scabbards' boat was then lifted by Law's submarine.[130]
Kin'emon later witnessed the arrival of the Kyoshiro Family and Kyoshiro attacking one of the Beasts Pirates ship. He was confused by the Yakuza being familiar with him and the Mountain God incident. Kin'emon then realized that his true identity was Denjiro, something the latter confirmed. Denjiro then revealed that Yasuie's altered message actually instructed the Kozuki allies to meet at the wharf by Port Habu. Thus, their allies had been able to reach the wharf before Orochi destroyed the bridges, and Denjiro had freed the Rasetsu Town prisoners after Orochi had left him in charge of the Flower Capital. As he revealed this, the alliance, now numbering 5400, arrived at Port Tokage on a massive fleet. Denjiro commended Kin'emon for cleverly misinforming the other Scabbards to mislead the spy Kanjuro. As he was complimented, Kin'emon internally noted that he actually misunderstood the message.[131]

Kin'emon leading Wano's samurai.
Kanjuro then fled the scene with Momonosuke in tow on a drawn crane and briefly attacked the alliance with an ink cloud that rained down ink arrows. Momonosuke ordered the alliance to press forward to Onigashima without worrying about him. As the alliance was attacked by a Beasts Pirates ship with long ranged cannons, Jinbe came to aid the rebels.[132] After Shishilian and Hyogoro boarded the Polar Tang, the Scabbards discussed with Law about the plan to enter Onigashima. Kin'emon was then surprised to see the Straw Hats take over the port in front of Onigashima.[133]
While the rest of the Scabbards traversed to the back of Onigashima with the Heart Pirates in Law's submarine, Kin'emon and Denjiro entered Onigashima through the front with the rest of the alliance. After disembarking, Kin'emon disguised the alliance members as Beasts Pirates.[134] The alliance then divided their forces with Kin'emon leading the eastern forces.[135] He and his group reached the Pleasure Hall owned by Black Maria. As they traversed through the area, they quickly hid themselves when Big Mom looked outside from one of the nearby buildings.[136] While Big Mom was preoccupied chasing the Brachio Tank V, Kin'emon and his forces continued with their infiltration.[137]
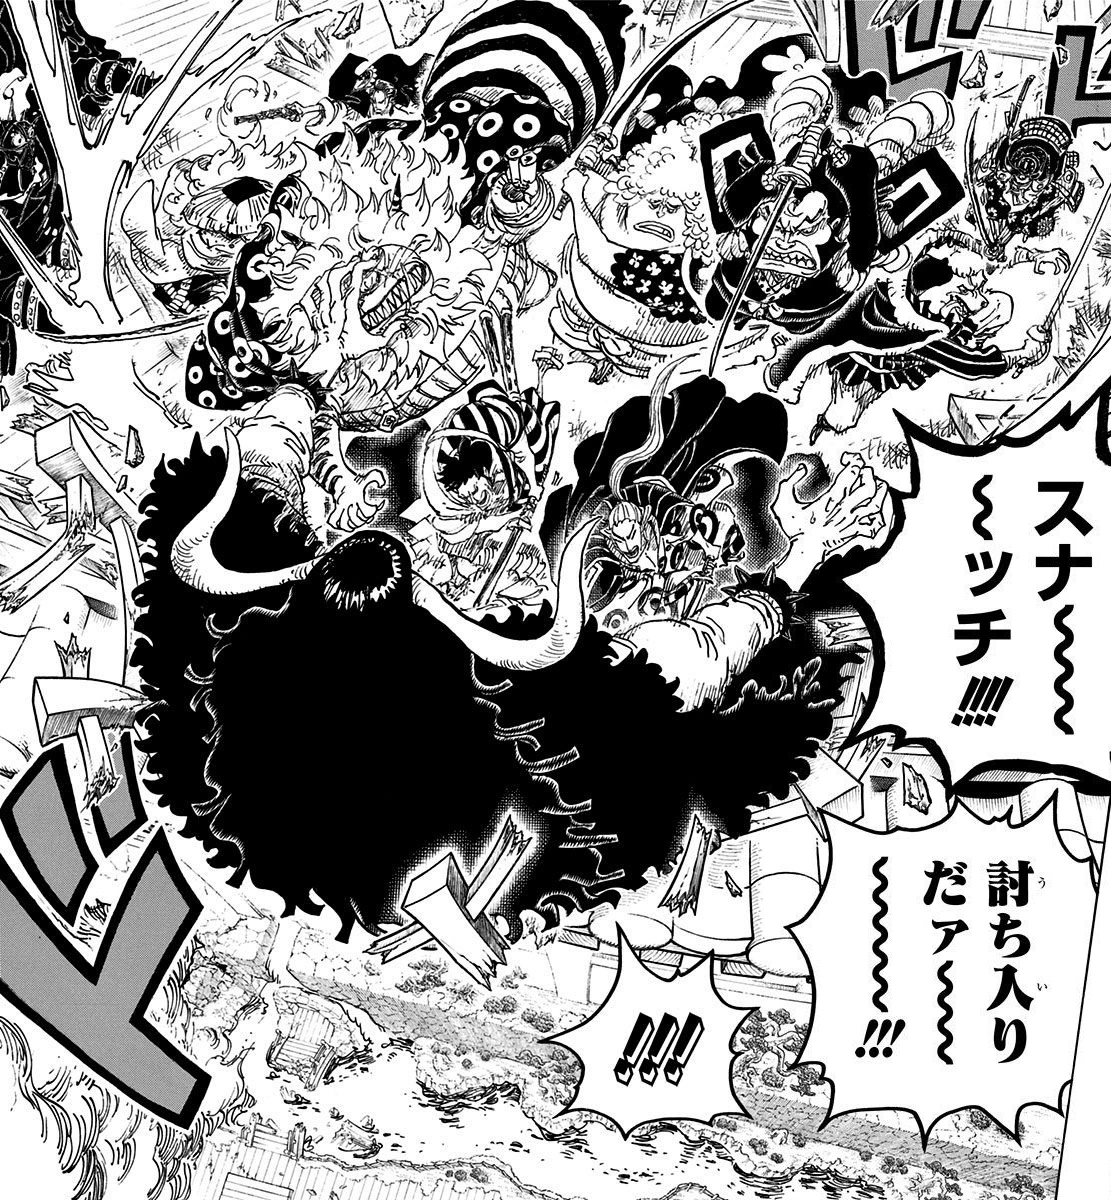

The Scabbards and Izou attack Kaidou.
Kin'emon and Denjiro later joined up with the other Scabbards and Izou at the back entrance and found Kanjuro laying on the ground defeated. They then entered Kaidou's castle, fought their way to the Performance Stage, and launched an all-out attack on Kaidou and the All-Stars.[138] While falling to the lower floor, the Scabbards managed to inflict wounds on Kaidou. As the alliance revealed themselves and attacked the Beasts Pirates, Kaidou transformed into his dragon form and flew to the roof of the Skull Dome, with the Scabbards grabbing onto him. On the roof, the Scabbards prepared to fight Kaidou with the Mink Tribe's help.[139]
As Jack fought the Mink Tribe, Kin'emon prepared to fight Jack, but Inuarashi and Nekomamushi stepped in after transforming into their Sulong forms and charged at Jack.[140] After Jack and his forces were defeated, the Scabbards and Izou resumed their confrontation with Kaidou. When the Emperor tried scorching the samurai with a fire breath, Kin'emon sliced the flames and cut Kaidou's mouth.[141]
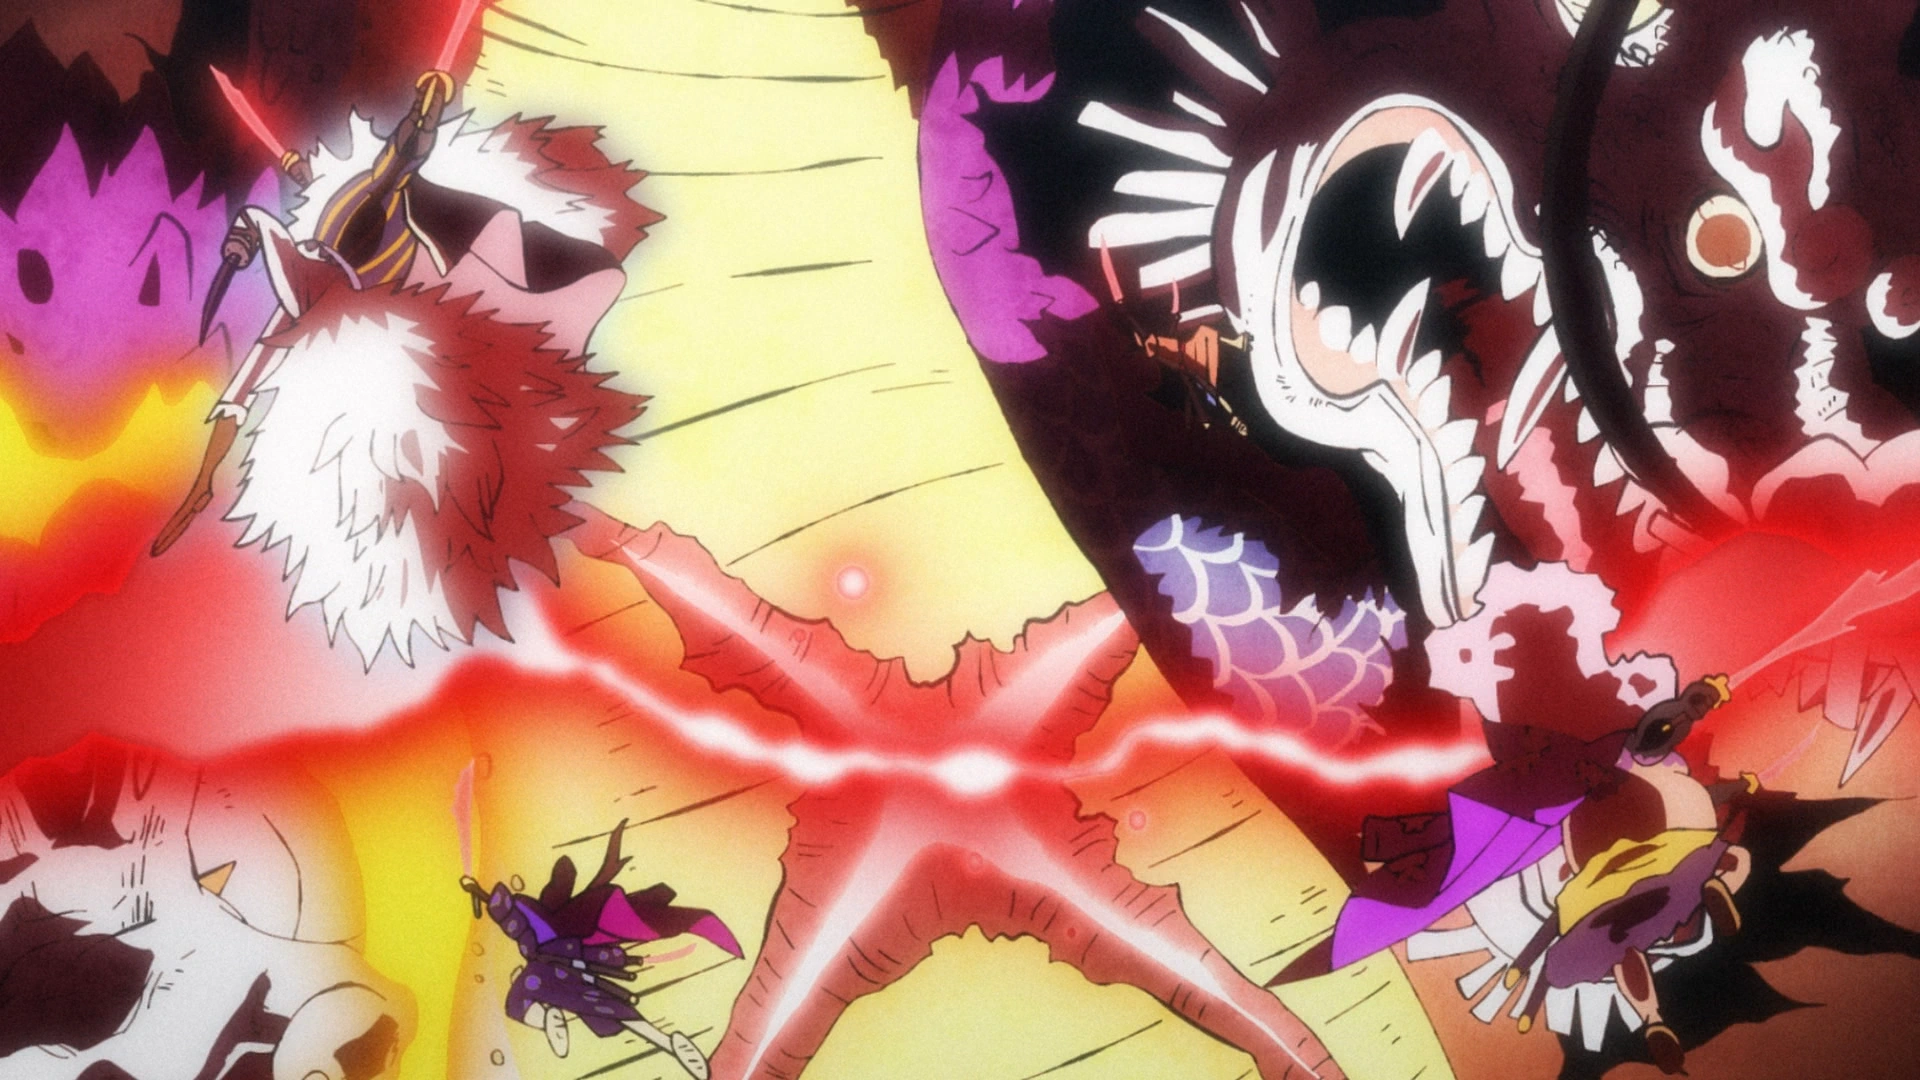
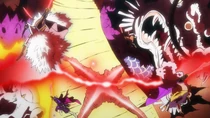
Kin'emon and three other Scabbards slash Kaidou's scar.
Kaidou roared lightning at them, but they dodged around it and each struck him in turn. After Raizo reflected Kaidou's Bolo Breath back at him, four of the Scabbards—Kin'emon, Ashura, Denjiro, and Inuarashi—replicated Oden's Two Sword Style stance and struck Kaidou's scar with the same attack that made it.[142] Kaidou retaliated with a roar that created wind scythes, and Kin'emon was alarmed when Kikunojo's left arm got sliced off.[143] Izou wrapped a tourniquet around Kikunojo's arm, and Kin'emon cauterized the wound. Kaidou returned to human form, praised the samurai for their resolve, and commented that death completes a person. Kin'emon responded with disdain, saying that losing to Kaidou brings no honor.[144]
Continuing the battle, Kaidou began overwhelming the Scabbards[145] and later incapacitated them. Big Mom, Kid, Killer, Zoro, Luffy, and Law later arrived at the roof. Luffy quickly checked up on Kin'emon and his group, and Kin'emon tearfully pleaded for Luffy to take Wano's fate upon his shoulders, to which Luffy agreed. Upon Luffy's request, Law teleported the Scabbards to a safe place.[146]

The wounded Scabbards in the Treasure Room.
They were placed in the second floor of the Treasure Room, where a mysterious person was tending to them.[147] The Scabbards later recovered and regained consciousness, but the mysterious figure already had left. Before they left the treasure room, they saw who appeared to be Oden.[148] Kin'emon believed that this was indeed his old master, but Ashura Doji quickly expressed doubt. Kin'emon remained adamant it was Oden, partly due to desperately desiring this outcome, but Ashura punched him out of the way and attacked "Oden", who was quickly revealed to be a Kanjuro drawing. The Oden drawing then stabbed Ashura and attacked the Scabbards as Kanjuro revealed he was headed toward Momonosuke before he could die of his wounds. The Oden drawing lit up a large amount of dynamite under its garment to blow up all of the Scabbards, but Ashura tackled it out of the room before it exploded, sacrificing himself to save his comrades. Enraged at Kanjuro for his cruel mockery of Oden and his actions toward Ashura, Kin'emon led the Scabbards out of the room to go to attack him and protect Momonosuke.
Immediately following this, the Scabbards were confronted by Jack, but Inuarashi stayed to take on the All-Star and allow his comrades to keep going.[149] As the Scabbards raced through the fortress, they came across Orochi and Fukurokuju. Orochi transformed into the Yamata no Orochi and moved to attack the Scabbards, but they proceeded to decapitate all of his heads instantaneously with synchronous strikes.[150]

Kin'emon strikes down Kanjuro.
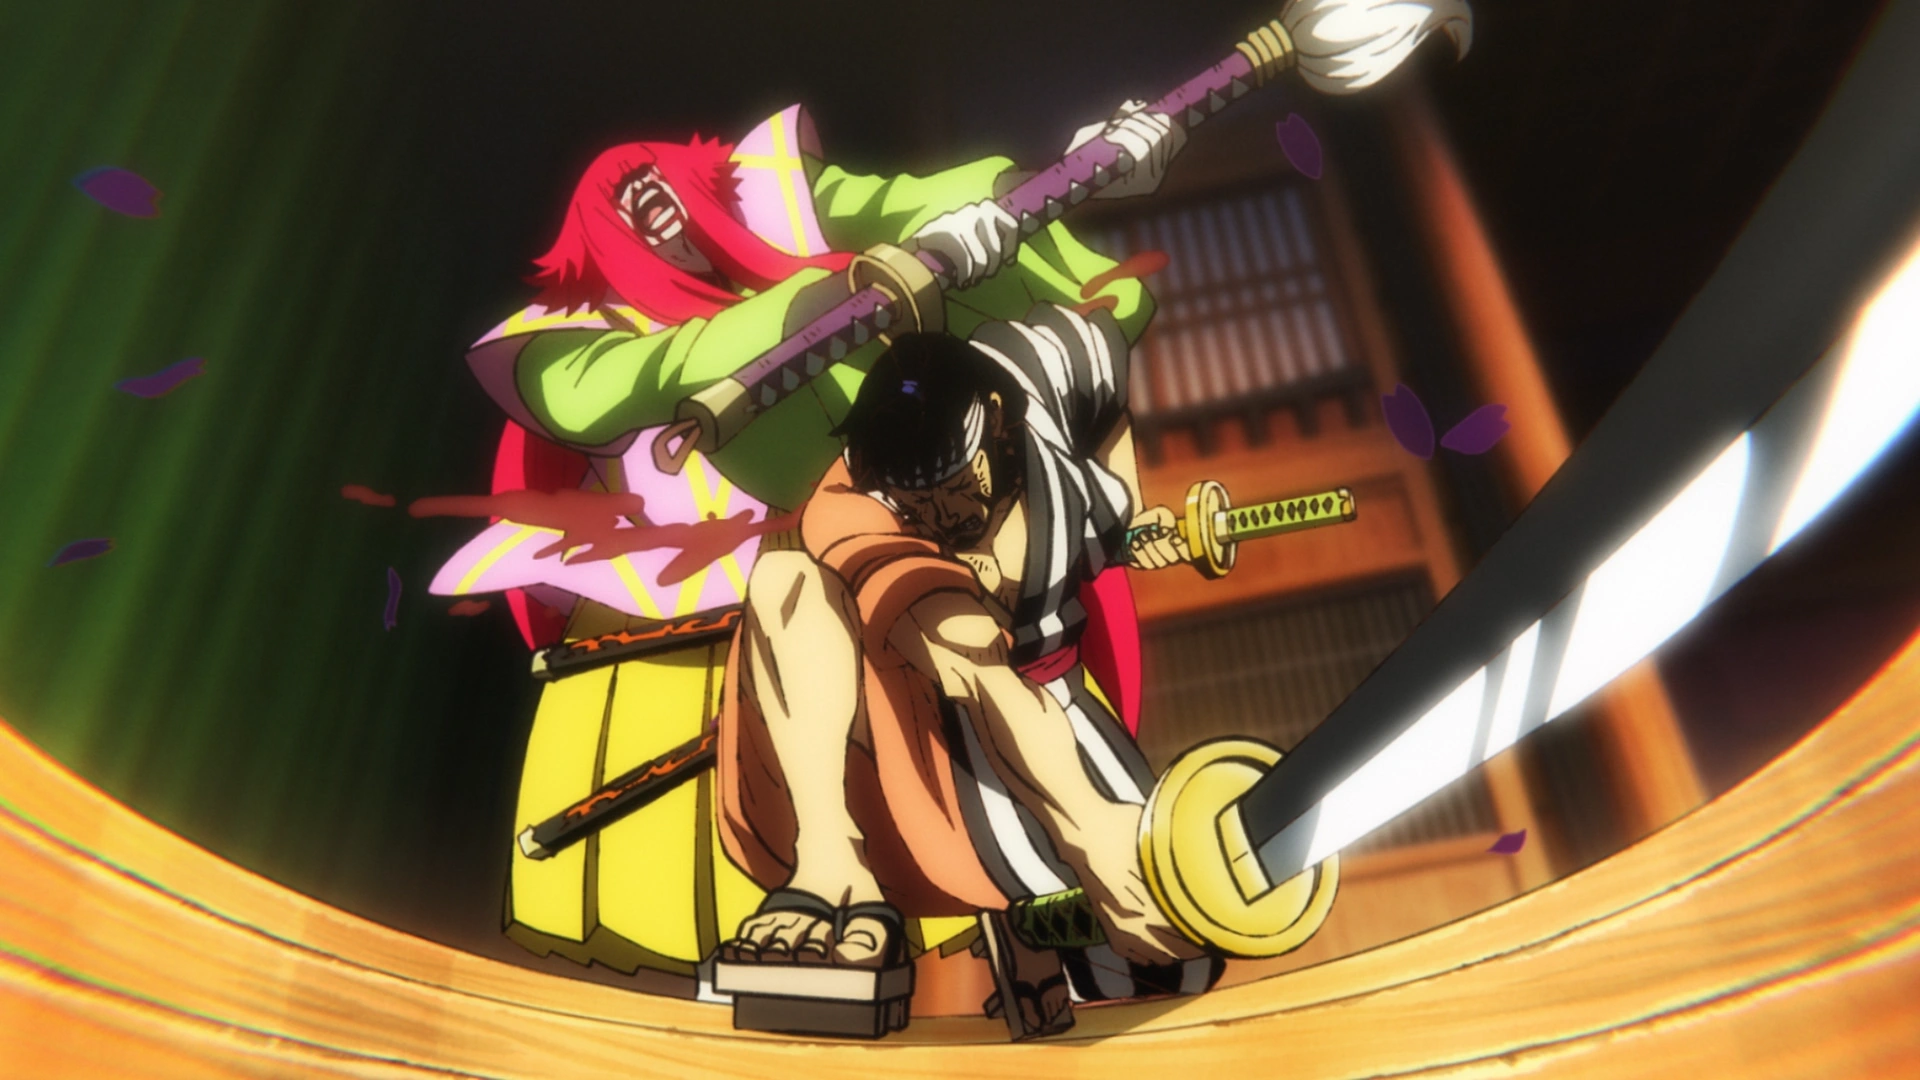
The Scabbards continued moving, and Kin'emon said he would be able to protect Momonosuke on his own. Kiku accompanied him to finish off Kanjuro, and the duo split off from the rest of the Scabbards, who went off to join the rest of the fighting.[151] Kin'emon and Kiku reunited with Momonosuke and Shinobu in the crawlspace on the first floor, and soon afterwards they were confronted by Kanjuro, who had shrouded himself in another Oden disguise. Kiku raced to attack Kanjuro, but he was able to weaken her resolve with the disguise and stab her. Kin'emon caught Kiku as she fell, and she expressed optimism for the future as she headed towards death. Kanjuro then shed his disguise and prepared to attack Kin'emon, but the samurai unsheathed his sword and struck down his former comrade in the blink of an eye with a deep diagonal cut to the chest. As Kanjuro fell to the ground dying, he laughed and said it was fitting for his closest "onstage" comrade to be the one who finished his story.
Kin'emon is taken down by Kaidou.
Immediately afterwards, Kaidou arrived at the crawlspace to kill Momonosuke. Kin'emon told Shinobu to take Momonosuke and flee, and he readied both his swords to defend against Kaidou's strike. However, Kaidou's kanabo shattered through Kin'emon's katanas with ease and smashed against the samurai's head with immense force.[152] Kin'emon was left heavily injured but still conscious, and struck Kaidou in the leg with his broken sword to buy what little more time he could. Kaidou then took a katana and plunged it into the samurai's back, leaving him lying motionless on the ground.[153] Unexpectedly, Kin'emon survived Kaidou's attack due to his torso and legs having not been properly reattached back on Punk Hazard. Kin'emon's legs then ran off to find help for Kikunojo, and came across Nami and Usopp's group, whom he was able to discern as allies when they drew the symbol of the rebellion on him. His lower half informed them of Kikunojo's condition, prompting Usopp to take the legs and Hamlet to the first floor crawlspace. Kin'emon then overheard the still alive Orochi communicate with the still alive Kanjuro to have him paint a monster that would burn the alliance and the Beast Pirates. Kin'emon watched in horror as Kazenbo came to life and began moving through the castle.[154]
Upon reaching the crawlspace, Usopp reattached Kin'emon's legs and had to defend both Kin'emon and Kikunojo from incoming Beasts Pirates. Kin'emon pleaded for Usopp to leave him behind and take Kikunojo while Kikunojo pleaded for the opposite. Usopp refused to do either and instead shared his beliefs about survival. After Izou showed up to hold off the Beasts Pirates, Usopp carried Kin'emon to safety while Hamlet grabbed Kikunojo,[155] being rushed into safety by them,[156][157] before Kin'emon's body was swept up in water released by Raizo, alongside his saviors and Kiku.[158] Kin'emon was then brought to Chopper alongside Kikunojo for treatment,[159] and would later emerge, bandaged and conscious, alongside the rest of the Scabbards when Momonosuke revealed himself to the people of Wano and declare himself Shogun of Wano, though Momonosuke silently asked for Kin'emon's help during his speech, to which Kin'emon replied that Momonosuke should lie a little bit. Kin'emon would then join the Scabbards and Momonosuke as they made their way towards the Shogun's castle.[160]


Marco, Kin'emon and Kawamatsu pay respect to the fallen.
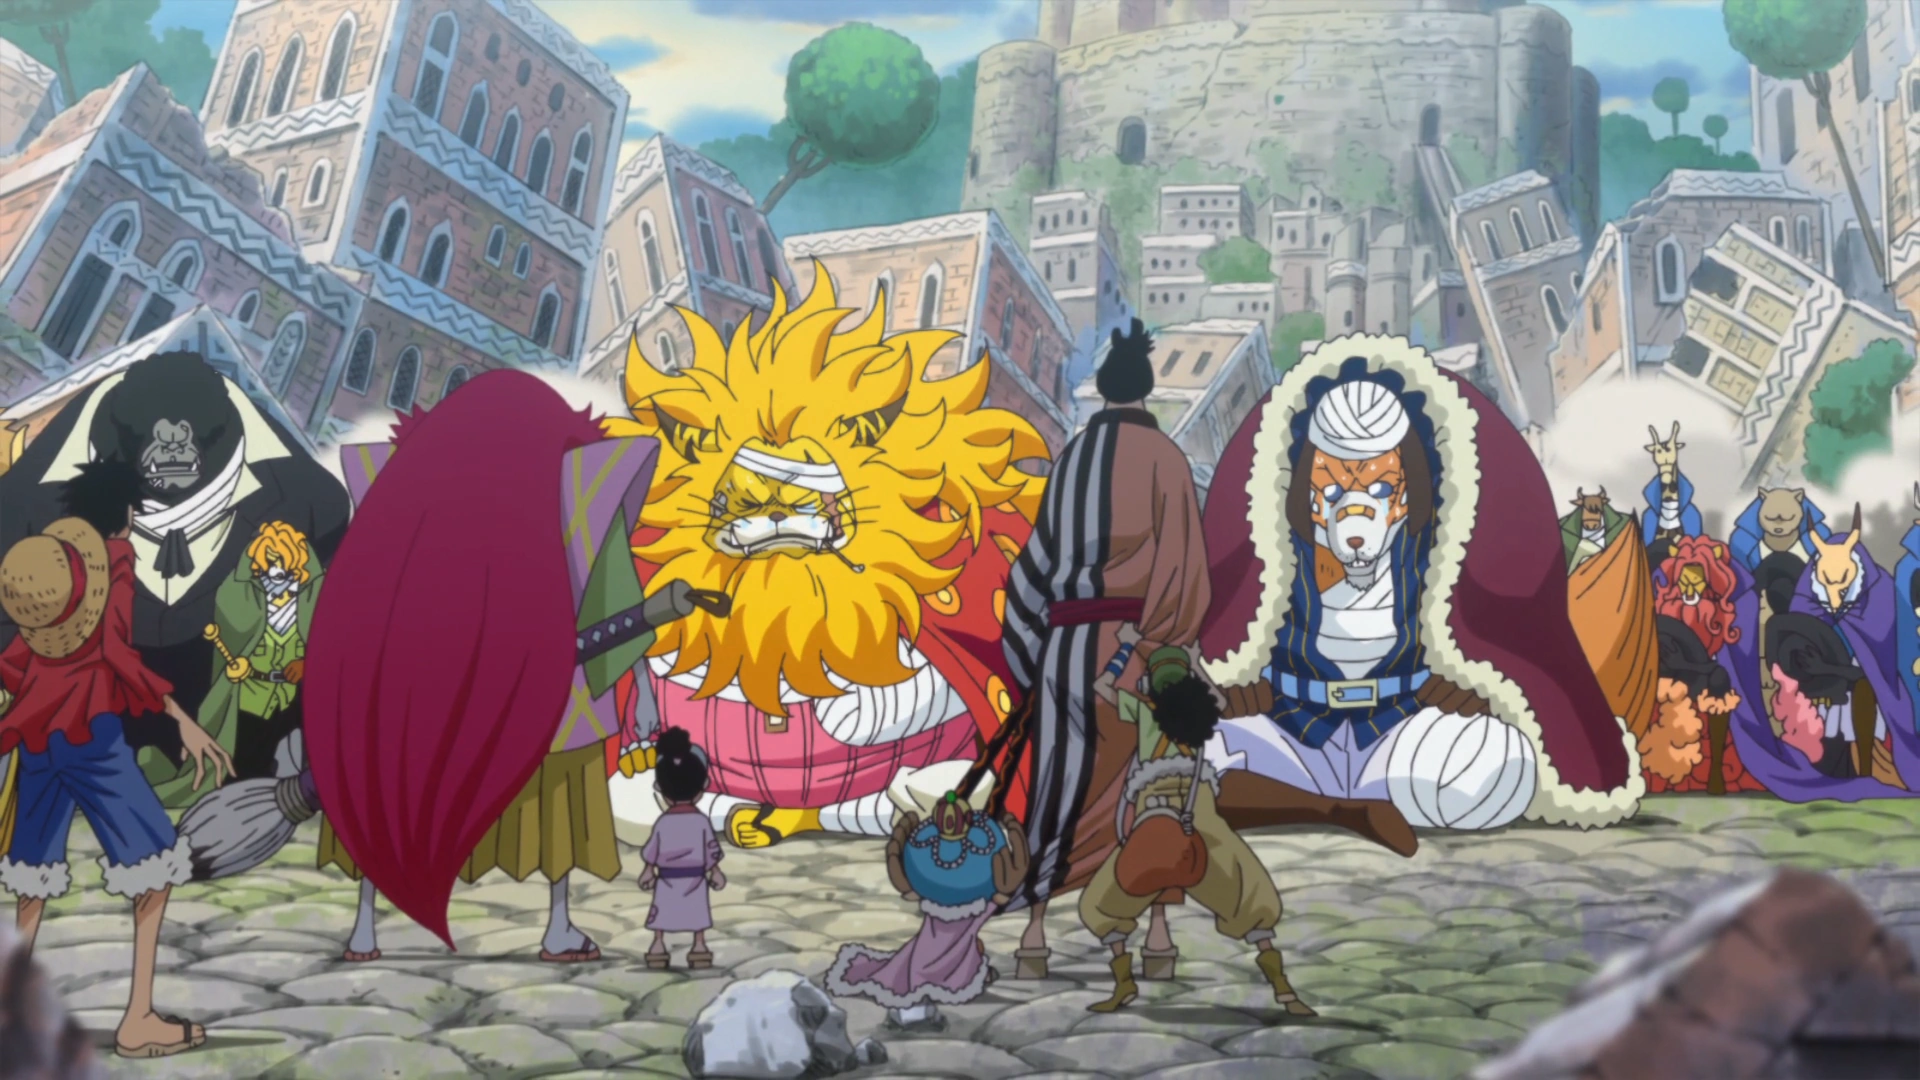
A week after the Raid ended, Kin'emon and Kawamatsu were at the graveyard in Ringo, discussing the possibility of building a temple dedicated to Kozuki Oden tribute to Ashura Doji and Izou who died during the Raid. When Marco arrived at the graveyard, Kin'emon asked him if he was fine with Izou being buried in Ringo to which Marco replied it was fine for Izou to be buried in his birth country. Marco then solemnly commented that he was once again left with one comrade dead, to which both Kin'emon and Kawamatsu noted that they knew this feeling.[161] When a second Fire Festival was held to celebrate the defeat of Kaidou and Orochi, Kin'emon was celebrating alongside Tsuru in Kuri, reuniniting with her after a long time,[162] being not with the rest of the Scabbards, Yamato and Momonosuke when Admiral Ryogukyu chose to go on a rogue mission and take Luffy's head before being forced to retreat by Shanks outside of Wano Country. Though Kin'emon admitted Ryoguyku had a point when saying that Kaidou's presence kept enemies away from Wano, he then apologized to Shinobu and Raizo who became victims of Ryokugyu's abilities, but was brushed off by Nekomamushi and was asked how Tsuru was doing.


Kin'emon with the other Samurai ready to build a bright future for Wano.
Kin'emon then explained that Tsuru was safe and sound, though she suffered a serious burn on her face while the whole of Okobore Town was burned down and blushingly noted that Tsuru was beauty even after all these years. Some days later, as the Straw Hat Pirates readied to depart Wano, Kin'emon was just as surprised as Momonosuke to find out that both had been the only ones left out of the farewell biddings and would later search for Yamato, who was on the roof telling them he intended to join the Straw Hats and live like Kozuki Oden.[163] Kin'emon was then carried by Momonosuke in his dragon-form alongside Yamato, when they both learned from Yamato that he decided to not join the Straw Hats and rather stay in Wano, exploring it first and then set out to sea, just like Kozuki Oden did. When Momonosuke angrily remarked how he and Kin'emon were left out of the goodbye biddings though they were the ones they knew the longest, both Kin'emon and Momonosuke angrily agreed to punish Luffy for his apparent rudeness and lack of friendship. When they reached the Tokage Port, they encountered the Straw Hats before they were leaving, with Kin'emon telling Luffy that their silent leaving had upset the shogun. When Momonosuke bursted down in tears, Luffy gave him a flag, declaring that Wano is now under the Straw Hats's protection and if Momonosuke, Kin'emon or Yamato should ever decide to become pirates, that they would come and pick them up, though only if they agreed to be no weaklings at that point. Just as the Straw Hats were leaving, Kin'emon was told by Momonosuke that he will surpass Oden one day, to which day Kin'emon looked forward to. Kin'emon would then return to the Flower Capital with Yamato and Momonosuke, when Momonosuke wondered where to put the Straw Hat's flag at.[164]
References[]
- ↑ 1.0 1.1 One Piece Manga and Anime — Vol. 66 Chapter 656 and Episode 580, Kin'emon makes his debut.
- ↑ 2.0 2.1 One Piece Manga and Anime — Vol. 81 Chapter 816 (p. 13) and Episode 767.
- ↑ One Piece Manga and Anime — Vol. 82 Chapter 819 (p. 13) and Episode 771.
- ↑ 4.0 4.1 One Piece Manga and Anime — Vol. 93 Chapter 932 (p. 11) and Episode 927, Kin'emon is revealed to be the leader of the Nine Red Scabbards.
- ↑ 5.0 5.1 One Piece Manga and Anime — Vol. 67 Chapter 657 (p. 15) and Episode 582.
- ↑ One Piece Manga and Anime — Vol. 95 Chapter 960 (p. 10-11, 16-17) and Episode 960.
- ↑ 7.0 7.1 7.2 7.3 Vivre Card - One Piece Visual Dictionary (Card #0805), Information about Kin'emon is revealed.
- ↑ One Piece Manga and Anime — Vol. 68 Chapter 672 (p. 14) and Episode 598.
- ↑ SBS One Piece Manga — Vol. 86 (p. 152), Kin'emon's birthday is revealed.
- ↑ SBS One Piece Manga — Vol. 96 (p. 172), Kin'emon's height and other favorite food are revealed.
- ↑ One Piece Official YouTube Channel
- ↑ One Piece Manga and Anime — Vol. 95 Chapter 960 (p. 4-6, 10-11, 16-17) and Episode 960.
- ↑ One Piece Manga and Anime — Vol. 95 Chapter 961 (p. 2, 5-9, 14, 16-17) and Episode 961.
- ↑ One Piece Manga and Anime — Vol. 95 Chapter 962 (p. 4-12) and Episodes 961–962.
- ↑ One Piece Manga and Anime — Vol. 95 Chapter 963 (p. 8-13) and Episode 962.
- ↑ One Piece Manga and Anime — Vol. 95 Chapter 964 (p. 2-3, 6) and Episode 963.
- ↑ One Piece Manga and Anime — Vol. 96 Chapter 967 and Episode 968.
- ↑ One Piece Manga and Anime — Vol. 96 Chapter 968 and Episodes 969–970.
- ↑ One Piece Manga and Anime — Vol. 96 Chapter 969 and Episodes 970–971.
- ↑ One Piece Manga and Anime — Vol. 96 Chapter 970 and Episodes 971–972.
- ↑ One Piece Manga and Anime — Vol. 96 Chapter 971 (p. 7-12) and Episode 973, Oden's execution begins.
- ↑ One Piece Manga and Anime — Vol. 96 Chapter 972 and Episode 974, Oden's execution reaches its climax.
- ↑ One Piece Manga and Anime — Vol. 96 Chapter 973 and Episode 975.
- ↑ One Piece Manga and Anime — Vol. 91 Chapter 920 (p. 6-14) and Episode 910.
- ↑ 25.0 25.1 One Piece Manga and Anime — Vol. 70 Chapter 700 (p. 10-11) and Episode 629.
- ↑ One Piece Manga and Anime — Vol. 67 Chapter 663 (p. 17) and Episode 588.
- ↑ One Piece Manga and Anime — Vol. 67 Chapter 657 and Episodes 581–582.
- ↑ One Piece Manga and Anime — Vol. 67 Chapter 658 and Episode 582.
- ↑ One Piece Manga and Anime — Vol. 67 Chapter 659 (p. 12-15) and Episode 584.
- ↑ One Piece Manga and Anime — Vol. 67 Chapter 660 and Episode 585.
- ↑ One Piece Manga and Anime — Vol. 67 Chapter 663 and Episodes 587–588.
- ↑ One Piece Manga and Anime — Vol. 68 Chapter 669 and Episode 595.
- ↑ One Piece Manga and Anime — Vol. 68 Chapter 671 and Episode 597.
- ↑ One Piece Manga and Anime — Vol. 68 Chapter 672 and Episode 598.
- ↑ One Piece Manga and Anime — Vol. 68 Chapter 673 and Episode 599.
- ↑ One Piece Manga and Anime — Vol. 68 Chapter 675 and Episode 601.
- ↑ One Piece Manga and Anime — Vol. 68 Chapter 677 and Episode 603.
- ↑ One Piece Manga and Anime — Vol. 68 Chapter 678 and Episode 604.
- ↑ One Piece Manga and Anime — Vol. 69 Chapter 679 and Episode 605.
- ↑ 40.0 40.1 One Piece Manga and Anime — Vol. 69 Chapter 682 and Episode 608.
- ↑ One Piece Manga and Anime — Vol. 69 Chapter 683 and Episode 609.
- ↑ One Piece Manga and Anime — Vol. 69 Chapter 685 (p. 15) and Episode 611.
- ↑ One Piece Manga and Anime — Vol. 70 Chapter 692 (p. 8-9) and Episode 618.
- ↑ One Piece Manga and Anime — Vol. 69 Chapter 690 and Episode 616.
- ↑ One Piece Manga and Anime — Vol. 70 Chapter 692 and Episode 618.
- ↑ One Piece Manga and Anime — Vol. 70 Chapter 696 and Episode 622.
- ↑ One Piece Manga and Anime — Vol. 70 Chapter 698 (p. 11) and Episode 624.
- ↑ One Piece Manga and Anime — Vol. 70 Chapter 698 (p. 15, 17) and Episode 625.
- ↑ One Piece Manga and Anime — Vol. 70 Chapter 699 and Episode 625.
- ↑ One Piece Manga and Anime — Vol. 70 Chapter 699 (p. 15-19) and Episode 628.
- ↑ One Piece Anime — Episode 626.
- ↑ One Piece Manga and Anime — Vol. 71 Chapter 701 (p. 7-14) and Episode 630.
- ↑ One Piece Manga and Anime — Vol. 71 Chapter 701 (p. 17) and Episode 631.
- ↑ One Piece Manga and Anime — Vol. 71 Chapter 702 (p. 2-7) and Episode 631.
- ↑ One Piece Manga and Anime — Vol. 71 Chapter 705 and Episode 635.
- ↑ One Piece Manga and Anime — Vol. 72 Chapter 713 (p. 14) and Episode 643.
- ↑ One Piece Manga and Anime — Vol. 72 Chapter 717 (p. 5-6) and Episode 647.
- ↑ One Piece Manga and Anime — Vol. 72 Chapter 718 (p. 18) and Episode 648.
- ↑ One Piece Manga and Anime — Vol. 73 Chapter 722 (p. 13) and Episode 652.
- ↑ One Piece Manga and Anime — Vol. 73 Chapter 723 and Episode 653.
- ↑ One Piece Manga and Anime — Vol. 73 Chapter 725 and Episode 656.
- ↑ One Piece Manga and Anime — Vol. 73 Chapter 728 and Episode 660.
- ↑ One Piece Manga and Anime — Vol. 73 Chapter 729 and Episode 661.
- ↑ One Piece Manga and Anime — Vol. 73 Chapter 730 and Episode 662.
- ↑ One Piece Manga and Anime — Vol. 73 Chapter 731 and Episode 663.
- ↑ One Piece Manga and Anime — Vol. 74 Chapter 734 and Episode 666.
- ↑ One Piece Manga and Anime — Vol. 74 Chapter 735 and Episode 667.
- ↑ One Piece Manga and Anime — Vol. 74 Chapter 736 (p. 11-13) and Episode 668.
- ↑ One Piece Manga and Anime — Vol. 74 Chapter 736 (p. 18-19) and Episode 669, Kin'emon is absent when Luffy, Zoro, and Viola are intercepted by Pica.
- ↑ One Piece Manga and Anime — Vol. 74 Chapter 740 (p. 13) and Episode 673.
- ↑ One Piece Manga and Anime — Vol. 75 Chapter 745 (p. 4) and Episode 679.
- ↑ One Piece Manga and Anime — Vol. 75 Chapter 746 and Episode 681.
- ↑ One Piece Manga and Anime — Vol. 76 Chapter 754 (p. 2-5) and Episode 691.
- ↑ One Piece Manga and Anime — Vol. 76 Chapter 755 (p. 2) and Episode 691.
- ↑ One Piece Manga and Anime — Vol. 76 Chapter 756 and Episodes 693–694.
- ↑ One Piece Manga and Anime — Vol. 76 Chapter 758 and Episodes 694–697.
- ↑ One Piece Manga and Anime — Vol. 76 Chapter 760 and Episode 699.
- ↑ One Piece Manga and Anime — Vol. 78 Chapter 777 and Episodes 717–718.
- ↑ One Piece Manga and Anime — Vol. 78 Chapter 778 and Episode 719.
- ↑ One Piece Manga and Anime — Vol. 78 Chapter 779 (p. 9-10) and Episode 720, Kin'emon and Usopp reunite with Zoro.
- ↑ One Piece Manga and Anime — Vol. 78 Chapter 780 (p. 8) and Episode 721, Kin'emon hears about Law's defeat from Viola.
- ↑ One Piece Manga and Anime — Vol. 78 Chapter 781 (p. 5-6) and Episode 722, The Birdcage starts to shrink.
- ↑ One Piece Manga and Anime — Vol. 78 Chapter 784 (p. 3) and Episode 726, Kin'emon and Kanjuro are informed about Zoro's intention to stop the Birdcage.
- ↑ One Piece Manga and Anime — Vol. 79 Chapter 787 (p. 11) and Episode 730.
- ↑ One Piece Manga and Anime — Vol. 79 Chapter 788 (p. 12-16) and Episode 731.
- ↑ One Piece Manga and Anime — Vol. 79 Chapter 791 and Episode 734.
- ↑ One Piece Manga and Anime — Vol. 80 Chapter 796 and Episodes 740–741.
- ↑ One Piece Manga and Anime — Vol. 80 Chapter 797 and Episodes 741–742.
- ↑ One Piece Manga and Anime — Vol. 80 Chapter 798 and Episode 743.
- ↑ One Piece Manga and Anime — Vol. 80 Chapter 799 and Episode 744.
- ↑ One Piece Manga and Anime — Vol. 80 Chapter 800 and Episode 745.
- ↑ One Piece Manga and Anime — Vol. 80 Chapter 801 and Episode 746.
- ↑ One Piece Anime — Episode 747.
- ↑ One Piece Anime — Episode 749.
- ↑ One Piece Manga and Anime — Vol. 80 Chapter 802 (p. 5, 13-17) and Episodes 747–751, Kin'emon and his allies make their way to Zou.
- ↑ One Piece Manga and Anime — Vol. 80 Chapter 803 (p. 2-5, 12-13) and Episode 752, Kin'emon and his allies begin ascending the elephant's leg.
- ↑ One Piece Manga and Anime — Vol. 80 Chapter 804 and Episode 753.
- ↑ One Piece Manga and Anime — Vol. 80 Chapter 806 (p. 3-4) and Episode 755.
- ↑ One Piece Manga and Anime — Vol. 81 Chapter 807 (p. 2) and Episode 756.
- ↑ One Piece Manga and Anime — Vol. 81 Chapter 815 (p. 16-17) and Episode 766.
- ↑ One Piece Manga and Anime — Vol. 81 Chapter 816 and Episode 767.
- ↑ One Piece Manga and Anime — Vol. 82 Chapter 817 and Episode 768.
- ↑ One Piece Manga and Anime — Vol. 82 Chapter 818 and Episodes 769–770.
- ↑ One Piece Manga and Anime — Vol. 82 Chapter 819 and Episodes 770–772.
- ↑ One Piece Manga and Anime — Vol. 82 Chapter 820 and Episodes 772–773.
- ↑ One Piece Manga and Anime — Vol. 82 Chapter 821 and Episodes 773–774.
- ↑ One Piece Manga and Anime — Vol. 82 Chapter 822 (p. 4-5, 14-16) and Episode 776.
- ↑ One Piece Manga and Anime — Vol. 90 Chapter 909 (p. 13) and Episode 892.
- ↑ One Piece Manga and Anime — Vol. 91 Chapter 919 (p. 12-17) and Episode 909.
- ↑ One Piece Manga and Anime — Vol. 91 Chapter 920 (p. 2-17) and Episodes 910–911.
- ↑ One Piece Manga and Anime — Vol. 91 Chapter 920 (p. 2-17) and Episodes 910–911.
- ↑ One Piece Manga and Anime — Vol. 91 Chapter 921 (p. 3-9, 17-19) and Episodes 911–912.
- ↑ One Piece Manga and Anime — Vol. 92 Chapter 922 (p. 2-5, 10) and Episode 913.
- ↑ One Piece Manga and Anime — Vol. 92 Chapter 924 (p. 7-8) and Episode 916.
- ↑ One Piece Manga and Anime — Vol. 92 Chapter 925 (p. 13-16) and Episode 918.
- ↑ One Piece Manga and Anime — Vol. 92 Chapter 929 (p. 7-8) and Episode 922.
- ↑ One Piece Manga and Anime — Vol. 93 Chapter 938 (p. 5-6) and Episode 934.
- ↑ One Piece Manga and Anime — Vol. 93 Chapter 941 (p. 8-9) and Episode 938.
- ↑ One Piece Manga and Anime — Vol. 93 Chapter 942 (p. 10-17) and Episode 940.
- ↑ One Piece Manga and Anime — Vol. 94 Chapter 943 (p. 3, 8) and Episodes 940–941.
- ↑ One Piece Manga and Anime — Vol. 94 Chapter 945 (p. 10-11) and Episode 943.
- ↑ One Piece Manga and Anime — Vol. 94 Chapter 950 (p. 8-13) and Episode 950.
- ↑ One Piece Manga and Anime — Vol. 94 Chapter 951 (p. 10) and Episode 952.
- ↑ One Piece Manga and Anime — Vol. 94 Chapter 952 (p. 11-13) and Episode 953.
- ↑ One Piece Manga and Anime — Vol. 94 Chapter 953 (p. 15) and Episode 954.
- ↑ One Piece Manga and Anime — Vol. 95 Chapter 954 (p. 7-9) and Episode 955.
- ↑ One Piece Manga and Anime — Vol. 95 Chapter 955 (p. 2-8, 10-12, 14-15) and Episode 956.
- ↑ One Piece Manga and Anime — Vol. 95 Chapter 958 (p. 9-15) and Episode 959.
- ↑ One Piece Manga and Anime — Vol. 95 Chapter 959 (p. 14-16) and Episode 960.
- ↑ One Piece Manga and Anime — Vol. 96 Chapter 974 and Episode 977.
- ↑ One Piece Manga and Anime — Vol. 97 Chapter 975 and Episodes 978–979.
- ↑ One Piece Manga and Anime — Vol. 97 Chapter 976 and Episodes 979–980.
- ↑ One Piece Manga and Anime — Vol. 97 Chapter 977 and Episodes 981–982.
- ↑ One Piece Manga and Anime — Vol. 97 Chapter 978 and Episode 983.
- ↑ One Piece Manga and Anime — Vol. 97 Chapter 979 (p. 3-4) and Episode 984.
- ↑ One Piece Manga and Anime — Vol. 97 Chapter 981 and Episodes 987–988.
- ↑ One Piece Manga and Anime — Vol. 97 Chapter 982 (p. 14) and Episode 989.
- ↑ One Piece Manga and Anime — Vol. 98 Chapter 986 and Episodes 994–995.
- ↑ One Piece Manga and Anime — Vol. 98 Chapter 987 and Episodes 996–997.
- ↑ One Piece Manga and Anime — Vol. 98 Chapter 990 and Episode 1000.
- ↑ One Piece Manga and Anime — Vol. 98 Chapter 991 and Episode 1003.
- ↑ One Piece Manga and Anime — Vol. 98 Chapter 992 (p. 6-19) and Episode 1004.
- ↑ One Piece Manga and Anime — Vol. 98 Chapter 993 and Episode 1005.
- ↑ One Piece Manga and Anime — Vol. 98 Chapter 994 and Episode 1006.
- ↑ One Piece Manga and Anime — Vol. 99 Chapter 996 (p. 14-15) and Episode 1010.
- ↑ One Piece Manga and Anime — Vol. 99 Chapter 1000 (p. 10-15) and Episode 1015.
- ↑ One Piece Manga and Anime — Vol. 99 Chapter 1004 (p. 15-17) and Episode 1020.
- ↑ One Piece Manga and Anime — Vol. 100 Chapter 1007 and Episode 1023.
- ↑ One Piece Manga and Anime — Vol. 100 Chapter 1008 and Episodes 1024–1025.
- ↑ One Piece Manga and Anime — Vol. 100 Chapter 1009 (p. 3-6) and Episode 1026.
- ↑ One Piece Manga and Anime — Vol. 100 Chapter 1012 (p. 2-4) and Episode 1032.
- ↑ One Piece Manga and Anime — Vol. 100 Chapter 1014 (p. 10-15) and Episode 1035.
- ↑ One Piece Manga and Anime — Vol. 100 Chapter 1015 (p. 9-11) and Episode 1036.
- ↑ One Piece Manga and Anime — Vol. 102 Chapter 1030 and Episode 1055.
- ↑ One Piece Manga and Anime — Vol. 103 Chapter 1036 (p. 11-14) and Episode 1063.
- ↑ One Piece Manga and Anime — Vol. 103 Chapter 1041 and Episode 1068.
- ↑ One Piece Manga and Anime — Vol. 103 Chapter 1046 and Episode 1073.
- ↑ One Piece Manga and Anime — Vol. 104 Chapters 1047–1049 and Episodes 1074–1076.
- ↑ One Piece Manga and Anime — Vol. 104 Chapter 1050 and Episode 1077.
- ↑ One Piece Manga and Anime — Vol. 104 Chapter 1051 and Episode 1078.
- ↑ One Piece Manga and Anime — Vol. 104 Chapter 1052 and Episode 1079.
- ↑ One Piece Manga and Anime — Vol. 104 Chapter 1053 and Episode 1080.
- ↑ One Piece Manga and Anime — Vol. 105 Chapter 1056 and Episode 1083.
- ↑ One Piece Manga and Anime — Vol. 105 Chapter 1057 and Episode 1085.
[]
| |||||||||||||
| |||||||||||||
| |||||||||||||
| |||||||||||
| |||||||||||
| |||||||||||
| |||||||||||||||
| |||||||||||||||
| |||||||||
| |||||||||
| |||||||||
| |||||||||
| |||||||
| |||||||
| |||||||
| |||||||
| |||||||||||||||
| |||||||||||||||
Thieves | |||||||
|---|---|---|---|---|---|---|---|
| |||||||
| |||||||