
|
Ahoy! This here is the 1st Featured Article.
"Monkey D. Luffy" has been featured, meaning it was chosen as an article of interest.
|
Whole Cake Island Saga
Zou Arc
Encounter with the Mink Tribe
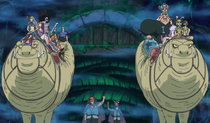
During a hail storm, Luffy learned that the Barto Club does not have a navigator, lack experience in sailing, and they usually called a granny who gives them useless advice. Therefore, Luffy, the other Straw Hats, the samurais, and Law needed to protect the ship. After one week of traversing through the dangers of the New World, the ship finally arrived at Zou. Luffy was astonished to see that Zou is an island on the back of giant elephant that is over 1000 years old.[26]
After finding the Thousand Sunny, the Barto Club bid Luffy's group farewell. Proceeding to search for Sanji's group, they climbed the giant elephant's left hind leg with a dragon that Kanjuro conjured. After the samurais explained that they were also searching for their ninja comrade, Raizo, Luffy and the others saw something dropping towards them.[27]
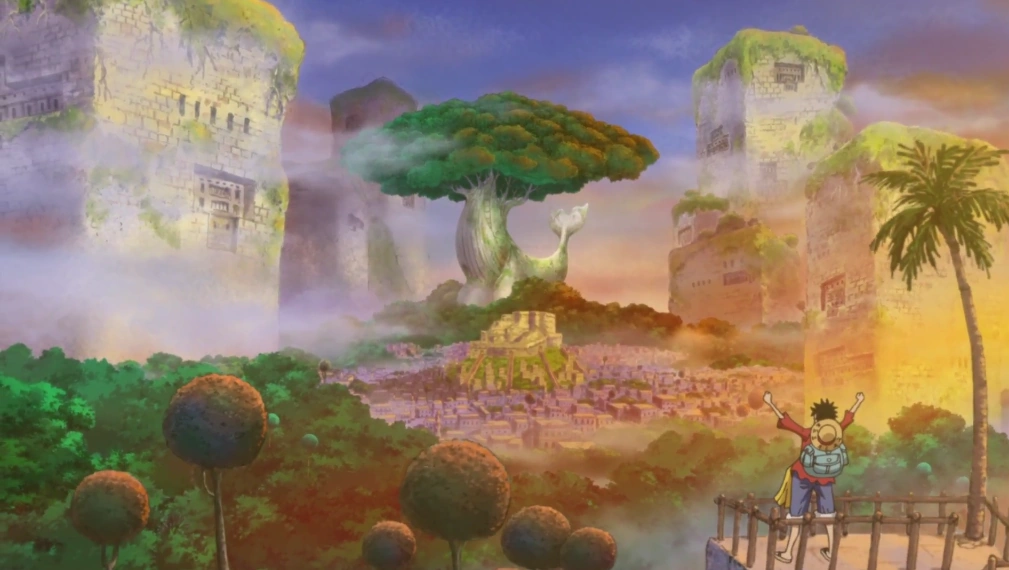

Luffy surveys the Mokomo Dukedom.
The thing that was falling towards them happened to be a monkey. The monkey hit Kin'emon and Kanjuro, causing them to off the dragon. Despite being separated from the group, the samurais assured the Straw Hats that they were alright and will catch up to them eventually. The rest of Luffy's group considered turning back for them, but after they saw the dragon struggling to climb, they decided to continue towards the top. Once they reached the top, the dragon turned back into a drawing and the group went on to explore the island. They discovered a village and Luffy ran ahead of the group, searching for Sanji, Nami, Brook, and Chopper.[28]
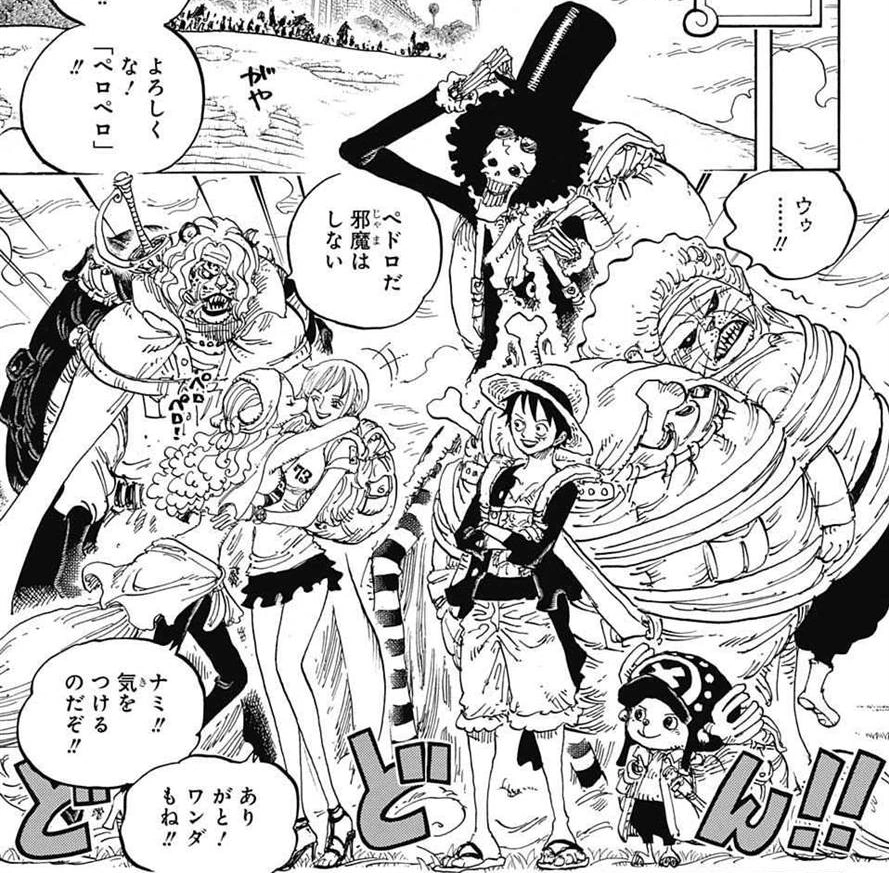
Luffy later went to the Whale Forest and got attacked by a bull mink called Roddy for trespassing. They clashed until Wanda and Carrot arrived and stopped them. After Pedro called off the guardians, Luffy got reacquainted with the Heart Pirates and explained that Law was on the island as well. Wanda then explained to Luffy about a recent attack on Zou before offering to take him to Sanji's group, much to his excitement.[29]
While riding Wany, Wanda told Luffy about the climate on Zou and how the sea water from Zunesha's eruption rain is filtered and sent across the country via a system of aqueducts. She and Carrot also explained that that rain also drops plenty of fish, providing them with a good food source. As they travel, they went past some wooden stockades used for torturing prisoners. Luffy asked her about the pirate she mentioned earlier, and she told him about Jack, explaining that his obituary was in the paper, since he was believed to be killed during a raid on a Marine escort. She added that his death wasn't confirmed, so he might still be alive. Right after Law teleported the rest of Luffy's friends close to their location, Wanda led them into Right Belly Forest. Luffy was overjoyed to be reunited with Nami and Chopper. Nami embraced Luffy as she told him what happened to Sanji.[30]


Luffy and the Straw Hats arrive at Right Belly Fortress.
While having a feast with the Mink Tribe, Luffy told Zoro not to be rude to the minks. He was then happy to see Brook again. Brook explained that Momonosuke was safe but refused to leave his room. He also warned Luffy not to mention samurai or the Wano Country. Before he could explain the reason, he was interrupted by canine minks. After Luffy told Chopper that Law was with his crew, Nami asked him what to do about Sanji. Since Sanji had left a letter, Luffy was not too worried, much to Nami's chagrin. Luffy then listened to Nami and Chopper's story about how they escaped the Big Mom Pirates before listening to Wanda's story about how Nami's group saved the Mink Tribe. After hearing that Prince Inuarashi awakened from his coma and wanted to meet Zou's benefactors, Luffy and his group went to meet him. On the way, Wanda began to explain to them about Jack's attack on Zou in more detail.[31]
During her explanation, Wanda revealed that Jack was searching for a Wano ninja known as Raizo. After Wanda finished with her recollection, Brook explained to his crew the reason why they should not mention samurai or the Wano Country. When Luffy blurted out the ninja's name, Nami, Usopp, and Brook swiftly beat him up. They then arrived at the duke's home where they were introduced to Sicilian, who expressed his gratitude to the crew. After entering the duke's home, they heard about a weapon Jack used against the Mink Tribe.[32]

After hearing that the weapon was made by Caesar, Luffy became angry. Inuarashi then changed the topic of their conversation to how he once met Shanks. Luffy was about to talk more about him, but the duke suddenly fell asleep since dusk arrived.[33]
After Wanda finished recalling the devastation caused by Jack and the Mink Tribe's salvation, Luffy promised to make Jack and Kaidou pay one day. Wanda expressed her doubt about Jack being dead, as she saw how powerful he was and how he fought. The Straw Hats then decided to visit Nekomamushi and the Guardians and they traveled to the Whale Forest with Wanda and Carrot. On the way, Nami and Brook began to explain to the rest of the group what happened when Big Mom's ship arrived at Zou two days before Luffy's group's arrival.[34] Specifically, they informed the rest of the crew of Big Mom's upcoming Tea Party, which would host a political wedding between Sanji, the third son of the Vinsmoke Family, and the 35th daughter of the Charlotte Family, Pudding. They also explained that Sanji, after ensuring the safety of Nami, Brook and Chopper, chose to leave with the Big Mom Pirates in order to settle things with his family.[35]

The Straw Hats go off to see Nekomamushi.
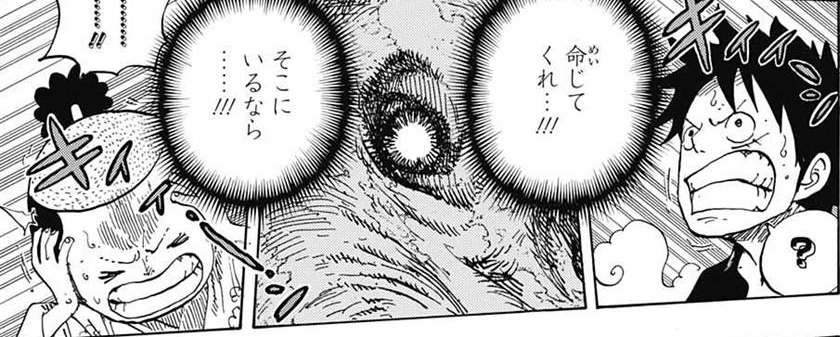
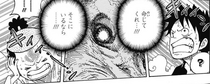
After hearing about the circumstances surrounding Sanji's departure, Luffy was initially excited at the prospect of having another crewmate. However, when Brook told him that they would become subordinate members of Big Mom's hierarchy if Sanji married her daughter, Luffy became displeased at the idea. Despite this, when Chopper explained the possibility of Sanji severing ties with them in order to avoid this exact scenario, Luffy became worried that Sanji might quit the Straw Hats, which he considered even worse than sailing under Big Mom. Luffy then decided to find Sanji, although his crew objected to confronting Big Mom without a plan. After arriving at the Whale Forest, Pedro then brought Luffy to Pekoms. When Luffy questioned him about the arranged marriage, Pekoms revealed that Sanji's father and Big Mom arranged the wedding to finalize an alliance between their families, and that the Vinsmoke Family is a family of killers.[36]

Luffy visits Pekoms and gets angry when the mink says Sanji will likely not return.
Pekoms proceeded to tell them about a mysterious organization known as Germa 66, commanded by the Vinsmokes and headed ultimately by Sanji's father. Luffy then stated that he did not care and told Pekoms that he wanted the Big Mom Pirates to be his underlings, not the other way around. Shocked and furious at this statement, Pekoms reminded Luffy of Big Mom's power and status. Once he calmed down, Pekoms explained the reason why Sanji could not refuse the invitation—if he did, he would receive the decapitated head of someone close to him. Luffy then asked him how the Big Mom Pirates knew so much about Sanji and Pekoms replied that it was because of the power that all Four Emperors hold. Pekoms went on to say that the marriage, instead of making the Straw Hats Big Mom's subordinates, would automatically result in Sanji leaving the Straw Hats and joining the Big Mom Pirates—a revelation to which Luffy did not take kindly. Pekoms said that he will return to the Big Mom Pirates once he recovered; Luffy then told Pekoms to also take him to the tea party to find Sanji, ignoring Pekoms' objections.
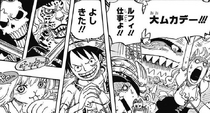
As he ran outside, he found Zoro listening in on the earlier conversation. Luffy assumed that Zoro was also worried about Sanji, much to Zoro's annoyance. They then met Nekomamushi, who then gave them a warm greeting. Law arrived and his introduced his crew to Luffy. Law was then shocked to be informed that Sanji went to Big Mom. Luffy said that he will bring Sanji back and told him not to attack Kaidou until he returns. Law then explained that Kaidou might be pursuing them as they speak and Zou could be at risk. After the minks felt touched by Law's concerns, Nekomamushi decided to party with Luffy and his group.[37]
Revelations and a New Alliance
Inuarashi and Nekomamushi reveal that Raizo is safe.
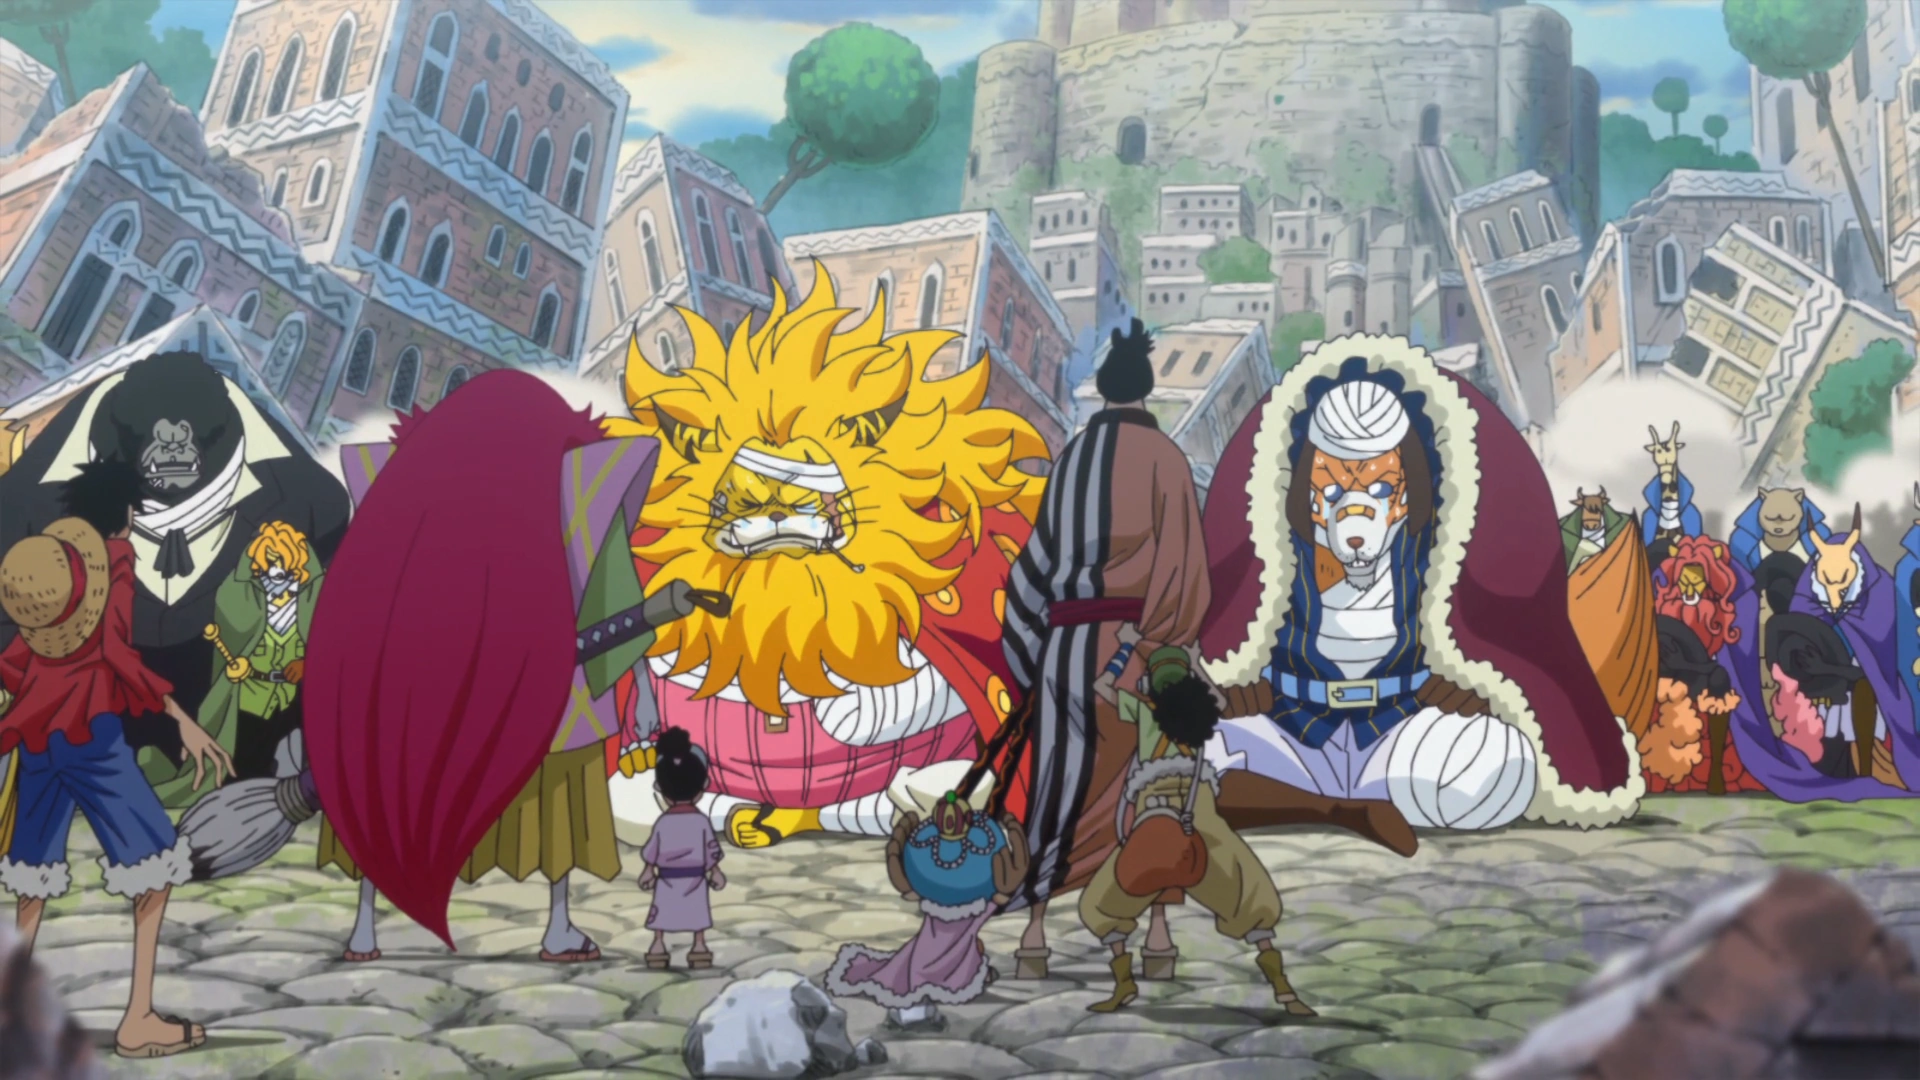
The next morning, Luffy and his group heard a bell ringing and realized that Kin'emon and Kanjuro had arrived. They quickly rushed to find them, fearing what would happen if the Mink Tribe meets the samurai. The Straw Hats managed to intercept Kin'emon, Kanjuro, and Momonosuke just as they arrived at Kurau City and tried desperately to keep them hidden. However, as Nekomamushi and Inuarashi were fighting, Kin'emon and Kanjuro revealed themselves. Contrary to what the Straw Hats expected, the Mink Tribe welcomed the samurais and revealed that Raizo is safe. The Straw Hats were stunned to learn that the minks knew about Raizo all along and went to great lengths to keep him hidden despite the abuse they suffered.[38]
After Momonosuke stopped Inuarashi and Nekomamushi from continuing their quarrel, Kin'emon revealed that Momonosuke was not his son but was actually the son of Kozuki Oden, which surprised Luffy as Momonosuke and Kin'emon looked alike. However, Luffy still did not took Momonosuke seriously. Inuarashi and Nekomamushi then took the Straw Hats, Law, and the samurais to Raizo, and Luffy and the other male pirates were excited to meet him, thinking he would be like a stereotypical ninja. When they met Raizo at a secret room inside the whale-shaped tree, Luffy and his crewmates were shocked by Raizo's appearance, but still begged him to perform various tricks. Raizo refused until the pirates started sulking, which caused him to use some of his ninja arts, and the pirates were immediately entranced.[39]
Luffy, Usopp, and Chopper then accompanied Kin'emon, Kanjuro, and Raizo as they stood outside the Whale Tree, expressing their sorrows as they saw the state Zou was in after Jack's attack. When Robin deciphered the red Poneglyph hidden in the Whale Tree, Nekomamushi called them back in. Inuarashi then explained to the Straw Hats about the four Road Poneglyphs and they listened in anticipation as he revealed how they can lead to Laugh Tale. When Nekomamushi revealed that Kaidou and Big Mom each possessed one Road Poneglyph, Luffy became more eager to fight them. Usopp was delighted to hear that they can copy the information on the Poneglyphs using gyotaku, but Luffy was not interested in that approach, much to Usopp's chagrin. The Straw Hats were then surprised when Nekomamushi revealed that Momonosuke's ancestors created the Poneglyphs. However, the samurai explained that Momonosuke never inherited the knowledge of the Poneglyphs due to the execution of Lord Oden at the hands of Kaidou and the shogun of Wano. The Straw Hats also learned that Oden was part of Roger's crew and had been on Laugh Tale with him as well as the Beasts Pirates' objective in obtaining the secret that Oden knew.[40]
The samurai explained Oden's will to open Wano Country to the world and they went on a journey to gather allies in order to fight Kaidou and the shogun of Wano. Kin'emon then requests Luffy's assistance, but Luffy declined, saying that Momonosuke should make the request himself. Momonosuke then declared his will to fight Kaidou and protect those dear to him. He bowed and humbly asked for Luffy's help. Seeing Momonosuke's resolve, Luffy accepted the request and formed an alliance with the samurai and the Mink Tribe.[41]
Luffy and Momonosuke hear Zunesha's voice.
Right after leaving the secret room, Luffy learned that Inuarashi and Nekomamushi traveled with Oden and had been on the ships of both Whitebeard and Roger. He also learned that the remnants of the Whitebeard Pirates were defeated and then forced into hiding by the Blackbeard Pirates one year after the Summit War of Marineford. The alliance decided to split up to accomplish different tasks and meet up again at Wano. Nami, Chopper, and Brook chose to accompany Luffy in his mission to rescue Sanji. Robin asked Luffy to make a copy of the Poneglyph in Big Mom's possession. However, before they could start their operation, they felt Zou shaking and heard Zunesha crying.[42]
As everything shook around them, Luffy heard Zunesha's voice. However, Luffy's own voice cannot reach it. After Momonosuke revealed that he can hear the elephant's voice as well, Luffy urged him to give the elephant a command, which was to drive Jack away. After Jack's fleet has been sunk, Luffy prepared to disembark Zou.[43]
Luffy and the Sanji Retrieval Team prepare to depart Zou.
He then went to check up on Pekoms and was shocked to see that the house he was resting in collapsed. He was relieved when Pekoms revealed that he used his Devil Fruit powers to save himself from further injury. Luffy then carried Pekoms on his back and departed from Zou with the Sanji Retrieval Team (which also included Pedro). Everyone, except the Straw Hat members left behind, were shocked when Luffy jumped off Zunesha with his party.[44]
Journey to Whole Cake Island

Carrot convinces Luffy to let her join their team.
As they sailed towards Whole Cake Island on the Thousand Sunny, Luffy scolded Nami, Chopper, and Brook for acting less energetic. Nami pointed out that they were still recovering from the shock of Luffy's stunt at Zou. The group on the Sunny were then surprised to see Carrot had snuck aboard the ship. After she begged them not to turn back, Luffy allowed her to come along. When the crew got hungry, Luffy, in Sanji's absence, insisted on preparing a meal himself after Nami was going to charge them money for the food.[45]
While cooking, Luffy and the rest of the Sanji retrieval team learned from a newspaper about the Blackbeard Pirates' attack on the Revolutionary Army's headquarters on Baltigo. Luffy was shocked to see what his father looks like and also worried for Sabo's life. Pedro assured Luffy that if the revolutionaries were defeated, it would have been mentioned in the newspaper. Luffy then realized that he forgot to turn off the stove, causing a fire. After passing through a storm, Luffy presented his dish, which his group did not enjoy in the least. Luffy then admitted that he used up all the food they had and his group found themselves in a food shortage crisis.[46]
Whole Cake Island Arc
Entering Totto Land

Luffy gets severe poisoning after eating a fish's skin.
A few days later, the group was famished from the lack of food and overheated as they passed through boiling waters. They were saved from starvation when Luffy managed to catch a gigantic fish. Luffy immediately started eating the fish and consumed the fish's toxic skin, which led to Luffy being incapacitated by food poisoning. After they entered Big Mom's waters, the group on the Sunny was approached by a ship belonging to Germa 66.[47]
The Straw Hats were approached by two of Sanji's siblings, Vinsmoke Yonji and Vinsmoke Reiju. Reiju proceeded to suck the poison out of Luffy through his mouth, causing him to be revived almost instantly. Luffy thanked Reiju for saving him, as Reiju explained that the Vinsmoke Family had been searching for Sanji since he left them as a child. Luffy wanted Reiju to give Sanji back to the crew, but Reiju leaped back onto her ship, and she and Yonji sailed away.[48]

Luffy and Chopper eat an entire café at Cacao Island.
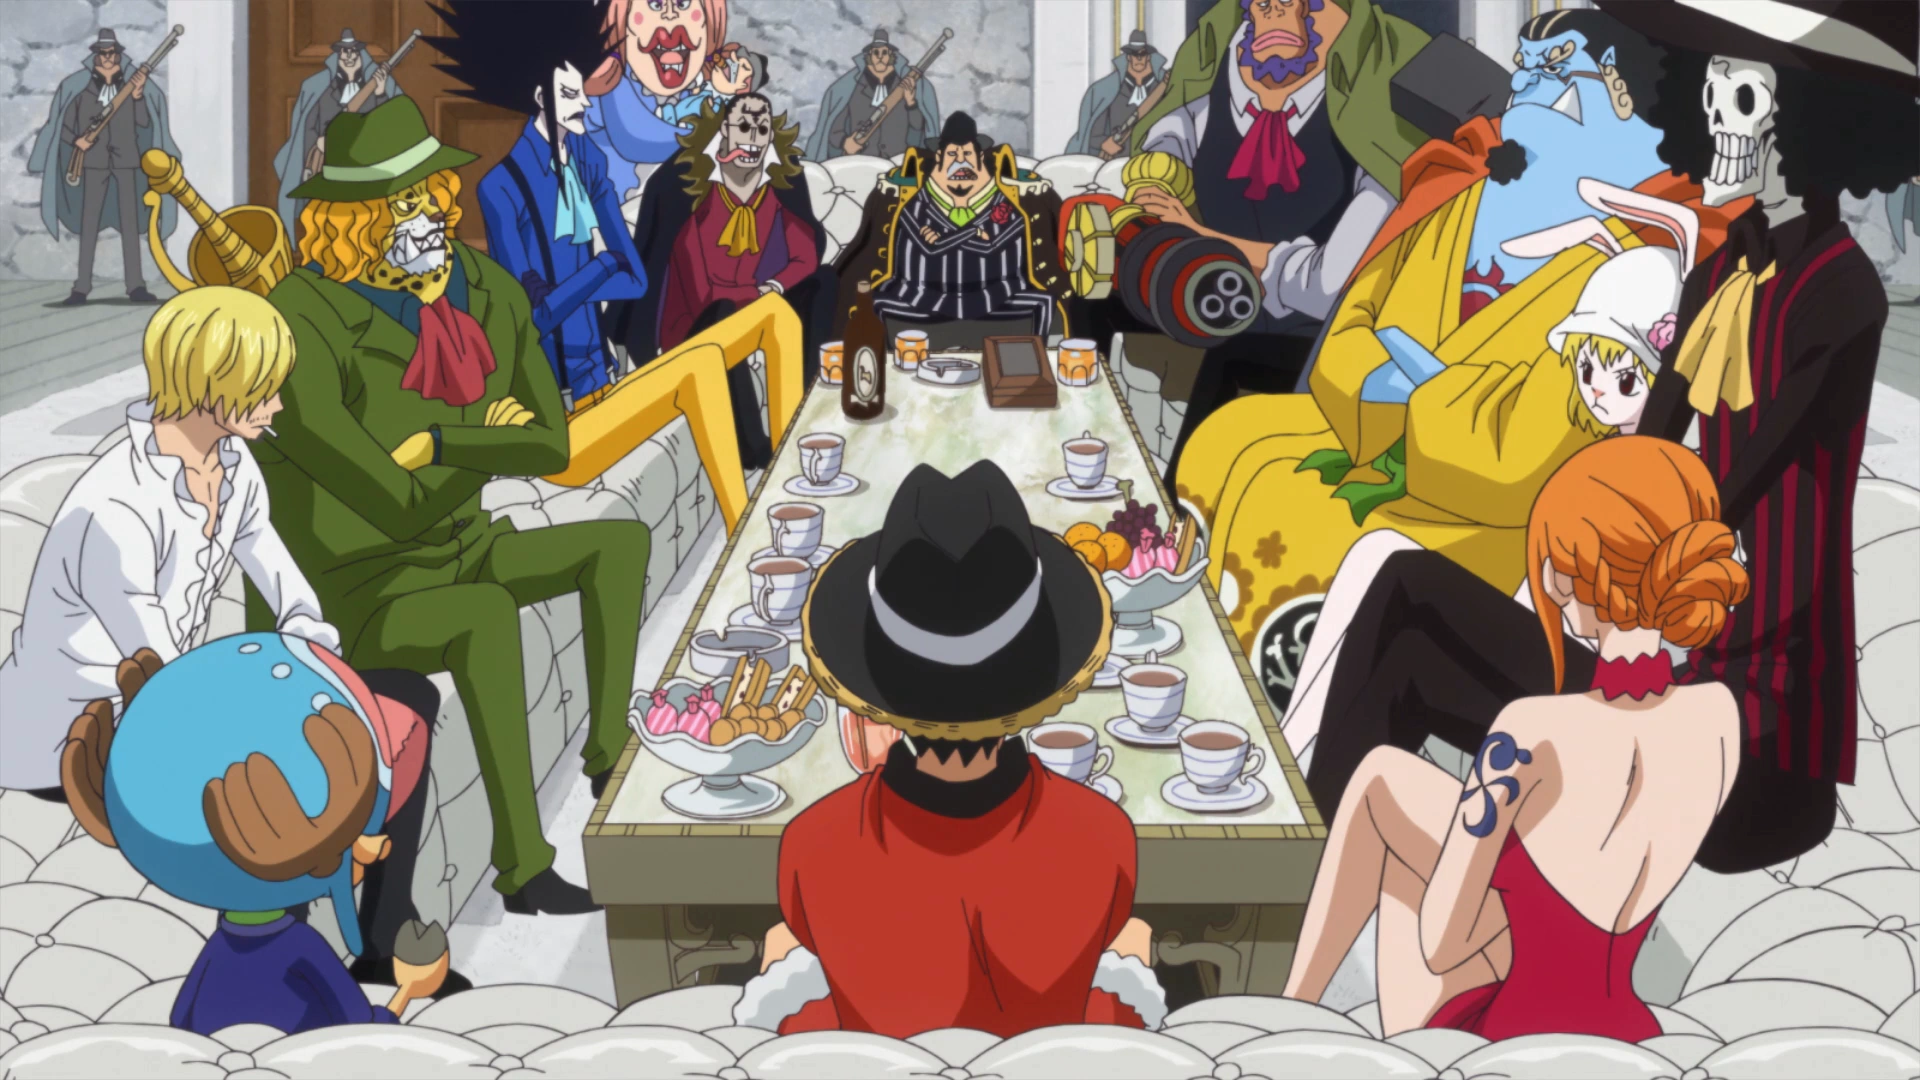
The group later docked at Cacao Island, an island close to Whole Cake Island. After seeing buildings made of chocolate, Luffy and Chopper went ahead to explore the island. When they ate a café, a policeman confronted them and was about to arrest them. The owner of the café, Charlotte Pudding, arrived and came to their defense, saying that they were hired to dismantle the café. After she saved Luffy and Chopper, the team accompanied her to her home where she offered them food. While conversing with her, Luffy accidentally revealed his name.[49]
The Sanji retrieval team was then shocked to learn that the woman they were conversing with was Sanji's betrothed, who in turn, was surprised to discover that the group was from the Straw Hat crew. After calming down, Luffy and the team listened as Pudding explained more about the Charlotte Family and her thoughts about Sanji. Luffy and the others was shocked to hear that Sanji turned her down. Pudding then showed them a secret route to Whole Cake Island and told them where to meet her while promising to bring Sanji to them. The Sanji retrieval team then left in a hurry when guards arrived for Pudding and quickly returned to the Thousand Sunny. Pekoms was nowhere to be seen and they found a message telling them to turn back. Luffy decided to continue forward, saying that things got interesting.[50]
The Sanji retrieval team battles a giant centipede.
After leaving Cacao Island, Luffy wanted to go rescue Pekoms, but Pedro dissuaded him, saying that the mink would be all right. The team sailed on Pudding's route and reached the next island, but Nami decided to stay away from it. Luffy quickly steered the ship starboard, causing the helm to burst into flames, much to Nami's chagrin. Luffy later wanted to go into the kitchen to cook again, but Nami quickly stopped him. A giant aquatic centipede then attacked the Thousand Sunny, and the team began battling it.[51]
The team later battled a swarm of giant ants before getting trapped in a frozen sea of syrup as night fell. As they worked to unfreeze the sea, Pedro revealed that the giant ants had once eaten his own ship, and Luffy wondered what he did there in the past. Pedro then explained that he once traveled with Pekoms as a pirate and came to Totto Land searching for Poneglyphs, revealing that his journey met with defeat. However, Pedro was fine with coming back to help the Straw Hats. He told Luffy that since Inuarashi and Nekomamushi showed him the Road Poneglyph on Zou, they must believe that he can follow in Gol D. Roger's footsteps, as he was the only other stranger to see it, and so they needed to acquire Big Mom's Road Poneglyph. He then offered to sneak in and steal it while the others rescue Sanji. Luffy agreed to this proposal as the ants returned. The next day, the team reached Whole Cake Island.[52]
The Perils of the Seducing Woods

Luffy confronts his physical reflection.
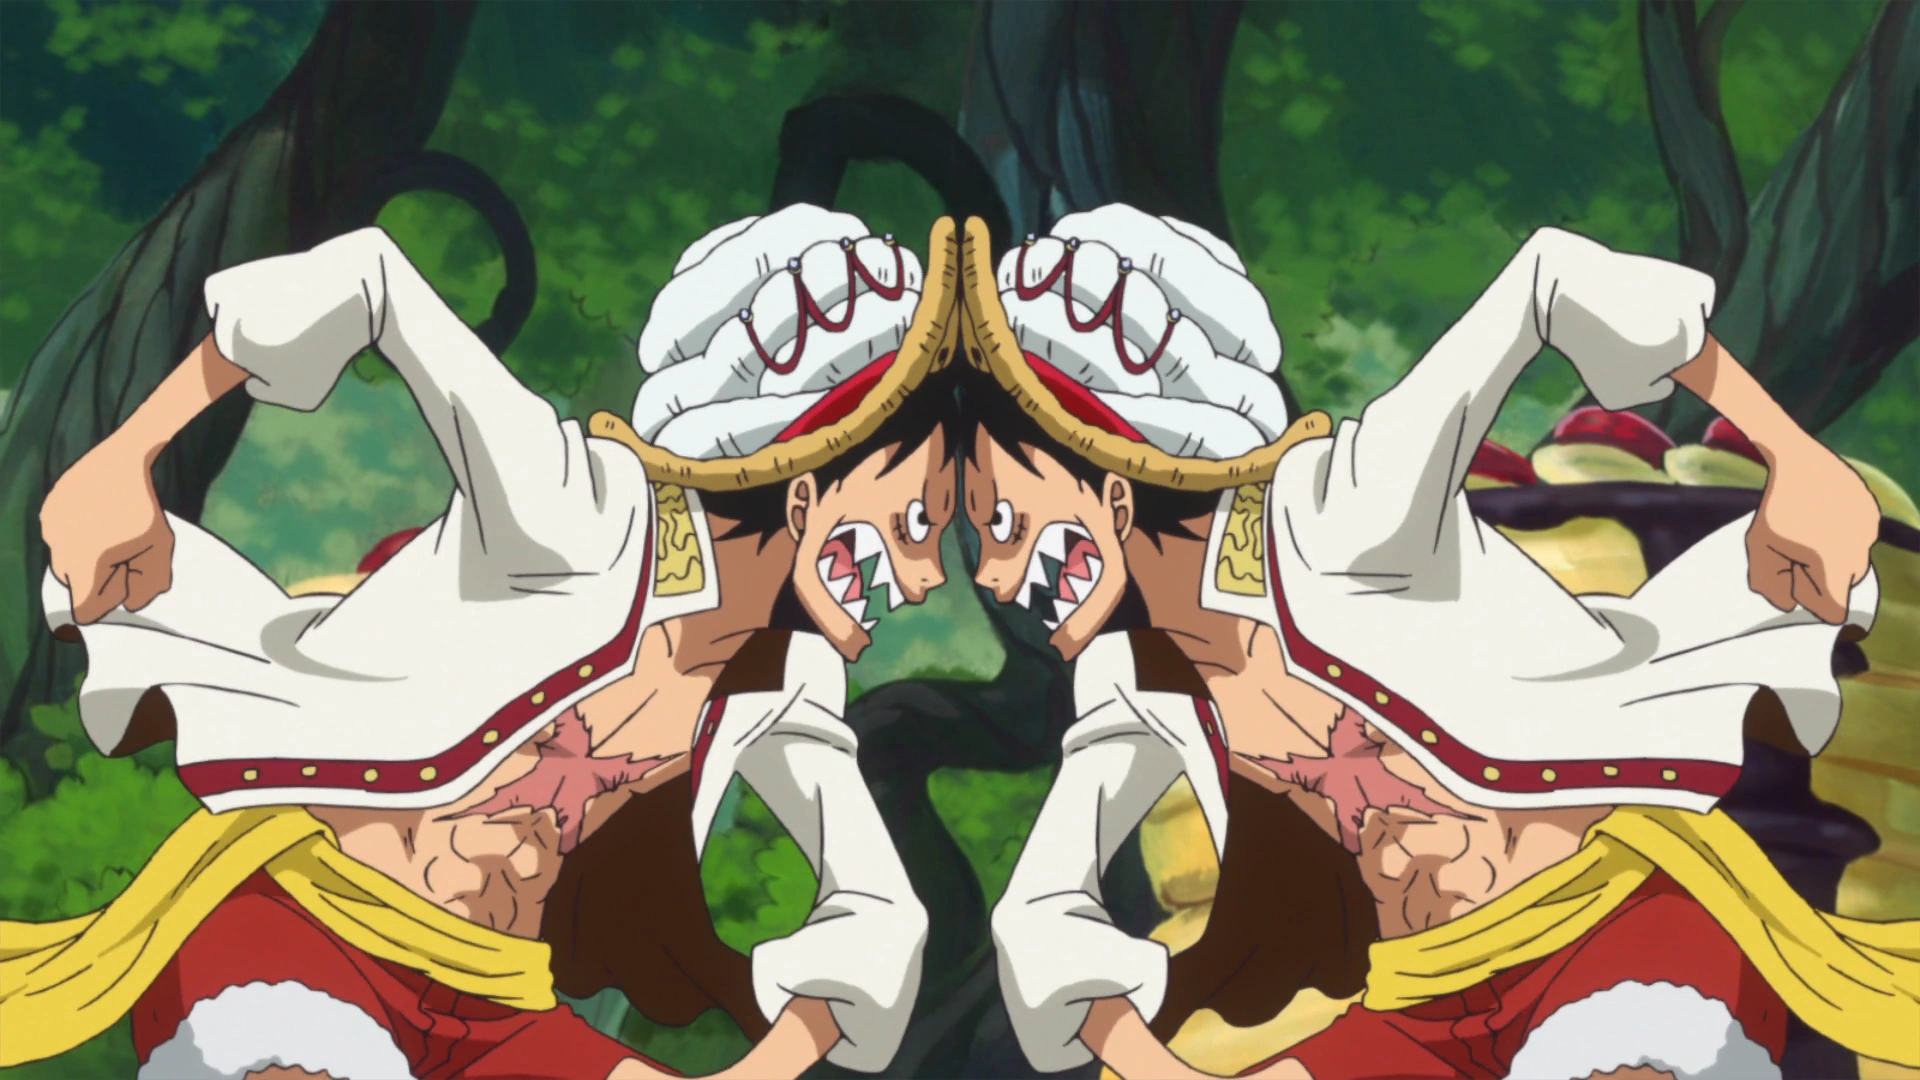
After docking at the southwestern coast of Whole Cake Island, the team split into two groups, with Pedro and Brook departing to find Big Mom's Road Poneglyph. Right after Luffy's group disembarked on the island, Luffy saw what appeared to be Sanji in the nearby forest. Luffy, Chopper, and Carrot ran after him with Nami following them, but he somehow disappeared. Luffy, Chopper, and Carrot entered the woods to continue searching, although they were often distracted by the sweet environment. The team was nearly eaten by a talking crocodile, and Nami attempted to get everyone to turn back, but Luffy intently pressed on the search for Sanji. They also encountered a man with a gigantic head whose body is buried into the ground. Suddenly, Luffy encountered Big Mom's 8th daughter, Brûlée, who was disguised as another version of himself and talked and acted simultaneously with him just like a mirror reflection. The two got angry at each other and started fighting, matching each other's blows exactly, and they told the others to go ahead and look for Sanji.[53]
Nami, Chopper, and Carrot returned to where Luffy was still fighting Brûlée as they were being chased by Randolph. Brûlée went with them while Luffy ran in the opposite direction. Luffy attempted to tell them that the real him was not with them, but Brûlée stifled him before he could say anything.[54]
As night fell over Whole Cake Island, Luffy gathered multiple, bound fake versions of Sanji, Pudding, Nami, Chopper and Carrot into the center of a clearing in the Seducing Woods. Luffy exclaimed that he found all of them, but that they were all acting strangely. He then asked whose idea it was to begin multiplying.[55] Luffy then discovered the real Nami among the fakes and quickly untied her. Luffy realized they did not multiply on purpose as she berated his logic and explained to Luffy about what happened during the encounter with Brûlée. While interrogating a buried man named Pound, they learned about a toll that the citizens of Totto Land must pay to Big Mom as well as the Emperor's Devil Fruit power, which enables her to give life to many things. The man then revealed that he was one of Big Mom's husbands, who was discarded after having two daughters. Big Mom's tenth son, Charlotte Cracker, appeared and confronted the group.[56]

Luffy saves Pound from Cracker.
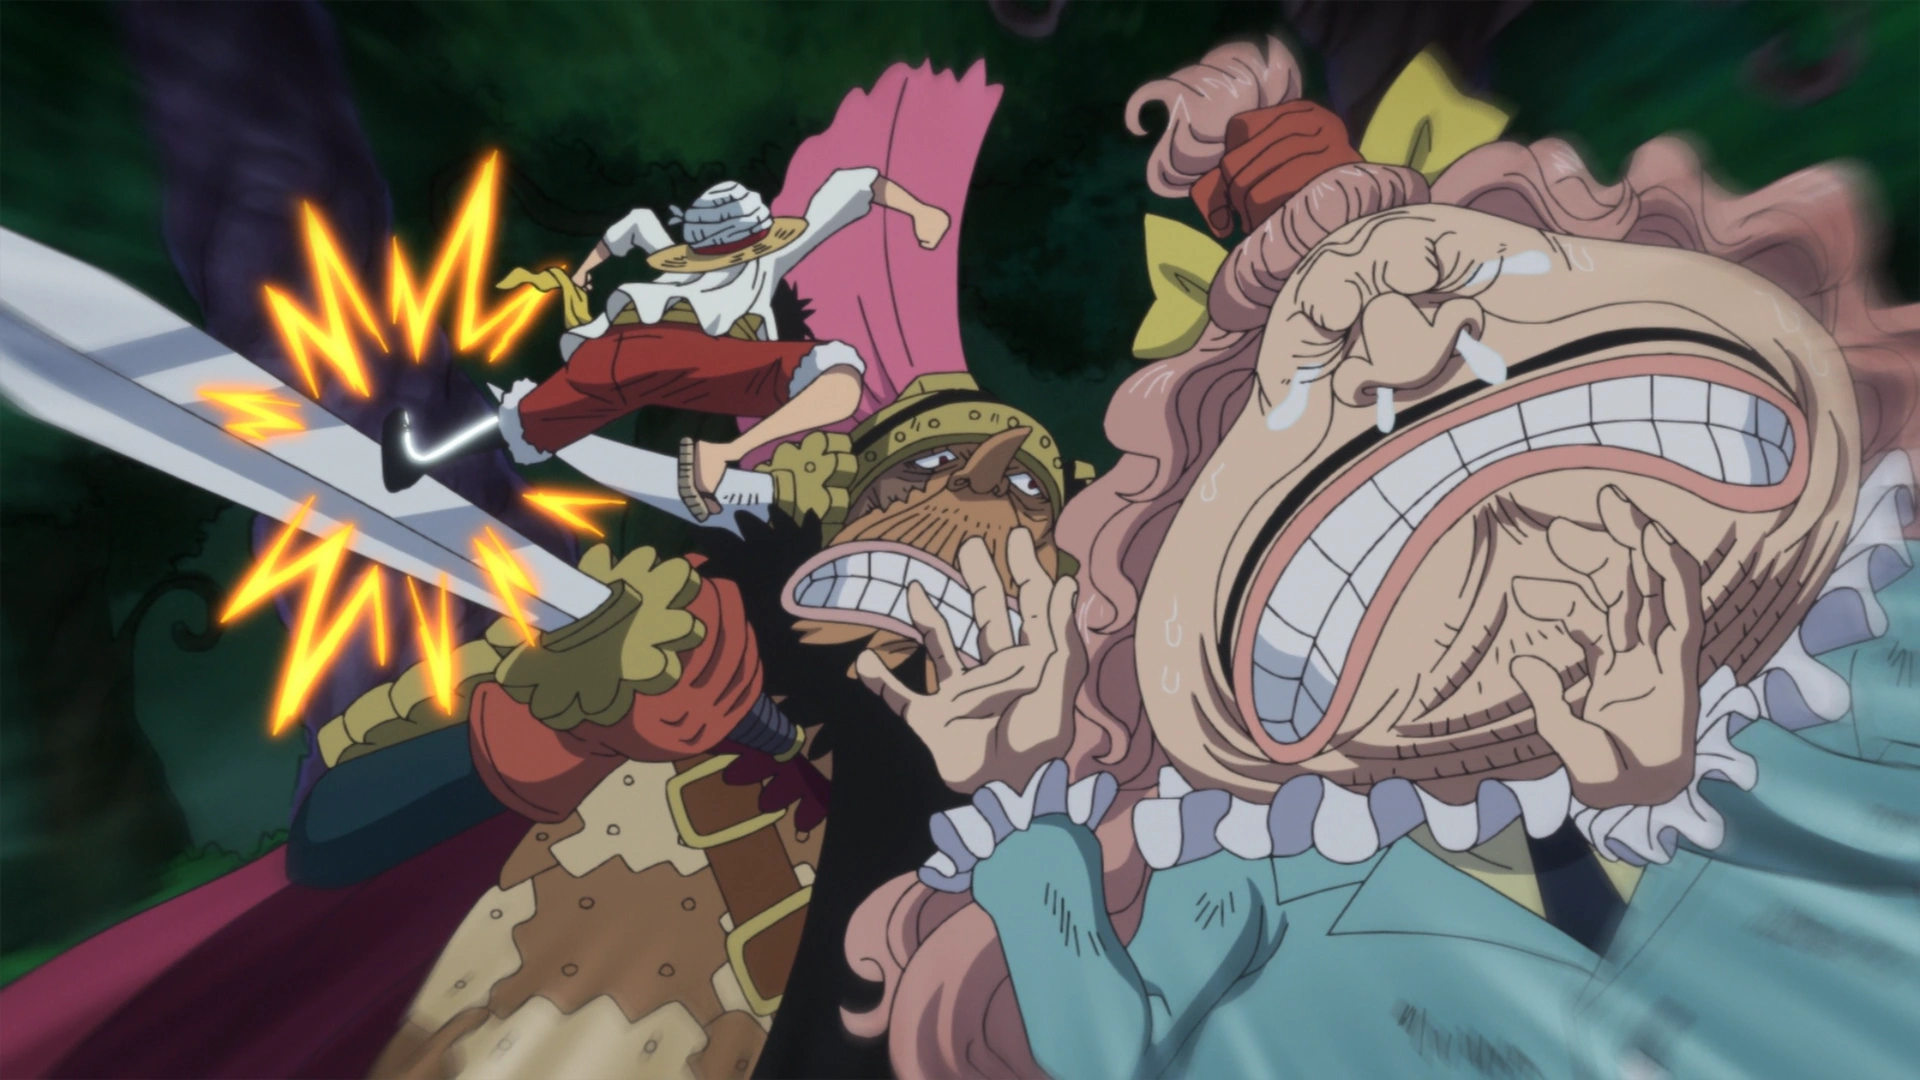
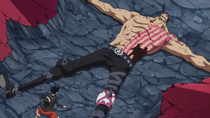
As Luffy and Nami confronted Cracker, they were suddenly ambushed by Randolph again, but Cracker knocked him over in anger. Luffy and Nami watched as Cracker argued with Brûlée and the guards of the Seducing Woods. Brûlée showed a captured Carrot and Chopper trapped in her mirror before shattering the mirror into pieces. Luffy was worried but Chopper revealed that he and Carrot remained unharmed. When Cracker tried to kill Pound, Luffy blocked his sword. He then kicked Cracker's arm, forcing him to free Pound. Luffy battled Cracker, but was sent flying into a tree homie, and he got up and prepared to give his all against Cracker.[57]
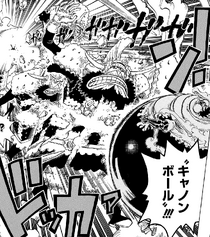
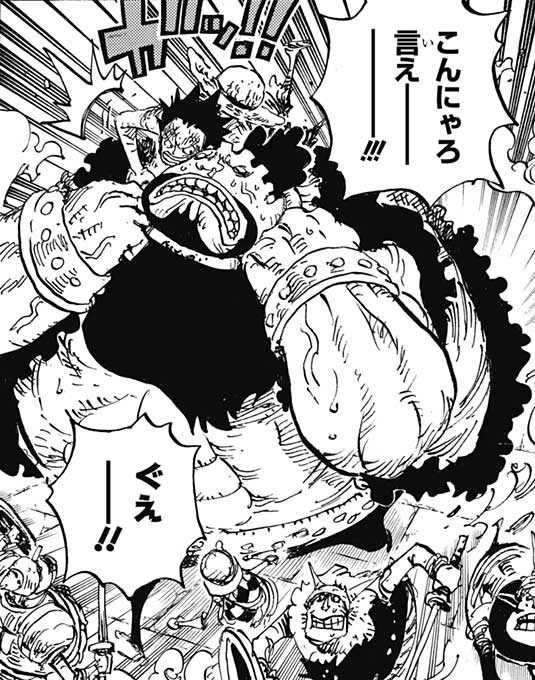
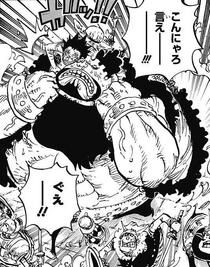
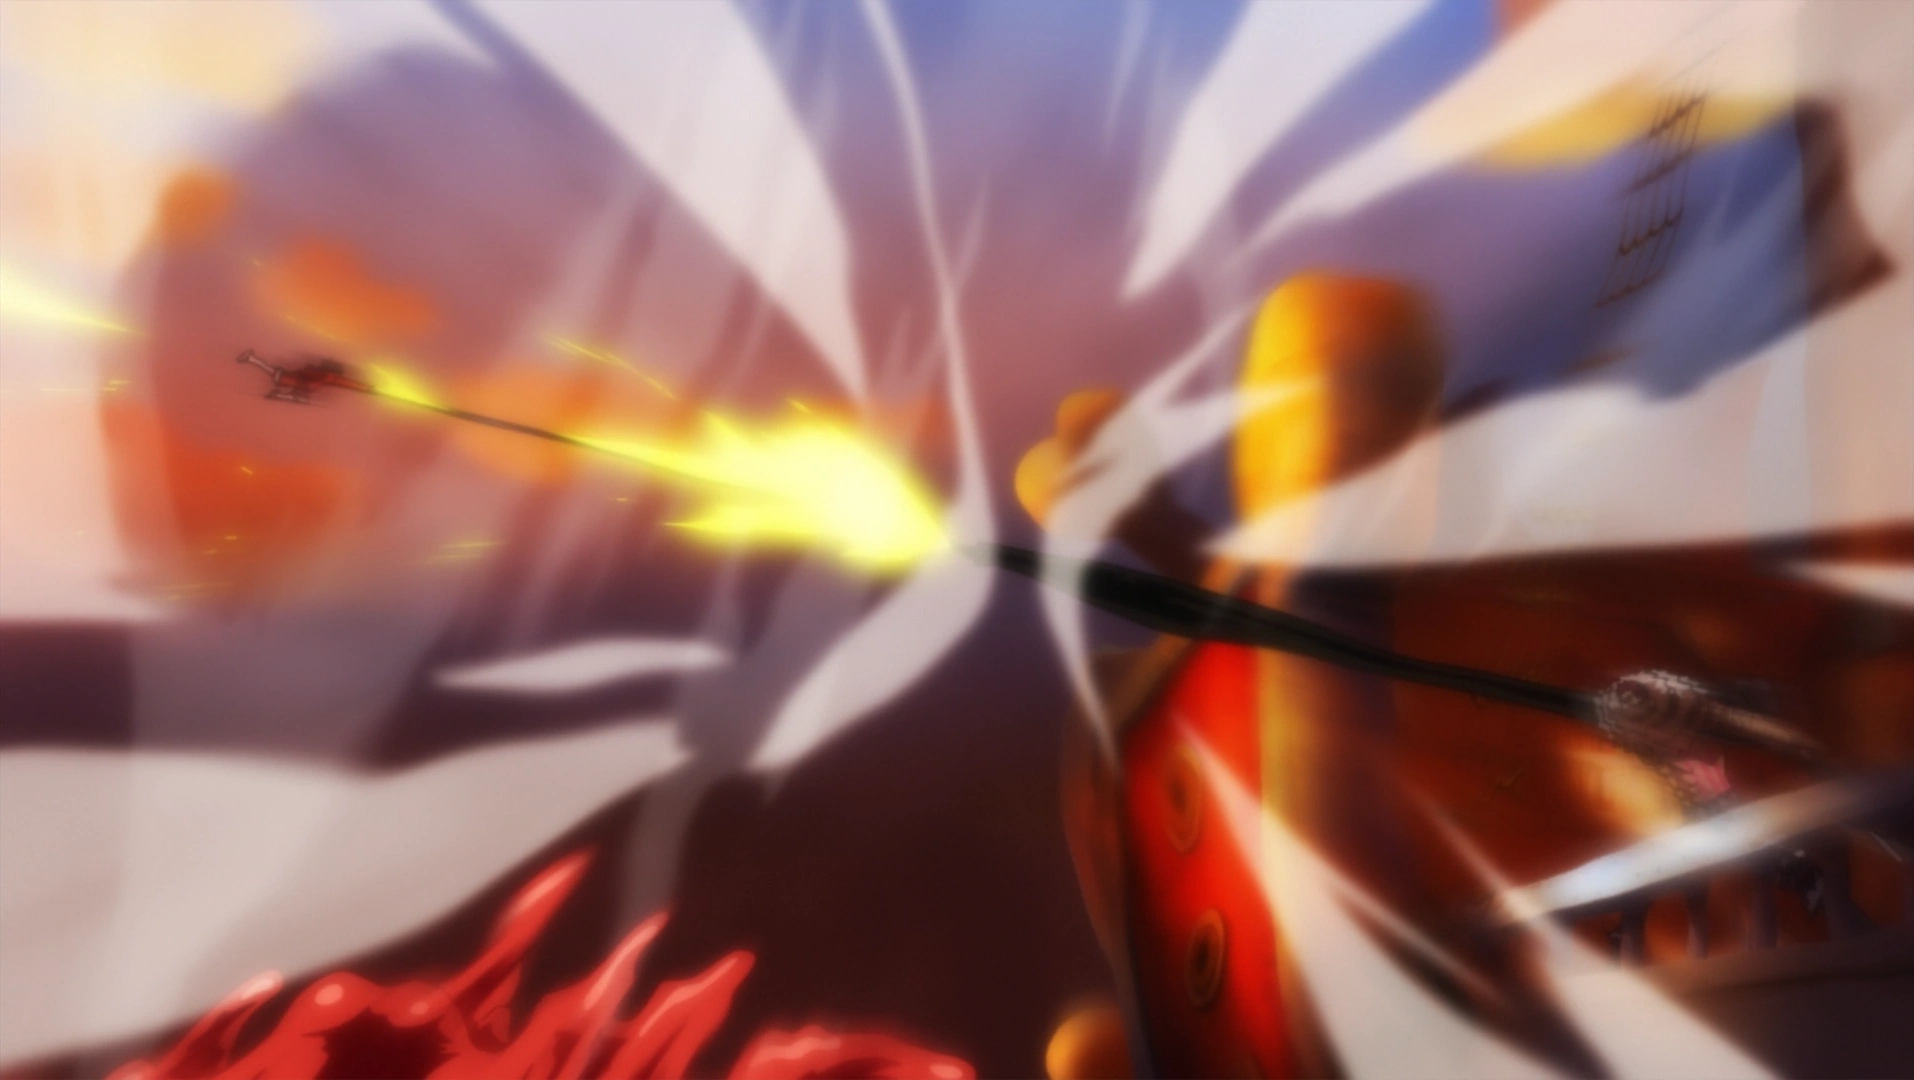
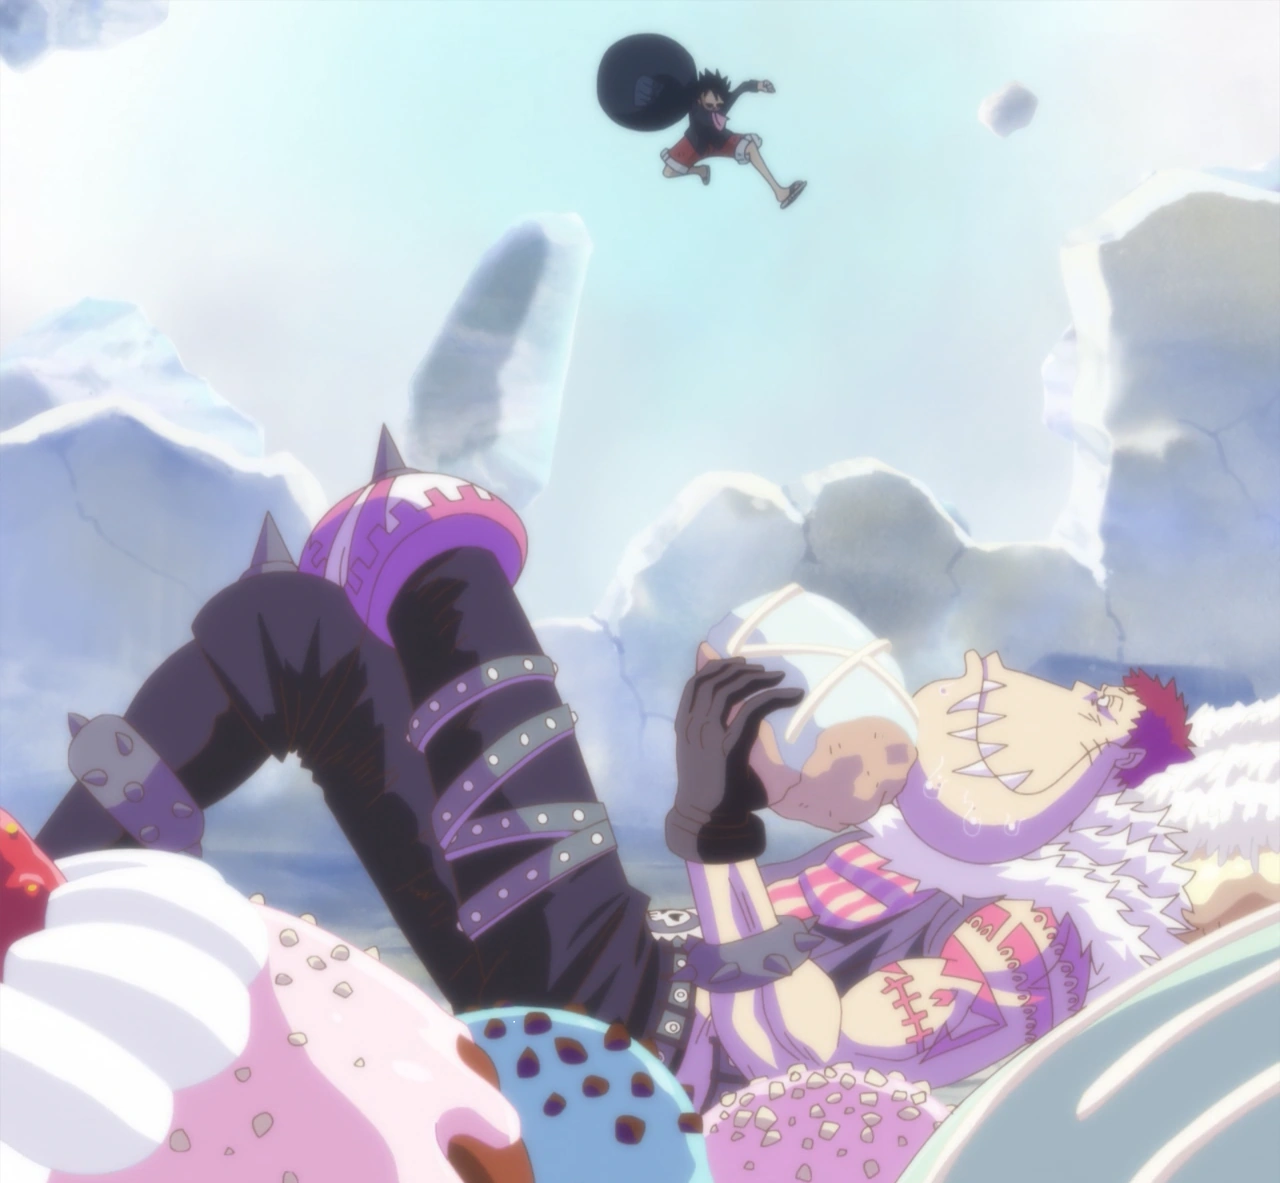
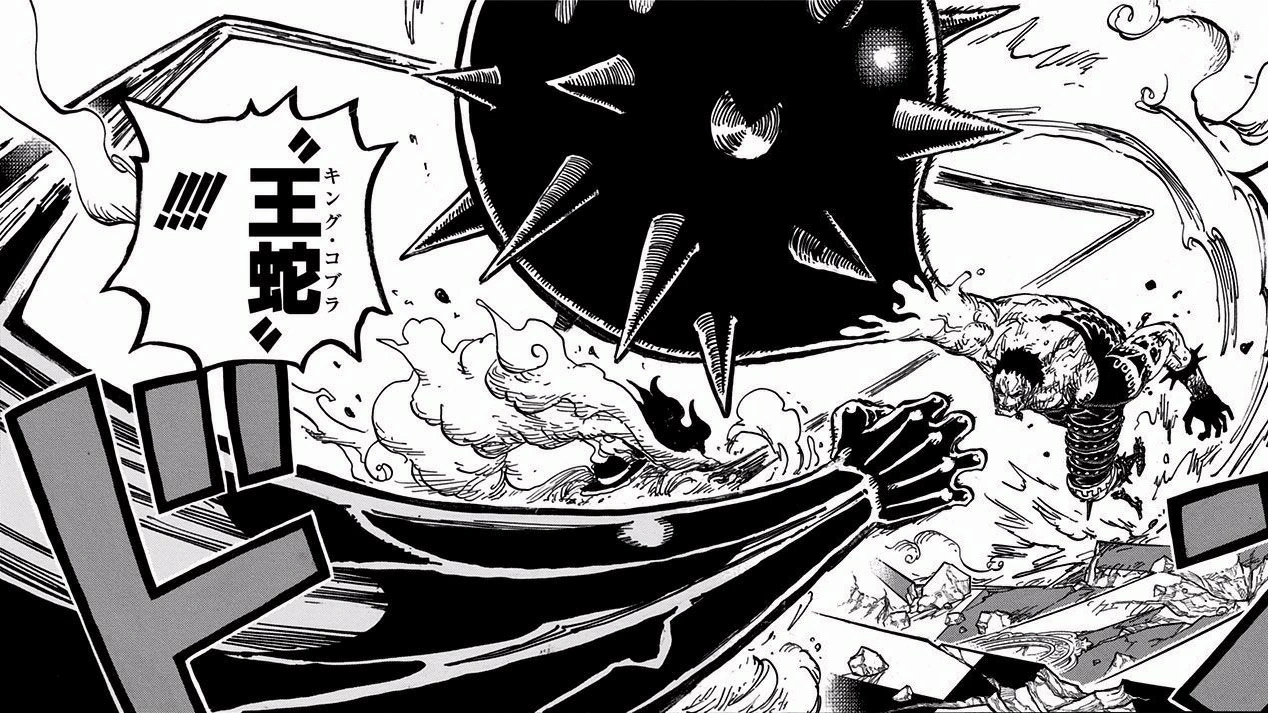
Nami asked to Luffy to retreat, but he refused and tried to attack Cracker with Elephant Gun. After blocking the attack, Cracker easily overwhelmed Luffy with his swordsmanship, Devil Fruit abilities, and Busoshoku Haki, sending Luffy flying through several tree homies despite Luffy using Haki himself. Luffy returned and attacked Cracker with Hawk Gatling, but Cracker countered it with his Haki-imbued shields, which Luffy stated were harder than any Busoshoku Haki he had faced before. Cracker slammed Luffy into the ground and drew closer to him, berating Luffy for wanting to take Sanji away from a royal lifestyle. Luffy grew angry at Cracker for claiming that Sanji would tell him and the other Straw Hats that he never wanted to see them again. Luffy then activated Gear 4 and managed to send Cracker flying with Kong Gun.[58]
While Cracker was on the ground, Luffy used another Kong Gun and shattered Cracker's biscuit armor. The real Cracker emerged from it, cutting Luffy's right arm with Pretzel. Cracker revealed his true Devil Fruit abilities to Luffy as he created multiple biscuit soldiers, which Luffy attacked. However, Cracker had them advance as he leaped out from behind them to attack Luffy, barely missing his head.[59]
Luffy defeats Cracker.
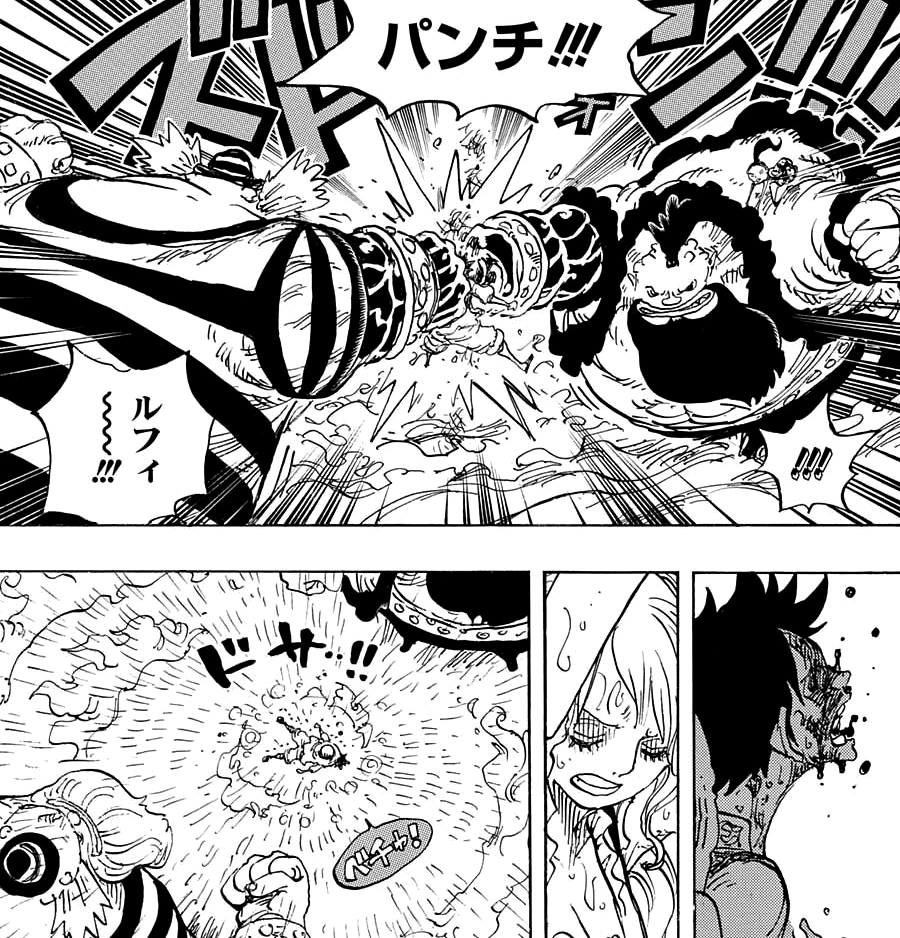
The battle lasted for eleven hours, and Luffy adopted a strategy of fighting, running, and eating Cracker's biscuit soldiers. This made Cracker increasingly exasperated, and Luffy was determined to chip away Cracker's stamina and go to Sanji.[60]
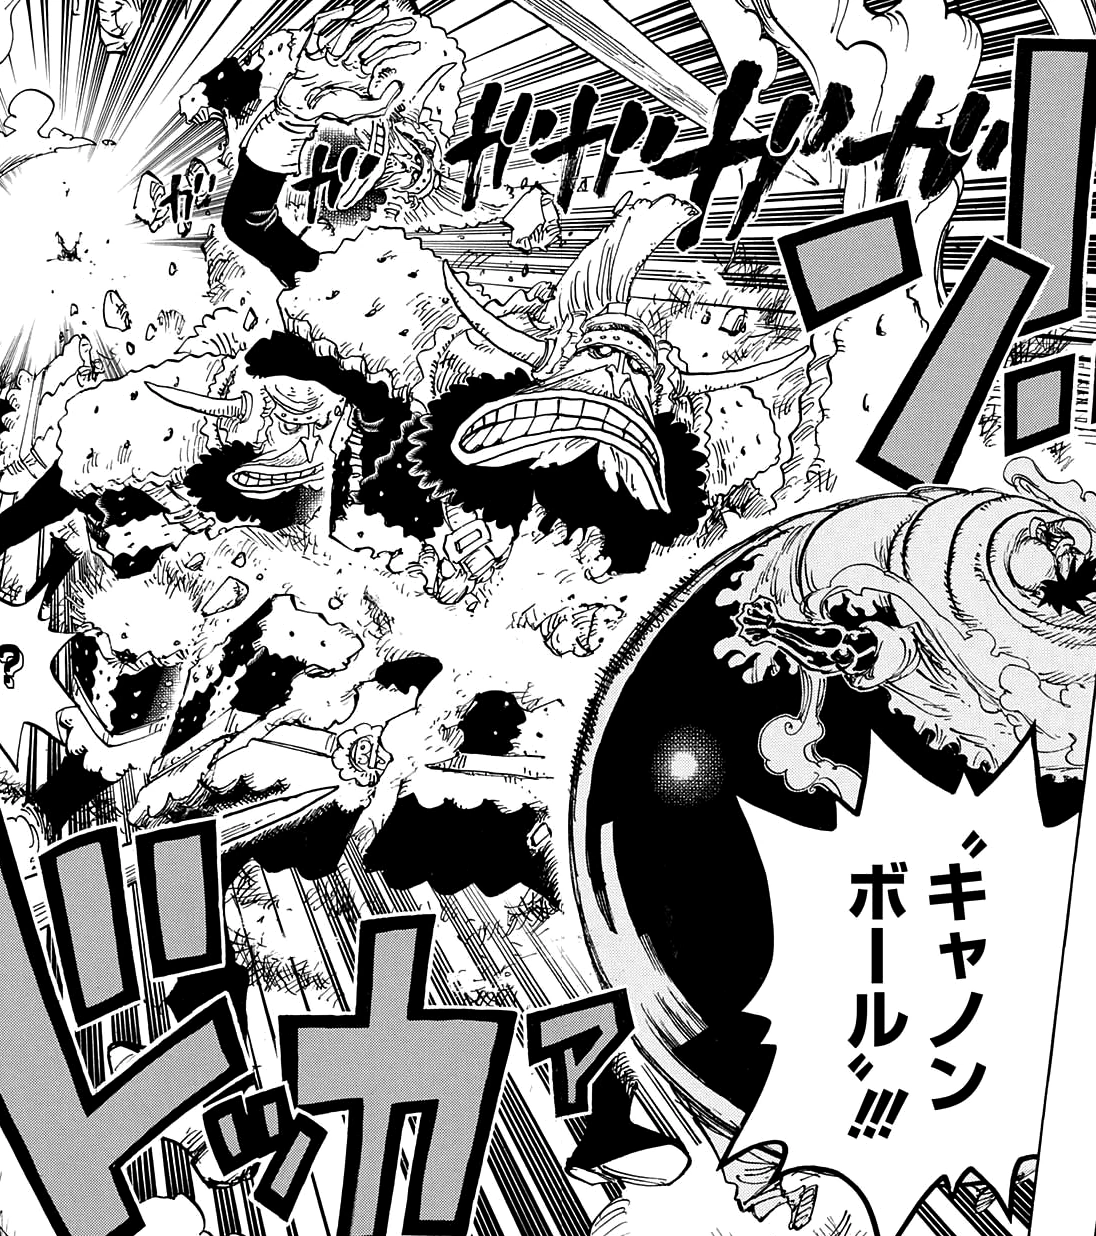
Cracker soon produced more biscuit soldiers and sent them charging at Luffy. Nami used Rain Spark and softened the soldiers, which Luffy then devoured. As Luffy was reaching his limit, he used another variation form of Gear 4 called Tankman: Full Version. When Cracker tried to pierce Luffy with his sword, Luffy sucked Cracker into his body and sent him flying into Sweet City.[61]
Sanji's Rejection and Big Mom's Retaliation


Luffy refusing to fight Sanji.
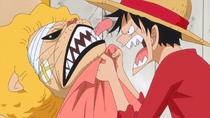
After Cracker's defeat, Luffy laid on the ground, exhausted from the battle. He then rested on top of King Baum's head alongside Nami as they traveled to Big Mom's castle. On the way, Luffy returned to his normal size and they encountered the Vinsmoke carriage and saw Sanji again. Excited, Luffy leaped onto the carriage and asked Sanji to return with him. In response, Sanji kicked Luffy off the carriage and told him to leave. Luffy refused to listen, so Sanji volunteered to handle Luffy himself.[62] As Sanji approached Luffy, he further insulted the latter before kicking him in the face. Luffy withstood the attack and remained on his feet. Sanji continued the confrontation by repeatedly kicking Luffy until he finally collapsed (and lost a tooth). After Sanji returned to his family's carriage, Luffy got back on his feet and yelled to Sanji, saying that he knew that Sanji never meant what he said. Luffy declared that he would wait for Sanji and would gladly starve to death if he does not return. Luffy went on saying that he would not eat any food unless it is made by Sanji's hands.[63]
Luffy is defeated by Counter and Cadenza.
After the Vinsmoke Family left, Luffy and Nami soon saw the weather changing into a massive storm as an army marched towards their location. Luffy refused to run and hide, so he fought the army head on.[64] As the battle raged on, Luffy managed to defeat most of the army before he was overwhelmed by Charlotte Opera's cream, which scalded his skin, and he raced to attack Opera. However, Charlotte Mont-d'Or put Luffy into the setting of one of his books, preventing Luffy from seeing the real world. This prevented Luffy from seeing two Big Mom Pirates members, Charlotte Counter and Charlotte Cadenza, from rushing at him, and he was punched from the front and the back with Cream Punch, sending him crashing down. The Big Mom Pirates headed back to Sweet City, and one of them tried to carry Luffy. Luffy tried holding onto the ground in order to stay at his spot, but Counter stomped on his head.[65]
Luffy and Nami held captive by Big Mom.
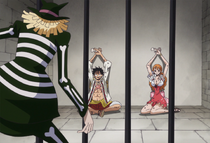
Luffy and Nami were then imprisoned inside a book. Inside the prisoner library, Big Mom spoke to them through a Den Den Mushi. Luffy shouted at her to let him go. Big Mom laughed at his liveliness and said that she thought he had broken his promise to battle her due to not bringing his entire crew. Luffy replied that he still intended to fulfill that promise, but he was only there to get Sanji back, though he would still fight her if she showed up. Big Mom replied by telling Luffy that he was nothing compared to her and that she could have him killed without even needing to show up. Big Mom said that if they gave up on rescuing Sanji, she would free them once the wedding was complete and warned them that if they interfered with her plans, she would give them hell. Big Mom recalled the time Luffy gave her treasure including the legendary box known as the Tamatebako and explained that she had taken a liking to the box that she would forgive the Fish-Man Island incident altogether and planned to open the Tamatebako during the wedding ceremony. Luffy shouted at her to be quiet, saying the wedding would not happen and asked to speak to his friend, Pudding. Big Mom laughed incredulously about the Straw Hats being friends with the bride-to-be and then inquired about Lola. Big Mom recounted on how Lola running away from an important political marriage ruined her plans to become Pirate King. Luffy replied that Lola did not need to be a pawn in Big Mom's rise to power and challenged the Emperor again, saying he would get Sanji back and defeat her in the end.[66]
Sometime after the conversation, Pudding came to the Prisoner Library and requested to talk to Luffy and Nami, and she entered their cell via an opening created by a bookmark. Pudding apologized for the harm her siblings had inflicted on them, and apologized for not meeting them on the coast like they agreed. She revealed that Sanji had proposed to her, but stated that she knew he did not truly want to marry her and so she would not marry him. She then whispered to Luffy and Nami, saying with a sinister expression that she would kill Sanji during the wedding ceremony and that Luffy and Nami would not leave alive. Pudding then left their cell with tears while telling them goodbye and insulting them.[67]
Luffy chokes Counter while racing throughout the Whole Cake Chateau to get to Sanji.
Shocked and angry at what Pudding said, Luffy then struggled to break free, determined not to die, even if it meant tearing off his arms.[68] Before Luffy could further injure himself, Jinbe arrived at the Prisoner Library and took down Opera with a single punch. Luffy and Nami were overjoyed as Jinbe prepared to free them.[69] Jinbe then released Luffy and Nami by burning the book they were imprisoned in. Luffy then collapsed from hunger but quickly got back up as Big Mom's soldiers were charging into the Prisoner Library. Luffy dashed out of the Prisoner Library and went on a rampage throughout the castle, searching for Sanji. During the rampage, Luffy strangled Counter while demanding Sanji's whereabouts.[70]
Luffy continued to run through the hallways, calling for Sanji, until Reiju grabbed him and hid him in the infirmary. Reiju then informed him that Sanji was already aware of Pudding's deception. She also mentioned that she tried to convince Sanji to leave, but he was worried about the chefs at the Baratie and the Straw Hats. Relieved that Sanji was not being deceived, Luffy jumped out of the castle and headed back to the place where he promised to wait for Sanji.[71] Dazed and fatigued, Luffy began his journey through Sweet City in the rain.[72] He later made it back to the promised place, where he fell asleep while he waited patiently for Sanji.[73]

Luffy punches Sanji to stop him from lying about his obstacles to rejoining the crew.
Luffy woke up when he smelled the bento box Sanji was carrying. Sanji gave the box to him and Luffy happily ate the food. When Luffy once again asked Sanji to leave with him, Sanji explained his reasons why he could not. Luffy responded by punching Sanji and demanded him to tell the truth. Sanji broke down in tears, saying that he wanted to return to the crew but did not want to leave his family to die. Luffy then gave Sanji his support, saying that they would ruin the wedding together.[74]
Luffy and Sanji were later contacted by Chopper's group through a mirror shard. After Luffy explained his intent to ruin the wedding ceremony, Jinbe explained to Luffy more about Bege, such as his backstory and him plotting against Big Mom. Jinbe proposed to Luffy about forming an alliance with Bege, and Luffy agreed to meet him.[75]
The Wedding

The Sanji Retrieval Team meets with the Fire Tank Pirates.
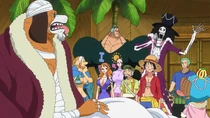
Once at Bege's hideout, Luffy and Sanji were greeted by Vito, who asked them to take a bath since his boss does not like to meet with dirty people. After Luffy and Brook had their bath, they raided Bege's fridge for milk (with Luffy regaining his lost tooth and Brook's cracked skull healing). Luffy and his team soon met Bege and the negotiations were hectic with Luffy spotting Caesar Clown among Bege's crew and wanting to attack Bege for hurting Pekoms. The brawl was broken up when Jinbe pointed out that the group share a common enemy in Big Mom. Reluctantly, Luffy asked Bege about his plan and the latter responded that he already had a perfect one prepared.[76]
Bege proceeded to explain the details, including informing Luffy that he would be the bait to distract Big Mom's subordinates once Bege triggers one of her tantrums. Despite Nami's and Chiffon's protests, Luffy agreed excitedly, stating that he already had a plan for how to make his entrance at the ceremony. Luffy, Bege, and Caesar then agreed that their alliance would come to an end once Big Mom was dead and all groups had made their escape. As the meeting adjourned, Luffy asked Bege for a favor.[77] Luffy requested Bege to place a mirror inside the wedding cake so he could enter the venue from there, taking everyone by surprise. Planning to take advantage of Brûlée's power, Luffy rounded up a bunch of animals from the Seducing Woods and had her turn them into Luffy duplicates.[78]


Luffy and his animal duplicates burst out of the wedding cake.
Bege took the alliance members to the tea party in his castle, and Luffy slept for the first time in three days.[79] After the wedding ceremony began, Jinbe had difficulty waking Luffy up but eventually managed to do so with food. The team then prepared to charge into the venue once they heard the signal. Right after Katakuri's attempted assassination on Sanji failed, multiple duplicates of Luffy emerged from the wedding cake.[80]
As chaos erupted at the wedding venue, Luffy identified himself when Big Mom called out to him. Luffy attempted to attack the photo of Carmel, but his attempt was thwarted by Katakuri, who immobilized Luffy with his Devil Fruit power. Jinbe came to Luffy's aid and freed him using black tea. When Jinbe officially declared to Big Mom that he was leaving the Big Mom Pirates and joining the Straw Hats, Luffy was worried that Big Mom would take away Jinbe's lifespan. However, Luffy was delighted to see that Big Mom's power had no effect on him due to having no fear towards Big Mom and cheered when he toasted a cup of sake to signify his departure from her.[81]

Luffy shows Big Mom the broken portrait of Mother Carmel.
Big Mom then tried to attack Luffy and Jinbe with Prometheus, but the two evaded the attack. Luffy was then overjoyed to see Brook destroying the picture of Carmel. However, Big Mom did not start screaming after three seconds like they planned. During the ensuing conflict, Bege pretended to pin Luffy down to avoid suspicion. When Brook was decapitated, his head rolled towards them, but he still survived. Brook then whispered to Luffy that Big Mom was in a state of confusion on what to be mad about and their best chance was to show her the broken photo of Carmel again. Bege questioned if there is any point with the plan, but when they were approached by Katakuri, Bege noticed that he foresaw a horrific future and became confident again that the plan will work out. While Bege confronted Katakuri, Luffy grabbed Carmel's broken portrait, preparing to show it to Big Mom.[82] Katakuri then went after Luffy and pinned him down with his Devil Fruit powers. However, Luffy was still able to stretch his arms and showed Carmel's broken portrait to Big Mom, causing her to start her strange scream. Luffy then shielded his ears from Big Mom's voice.[83]
After putting on earplugs, Luffy watched as Bege, Vito, and Gotti fired their KX Launchers at Big Mom. However, Big Mom's scream detonated the rockets before they could reach her, shocking Luffy and his allies. With the assassination attempt a failure, Caesar flew into the venue with the escape mirror and Bege signaled Luffy to retreat. Before they could escape into the mirror, Big Mom's scream shattered it, leaving them trapped in the venue. Luffy then watched in amazement as Bege transformed into a giant fortress.[84]
Luffy then marveled at the fortress as he and his group fled to it. After all the alliance members and the Vinsmoke Family successfully retreated inside, Bege went on to explain to his allies about the dire situation they were in. Luffy then showed concern when Bege bled as his fortress sustained damage from Big Mom's attacks.[85] He tried rushing out to attack Big Mom, but was held back by his crew. They were intent on not fighting Big Mom, and Bege hatched an escape plan. The Vinsmoke Family went out to cover for the alliance, but when Reiju was overwhelmed, Luffy and Sanji went out and blocked Big Mom's attack, with Luffy doing so against Sanji's orders.[86]


Luffy clashes with Big Mom.
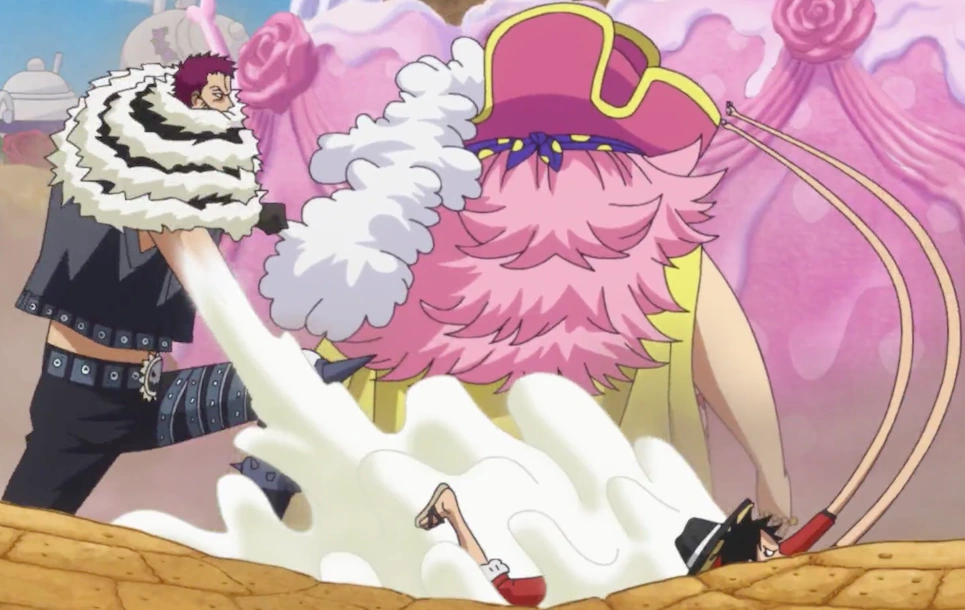
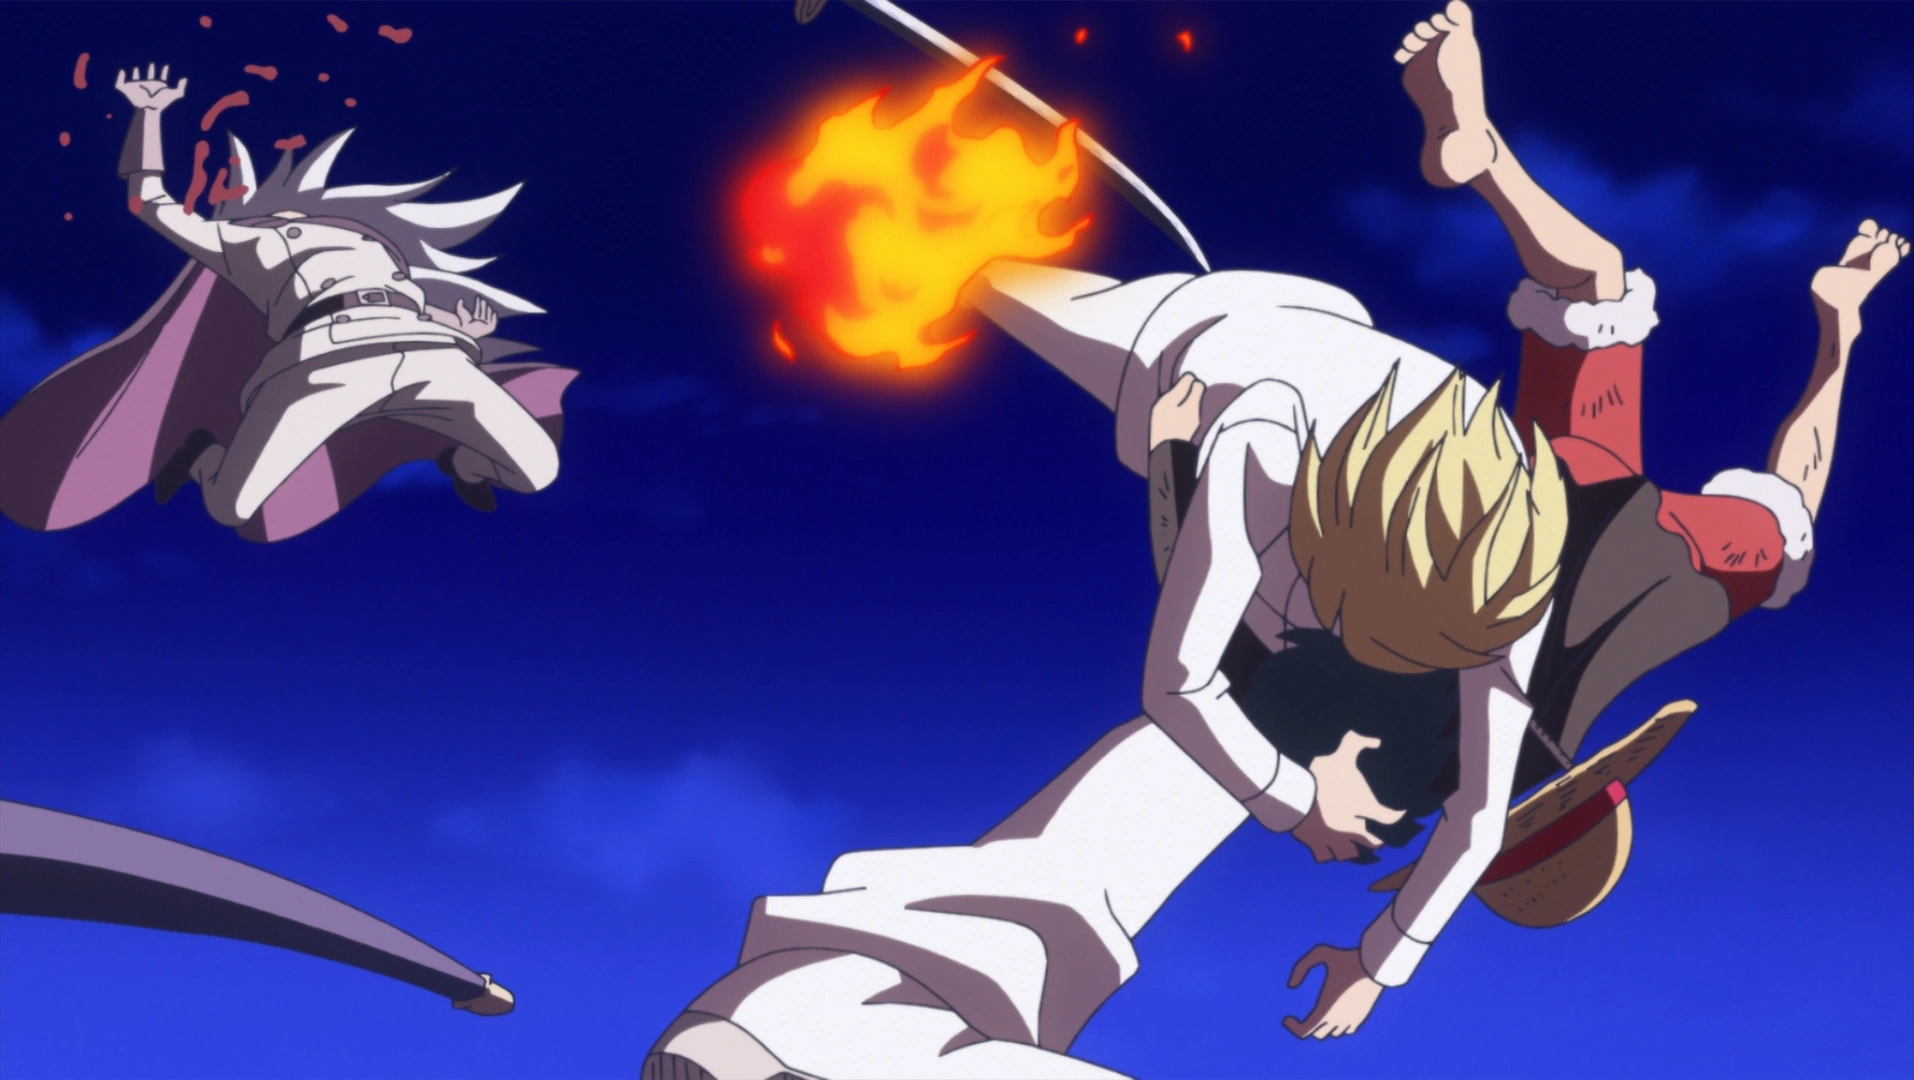
As Sanji dragged Luffy away, Big Mom taunted Luffy by using his previous threats to her before calling him spineless. In response, Luffy activated Gear 4 and tried to strike Big Mom, who easily blocked his attack. Before falling back, Luffy told Big Mom that he would be coming after her after Kaidou is defeated. Before they could escape, Luffy, Sanji, and the Vinsmoke Family were subdued by the Charlotte Family. Big Mom was going to execute them, but the Tamatebako dropped to the base of the Whole Cake Chateau and exploded, causing the castle to topple over.[87]
Fleeing From Big Mom

Big Mom attacks the Straw Hats as they try to escape.
As the castle collapsed, Luffy's group, Bege's crew, and the Vinsmoke Family got away. The Sanji Retrieval Team and the Fire Tank Pirates rendezvous at the northwest part of Whole Cake Island, where Luffy and Bege agreed to go their separate ways.[88] After Brook and Chopper separated from the group to retrieve the Shark Submerge, the rest head for the Thousand Sunny. As they approached the Seducing Woods, Luffy was surprised to see King Baum alive and stitched back together. Nami then revealed that she still possessed part of Big Mom's Vivre Card and used it to control King Baum again, forcing him to transport the fleeing team. However, before they reached the Seducing Woods, a crazed Big Mom (while riding on Zeus) caught up to them.[89]

Luffy unsuccessfully attacks Prometheus.
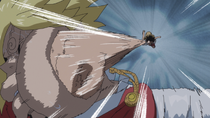
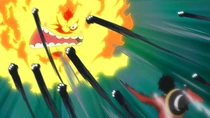
Using Napoleon in its sword form, Big Mom unleashed an air slash that cut off a part of King Baum. Luffy noted that the attack was similar to Dorry and Brogy's combination attack. As Big Mom prepared to attack again, Luffy prepared to fight, but Nami interrupted him and diverted Zeus' attention by using thunderclouds, causing the cloud homie to veer off-course and drop Big Mom. When Luffy and his group reached the Seducing Woods, Big Mom ordered the tree homies to stop the Straw Hats, but King Baum charged through them. Luffy and his group were later forced to jump off King Baum when Prometheus attacked and burned King Baum for his betrayal.[90] As the Sanji Retrieval Team continued with their escape, Jinbe explained about Big Mom's eating disorder to Luffy as she resumed her pursuit. Prometheus caught up to them and Luffy attacked the fire homie to avenge King Baum, but he was unable to harm the living flames with Haki punches. After Jinbe stunned Prometheus with blasts of water, several Big Mom Pirates caught up to their captain and clashed with the Sanji Retrieval Team. Along the way, Luffy stopped Carrot from separating from the group. The team pulled out of the conflict quickly, knowing they could not split up there. When Zeus ate one of Nami's weather eggs and grew massively and became stormy, Nami took the opportunity to summon a massive lightning bolt that struck the Big Mom Pirates pursuing them.[91]
Nami's attack left Big Mom laying at the bottom of a crater. To the Straw Hats' shock, Big Mom was barely affected and continued to move. She ate through the ground as she moved back up, and the team started running again. They were then approached by Pudding and Chiffon. Luffy was angry to see Pudding again as she tried to tell Sanji about their mission to make a cake. To Luffy's confusion, her mood swings as she went from being in love with Sanji to wanting to kill him and back. Chiffon took the lead as she petitioned for Sanji to help them make a cake to satiate Big Mom's eating disorder, and Sanji readily agreed to assist them. Big Mom then got back on her feet and unleashed another devastating air slash, and the two groups parted ways with Sanji heading to Cacao Island with Pudding and Chiffon while Luffy and his group continued fleeing to the Thousand Sunny. Pudding used her Devil Fruit powers to send memories flooding into the souls in the homies, allowing the Straw Hats to make it to the coast without trouble.[92]

Luffy clashes with Katakuri to get the Sunny back.
The Sanji Retrieval Team made it back to the ship, but they got into a conflict with Perospero and Katakuri, who were onboard. Luffy was also surprised to find Chopper and Brook trapped in candy. Perospero sent a spiked candy iron maiden at the Straw Hats, but Luffy destroyed it with a Red Hawk. Upon reaching the ship, Luffy clashed against Katakuri. After Perospero trapped the ship in candy, Luffy watched in shock as Pedro attempted to take out Perospero with a massive suicidal explosion.[93]
As the team completed preparations for their getaway, Katakuri once again made his move and subdued Carrot when she tried to attack him. Luffy then grabbed Katakuri and dragged him into the Mirro-World. Once there, Luffy smashed the mirror to the Sunny and prepared to continue his fight with the Sweet Commander.[94]
A Fierce Clash

Luffy and Katakuri clash inside the Mirro-World.
With the Sunny fleeing from Big Mom and her fleet, Luffy and Katakuri commenced their fight, with Katakuri claiming that he had outmatched Luffy in both speed and power. After Luffy attacked with Hawk Gatling, Katakuri countered with several mochi tendrils hardened into fists, before proceeding to warn Luffy that anything Luffy can do, he could do better. Luffy then asserted that rubber would never lose to mochi, but his subsequent Hawk Stamp was dodged and Katakuri kicked him into a wall. Luffy then tried using Elephant Gun, but Katakuri created an even larger fist with mochi and pushed Luffy into the wall with tremendous power, overwhelming Luffy.[95]
With Luffy lying on the floor, Katakuri then ordered Brûlée to find another mirror on the Sunny and use the portal to set the Sunny on fire. After Joscarpone and Mascarpone arrived with a mirror, Luffy rushed towards them, but Katakuri stopped him and reminded him of his promise to fight one-on-one. Katakuri then resumed attacking Luffy, warning him not to lay a hand on his younger brothers and sisters. Luffy successfully dodged the attacks and made contact with Nami through a mirror shard, ordering her to break all the mirrors on the Sunny so that he can focus solely on fighting Katakuri.[96]
Luffy showed concern for his group when he heard that Big Mom sunk the Thousand Sunny. While the Big Mom Pirates were puzzled by the mirrors leading to the Sunny breaking one by one, Luffy was contacted by his team after they survived Big Mom's assault. As Luffy distanced himself from the nearby Big Mom Pirates, his group told him to find a mirror connecting to Cacao Island so they could meet him there. Luffy was then further assaulted by Katakuri and Luffy covered his mouth to prevent his team from knowing that he was sustaining injuries. In a brief moment, Luffy told his team to hurry on to Cacao Island. As Katakuri prepared to kill him, Luffy declared that he did not plan on dying.[97]
As Luffy continued to struggle against Katakuri, Brûlée started bragging about Katakuri's legendary strength. Luffy then tried to punch her, but Katakuri grabbed his fist and slammed him into a wall. After pondering on how he should maim Luffy, Katakuri then began to attack with his trident Mogura. In the midst of this, Katakuri noted on how Luffy dodged his strikes more so than anyone and revealed his awakened powers to trap the Straw Hat captain. As Luffy was restrained, he prepared to resort to using Gear 4.[98]

Luffy intrudes on Katakuri's snack time.
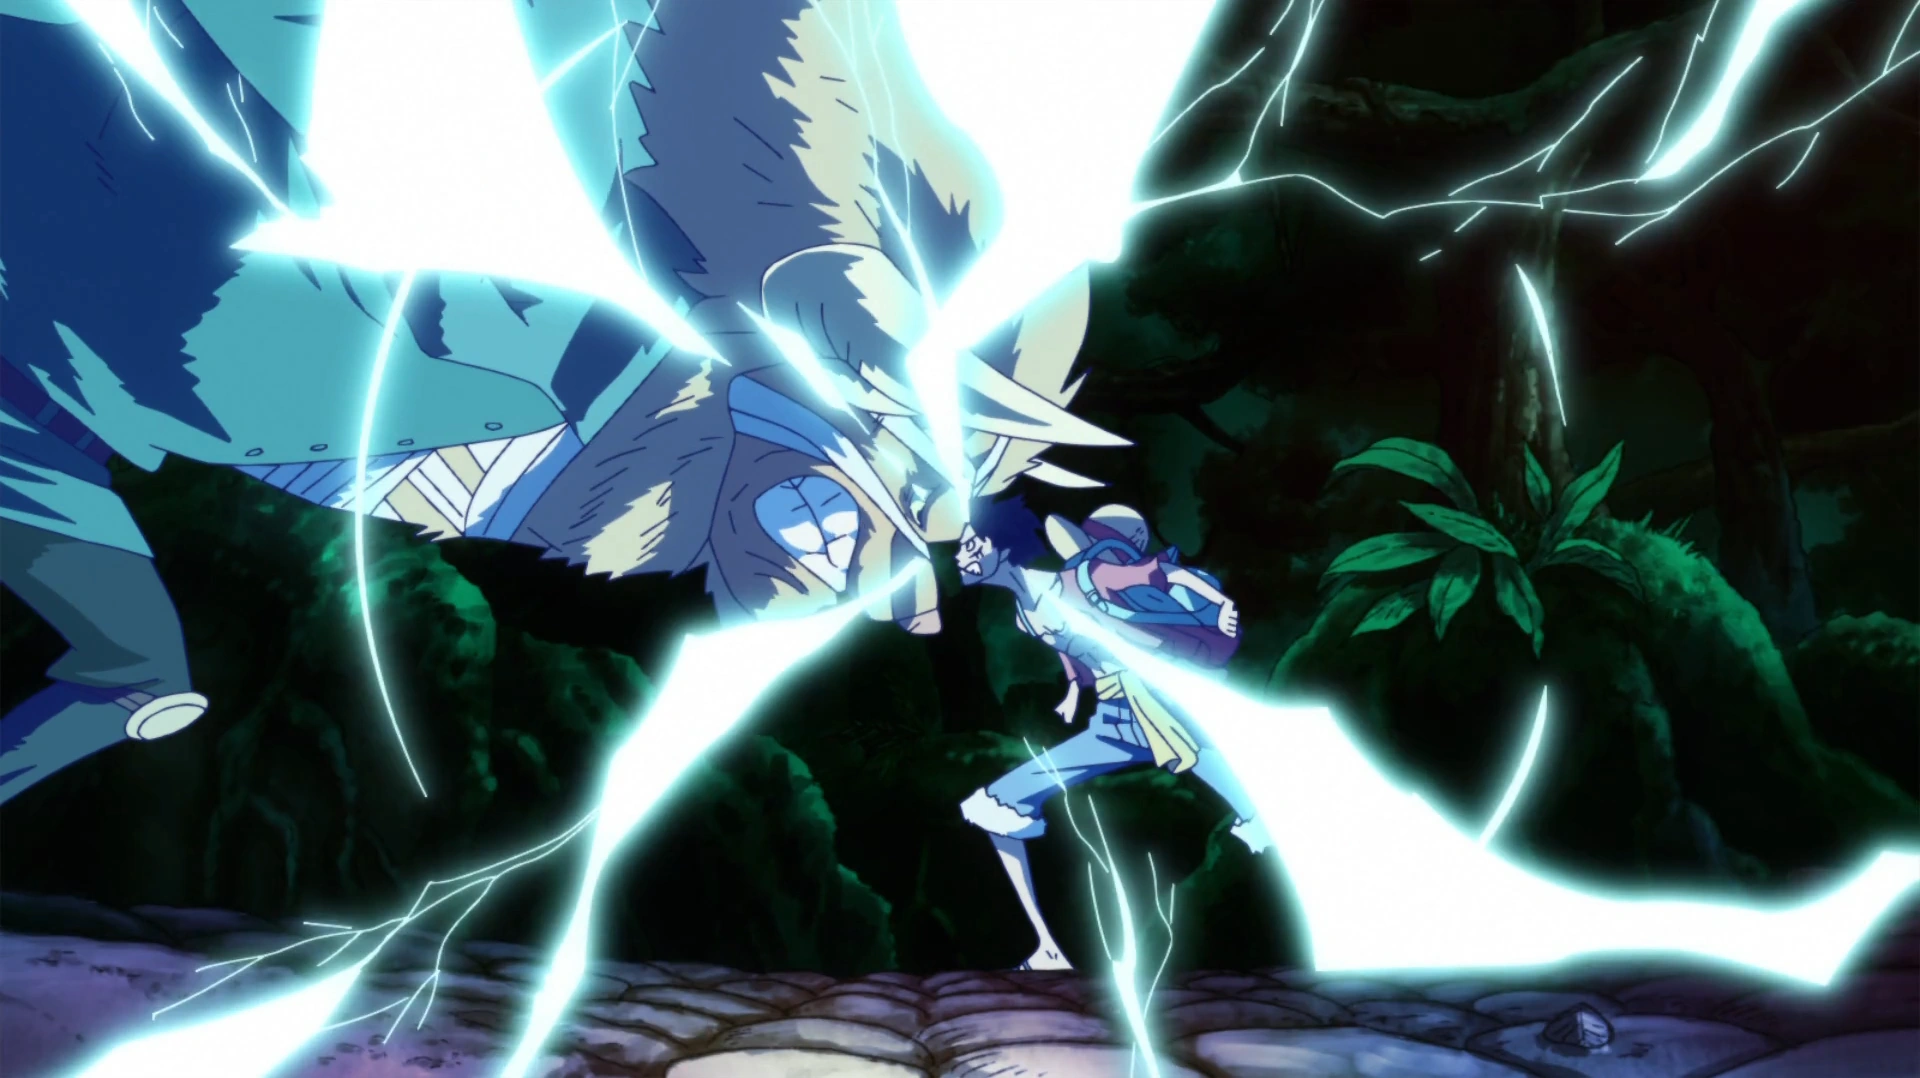
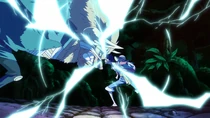
Before Luffy could activate his Gear 4, Katakuri prevented him from activating it by engulfing him with mochi. Growing tired of their battle making his snack time late, Katakuri turned much of the surrounding Mirro-World into mochi and piled it onto Luffy in order to suffocate him. While Katakuri was feasting on some snacks, Luffy escaped by eating through the mochi and located Katakuri inside a nearby mochi house using his Kenbunshoku Haki. He then broke into his house and saw Katakuri in the state of eating. This made Katakuri furious, and he quickly dispatched his chefs before attacking Luffy, overwhelming him with strong Busoshoku Haki. However, Luffy managed to land a kick on Katakuri's jaw, and Katakuri was incredulous when Luffy stated he had figured out his weakness. Luffy then activated Gear 4 and struck Katakuri with Kong Gun, which Katakuri blocked.[99] Luffy gained the upper hand against Katakuri, landing several Gear 4 attacks on him. However, once Katakuri regained his composure, he resumed dodging Luffy's attacks and landed a powerful strike on Luffy, knocking him back.[100]
With Luffy losing the advantage, Katakuri went on the offensive. When Katakuri mentioned that Luffy would deflate, Luffy realized that his Gear 4 would wear out soon and retreated. His Gear 4 wore out as he was fleeing with Katakuri chasing after him. Once he came across Brûlée, he grabbed her and escaped the Mirro-World before Katakuri could catch him. Luffy and Brûlée then arrived at Nuts Island and found Big Mom rampaging there. After he was spotted by Big Mom, Luffy ran away while still carrying Brûlée. Perospero blocked Luffy's path with a Candy Wall and Luffy tried to destroy it with a Gigant Pistol, which had no effect. He then dodged an attack from Amande, jumped over the Candy Wall, and continued running with Big Mom pursuing him.[101]
Luffy then escaped from Big Mom and traveled from island to island through the Mirro-World. While hiding inside a building with the captured Brûlée, Luffy wondered on how to defeat Katakuri. He then remembered about Rayleigh's lessons and expressed an interest in seeing into the future before declaring that he would surpass Katakuri.[102] Eventually, Luffy confronted Katakuri again, clashing with him once more.[103]
Though Katakuri pummeled him many times, Luffy kept getting back up. Luffy then calmed his mind and remembered what Rayleigh told him. He began to see into the future when he attempted to counter against a giant mochi fist. Katakuri tried to deter Luffy from continuing the battle, but Luffy refused to give up, saying that his friends were believing in him.[104] Knowing that Luffy's Kenbunshoku Haki was improving dramatically, Katakuri tried to end the battle quickly. Just as Luffy was about to attempt to dodge his opponent's next attack, a projectile pierced his thigh, breaking his balance, allowing Katakuri the opportunity to deal a devastating blow to him.[105]

Luffy and Katakuri meet in a final clash.
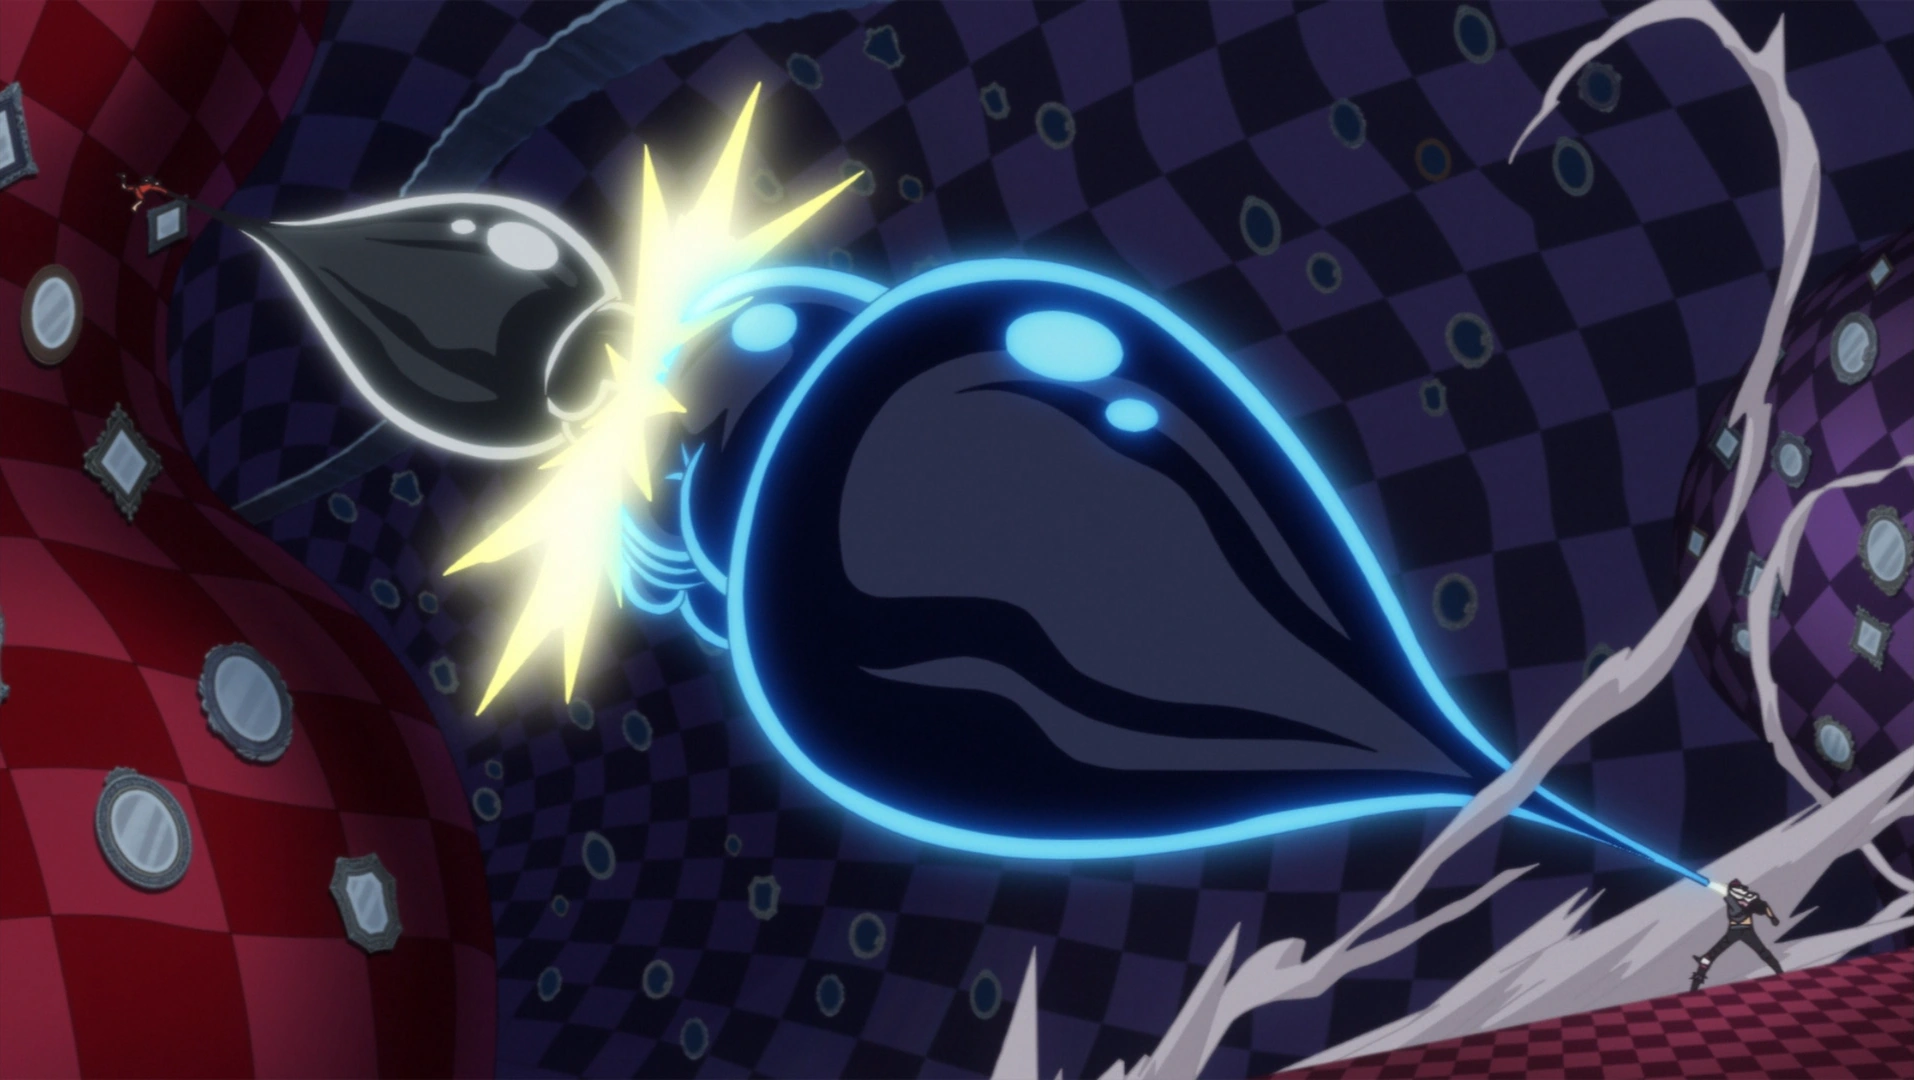
Luffy briefly cried out in pain before Katakuri kicked him into a wall. He then tried to strike Luffy again his mochi spear, but Luffy dodged it. Finally, Katakuri unleashed a barrage of mochi fists, pummeling Luffy into the floor. While lying down, Luffy thought back to his training with Rayleigh and got back on his feet. Flampe tried to shoot Luffy with her Silent Blowgun, but he dodged the shot. After Katakuri injured himself and revealed his face to Flampe while berating her for her interference, both Luffy and Katakuri unleashed a blast of Haoshoku Haki, knocking out Flampe and her subordinates. With no one meddling in their fight, Luffy resumed his battle with Katakuri.[106] They continued to trade blows with each other and as they were getting worn out from the battle, Luffy activated another variation of Gear 4: Snakeman.[107] With his increased speed and ability to home in on his target, Luffy was able to land more hits on Katakuri. However, Katakuri countered with his spiked mochi attacks. After trading more blows with each other, both fighters claimed that they would end the battle before engaging in a massive clash.[108]

Luffy victorious over Katakuri.
After the clash, Luffy's Gear 4 wore off and he fell into the hole created by the impact. As Luffy later climbed out of the hole, Katakuri stood and asked Luffy if he would return to defeat Big Mom. Luffy replied that he would and Katakuri collapsed and fell unconscious. With Katakuri defeated, Luffy covered his fanged mouth with his extra hat before walking away. Pekoms, while in disguise, then approached him with the captured Brûlée and told Luffy that he planned to help him escape to honor Pedro's sacrifice.[109]
Final Push to Freedom

Sanji rescues Luffy on Cacao Island.
While traveling to the mirror leading to Cacao Island, Pekoms explained to Luffy about the Sulong form and his plan to help Luffy escape. While exiting the Mirro-World, Pekoms sandwiched Luffy between himself and Brûlée to hide the Straw Hat. Pekoms transformed but he was viciously attacked, causing Luffy to be exposed. Sanji then grabbed Luffy and attempted to escape through the air, but they were smashed into the ground by Charlotte Yuen. Luffy and Sanji were cornered, but they were saved by the arrival of Germa 66.[110]
As Sanji's siblings shielded them from bullets, Sanji was told to escape with Luffy, who lost consciousness. After Sanji kicked through several of the Big Mom Pirates, Brûlée revealed to them of Katakuri's defeat at Luffy's hands, causing them to become furious. In response, an enraged Oven attempted to attack Sanji and Luffy, but Ichiji repelled Oven as Sanji and Luffy fled into the air. Yuen tried to attack Sanji once more but Yonji interfered. Sanji was then shot at by several snipers, and one of them fired a missile. Niji grabbed Sanji before he was caught in the explosion and while holding onto Sanji and Luffy, Niji traveled at a high speed and took down several pirates with his sword. Niji then threw Sanji and Luffy toward the Thousand Sunny, sending them flying over the Big Mom Pirates' fleet. As the group on the Sunny sailed past the port, Sanji told his captain that their ship was within sight.[111]

Luffy tells Jinbe to return as his new crewmate takes on the Big Mom Pirates.
Luffy and Sanji returned to the Sunny and Chopper quickly tended to Luffy's injuries. The group was then besieged by Smoothie's fleet, but Judge came to their rescue. As the Sunny passed by Judge's castle, Judge asked Luffy why he risked his life to rescue Sanji. Instead of answering his question, Luffy thanked him. The Sunny group later saw enemy ships approaching them from the front and when the situation grew more dire, they were surprised when Wadatsumi appeared and attacked the enemy.[112] The Sun Pirates cleared a path for the Sunny. Luffy thanked them and Aladine asked Luffy to take care of Jinbe. However, despite their efforts, the Sunny was intercepted and attacked by the Queen Mama Chanter.[113] Wadatsumi saved the Sunny by switching it with the Sun Pirates' ship and hid the Sunny in his mouth. Wadatsumi tried swimming away, but Oven attacked him with heat waves, forcing him to spit out the Sunny. As the Sun Pirates held back the Big Mom Pirates, Jinbe decided to stay behind to help them. Luffy consented to Jinbe's decision but reminded him that as an official member of the Straw Hats, Jinbe must survive and meet up with the rest of the crew at Wano. After Jinbe joined his former crew in battle, the Sunny group sailed far away from Cacao Island.[114]
With the Big Mom Pirates unable to pursue, the Sunny group successfully escaped Totto Land. After some rest, Sanji cooked a meal for them.[115]
Levely Arc

Luffy realizes his bounty jumped up by a billion berries.
After Sanji realized that he received a raid suit from Niji during the escape from Cacao Island, Luffy and Chopper begged him not to throw it away. Carrot received a newspaper and the group read it. Luffy became depressed when he misread his new bounty as ![]() 150,000,000. Brook later took a closer look at the poster and told Luffy that he misread the amount. The group was then shocked to hear that Luffy's bounty actually increased to
150,000,000. Brook later took a closer look at the poster and told Luffy that he misread the amount. The group was then shocked to hear that Luffy's bounty actually increased to ![]() 1,500,000,000.[116]
1,500,000,000.[116]
References
- ↑ 1.0 1.1 One Piece Manga and Anime — Vol. 1 Chapter 1 (p. 5) and Episode 4, Luffy is first introduced.
- ↑ 2.0 2.1 One Piece Manga and Anime — Vol. 1 Chapter 2 (p. 8) and Episode 1, Luffy debuts in the present.
- ↑ 3.0 3.1 One Piece Manga and Anime — Vol. 5 Chapter 44 (p. 2-20) and Episode 21, Luffy works off his debt to Zeff.
- ↑ One Piece Manga and Anime — Vol. 104 Chapter 1053 (p. 17) and Episode 1080, Luffy became recognized as one of the Four Emperors.
- ↑ One Piece Manga and Anime — Vol. 71 Chapter 703 (p. 16) and Episode 633, Luffy's alias in Dressrosa is revealed.
- ↑ 6.0 6.1 Vivre Card - One Piece Visual Dictionary (Card #0001), Luffy-tarou is romanized.
- ↑ One Piece Manga and Anime — Vol. 91 Chapter 914 (p. 7) and Episode 900, Luffy's first alias in Wano is revealed.
- ↑ One Piece Manga and Anime — Vol. 91 Chapter 916 (p. 8) and Episode 903, Luffy's second alias in Wano is revealed.
- ↑ One Piece Manga and Anime — Vol. 103 Chapter 1043 (p. 16-17) and Episode 1070, Zunesha declares Joy Boy's return.
- ↑ One Piece Manga — Vol. 1 Chapter 2 (p. 3), Luffy's epithet is written in the title of the chapter.
- ↑ SBS One Piece Manga — Vol. 4 (p. 28), Luffy's age is revealed.
- ↑ 12.0 12.1 One Piece Blue Deep: Characters World (p. 186), Luffy's profile after timeskip is revealed.
- ↑ 13.0 13.1 SBS One Piece Manga — Vol. 69 (p. 66), Luffy's age and height after timeskip are revealed.
- ↑ SBS One Piece Manga — Vol. 15 (p. 90), Luffy's birthday is revealed.
- ↑ SBS One Piece Manga — Vol. 10 (p. 46), Luffy's height is revealed.
- ↑ SBS One Piece Manga — Vol. 66 (p. 162), Oda explains the blood types of the world and reveals Luffy's blood type.
- ↑ One Piece Manga and Anime — Vol. 104 Chapter 1053 (p. 4-5) and Episode 1080, Luffy's bounty as one of the new Four Emperors.
- ↑ One Piece Manga and Anime — Vol. 90 Chapter 903 (p. 16-17) and Episode 879, Luffy's sixth bounty after Whole Cake Island.
- ↑ One Piece Manga and Anime — Vol. 80 Chapter 800 (p. 7) and Episode 745, Luffy's bounty is stated to have risen after Dressrosa.
- ↑ One Piece Manga and Anime — Vol. 61 Chapter 601 (p. 12) and Episode 521, Luffy's fourth bounty after the Summit War of Marineford.
- ↑ One Piece Manga and Anime — Vol. 45 Chapter 435 (p. 16-17) and Episode 320, The crew members' bounties for attacking Enies Lobby are revealed.
- ↑ One Piece Manga and Anime — Vol. 23 Chapter 213 (p. 22) and Episode 128, Luffy's bounty is raised after Arabasta.
- ↑ One Piece Manga and Anime — Vol. 11 Chapter 96 (p. 6) and Episode 45, Luffy's first bounty is put by Brannew in the wanted list.
- ↑ SBS One Piece Manga — Vol. 30 (p. 104), Gomu Gomu no Mi is confirmed to be a Paramecia.
- ↑ One Piece Manga and Anime — Vol. 103 Chapter 1044 (p. 4-6) and Episode 1071, The Five Elders discuss the nature of Luffy's Devil Fruit.
- ↑ One Piece Manga and Anime — Vol. 80 Chapter 802 (p. 3-5, 12-17) and Episodes 747–751, Luffy, his crew, and his allies make their way to Zou.
- ↑ One Piece Manga and Anime — Vol. 80 Chapter 803 (p. 2-5, 12-13) and Episode 752, Luffy, his crew, and his allies begin ascending the elephant's leg.
- ↑ One Piece Manga and Anime — Vol. 80 Chapter 804 and Episode 753.
- ↑ One Piece Manga and Anime — Vol. 80 Chapter 805 and Episode 754.
- ↑ One Piece Manga and Anime — Vol. 80 Chapter 806 and Episode 755.
- ↑ One Piece Manga and Anime — Vol. 81 Chapter 807 and Episode 756.
- ↑ One Piece Manga and Anime — Vol. 81 Chapter 808 and Episodes 757–760.
- ↑ One Piece Manga and Anime — Vol. 81 Chapter 809 and Episodes 758–760.
- ↑ One Piece Manga and Anime — Vol. 81 Chapter 811 and Episodes 761–762.
- ↑ One Piece Manga and Anime — Vol. 81 Chapters 812–813 and Episodes 763–764.
- ↑ One Piece Manga and Anime — Vol. 81 Chapter 814 and Episode 764.
- ↑ One Piece Manga and Anime — Vol. 81 Chapter 815 and Episodes 765–766.
- ↑ One Piece Manga and Anime — Vol. 81 Chapter 816 and Episode 767.
- ↑ One Piece Manga and Anime — Vol. 82 Chapter 817 and Episodes 768–769.
- ↑ One Piece Manga and Anime — Vol. 82 Chapter 818 and Episodes 769–780.
- ↑ One Piece Manga and Anime — Vol. 82 Chapter 819 and Episodes 770–772.
- ↑ One Piece Manga and Anime — Vol. 82 Chapter 820 and Episodes 772–773.
- ↑ One Piece Manga and Anime — Vol. 82 Chapter 821 and Episodes 773–774.
- ↑ One Piece Manga and Anime — Vol. 82 Chapter 822 and Episode 776.
- ↑ One Piece Manga — Vol. 82 Chapter 823.
- ↑ One Piece Manga — Vol. 82 Chapter 824.
- ↑ One Piece Manga — Vol. 82 Chapter 825.
- ↑ One Piece Manga — Vol. 82 Chapter 826.
- ↑ One Piece Manga — Vol. 82 Chapter 827.
- ↑ One Piece Manga — Vol. 83 Chapter 828.
- ↑ One Piece Manga — Vol. 83 Chapter 829.
- ↑ One Piece Manga and Anime — Vol. 83 Chapter 830 (p. 11-17) and Episode 790.
- ↑ One Piece Manga — Vol. 83 Chapter 831.
- ↑ One Piece Manga — Vol. 83 Chapter 832.
- ↑ One Piece Manga — Vol. 83 Chapter 834.
- ↑ One Piece Manga — Vol. 83 Chapter 835.
- ↑ One Piece Manga — Vol. 83 Chapter 836.
- ↑ One Piece Manga — Vol. 83 Chapter 837.
- ↑ One Piece Manga — Vol. 83 Chapter 838.
- ↑ One Piece Manga — Vol. 84 Chapter 841.
- ↑ One Piece Manga — Vol. 84 Chapter 842.
- ↑ One Piece Manga — Vol. 84 Chapter 843.
- ↑ One Piece Manga — Vol. 84 Chapter 844.
- ↑ One Piece Manga — Vol. 84 Chapter 845.
- ↑ One Piece Manga — Vol. 84 Chapter 846.
- ↑ One Piece Manga — Vol. 84 Chapter 847.
- ↑ One Piece Manga — Vol. 84 Chapter 848.
- ↑ One Piece Manga — Vol. 85 Chapter 850.
- ↑ One Piece Manga — Vol. 85 Chapter 851.
- ↑ One Piece Manga — Vol. 85 Chapter 852.
- ↑ One Piece Manga — Vol. 85 Chapter 853.
- ↑ One Piece Manga — Vol. 85 Chapter 854.
- ↑ One Piece Manga — Vol. 85 Chapter 855.
- ↑ One Piece Manga — Vol. 85 Chapter 856.
- ↑ One Piece Manga — Vol. 85 Chapter 857.
- ↑ One Piece Manga — Vol. 85 Chapter 858.
- ↑ One Piece Manga — Vol. 86 Chapter 859, The new alliance concludes its discussions on the plot to assassinate Big Mom.
- ↑ One Piece Manga — Vol. 86 Chapter 863.
- ↑ One Piece Manga — Vol. 86 Chapter 861.
- ↑ One Piece Manga — Vol. 86 Chapter 862.
- ↑ One Piece Manga — Vol. 86 Chapter 863.
- ↑ One Piece Manga — Vol. 86 Chapter 864.
- ↑ One Piece Manga — Vol. 86 Chapter 865.
- ↑ One Piece Manga — Vol. 86 Chapter 868.
- ↑ One Piece Manga — Vol. 86 Chapter 869.
- ↑ One Piece Manga — Vol. 87 Chapter 870.
- ↑ One Piece Manga — Vol. 87 Chapter 871.
- ↑ One Piece Manga — Vol. 87 Chapter 872.
- ↑ One Piece Manga — Vol. 87 Chapter 873.
- ↑ One Piece Manga — Vol. 87 Chapter 874.
- ↑ One Piece Manga — Vol. 87 Chapter 875.
- ↑ One Piece Manga — Vol. 87 Chapter 876.
- ↑ One Piece Manga — Vol. 87 Chapter 877.
- ↑ One Piece Manga — Vol. 87 Chapter 878.
- ↑ One Piece Manga — Vol. 87 Chapter 879.
- ↑ One Piece Manga — Vol. 88 Chapter 880.
- ↑ One Piece Manga — Vol. 88 Chapter 881.
- ↑ One Piece Manga — Vol. 88 Chapter 882.
- ↑ One Piece Manga — Vol. 88 Chapter 883.
- ↑ One Piece Manga — Vol. 88 Chapter 884.
- ↑ One Piece Manga — Vol. 88 Chapter 885.
- ↑ One Piece Manga — Vol. 88 Chapter 886.
- ↑ One Piece Manga — Vol. 88 Chapter 888.
- ↑ One Piece Manga — Vol. 89 Chapter 891.
- ↑ One Piece Manga — Vol. 89 Chapter 892.
- ↑ One Piece Manga — Vol. 89 Chapter 893.
- ↑ One Piece Manga — Vol. 89 Chapter 894.
- ↑ One Piece Manga — Vol. 89 Chapter 895.
- ↑ One Piece Manga — Vol. 89 Chapter 896.
- ↑ One Piece Manga — Vol. 89 Chapter 897.
- ↑ One Piece Manga — Vol. 89 Chapter 898.
- ↑ One Piece Manga — Vol. 89 Chapter 899.
- ↑ One Piece Manga — Vol. 89 Chapter 900.
- ↑ One Piece Manga — Vol. 90 Chapter 901.
- ↑ One Piece Manga — Vol. 90 Chapter 902.
- ↑ One Piece Manga and Anime — Vol. 90 Chapter 903 and Episodes 878–879.
| |||||||||||||
| |||||||||||||
| |||||||||||||
| |||||||||||
| |||||||||||
| |||||||||||
| |||||||||||
| |||||||||||
| |||||||||||
| |||||||||||
| |||||||||||
| |||||||||||
| |||||||
| |||||||
| |||||||
| |||||||
| |||||||||||
| |||||||||||
| |||||||||||
| |||||||||||
| |||||||||||||
| |||||||||||||
| |||||||||||||
| |||||||||||||
| |||||||||||||
| |||||||||||||
| |||||||||||
| |||||||||||
| |||||||||||
| |||||||||||||
| |||||||||||||
| |||||||||||||
| |||||||||||||
| |||||||||||||
| |||||||
| |||||||
| |||||||||||
| |||||||||||
| |||||||||||
East Blue Inhabitants | |||||||||||||||||||||||||||||
|---|---|---|---|---|---|---|---|---|---|---|---|---|---|---|---|---|---|---|---|---|---|---|---|---|---|---|---|---|---|
| |||||||||||||||||||||||||||||
| |||||||||||||||||||||||||||||
| |||||||||||||||||||||||||||||
| |||||||||||
| |||||||||||
| |||||||||||
| |||||||||||
| |||||||||||
| |||||||||||
| |||||
| |||||||||||||||||
| |||||||||||||||||
| |||||||||||||||||
| |||||||||||||||||
| |||||||||
| |||||||||
| |||||||||
Individuals with Bounties | |||||||||||||||||
|---|---|---|---|---|---|---|---|---|---|---|---|---|---|---|---|---|---|
| |||||||||||||||||
| |||||||||||||||||
| |||||||||||||||||
| |||||||||||||||||
| |||||||||||||||||
| |||||||
| |||||||
| |||||||||||||
| |||||||||||||
| |||||||||||||
| |||||||||||||
| |||||||||||||||||
| |||||||||||||||||
| |||||||||||||||||
| |||||||||||||||||
| |||||||||||||||||
| |||||||||||||||||