| Line 206: | Line 206: | ||
In Ringo, Zoro and Hiyori returned to Oihagi Bridge, where Gyukimaru and Zoro clashed again. Their fight was then interrupted by Kawamatsu, who then reunited with Hiyori. The reunion was interrupted by a group of Beasts Pirates who were after Gyukimaru, but they were easily defeated by Zoro and Kawamatsu. Gyukimaru fled the scene with tears of joy from learning that Kawamatsu survived.{{Qref|name=c952|chap=952}} |
In Ringo, Zoro and Hiyori returned to Oihagi Bridge, where Gyukimaru and Zoro clashed again. Their fight was then interrupted by Kawamatsu, who then reunited with Hiyori. The reunion was interrupted by a group of Beasts Pirates who were after Gyukimaru, but they were easily defeated by Zoro and Kawamatsu. Gyukimaru fled the scene with tears of joy from learning that Kawamatsu survived.{{Qref|name=c952|chap=952}} |
||
| − | As Zoro chased after Gyukimaru, Kawamatsu told Hiyori of his ordeals after their separation. After Hiyori left him, Kawamatsu desperately searched for her but could not find her. He eventually went to the Ringo region, which was once ruled by [[Shimotsuki Ushimaru]], and encountered [[Onimaru]]. When Kawamatsu was taking the swords from the graves in order to support the future rebellion, Onimaru tried to stop him but relented after seeing that he was sincere. The two then teamed up to protect the graves and steal weapons from grave robbers. One day, Kawamatsu went to the Flower Capital to gather food and made a blunder, resulting in him being captured. Back in the present, Kawamatsu and Hiyori caught up to Zoro, who revealed that Gyukimaru opened up a door before disappearing. Kawamatsu then went inside to a secret room filled with swords. Kawamatsu contacted Kin'emon to inform him of the weapon stash. Back outside, Gyukimaru stood behind a house and transformed into Onimaru before walking away, content. Meanwhile, Hiyori requested Zoro to return [[Shusui]] to Wano and offered her father's sword [[Enma]] in exchange.{{Qref|chap=953}} |
+ | As Zoro chased after Gyukimaru, Kawamatsu told Hiyori of his ordeals after their separation. After Hiyori left him, Kawamatsu desperately searched for her but could not find her. He eventually went to the Ringo region, which was once ruled by [[Shimotsuki Ushimaru]], and encountered [[Onimaru]]. When Kawamatsu was taking the swords from the graves in order to support the future rebellion, Onimaru tried to stop him but relented after seeing that he was sincere. The two then teamed up to protect the graves and steal weapons from grave robbers. One day, Kawamatsu went to the Flower Capital to gather food and made a blunder, resulting in him being captured. Back in the present, Kawamatsu and Hiyori caught up to Zoro, who revealed that Gyukimaru opened up a door before disappearing. Kawamatsu then went inside to a secret room filled with swords. Kawamatsu contacted Kin'emon to inform him of the weapon stash. Back outside, Gyukimaru stood behind a house and transformed into Onimaru before walking away, content. Meanwhile, Hiyori requested Zoro to return [[Shusui]] to Wano and offered her father's sword [[Enma]] in exchange.{{Qref|name=c953|chap=953}} |
| − | Ignoring Kawamatsu's objection to Hiyori's offer for Zoro to receive Enma, Hiyori told Zoro that her father used two swords in combat, and passed on Enma to her while he gave [[Ame no Habakiri]] to Momonosuke. Zoro agreed to Hiyori's offer, but wanted to visit [[Ryuma]]'s grave later. Back in the Flower Capital, Law managed to subdue Hawkins and cut him to pieces after receiving help from an unknown individual. Hawkins then revealed what happened to the pirate alliance between him, Kid, and Apoo. Hawkins said that Apoo had set them up, having been working for Kaido since before the alliance's formation. After Kaido arrived at Kid's hideout, Hawkins surrendered to him while Kid and Killer tried to fight. When Hawkins wondered if Law had changed his mind, Law slashed him again before leaving the cell. At the Prisoner Mines, Luffy continued training to progress his Busoshoku Haki under Hyogoro's supervision. In Amigasa Village, Kin'emon contacted the various rebel squads and informed them of Yasuie's message. Key [[File:Kaido_and_Big_Mom_Make_an_Alliance.png|thumb|left|210px|Kaido and Big Mom form an alliance.]]members of the alliance including Zoro, Sanji, Robin, Brook, Momonosuke, Kanjuro, Raizo, Inuarashi, Kikunojo, Kawamatsu, Ashura Doji, and Shinobu also gathered in the village for a strategy meeting. Apoo and a group called the [[Numbers]] also returned to Wano for the Fire Festival. At Onigashima, Kaido and Big Mom stopped their fight and formed an alliance, deciding to take over the world together before trying to kill each other again.{{Qref|chap=954}} |
+ | Ignoring Kawamatsu's objection to Hiyori's offer for Zoro to receive Enma, Hiyori told Zoro that her father used two swords in combat, and passed on Enma to her while he gave [[Ame no Habakiri]] to Momonosuke. Zoro agreed to Hiyori's offer, but wanted to visit [[Ryuma]]'s grave later. Back in the Flower Capital, Law managed to subdue Hawkins and cut him to pieces after receiving help from an unknown individual. Hawkins then revealed what happened to the pirate alliance between him, Kid, and Apoo. Hawkins said that Apoo had set them up, having been working for Kaido since before the alliance's formation. After Kaido arrived at Kid's hideout, Hawkins surrendered to him while Kid and Killer tried to fight. When Hawkins wondered if Law had changed his mind, Law slashed him again before leaving the cell. At the Prisoner Mines, Luffy continued training to progress his Busoshoku Haki under Hyogoro's supervision. In Amigasa Village, Kin'emon contacted the various rebel squads and informed them of Yasuie's message. Key [[File:Kaido_and_Big_Mom_Make_an_Alliance.png|thumb|left|210px|Kaido and Big Mom form an alliance.]]members of the alliance including Zoro, Sanji, Robin, Brook, Momonosuke, Kanjuro, Raizo, Inuarashi, Kikunojo, Kawamatsu, Ashura Doji, and Shinobu also gathered in the village for a strategy meeting. Apoo and a group called the [[Numbers]] also returned to Wano for the Fire Festival. At Onigashima, Kaido and Big Mom stopped their fight and formed an alliance, deciding to take over the world together before trying to kill each other again.{{Qref|name=c954|chap=954}} |
==Story Impact== |
==Story Impact== |
||
Revision as of 16:04, 4 September 2019
The Wano Country Arc (ワノ国編, Wano Kuni Hen?) is the thirty-first story arc in the series and the fourth in the Yonko Saga of One Piece, continuing from the Levely Arc.
The Ninja-Pirate-Mink-Samurai Alliance sets their plan into motion to recruit allies within the Wano Country to liberate it from the control of the shogun Kurozumi Orochi and his allies, Kaido of the Yonko and his crew the Beasts Pirates. Meanwhile, the Big Mom Pirates also head to Wano to get revenge on the Straw Hats for the previous events back on Totto Land.
Summary
First Act
Arrival at Wano: The Plight of O-Tama and the Leftovers Citizens
Nekomamushi and the Guardians arrived on Sphinx, where Marco resided and worked as a doctor. Marco revealed that Sphinx was Whitebeard's homeland and his last keepsake. With Edward Weevil and Bakkin hunting for Whitebeard's inheritance, Marco anticipated that they would attack this place, and so elected to stay behind and protect it instead of joining the Ninja-Pirate-Mink-Samurai Alliance against Kaido. However, he told Nekomamushi to give Luffy a message from him once he arrived at Wano Country.[1]
Zoro cuts down a magistrate after being framed for a crime.
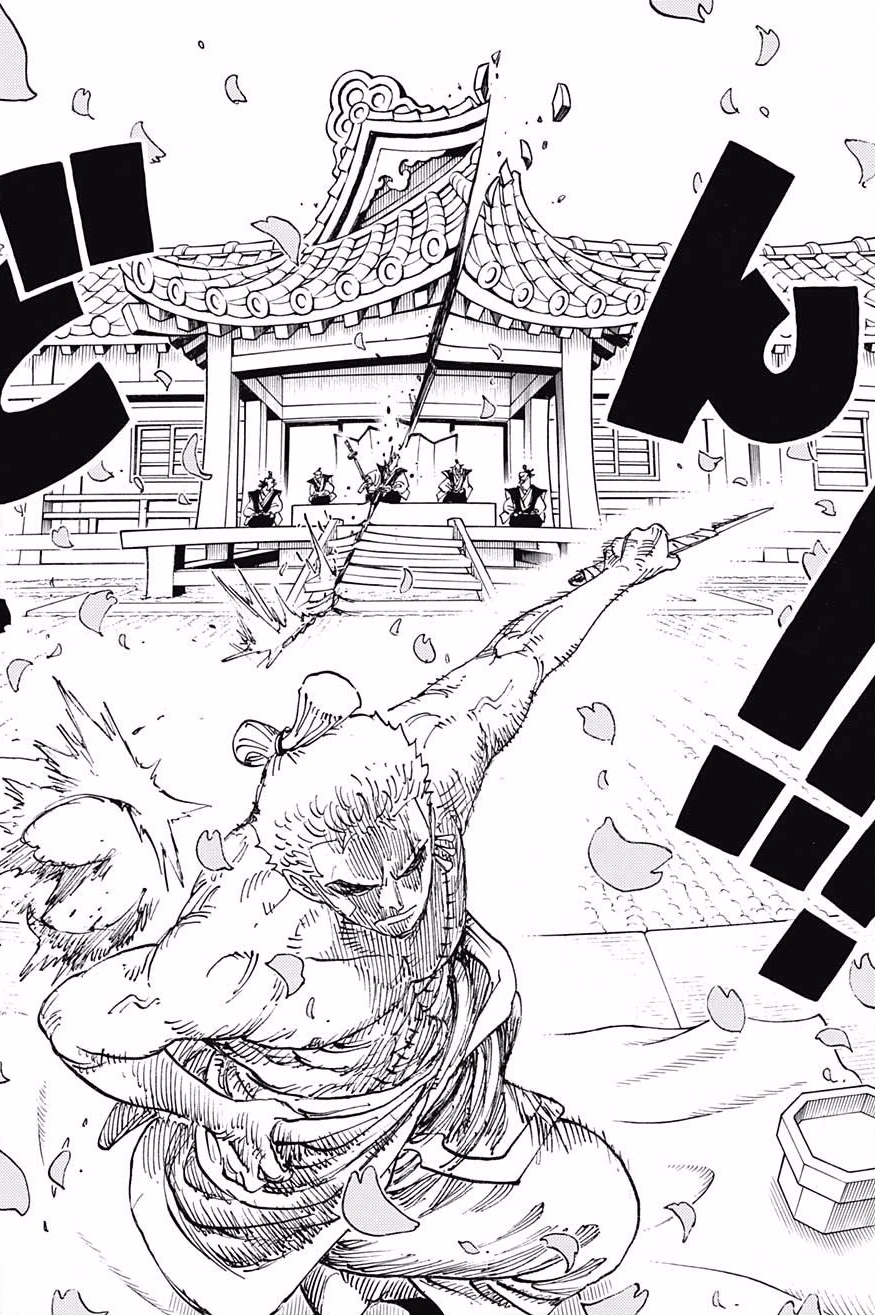
Meanwhile, Kin'emon, Law, Zoro, Usopp, Robin, and Franky had snuck into Wano's Flower Capital. Kin'emon warned the group that the shogun, Kurozumi Orochi, had agents lurking around every corner, so they would need to disguise their identities and assimilate into the populace. Franky became an apprentice carpenter under Minatomo, Usopp sold toad oil on the streets, and Robin trained to become a geisha performing for Orochi. Zoro, however, became a ronin, and was framed for several street murders. The magistrate sentenced him to seppuku and gleefully apprehended the stolen Shusui, but Zoro sensed that he was the one who actually committed the murders. With the short seppuku blade, he cut down the magistrate from a considerable distance.[1]
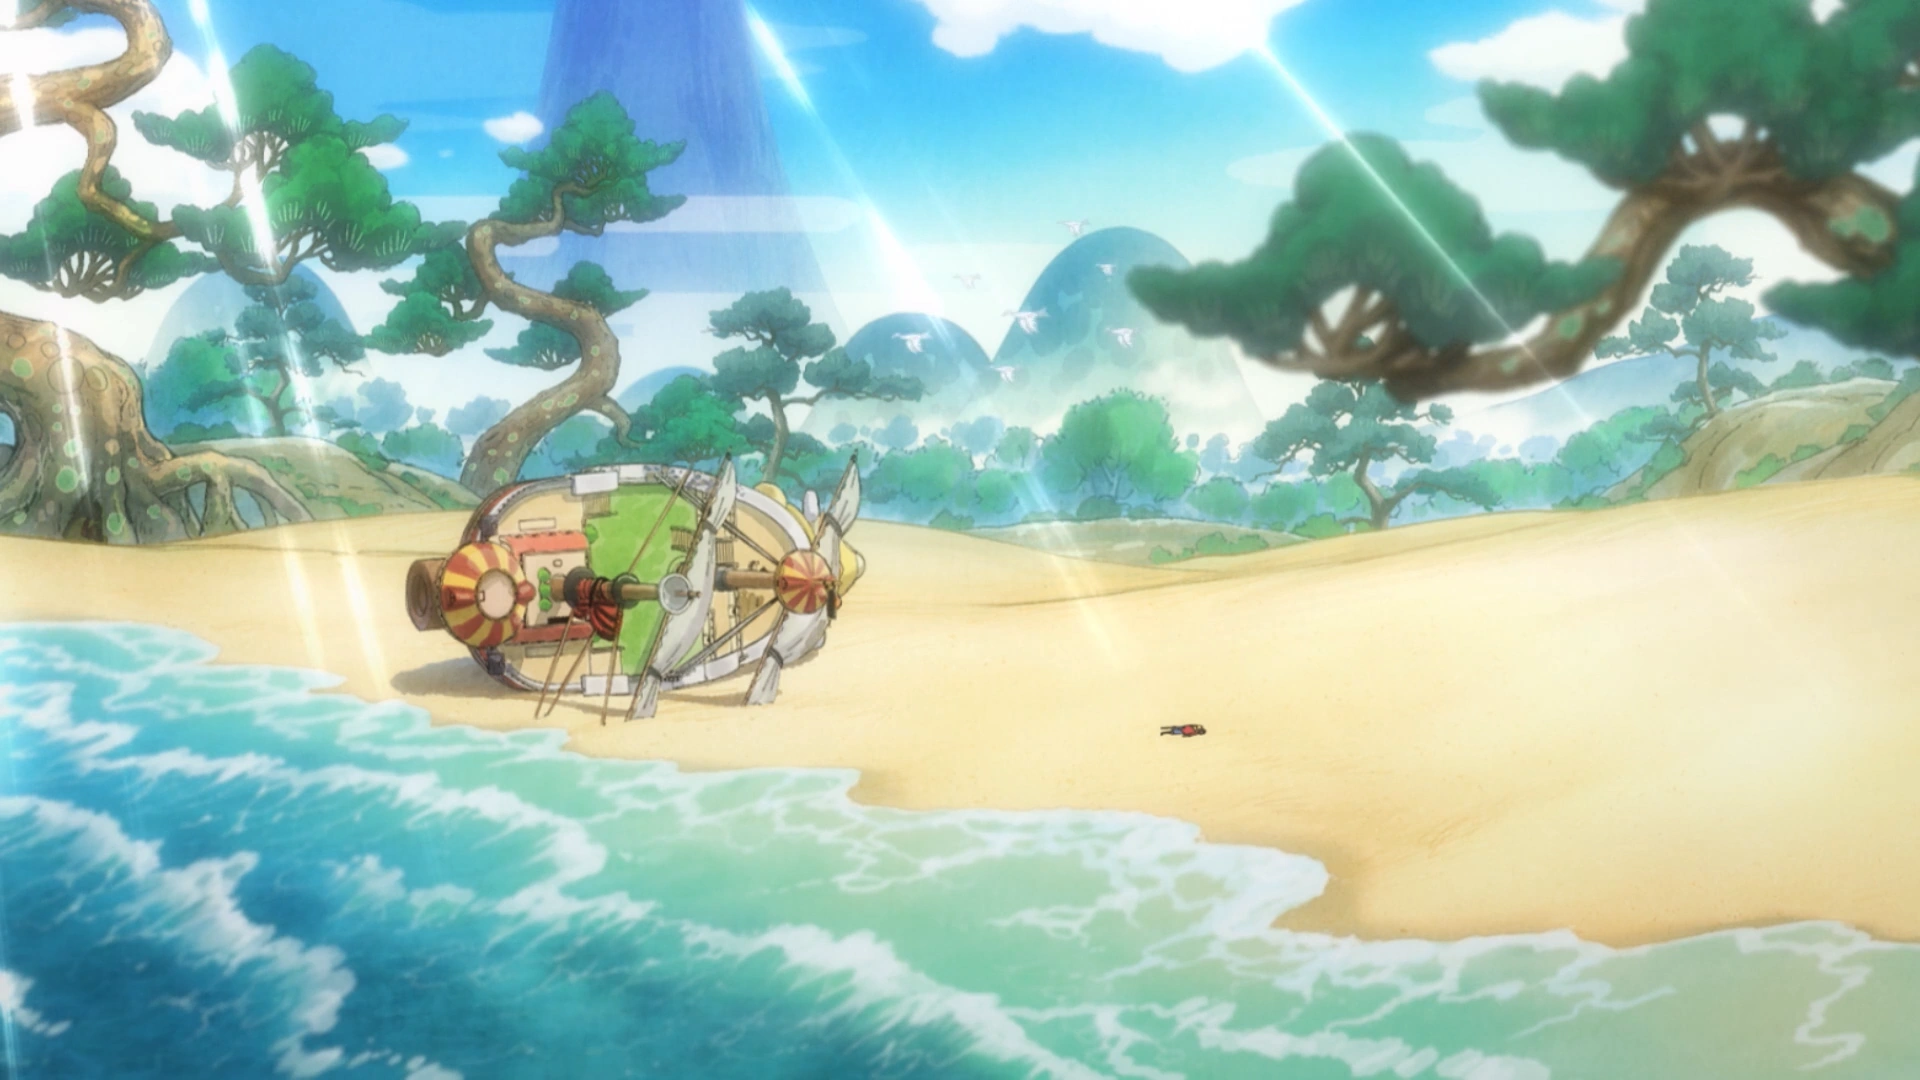
Some time later, Luffy's group read about the Levely while sailing to Wano. Nami noticed an article about Kaido and Big Mom, but was unable to read it due to Sanji and Chopper cutting pictures out. The crew then came to a stormy area that looked like Wano, and as they sailed through it, they encountered a school of giant carp. They then came to the bottom of a massive waterfall, and Luffy grabbed onto two of the jumping carp to pull themselves up. At the top of the waterfall was a whirlpool,[2] and Luffy had Sanji fly the others to land. When he tried to follow them, an octopus that had boarded the Sunny held him back, causing him to go down into the whirlpool.[3]
Luffy and the Sunny wash up on Wano.
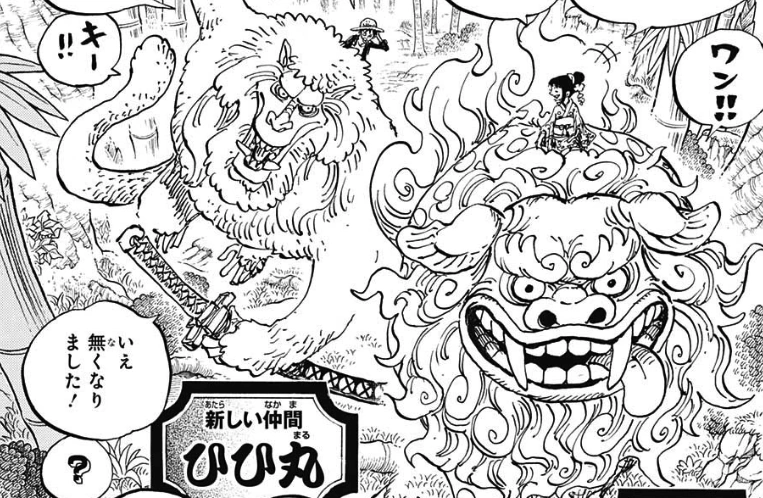
Luffy and the Sunny washed up on Kuri Beach, and after coming to, Luffy immediately encountered a baboon with a sword named Hihimaru battling a komainu named Komachiyo.[2] Close by, a group of Beasts Pirates scouts were riding to shore with a young captive girl named Tama, whom they had captured after she mentioned the Kozuki Family when they were harassing her at the market. They attempted to take out Luffy for illegally entering the country, but Luffy quickly brought them down. One of them was still conscious and told Hihimaru to take down Luffy, but it quickly backed down due to Luffy's Haoshoku Haki. Tama then knocked out the scout and submitted herself to Luffy, and in his confusion she managed to pull a piece of kibi dango from her cheek and feed it to Hihimaru, instantly taming him.[3]
O-Tama takes Luffy to her house after he saves her from the Beasts Pirates.
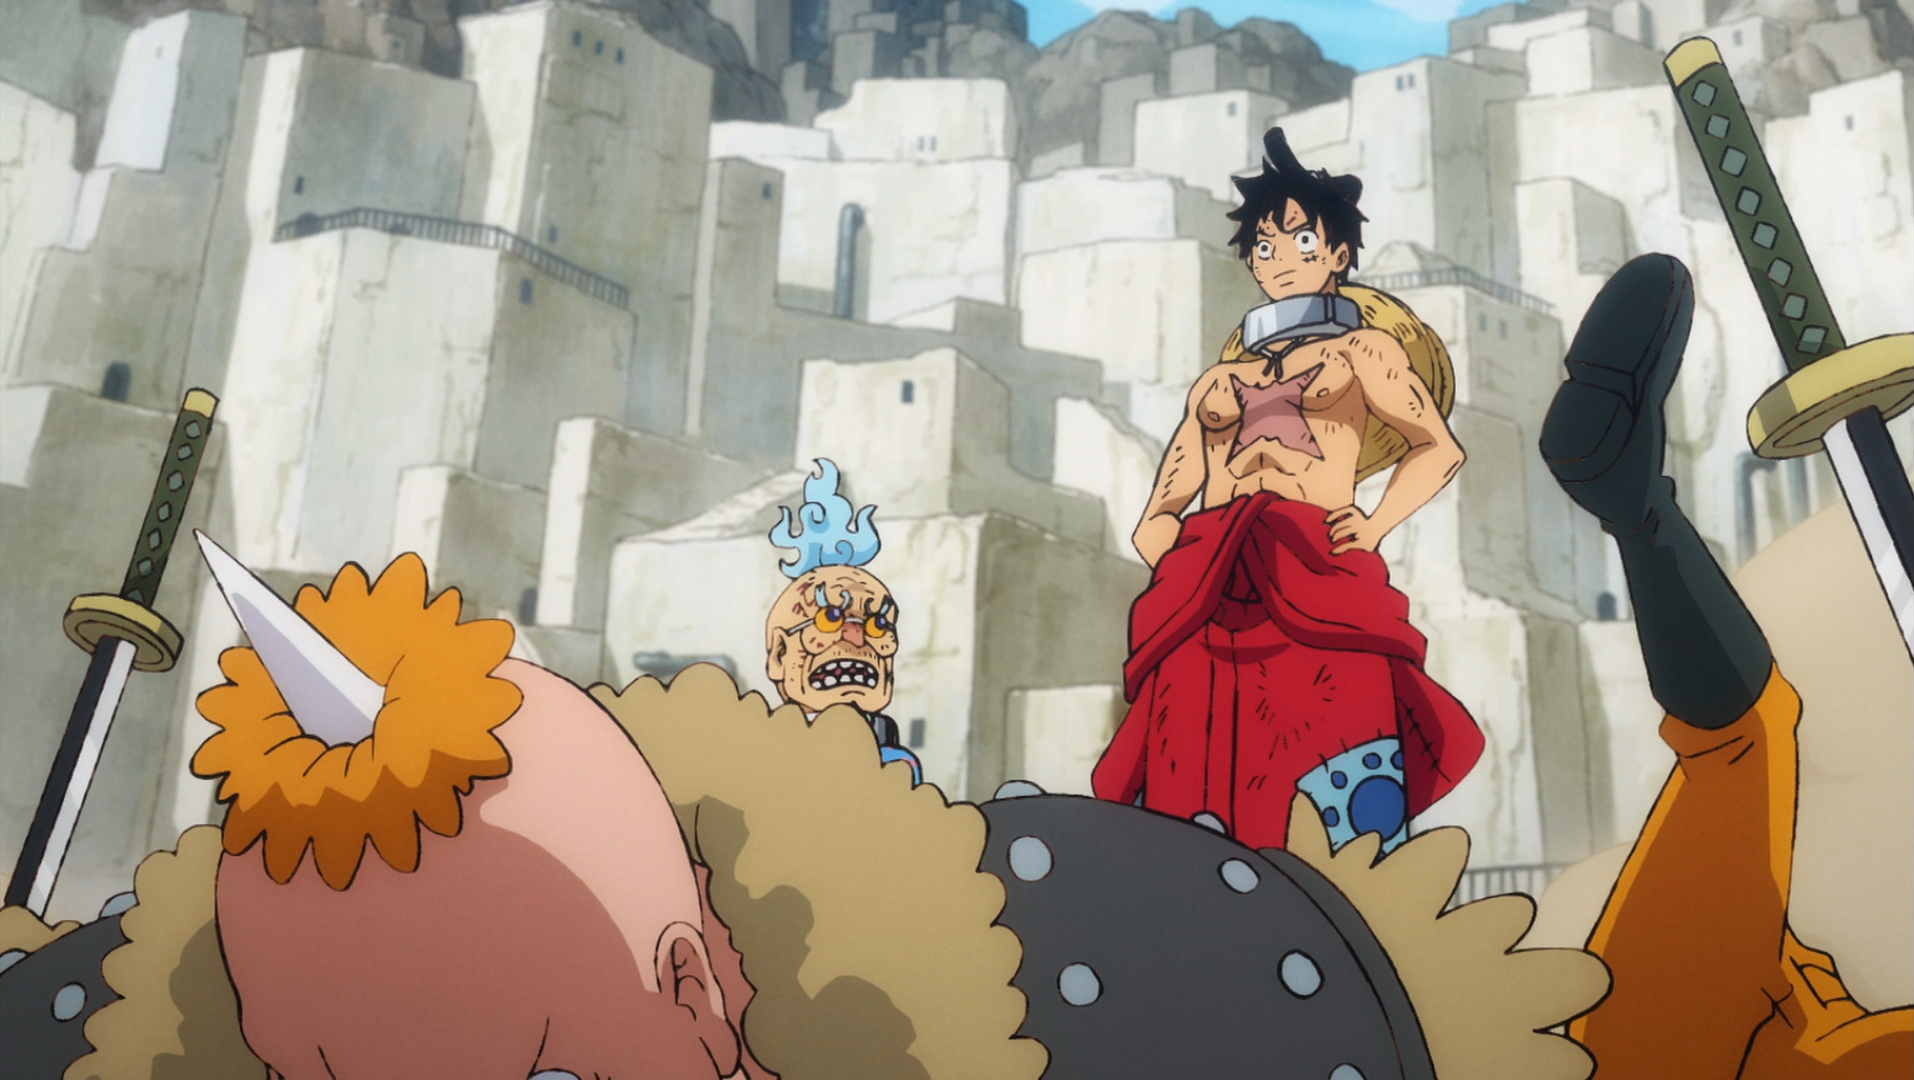
To thank Luffy, Tama helped him dock the Sunny in a hidden cave before taking him to her home to feed him. When they got to her place, she made a small meal for him out of the little rice she had. She then went out, and Luffy was suddenly confronted by her master Tenguyama Hitetsu, who thought he had stolen her small rations. Tama then came back and revealed what happened, but she then fell ill due to drinking contaminated river water to suppress her hunger.[3] Hitetsu said that much of the country was turned into a polluted wasteland by Kaido and his factories, and this place, Amigasa Village, had been destroyed by the Headliner X Drake a year ago. Tama continued living here, however, in order to wait for Portgas D. Ace, who had come during a famine four years ago and helped feed everyone. Before he left, he had promised to take Tama along with him the next time he came. Luffy revealed that Ace had died, causing Tama to faint. He then decided to go out to the nearest town to get Tama treated by a doctor, and donned a kimono. He also chose to take the cursed sword Nidai Kitetsu despite Hitetsu's protests, and set off with Tama.[4]
Hawkins facing Luffy and Zoro.
Somewhere in Kuri, Beasts Pirates Headliner Basil Hawkins received a report that they had lost contact with their men on Kuri Beach, and Hawkins decided to deal with this himself.[3] On the way to town, Komachiyo arrived to give Luffy and Tama a ride. They emerged from the forest into a massive wasteland, and Tama told Luffy more about the pollution in the country. Luffy then saw a woman being chased by some Beasts Pirates, only for the pirates to be cut down by someone. Luffy saw that the attacker was in fact Zoro, and quickly went to reunite with his crewmate. However, the two of them were soon confronted by Hawkins and his men.[4] The two sides began battling, and Luffy and Zoro went after Hawkins, but he shrugged off their attacks with his Wara Wara no Mi abilities. Komachiyo then ran in and grabbed Luffy and Zoro to make sure Tama got to treatment, and Hawkins pursued them with a giant straw avatar for a bit until Zoro managed to cut down the avatar.[5]


Gazelleman kidnaps Tama and takes her to Bakura Town.
As Luffy, Zoro, and Tama headed to town, they were suddenly greeted by Tsuru, who was the woman Zoro had saved. Tsuru offered to repay them for helping her by taking them to her tea house and brewing an herb to cure Tama. At Okobore Town, the leftovers town, the tea house's poster girl Kiku was courted by the Flower Capital's strongest sumo wrestler Urashima, but she declined his marriage proposal. Luffy's group then arrived, and Tsuru told Kikunojo to make the healing brew.[5] Tama was healed after drinking it, and Tsuru gave her some porridge to eat. After very reluctantly accepting it, Tama was brought to tears by its taste. Kikunojo bandaged Zoro's wounds, and Tsuru explained that all of them in the leftovers towns lived with barely any food to eat. Kozuki Oden once had a farm to feed everyone, but that farm was now used to feed Orochi and the wealthy citizens in the nearby Bakura Town; everything Okobore Town got were castoffs and leftovers from there. Suddenly, the group found themselves under attack from the Gifter Batman, who with his Bat SMILE had overheard their conversation. While they dealt with Batman's attacks, Gazelleman came in and kidnapped Tama to bring her to Bakura Town, which the Headliner Holdem had planned in order to find out about Hihimaru's taming.[6]

Luffy defeats the renowned yokozuna Urashima in a sumo wrestling match.
Kikunojo immediately mounted Komachiyo to go rescue Tama, and Luffy and Zoro joined her. She explained to them the situation in Bakura Town, and revealed that she was a samurai.[6] On top of the mountain where Oden Castle was located, Bepo, Shachi, and Penguin spotted Luffy and Zoro from afar.[5] When they saw the duo heading to Bakura Town, they told Law, who quickly became worried and planned to stop them.[6] In Bakura Town, Gazelleman brought Tama to Holdem, who decided to try testing her abilities by pulling on her cheek with pliers. Elsewhere, Urashima told the Gifter Mouseman about Kikunojo while eating, and Mouseman encouraged him to use his high status to take her by force. Luffy, Zoro, and Kikunojo later arrived at Bakura Town, and while racing down the street, they were suddenly hit by a sumo wrestler who had been knocked out of the ring by Urashima. As Urashima was dominating his opponents, he saw Kikunojo and became ecstatic, thinking she had come to accept his proposal. He had his men bring her to him, but when he silenced and degraded the lower-class spectators, Kikunojo became mad and cut off his topknot with her sword.[7]
One of Holdem's men told him that Urashima's topknot had been cut off, while Hawkins and his men warned the Bakura Town forces about Luffy as they headed there themselves. Back at the sumo ring, Urashima decided to attack Kikunojo for her actions, but his attack was met by Luffy. Luffy challenged him to a sumo match for Kiku, and the two of them began fighting. Luffy was able to effortlessly dodge Urashima's attacks, and knocked him out of the ring with a single Gear Third-enhanced Harite, destroying several buildings. The Beasts Pirates guards then attacked Luffy, Zoro, and Kiku, causing a fight to break out as the latter trio searched for Holdem. Holdem then appeared on a rooftop with Tama, angry that Luffy had sent Urashima flying into his house, and said he would kill Tama if he made a move. Law was still on the mountain when Shachi saw that a fire had broken out and Hawkins had arrived at Bakura Town, leaving him aghast.[8]
Luffy punches Holdem and frees Tama.
Deep within Bakura Town, the Headliner and Horse SMILE user Speed collected a cart full of clean food from the Paradise Farm. She saw the fire and destruction around Holdem's house as she went into town, and wondered what was going on. As Holdem threatened Tama with Kamijiro, the lion head growing from his stomach, Kikunojo warned Luffy that going against Holdem would attract the wrath of the All-Star and ruler of Kuri Jack. However, Luffy decided to take action after seeing Speed bring the food provisions cart onto the scene, and in the blink of an eye punched Kamijiro and freed Tama. Zoro attacked the pirates around the provisions cart, and Komachiyo pulled it away. When Luffy saw that Holdem had hurt Tama's cheek, he turned around to attack the Headliner. Holdem had Kamijiro breathe fire at Luffy, but it was to no avail as Luffy took him out with Gomu Gomu no Red Hawk.[9]

Luffy and Zoro deliver a cart of clean food to Okobore Town.
As Hawkins entered Bakura Town, he was confronted by a masked Law, who intended to take him out before the fellow Supernova could recognize him.[9] However, Hawkins quickly recognized Law by his Devil Fruit power and tattoos, and after a brief clash, he removed Law's mask. He revealed to Law that he had figured out that his and Luffy's alliance had infiltrated Wano, and Law's panic only grew as Hawkins received a call that Holdem had been taken out and Jack had been notified. Nearby, Luffy and Tama immediately started running away, and Luffy saw Speed's horse body and jumped on her. She quickly became angry, and Luffy told Tama to feed her a kibi dango, which she did. Although the dango was not supposed work on humans, it did work on Speed due to her Devil Fruit, and she happily carried Luffy and Tama away. Zoro and Kikunojo rode the provisions cart out of town, and Law hitched a ride with them in order to yell at Zoro for his actions. They took the provisions cart to Okobore Town, where they offered it to the delighted citizens. Some Gifters attempted to stop this, but they were then crushed by a massive tub of clean water that Luffy brought. As Tama ate an apple, Luffy promised her that by the time he left Wano, she would be able to eat until she is full every day, and this caused Tama to start crying as Ace had said the exact same thing.[10]
Ghosts of the Past: The Truth About the Kozuki Family
In the Flower Capital, a teacher taught some students that Kozuki Oden and his Nine Red Scabbards had tried to commit the evil act of opening Wano's borders, but their hero, the shogun Orochi, had defeated and killed them 20 years ago. Elsewhere in the capital, Orochi's money changer Kyoshiro brought up the night Oden was killed, recalling how his wife Kozuki Toki had sworn a curse on him. Orochi believed this was a prophecy that the Kozuki Family would return for vengeance in 20 years, with this year being the year of prophecy, but Kyoshiro was derisive of the shogun's paranoia, believing the Kozukis and their scabbards were all dead.[11]
Law then told Luffy and Zoro he would take them to the ruins of Oden Castle on top of the nearby mountain.[10] Tama bid farewell to Luffy as Speed took her back to Amigasa Village, and the villagers thanked Luffy for his actions. Kikunojo joined Law's group on the way to Oden Castle, and Luffy wondered why she wanted to go there. Zoro wandered off along the way, and when they reached the ruins, Luffy spotted graves for Kin'emon, Kanjuro, Raizo, and Momonosuke, and was led to believe they were dead. However, Kin'emon then appeared, queasy but very alive, and Luffy also reunited with Momonosuke and his crew from Whole Cake Island while Kikunojo excitedly greeted Kin'emon. Law and Kin'emon then took the Straw Hats inside to eat, and there, Kin'emon revealed that his group had come here by traveling 20 years forward in time.[11] Meanwhile, a lost Zoro decided to head toward a wharf, where he took a ride on a boat.[12]
Kin'emon talked about Oden's history, explaining that he was the son of shogun Kozuki Sukiyaki, but had been exiled from the Flower Capital for participating in violent fights. While in exile, he went to Kuri, which was then the most lawless region in Wano, and defeated its most dangerous criminal Ashura Doji. After rounding up the other criminals, Oden was granted the title of daimyo of Kuri by his father. He gathered many of his followers during that time, including Inuarashi and Nekomamushi after they had drifted ashore. However, he felt confined by Wano's borders and so illegally set off to sea, first sailing with the Whitebeard Pirates before joining the Pirate King Gol D. Roger and the Roger Pirates.

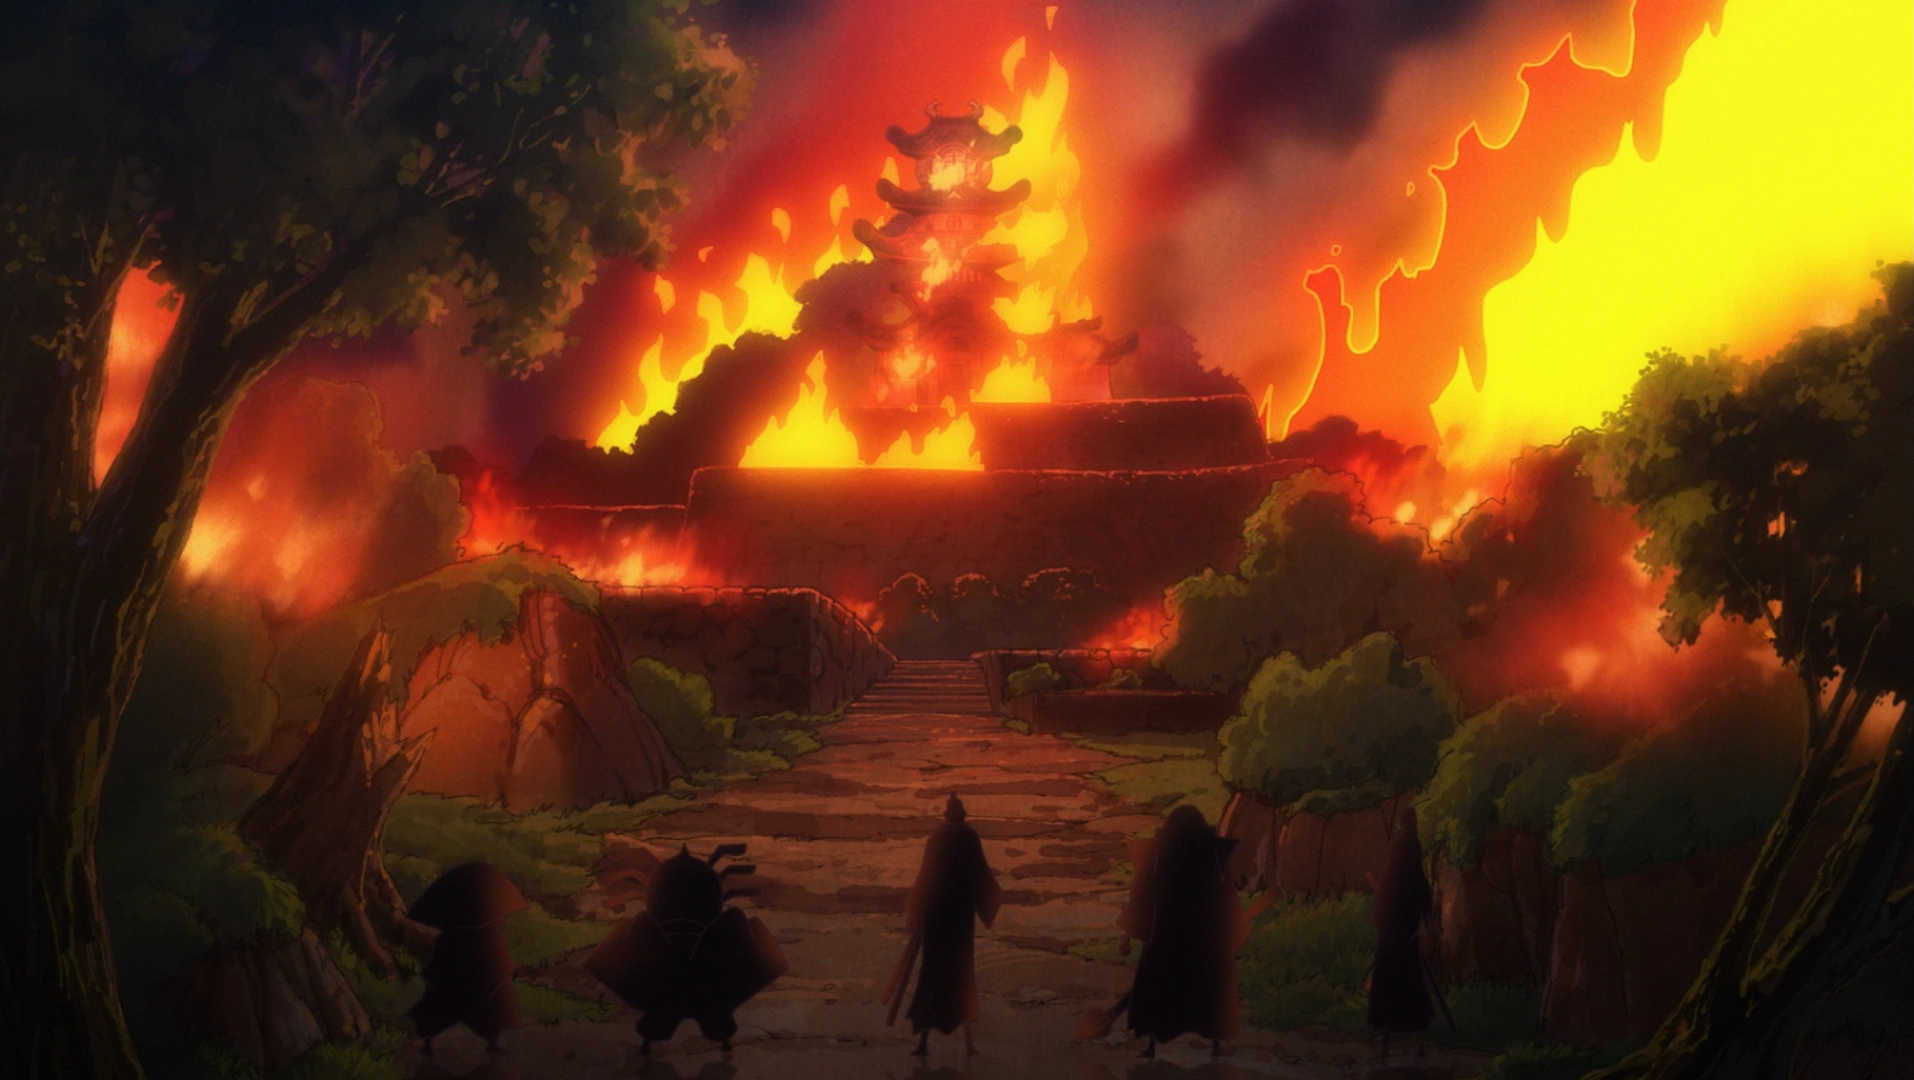
Kaido burning down Oden Castle 20 years ago.
However, this ultimately led to his execution 20 years ago. After Oden's execution, Kin'emon, Kanjuro, Raizo, Kiku, and another retainer managed to escape and head for Oden's wife and two children, Momonosuke and Hiyori, in Oden Castle, but Kaido had set it ablaze. After getting into the burning castle and finding Oden's family, Toki decided to send Momonosuke, Kin'emon, Kanjuro, Raizo, and Kikunojo forward in time with her Toki Toki no Mi ability while she would die here, and Kin'emon promised to fulfill Oden's wishes. They were then sent 20 years into the future, where they saw gravestones with their names on it. They traveled through the new Wano and initially despaired, but they were able to find people who were still loyal to the Kozuki Family, and set off to sea to find more allies to fight Orochi and Kaido, which led to them finding the Straw Hats and Law.[12]
With the alliance now formed, Kin'emon revealed that their goal was not to wage a full-scale war, but to conduct a raid on Kaido's home of Onigashima during the Fire Festival two weeks from now. He presented a secret message to tell recipients to meet at the Habu Port at the appointed time, which they would pass out to their allies, who were marked by a crescent moon symbol on their ankles. Zoro's group was already working to gain intel in the Flower Capital, and the rest of the Straw Hats would do the same. Kin'emon had Nami train to be a kunoichi, and summoned the master kunoichi Shinobu to train her. Finally, he told the alliance that there were three samurai they particularly needed to find, as they were each worth 100 men: Ashura Doji, Kawamatsu, and Denjiro.[13]
A Terrifying Force: Kaido Appears
Kaido comes to Kuri and obliterates Oden Castle.
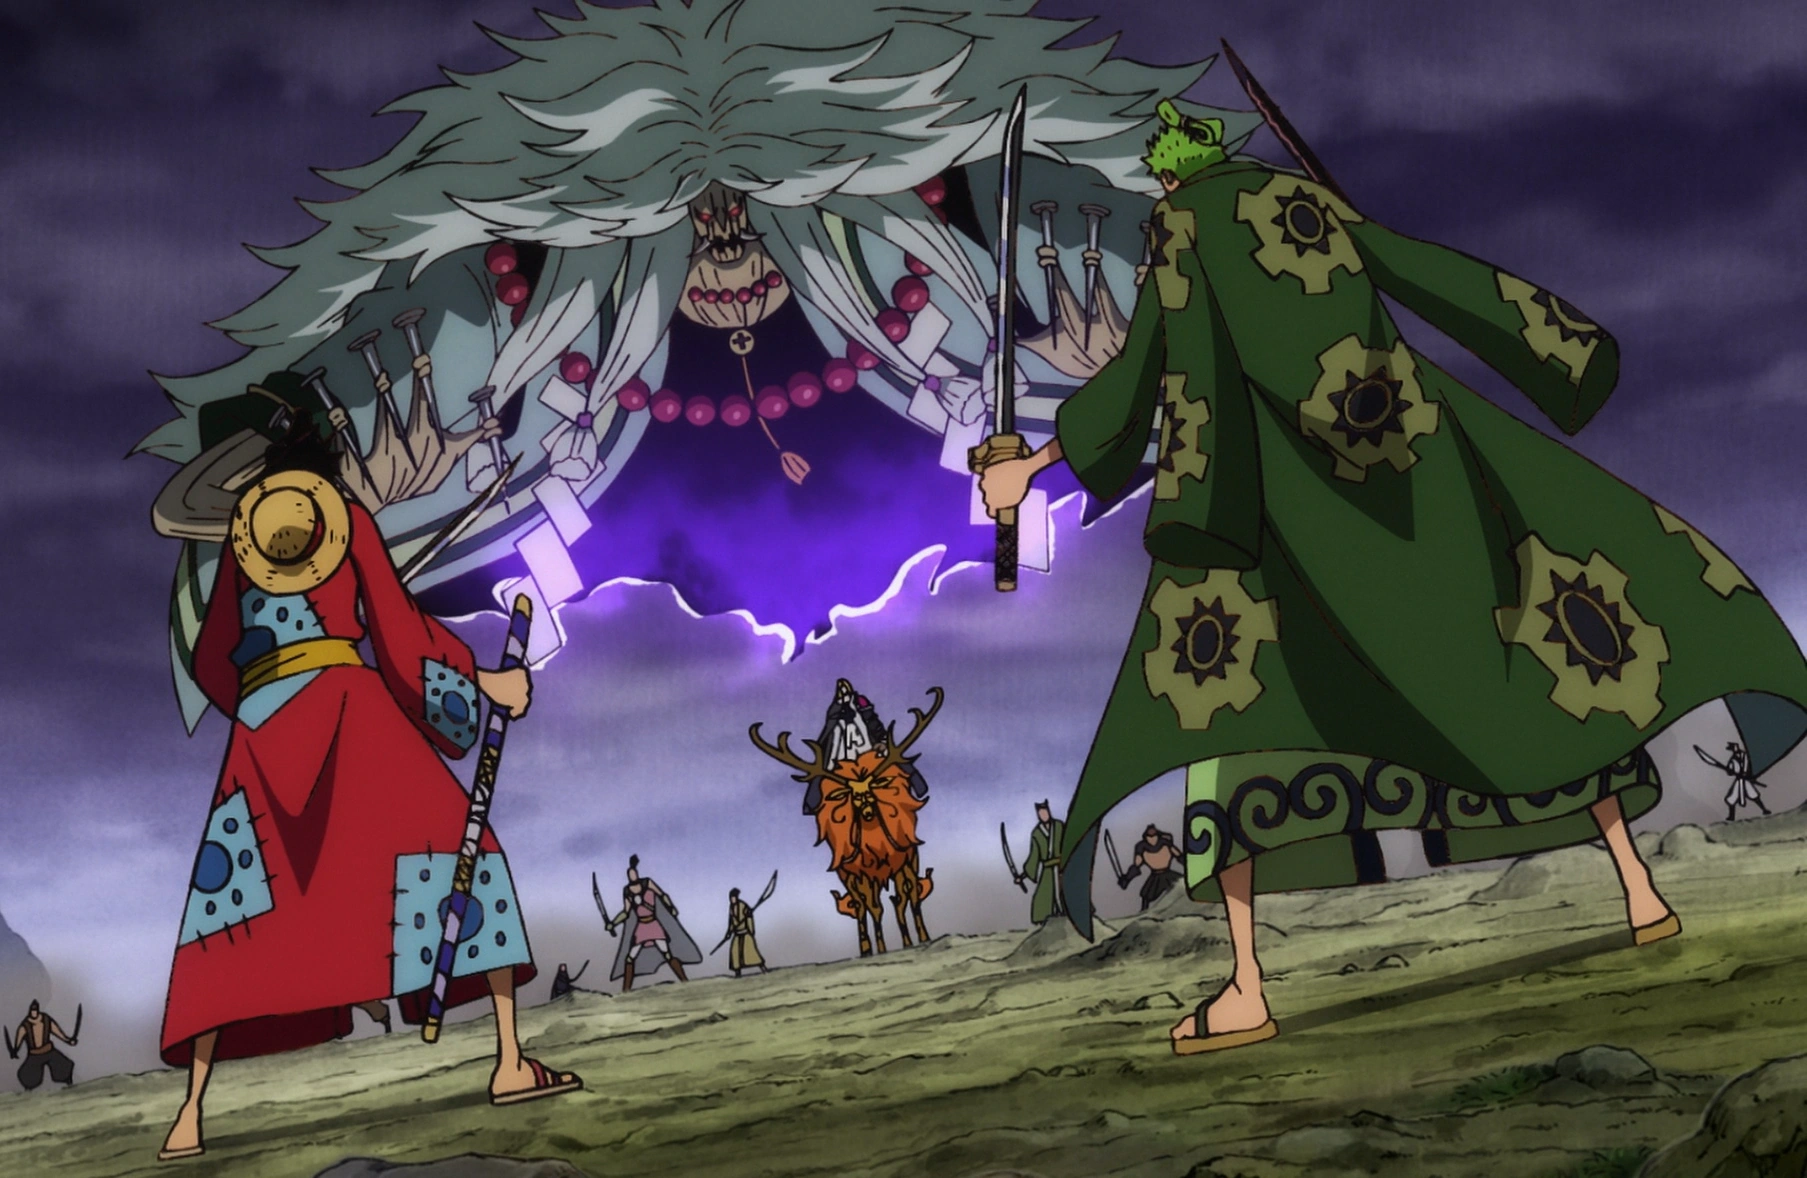
Back in Okobore Town, the citizens found themselves under attack by Shutenmaru and the Mt. Atama Thieves. The thieves took their food, and Shutenmaru felt no pity for the citizens, believing that there were no heroes who would really feed and protect them. Jack then rode into town looking for Luffy and confronted Shutenmaru, saying that his crew would only let the thief live if he joined Kaido. Shutenmaru refused and attacked Jack, and the two sparred. However, their fight was soon interrupted when Kaido suddenly came flying in as a dragon, wanting to know where Luffy and Law were.[13] Kin'emon's group was shocked to see Kaido, and Law revealed why he had come, saying that he and Luffy needed to deal with this alone to keep the rest of them from being exposed. Kaido drunkenly flew around Okobore Town, dealing lots of destruction in the process, and to stop the destruction, Hawkins raced in and claimed without knowing that Luffy and Law were at the ruins of Oden Castle. Kaido immediately flew toward the ruins and instantly blew them apart with fire breath, and this caused Luffy to become extremely angry and attack him.[14]
Kaido defeats Luffy.
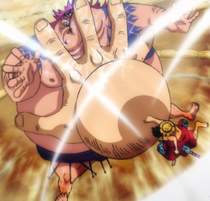
After the attack, Luffy raced back toward the ruins when he encountered a heavily injured Speed, who revealed that Kaido had attacked her and Tama on the way to Amigasa Village. With no idea if any of his allies were safe, Luffy decided to try ending the plan immediately and confronted Kaido. He spared no time in pummeling the Yonko with his most powerful attacks, bringing him back into his human form. After Luffy's onslaught, however, Kaido got back up without any signs of damage and knocked him out with one swing of his mace.[15]
Law attempted to bring Luffy to him, but was hit with a Seastone nail and attacked by Hawkins, forcing him to flee. Luffy knocked out several pirates with Haoshoku Haki when they tried to apprehend them, and Kaido decided to have him thrown in prison to break his spirit and make him a subordinate. Now that he was sober, Kaido decided to go after Law later and flew off to Onigashima to drink. Meanwhile, Kin'emon had gone to Okobore Town to check on his wife Tsuru, and was happy to find her alive and well, but did not intend on reuniting with her until after their mission had been accomplished. He then spotted Shutenmaru riding away, and recognized him as Ashura Doji. In the now-destroyed castle ruins, the alliance was able to survive the blast due to Shinobu rotting the ground away with her Juku Juku no Mi abilities, and after getting out of the hole, Kikunojo prepared to tell them about the current situation in Wano. In the wastelands of Kuri, Inuarashi and his Musketeers found the injured Tama and took her to receive treatment.[16]

Luffy imprisoned alongside Kid.
An extra edition of the newspaper covering the fight was printed out, and Usopp, Franky, Robin, and Zoro were appalled when they read it. The next day, Luffy was taken to the Prisoner Mines in Udon, where prisoners tirelessly worked to build weapons for Kaido. One mysterious prisoner was fed a poisoned fish that was supposed to be boneless, and when Luffy was brought inside the prison, a guard attempted to attack him for glaring at him. However, the mysterious prisoner spit the fish bones at the guard, taking him out. The guards threw Luffy into a cell, saying that starting tomorrow they would break his spirit by working him to death. Luffy's cell was next to Eustass Kid's, and they both swore revenge against Kaido, causing them to realize the other's presence.[16]
Second Act
Making News Inside and Outside Wano: The Alliance Gets to Work

Moria attacks the Blackbeard Pirates to look for Absalom.
On Kuraigana Island, Perona was elated to see news of Gecko Moria being alive. She decided to go find him, which Mihawk stated might be for the best because of some developments at the Levely. Meanwhile, Moria invaded Pirate Island with his zombie army to confront Blackbeard and find the missing Absalom, who had come to the island a few days ago. However, Moria found out that Absalom had been killed after Catarina Devon impersonated him with the Inu Inu no Mi, Model: Kyubi no Kitsune, allowing Shiryu to use the Suke Suke no Mi power he had stolen from Absalom to attack Moria and his army. Blackbeard then called out to Moria from his hideout, inviting the former Shichibukai to join his crew and revealing recent earth-shaking events including the executives of the Revolutionary Army fighting Fujitora and Ryokugyu during the Levely and the Straw Hats' arrival at Wano Country.[17]
Back on Wano, Tama made a full recovery thanks to Chopper and the mink doctors. On Mt. Mt. Atama, Inuarashi and Shutenmaru briefly sparred before Kin'emon ended the fight. Shutenmaru refused to rejoin the Kozuki Family, saying the 20 years that they had abandoned Wano could never be filled. On Onigashima, Jack was reprimanded by his fellow All-Stars King and Queen for the low tribute amounts from Kuri.[17] A few days after Luffy's capture, the Straw Hats in the Flower Capital passed along the Kozuki Family's secret messages in the newspapers. Meanwhile, Shinobu trained Nami to be a ninja by having her spy on government officials, and Sanji opened a soba stand.[18]

Luffy and Kid become standout workers in the Prisoner Mines.
In the Prisoner Mines, the prisoners were forced to work for their food and given inhuman workloads, but Luffy and Eustass Kid completed their tasks with ease despite having Seastone handcuffs on. This led to a rivalry forming between them as they each earned heaping bowls of kibi dango for their efforts. This attracted the ire of the deputy warden Dobon due to taking away from his food supply, and he attempted to discipline Luffy and Kid. However, they swiftly defeated him and were hailed as heroes by the other prisoners.[18]
In the Flower Capital, Usopp, Robin, and Franky reunited with Sanji at his soba stand, which was very popular. However, Sanji was confronted by three members of the Kyoshiro Family - Kaku, Kuni, and Suke - who attempted to get him to pay them to keep his stand running. When Sanji refused, they attacked him, but Kuni and Kaku were swiftly defeated by Sanji and Franky. Suke ran off to report this to Kyoshiro, who told him to contact Queen to send assassins to help him. After the skirmish, a girl named Toko came out to try Sanji's soba again after Kaku had destroyed her first bowl, and after eating, she ran off to join the courtesan Komurasaki, whom she worked for as a kamuro.[19]

The oiran Komurasaki heads to Orochi's banquet.
Komurasaki was proceeding through the town to take part in a banquet held by Orochi, and in his palace, Orochi expressed his desire to make the courtesan his.[19] Three men approached Komurasaki and attempted to kill her, but were quickly dispatched by a guard. One of them, Bingo, remembered how Komurasaki had asked him to purchase her freedom, promising to be with him forever if he paid the high price. Bingo sold everything he had, even his family, to raise the money, only to find out that she had spent all of it and had no intention of leaving with him. With his and the other victims' attempt at revenge foiled, they were exiled from the Flower Capital for having no money.[20]
Raizo successfully infiltrated the Udon prison and planned with Luffy to free him. However, he discovered that the key to Luffy's Seastone handcuffs was kept in a heavily guarded Seastone box. Caribou then approached Luffy and offered to help him with his prison break, but Luffy refused and told him to work with Kid, who was acting on his own in competition with Luffy. At Amigasa Village, Momonosuke told Tama he had a sister named Hiyori whom he believed was still alive, but he said he could not reunite with her until after the war in order to protect her.[20]
In the Flower Capital, Franky asked his boss Minatomo for him to see the blueprints to Kaido's fortress, but Minatomo revealed that he had pawned them off ten years ago. An angry Franky attacked Minatomo and was promptly fired, and he traced the blueprints' whereabouts from the pawn shop through everybody it had been passed on to. Eventually, a man named Rakuda told him that a masked man from Kuri had stolen it from him, and Franky contacted Kin'emon to tell him about this. Meanwhile in the region of Kibi, a man named Tonoyasu tagged along with Zoro, and the two of them headed to a leftovers town near the Flower Capital.[21]

Orochi meets with CP-0 to broker a trade agreement with the World Government.
In Orochi's castle, the shogun met with agents from CP-0, who wished to broker a trade agreement with the Beasts Pirates through him now that their intermediary Doflamingo had been taken down. Orochi laughed at their desperation and demanded that Vegapunk be brought to him in exchange for a deal, having no fear of the World Government and Marines due to Kaido's backup. He then headed to his banquet, where he partied with Komurasaki by his side.[21]
Chaos Reigns: Trouble Brewing in the Flower Capital
X Drake and Page One of the Beasts Pirates' six strongest Headliners, the Flying Six, arrived at the Flower Capital to kill Sanji, and they were joined by Hawkins. Law came up to Sanji and warned him to run away, as Drake and Hawkins knew their identities.[21] The two of them ran off with Usopp and Franky, but Page One started rampaging and attacking every soba shop he could find to look for Sanji. Despite Law heavily warning against it, Sanji went into action and attacked Page One, intending to take down the pirate who did not recognize him before Drake and Hawkins arrived.[22]
Tonoyasu brought Zoro to his home, the leftovers town of Ebisu, where everyone acted happy.[22]

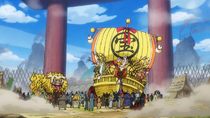
The Big Mom Pirates arrive on Wano.
On Onigashima, Kaido received a report that the Big Mom Pirates were approaching Wano. Big Mom and her crew took out the preliminary defenses as they prepared to scale the waterfall surrounding Wano on the Queen Mama Chanter. As Kaido desperately ordered his men to stop her, King flew in and hit the Chanter just as it reached the top of the waterfall, causing it to fall back down the waterfall and sending Big Mom into the ocean.[22] Back at Kuri, Momonsuke, Kiku, Chopper, and Tama went to Kuri Beach and found the washed-up Big Mom unconscious. Chopper suggested killing her before she woke up, but he was too late as she regained consciousness. To his suprise, Big Mom then asked who she was, having lost her memories.[23]

Sanji uses his Raid Suit to battle Page One.
In the Flower Capital, Sanji stood in front of Page One, with Law, Franky, and Usopp hiding behind him, questioning his choices. Sanji replied that he would have to swallow his pride if he wants to protect anyone. He activated his Raid Suit while Franky and Usopp marveled at the transformation. Law recognized the suit, as he is from North Blue and read the "Sora, Warrior of the Sea" comic. Sanji then attacked Page One and learned that his suit grants him the power of invisibility that he sought for years. Page One struck back, knocking Sanji away, but Sanji remained mostly unharmed thanks to the suit's protection and continued the fight while Law, Franky, and Usopp fled to Ebisu Town. At Orochi's castle, as the party went on, Robin searched for information about the location of the Poneglyph, but she was found and interrogated by the Orochi Oniwabanshu.[23]
The Orochi Oniwabanshu tried to capture Robin, but the Robin they attacked was a duplicate created by her Devil Fruit powers. Robin then contacted Nami and Shinobu through Den Den Mushi and warned them about the ninjas before returning to the banquet. Orochi cautioned his guests about the prophesied resurrection of Oden's Nine Red Scabbards, but none of the guests took his word seriously. Toko then started laughing, and Orochi quickly became enraged as he moved to attack her. Komurasaki then slapped him, and Orochi was infuriated by her actions and transformed into his Yamata no Orochi form. As the chaos in the castle began, Robin carried Toko away.[24]


Kyoshiro strikes down Komurasaki.
Orochi gave Komurasaki one chance to beg for mercy, but she firmly refused, causing him to go beserk and attack the other guests. One of Orochi's heads also grabbed Komurasaki. Meanwhile, Robin was once again confronted by the Orochi Oniwabanshu. Toko begged Robin to help Komurasaki, but Robin was more preoccupied with protecting Toko. Brook arrived in his spirit form and assisted Robin in getting past the ninjas. While spying on the banquet hall from over the ceiling, Shinobu and Nami were confronted by one of Orochi's ninjas, but Shinobu incapacitated him before collapsing the ceiling onto Orochi, freeing Komurasaki from his grip. Kyoshiro approached Komurasaki and struck her down with his sword, shocking everyone in the banquet hall. Orochi questioned Kyoshiro, who explained that he was giving a samurai's mercy. Orochi turned his attention to Toko and pursued her and Robin as Nami unleashed Zeus and used a lightning attack on the shogun.[25]
Echoes of the Past: New Training, New Allies, New Problems

An amnesiac Big Mom accompanies Chopper, Momonosuke, Tama, and Kikunojo to Udon.
The next morning, Chopper, Momonosuke, Kiku, and Tama brought Big Mom to Okobore Town, where Tsuru gave her some food. On Tama's urging, Chopper convinced Big Mom to go to Udon with them.[25] On the sea outside of Wano, the Big Mom Pirates sailed, knowing Big Mom was alive but not knowing what she was doing. Chopper's group rode to Udon on a crocodile-shark that Big Mom tamed, and Tama contacted Hitetsu, who was very opposed to their mission, while Momonosuke continued training.[26]
The group that infiltrated Orochi Castle, along with Kanjuro, hid in the Northern Cemetery. Robin shared all of the information that she acquired, and Brook revealed that there was a Poneglyph in the basement of Orochi Castle. The group, save for Brook, then headed to the bathhouses. At the bathhouse, they overheard conversation about Kyoshiro, and Shinobu wished that the yakuza boss Hyogoro was still around. He was charismatic enough for all the other yakuza bosses to serve under him, and would have surely helped their current recruitment, but he was presumed to have died after refusing to submit to Orochi 20 years ago.[27] In Ebisu Town, Sanji's group read the news of Komurasaki's death, and Law also saw that Kid had escaped from the Prisoner Mine. In the mine, as everyone was on high alert due to the escape, Grandpa Hyo was being attacked by the vice warden Daifugo, who knew he did not earn all the meal tickets he had. However, Hyo, who was once the famous yakuza boss Hyogoro, accepted his death because he had been fulfilled by Luffy's display of nobility. Before he could be killed, though, Luffy rushed in and attacked Daifugo, and as this was going on, Queen arrived at the mine.[26]

Luffy tests his strength in Queen's Sumo Inferno.
In the Prisoner Mine Executive Tower, Vice Warden and Headliner Solitaire was alerted after Raizo successfully stole the keys to the Seastone handcuffs. After kicking Daifugo, Luffy was subdued by the warden Babanuki, and after a failed escape attempt, he and Hyo were brought before Queen. As Raizo spied on Luffy, the mysterious prisoner who had been fed the poisoned fish called out to him, revealing himself to be Kawamatsu.[27] Raizo attempted to free Kawamatsu, but had to flee after his presence was exposed. Queen put Luffy and Hyogoro into a sumo ring and put special collars on them that would slice their heads off if they were knocked out. He gave a concession to Luffy by having his Seastone handcuffs removed, and with his restraints gone, Luffy quickly knocked out the first group of assailants with Haoshoku Haki.[28]
Meanwhile, Hawkins and Drake led a group into the Flower Capital bathhouse to round everyone up and see if anyone possessed the Kozuki Family's crescent moon symbol. Hawkins noticed Nami hiding behind Shinobu and tried drawing her out, disrobing her. This caused Sanji to reveal his presence, and he, Nami, Robin, and Shinobu then escaped through the air. Sanji revealed that the Heart Pirates had been captured to lure Law out, and they needed to tell him.[28]
Zoro strikes down the assassin Kamazo.
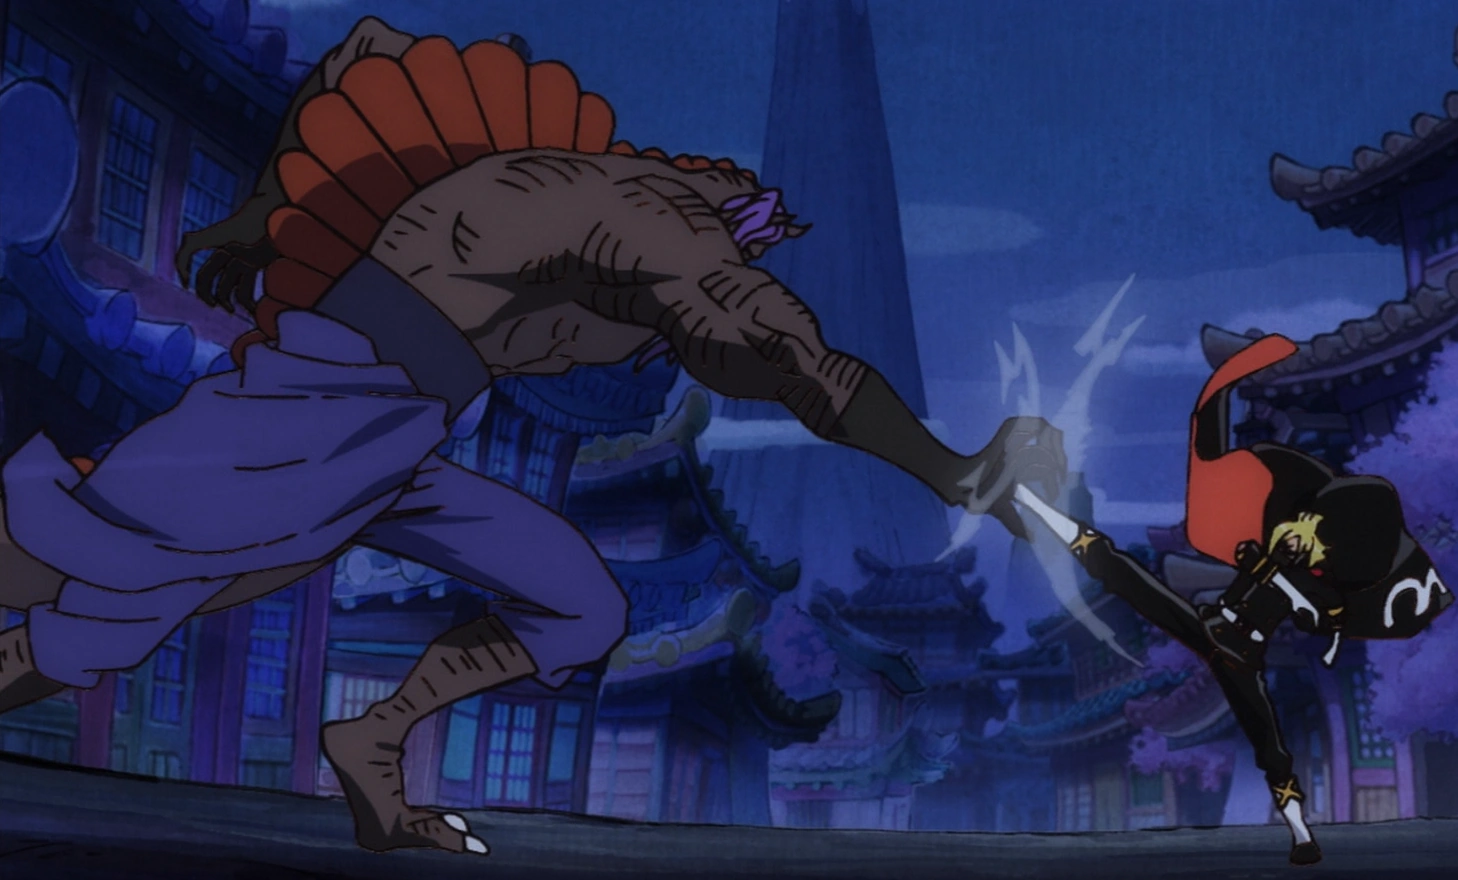
Law's group met Tonoyasu, who revealed that Zoro had left to go after someone who had stolen his sword.[27] Some time later, Zoro confronted the thief, Gyukimaru, in Ringo. Gyukimaru had returned Shusui to Ryuma's grave, refusing to believe Zoro had earned the sword.[28] The two then sparred for the weapons in each other's possession, when Toko and a covertly clad Komurasaki suddenly came in running for their lives from Kamazo. Kamazo was secretly an assassin working for Orochi who was tasked with killing Toko, and he was ready to kill anyone standing in his way. Zoro agreed to help Komurasaki and Toko in return for food and alcohol, but as he clashed with Kamazo, Gyukimaru continued trying to attack him. This ended up distracting Zoro enough for Kamazo to impale him with one of his scythes, but Zoro managed to disarm the scythe from him and strike him down.[29]
He then fell unconscious, and Komurasaki took him to the Northern Cemetery to treat his wounds. When Zoro woke up, she told him about Gyukimaru, and when he wondered about her, she revealed that she was really Momonosuke's sister Hiyori, and wanted to look for him.[30] Hiyori revealed that she had not traveled in time in order to keep the Kozuki bloodline alive just in case, and she had no faith that her brother and retainers would return in 20 years, but eventually became happy again thanks to her caretaker and retainer Kawamatsu.[31]

Orochi and Kaido's forces expose and arrest citizens still loyal to the Kozuki Family.
Kaido and Orochi's forces patrolled the Flower Capital and arrested anyone with the crescent moon symbol on their ankle. Nami's group went to Ebisu Town, and Shinobu blamed Law's crewmates for exposing the alliance's message, causing her to argue with Law and Kanjuro over what to do with them.[30] The alliance's allies were rounded up and placed in a prison in the Rasetsu District of the Flower Capital to serve as an example for the other citizens.[31] An angry Law left to rescue his crewmates, and Tonoyasu then came in to pledge his help for the final battle. Neither Kanjuro nor Shinobu knew who he was, though the Straw Hats heard from the Ebisu Town citizens that he was a saint who took the money his daughter Toko earned in the Flower Capital and gave it to the other townspeople.[32]


Hyogoro demonstrates an advanced application of Busoshoku Haki by defeating Alpacaman.
In the Prisoner Mines, Luffy and Hyogoro fought against the Gifters Alpacaman and Madilloman, and Luffy unsuccessfully attempted to project a Busoshoku Haki shockwave from his palm. Hyogoro realized that he knew about Busoshoku Haki as well under a different name, and defeated Alpacaman with the shockwave that Luffy was trying to acquire, causing Luffy to want to learn from him.[31] Hyogoro tried teaching Luffy to make his Haki flow, but Luffy was unable to achieve it as night fell and Queen put the Sumo Inferno on hold until the next morning. Raizo then arrived with Caribou, whose handcuffs were the ones he stole the key for. Hyogoro was delighted to see Raizo again, and told him that there were tens of thousands of prisoners in the Prisoner Mines who were here for defying Orochi and would likely join their cause.[32] Raizo and Caribou then broke into Queen's o-shiruko storage to feed Luffy and Hyo, and the duo ate all of it.
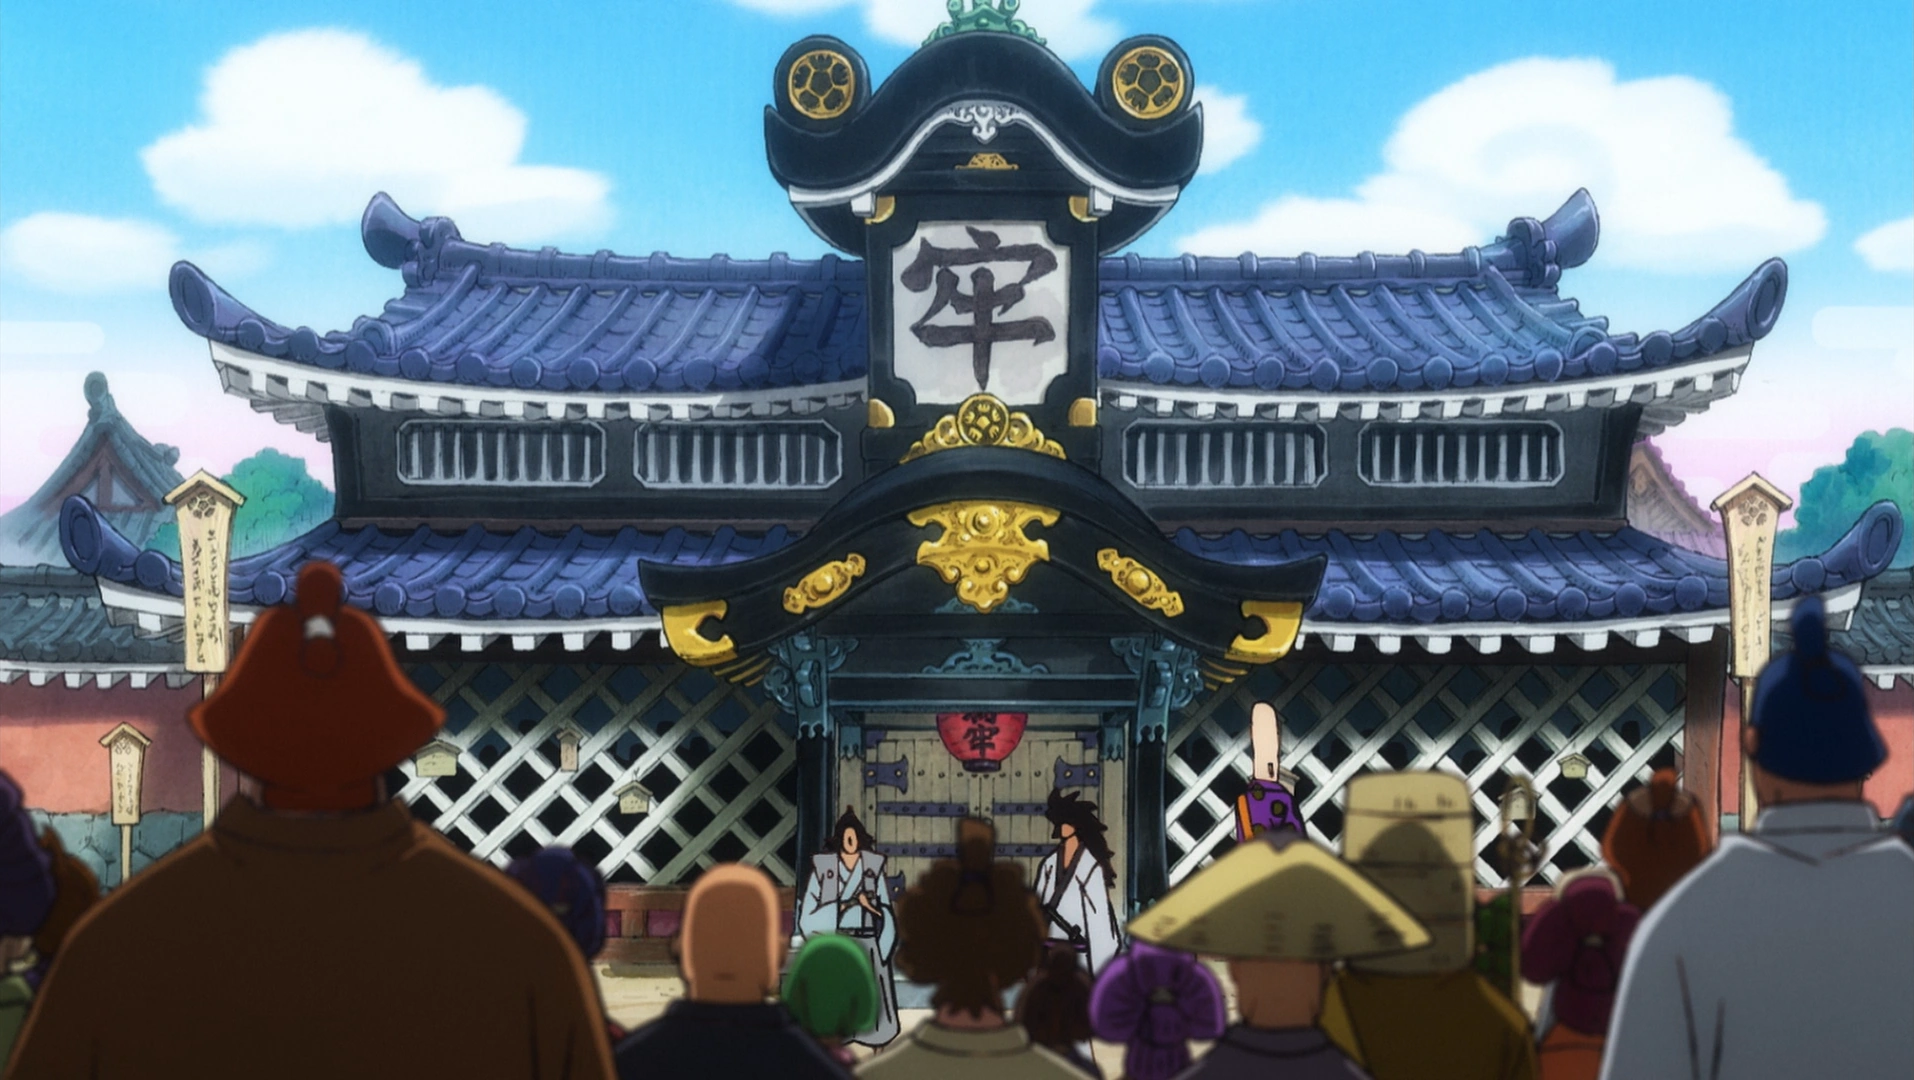
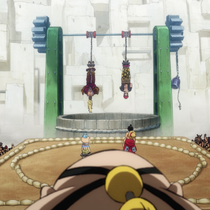
That night, Tonoyasu was arrested by Orochi's forces and exposed as Ushimitsu Kozo, the thief that infiltrated the Flower Capital at night and stole from the wealthy to give to the poor. Upon hearing about his identity the next morning, Orochi ordered for him to be crucified during Komurasaki's funeral, and to have these events broadcasted across the country. After seeing a beaten Yasu being crucified in the broadcast from the Rasetsu District, Kanjuro and Shinobu finally recognized him as Yasuie, the former daimyo of Hakumai who had served under the Kozuki Family. Meanwhile, Brook went to the Northern Cemetery and found Zoro's group. He told them about the current events, and Toko raced off to rescue her father, forcing the other three to chase after her.
Meanwhile, Mt. Atama was set on fire in order to draw out Shutenmaru. The Mt. Atama Thieves believed the fire to have been started by one of Holdem's men, and so Shutenmaru led them to Bakura Town. Kin'emon and Inuarashi heard this and went to find him.[33]
While he awaited Orochi's arrival, Yasuie remembered his past as a daimyo before revealing to the gathered crowd that he lied about being the Ushimitsu Kozo. After learning about his execution, the residents of Ebisu Town entered the capital and began rioting for his release. Seeing the commotion, Yasuie began his speech to the crowd, entailing Orochi's foul ways and claiming to be the one behind the alliance's message, saying it was just a prank. He then claimed that the crescent moon tattoo has no hidden meaning other then a popular mark, making the crowd and some of the guards question Orochi's orders. In his mind, Yasuie wished Momonosuke and Kin'emon luck with the plan, now that the alliance was provided with a new meeting location to execute their plot. Orochi and some of his soldiers proceeded to execute Yasuie by shooting him. Zoro's group arrived just in time to witness the execution.
As the whole scene was broadcasted across Wano, Shutenmaru, his men, Kin'emon, and Inuarashi watched the video in Bakura Town. Back in the Flower Capital, the residents of Ebisu Town began to grieve but they could only laugh. Zoro was angry at them, thinking they were mocking Yasuie's death, but he was stopped by a crying Hiyori, who explained that the residents of Ebisu Town are incapable of showing any other type of emotion due to a side effect of the SMILE fruits.[34]

Sanji and Zoro meet again while protecting Toko.
Kanjuro, Shinobu, Franky, Sanji, Usopp, Nami, and Robin arrived at Rasetsu Town only to see that they were too late in saving Yasuie. The Nine Red Scabbards mourned his death as they watched the broadcast. Luffy, Hyogoro, and Queen also watched the execution from the Prisoner Mines. Shinobu then explained to the Straw Hats with her more about the SMILE fruits and how Orochi used the faulty ones to rob the poor citizen of their ability to express sadness and anger while Hiyori also told the same to Zoro and Brook. The crowd noticed Toko slipping into the execution site, alarming Hiyori and the Straw Hats. As Toko hopelessly tried to revive her father with Usopp's toad oil, Orochi spotted her and attempted to kill her as well. Zoro and Sanji jumped in and shielded the girl.[35]
Both were recognized as the wanted criminals from the Flower Capital. Zoro then proceeded to attack Orochi directly, but his attack was blocked by Kyoshiro who then clashed with Zoro. Orochi was able to retreat from the battle. Meanwhile, Sanji was then engaged in battle with X Drake, who recognized Sanji as a part of the Vinsmoke Family, enraging Sanji. The rest of the Straw Hat Crew joined the battle while Franky was able to retrieve Yasuie's body. Sanji then gave Toko to Usopp for safety while fighting X Drake. The Orochi Oniwabanshu joined in by attacking the Straw Hats as well as Hiyori, who was saved by Zoro from Raijin and Fujin.
Meanwhile, Law was confronted by Hawkins when he reached the prison where his crewmates were held prisoners. He then noticed Bepo was missing to which Hawkins responded that they were not foolish enough to keep all hostages in one place. He then said that Law could not defeat him as he cut his arm, causing Shachi's arm to be cut in the same spot. He then told Law he could not defeat him unless he killed all three of his subordinates.
Outside Bakura Town, Shutenmaru attacked Kin'emon for framing him for theft. Kin'emon then reflected that he only concentrated on fighting for the greater good for the upcoming fight but not considered what Shutenmaru went through in the past 20 years. However, Kin'emon pointed out that Yasuie sacrificed himself for their plan and the samurai and that they would come to their aid for the raid at the Fire Festival. When Kin'emon asked Shutenmaru to join them, Shutenmaru responded by saying he wanted to show him and Inuarashi something.
Prisoners Rising: Taking over Udon!
Killer and Kid undergo water torture.
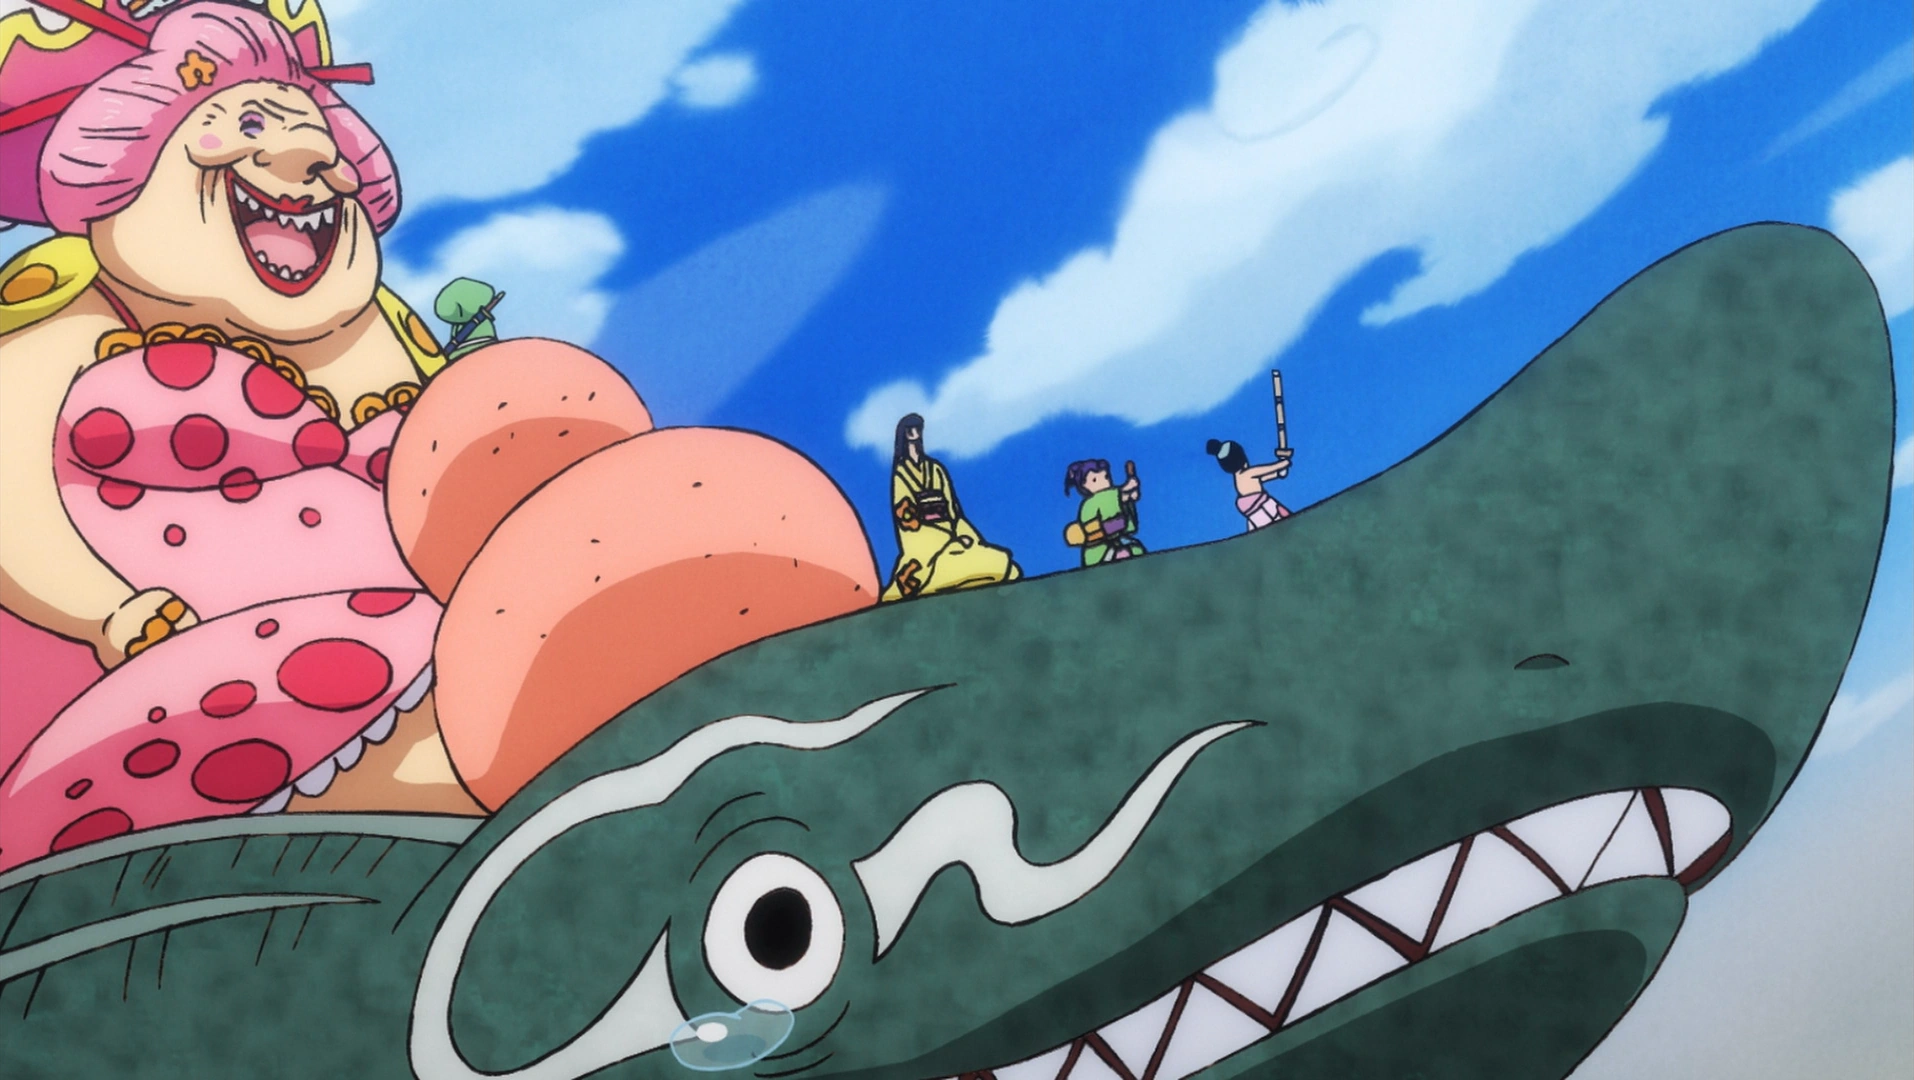
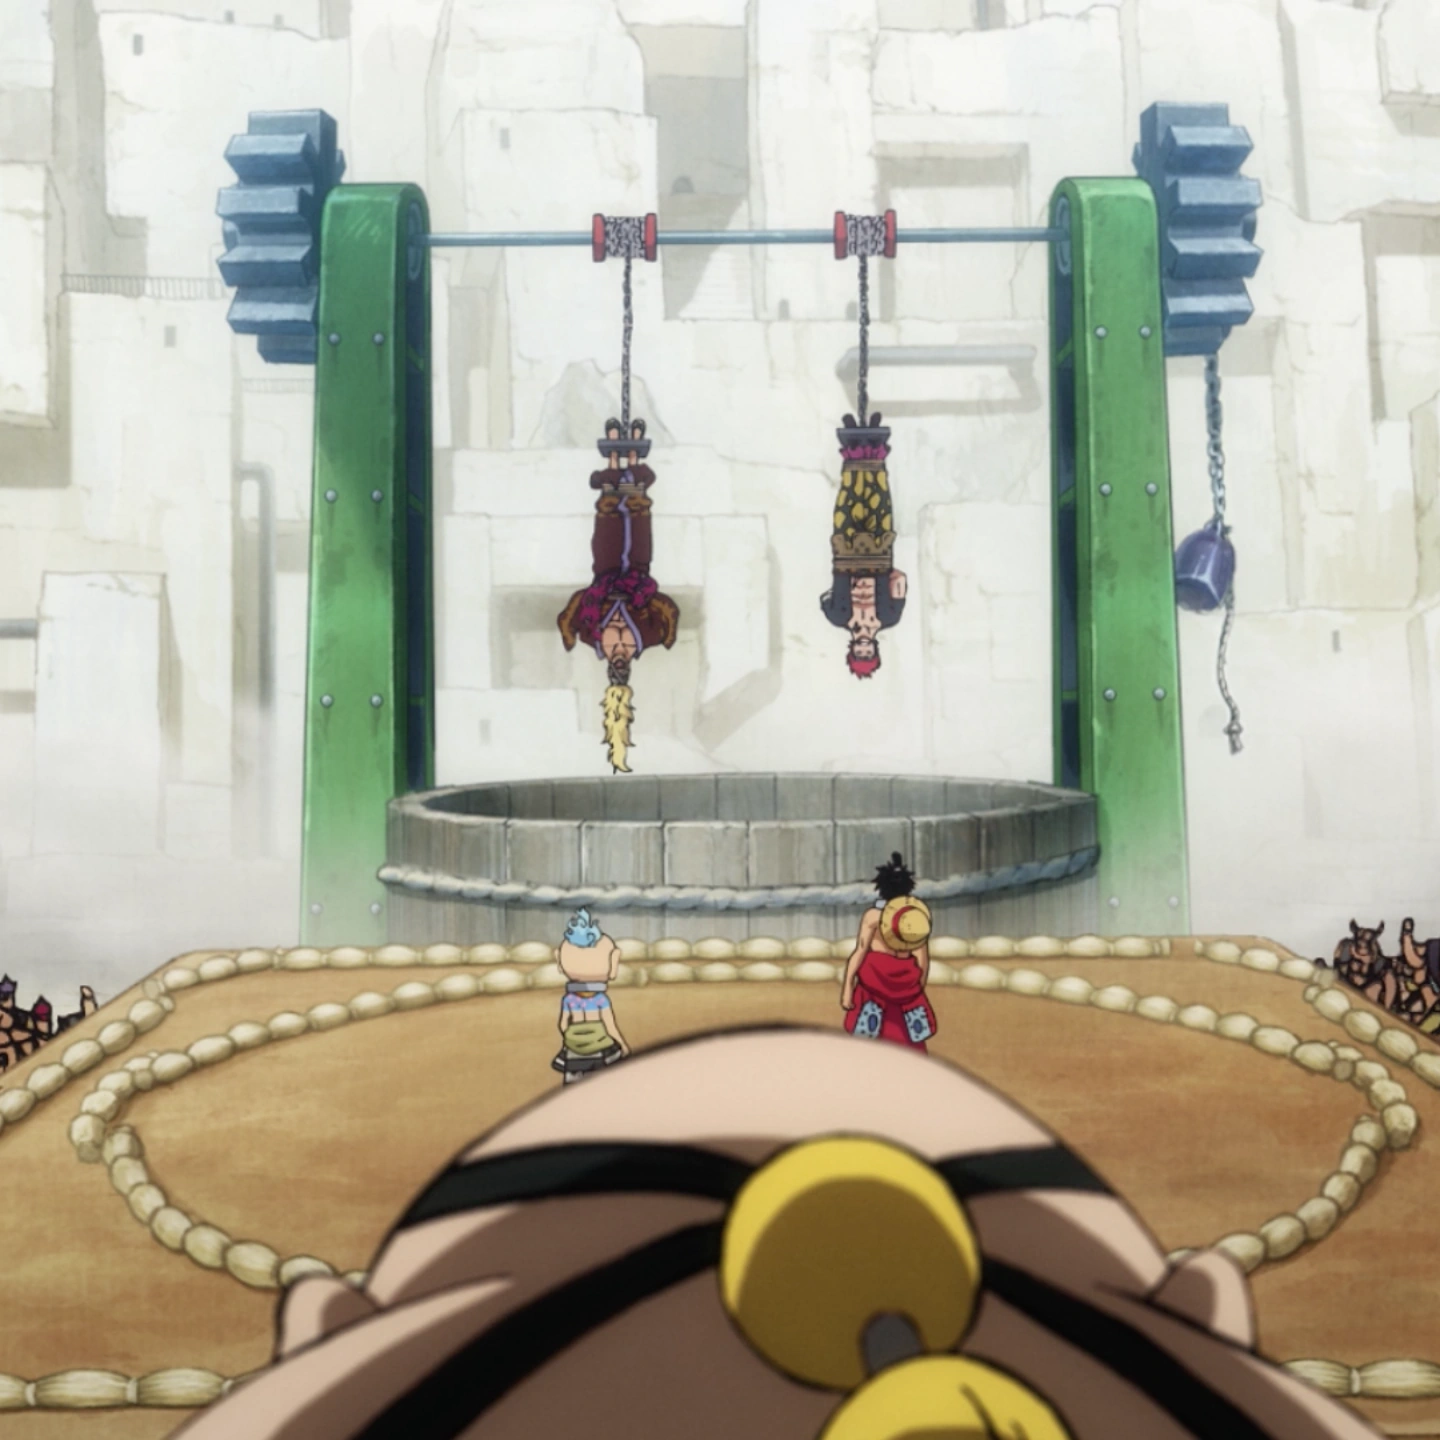
In the Prisoner Mines, two captured criminals were brought to the mines, one was revealed to be Kid's crewmate and member of the Worst Generation, Killer, who became Kamazo, but was discarded by Orochi after a failed mission. The other was the former prisoner Eustass Kid, whom they encountered unexpectedly on their way back. Kid wondered why Killer was constantly laughing while he used to beat up everyone who mocked his laugh. Luffy was shocked to hear that it was Killer, and Hyogoro stated that Killer fell victim to a failed SMILE. Queen then subjugated Kid and Killer to water torture, saying they would drown until Luffy dies. Luffy then tried to punch Queen, but Queen easily blocked his attack. Shortly after, a loud noise could be heard from outside the mines. Queen was then told by his subordinates that they lost communication with all guards outside the mines as Big Mom, craving for oshiruko, arrived at the mines.[36]
Big Mom attacks Queen after he refuses to share his oshiruko
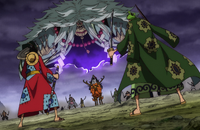
Big Mom then broke through all three gates, leaving everyone astonished when she appeared in the mines. Kikunojo and Chopper entered the Prisoner Mines while Momonosuke and Tama remained outside. When Big Mom asked for oshiruko, Queen was angered and transformed into a Brachiosaurus with the Ryu Ryu no Mi: Model Brachiosaurus, claiming he would not share anything. Big Mom grew impatient with him, leaping up and slaming his head into the ground.[37]
As Big Mom swung Queen around, Kid and Killer were saved from drowning when Queen crashed into the contraption that was holding them. Meanwhile, Caribou disabled Udon's communication network while Raizo worked to steal the keys to free Kawamatsu. After overpowering Queen, Big Mom discovered that Luffy ate the oshiruko, and she furiously attacked him. When Luffy and Hyogoro were pushed out of the ring, Luffy managed to remove the collars. Hyogoro then decided to remain in Big Mom's path, hoping that Luffy could become stronger by facing her.[38]
Luffy attempted to defend against Big Mom, but she instantly sent him and Hyogoro crashing into a wall. Both Luffy and Hyogoro survived, but Big Mom continued chasing Luffy through the Prisoner Mines. Queen recovered and came up with a plan to subdue Big Mom. When Luffy and Big Mom returned to where they started, Queen attacked her by slamming into her head in his brachiosaurus form. Big Mom then regained her memories but fell asleep immediately afterwards. Queen then quickly ordered his men to wrap the sleeping Big Mom in Seastone chains and inject her with heavy doses of anesthesia. He also had most of his subordinates accompany him and Big Mom on a ship heading for Onigashima, leaving Babanuki to lead the small remainder of the crew in restoring order to the prison. As Queen's ship set sail, Tama decided to go inside the prison along with Momonosuke before the emergency gates closed. With communications still cut off, Luffy decided to take down Babanuki and his forces and take over the prison.[39]

Luffy's party prepare to take over Udon.
Surrounded by the Beasts Pirates, Luffy used his attackers as training dummies for his Haki, causing Hyogoro to commend him for his spirit. Babanuki then ordered the prisoners to subdue Luffy. Surprised by the prisoners doing as they were told, Luffy tried to explain himself to them, only for the prisoners to tell him that fighting was meaningless as long as Kaido was in control of Wano. Meanwhile, Daifugo tested his Excite Bullets on a group of prisoners, causing one of them to have a fever and infect all those who made contact with him. Luffy pointed out that bullets would not work on him, but Daifugo revealed his plan to shoot any of the prisoners holding him and have them infect him. Seeing this, Kawamatsu yelled to Luffy to tell the prisoners the truth, revealing to the Beasts Pirates that he survived. Babanuki ordered his men to kill Kawamatsu, but Raizo left the Executive Tower and delivered the keys to his chains and his sword. Kawamatsu quickly repelled his attackers and reunited with Raizo and Kiku. As Kikunojo ordered the prisoners to release Luffy, Hyogoro approached the group and asked Raizo and Kikunojo to reveal themselves to give the prisoners hope, which they did. The group then prepared to take on the Beasts Pirates.[40]
The alliance assailed the Beasts Pirates, but in spite of this, the guards focused their Excite Bullets on the non-resisting prisoners, infecting them with the Mummy Virus and forcing them to turn on their saviors. When the prisoners started acting on Daifugo's orders and attempted to capture Luffy and his comrades, they also blamed them for their current predicament, which greatly annoyed Luffy. He then grabbed all the infected and became infected himself, before throwing them to the ground and berating them for giving into slavery, whilst boldly announcing that he would defeat Kaido. Babanuki, seeing that morale was going in Luffy's way, attempted to launch a concentrated plague shell with his elephant SMILE, but the Straw Hat captain predicted this and tied up the elephant's trunk, forcing the round to explode within Babanuki. With this, the prisoners decided to ally themselves with the resistance, defeating the guards, and taking over Udon.[41]
Reunions and Meetings: Alliances New and Old
Luffy offered Kid an alliance to fight Kaido, but Kid rejected the offer. Kid then left Udon with Killer, intending to find his other crewmates. The prisoners learned that Luffy is a pirate and became skeptical of allying with him, but Raizo and Hyogoro tried to vouch for Luffy. Inside a room, Chopper was working on treating Luffy's condition as Tama and Momonosuke stood nearby. When Momonosuke appeared before the prisoners, they bowed to him. Elsewhere in Kuri, Ashura showed Kin'emon and Inuarashi the graves of fallen comrades and recounted what happened ten years ago. He then decided to rejoin the Kozuki Family with his gang deciding to join as well. In a forest outside the capital, Zoro defeated some members of the Orochi Oniwabanshu. He then told Hiyori his plan to take back Shusui and avenge Yasuie. In the Flower Capital, Law had been captured and Hawkins intended to interrogate him.[42]
It was then revealed that Hawkins released Bepo, Shachi, and Penguin in exchange for Law, who told his crewmates not to tell anything to Luffy or the others about his capture. In Ebisu Town, Bepo gave Yasuie's last message to Nami and she then departed with Franky and Kanjuro, who promised to give Yasuie a proper burial. Brook, Robin, and Usopp snuck out of the Flower Capital with Toko. Meanwhile, Ashura Doji showed Kine'mon and Inuarashi an abandoned port which contained dozens of ships. Kine'mon planned to have Franky repair them.[43]
Kaido and Big Mom clash
Big Mom was taken Onigashima, where she was watched by Jack, King, and Queen. Big Mom then told King she would forgive him if he joins her crew, as three races are still missing from Totto Land's population and he is a member of one of it, which is thought to be extinct. Kaido then arrived and ordered his underlings to remove her handcuffs. Big Mom then activated Napoleon, and the two Yonko engaged in a clash. During their fight, Queen tried to check on Udon. Babanuki, who was tamed by Tama, gave him a false report to prevent Queen from returning to Udon. Meanwhile, thanks to Chopper, Luffy and the other infected prisoners had been cured from the Mummy Virus. Hyogoro reunited with four of the Yakuza bosses who were still loyal to him and they left Udon to recruit the hidden resistance in Wano Country. Raizo informed Kine'mon about the events in Udon and the number of allies they gained. After discussing about their weapon shortage, Kine'mon departed for Amigasa Village.[43]
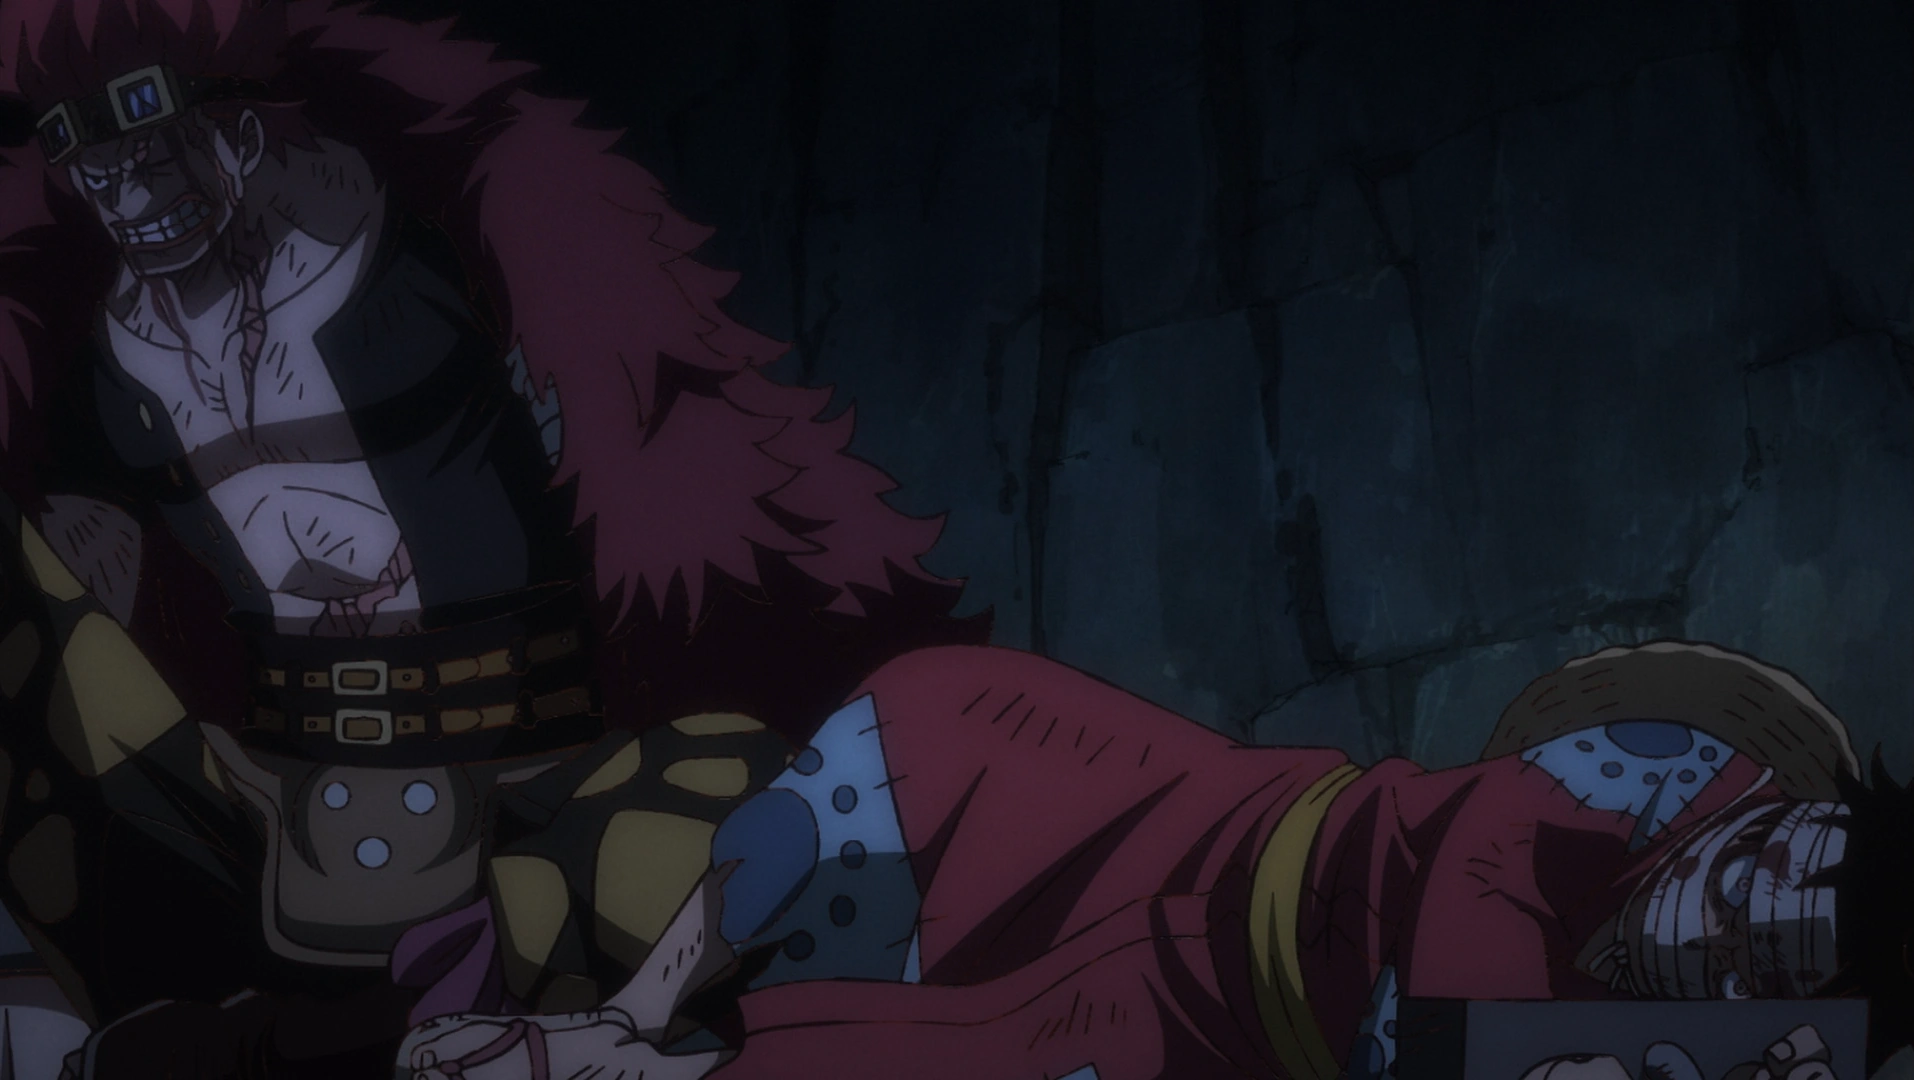
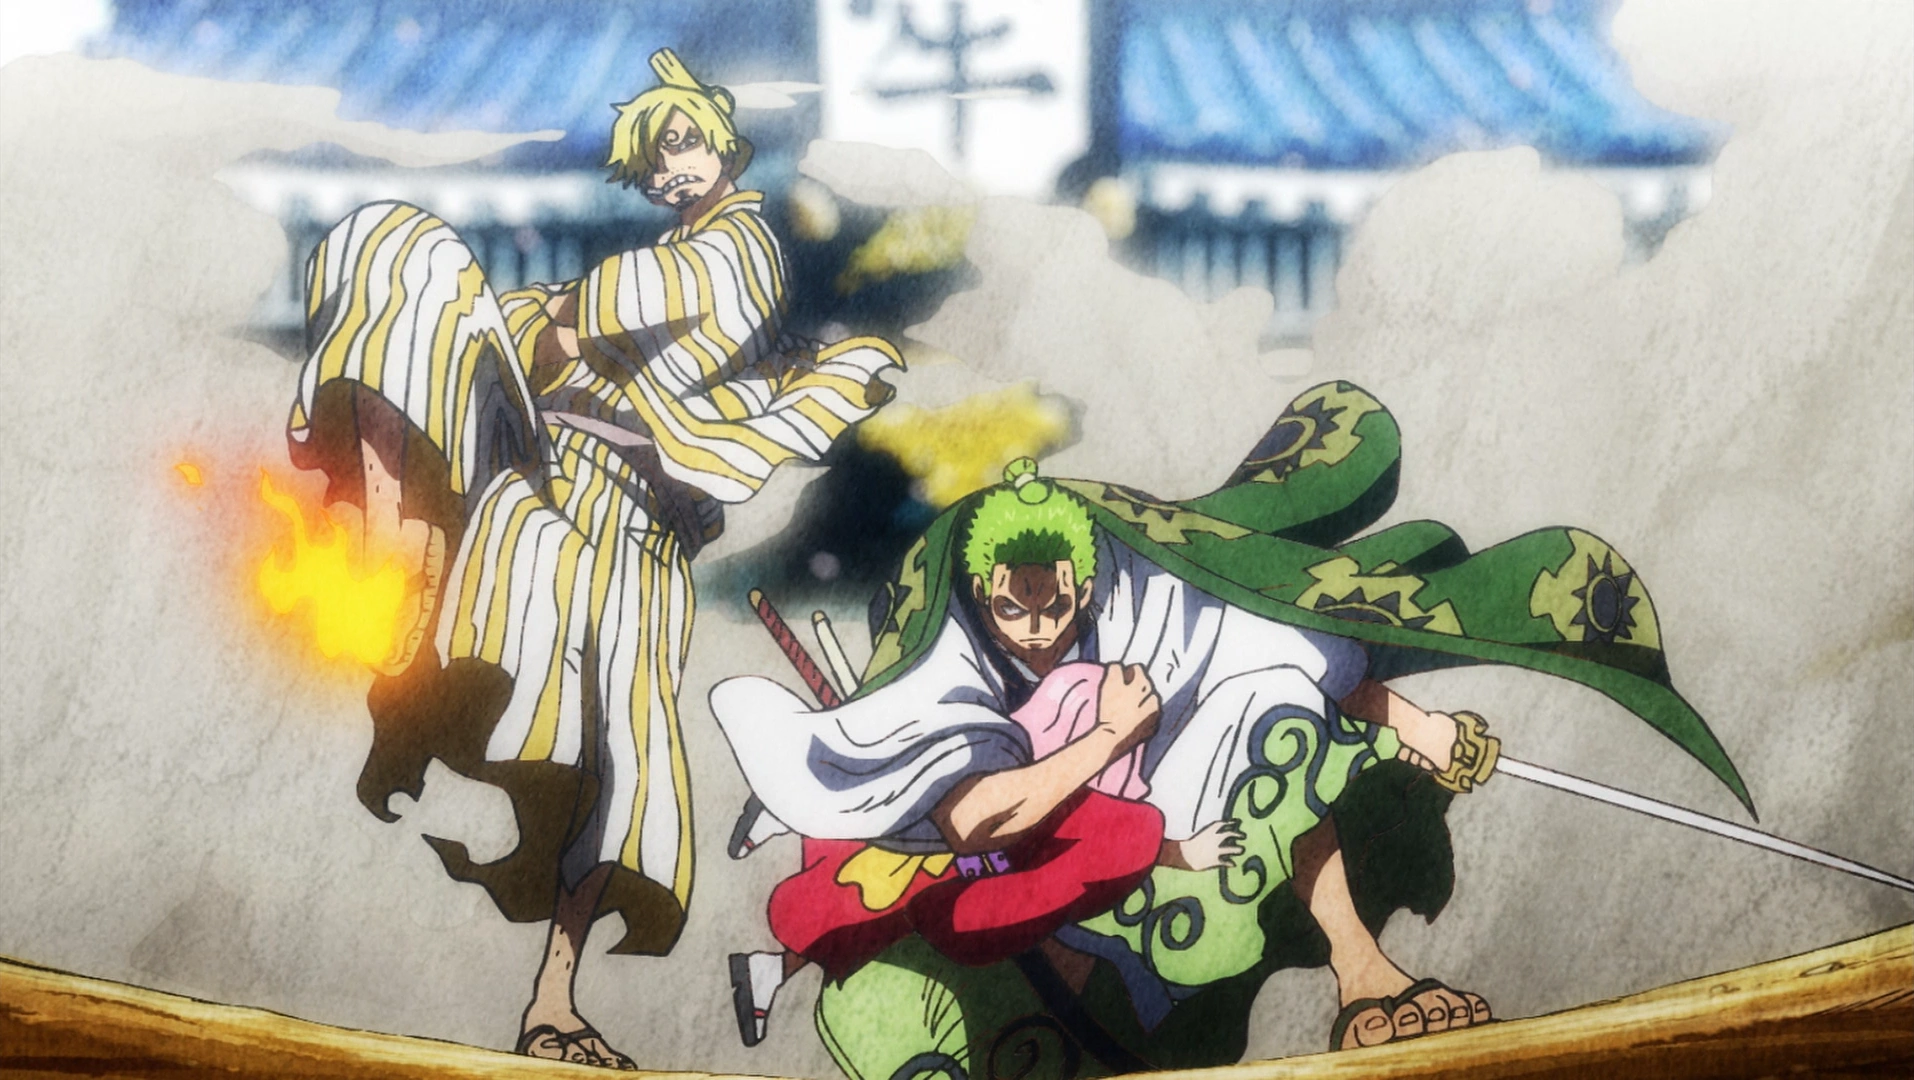
In Ringo, Zoro and Hiyori returned to Oihagi Bridge, where Gyukimaru and Zoro clashed again. Their fight was then interrupted by Kawamatsu, who then reunited with Hiyori. The reunion was interrupted by a group of Beasts Pirates who were after Gyukimaru, but they were easily defeated by Zoro and Kawamatsu. Gyukimaru fled the scene with tears of joy from learning that Kawamatsu survived.[44]
As Zoro chased after Gyukimaru, Kawamatsu told Hiyori of his ordeals after their separation. After Hiyori left him, Kawamatsu desperately searched for her but could not find her. He eventually went to the Ringo region, which was once ruled by Shimotsuki Ushimaru, and encountered Onimaru. When Kawamatsu was taking the swords from the graves in order to support the future rebellion, Onimaru tried to stop him but relented after seeing that he was sincere. The two then teamed up to protect the graves and steal weapons from grave robbers. One day, Kawamatsu went to the Flower Capital to gather food and made a blunder, resulting in him being captured. Back in the present, Kawamatsu and Hiyori caught up to Zoro, who revealed that Gyukimaru opened up a door before disappearing. Kawamatsu then went inside to a secret room filled with swords. Kawamatsu contacted Kin'emon to inform him of the weapon stash. Back outside, Gyukimaru stood behind a house and transformed into Onimaru before walking away, content. Meanwhile, Hiyori requested Zoro to return Shusui to Wano and offered her father's sword Enma in exchange.[45]
Ignoring Kawamatsu's objection to Hiyori's offer for Zoro to receive Enma, Hiyori told Zoro that her father used two swords in combat, and passed on Enma to her while he gave Ame no Habakiri to Momonosuke. Zoro agreed to Hiyori's offer, but wanted to visit Ryuma's grave later. Back in the Flower Capital, Law managed to subdue Hawkins and cut him to pieces after receiving help from an unknown individual. Hawkins then revealed what happened to the pirate alliance between him, Kid, and Apoo. Hawkins said that Apoo had set them up, having been working for Kaido since before the alliance's formation. After Kaido arrived at Kid's hideout, Hawkins surrendered to him while Kid and Killer tried to fight. When Hawkins wondered if Law had changed his mind, Law slashed him again before leaving the cell. At the Prisoner Mines, Luffy continued training to progress his Busoshoku Haki under Hyogoro's supervision. In Amigasa Village, Kin'emon contacted the various rebel squads and informed them of Yasuie's message. Key
Kaido and Big Mom form an alliance.
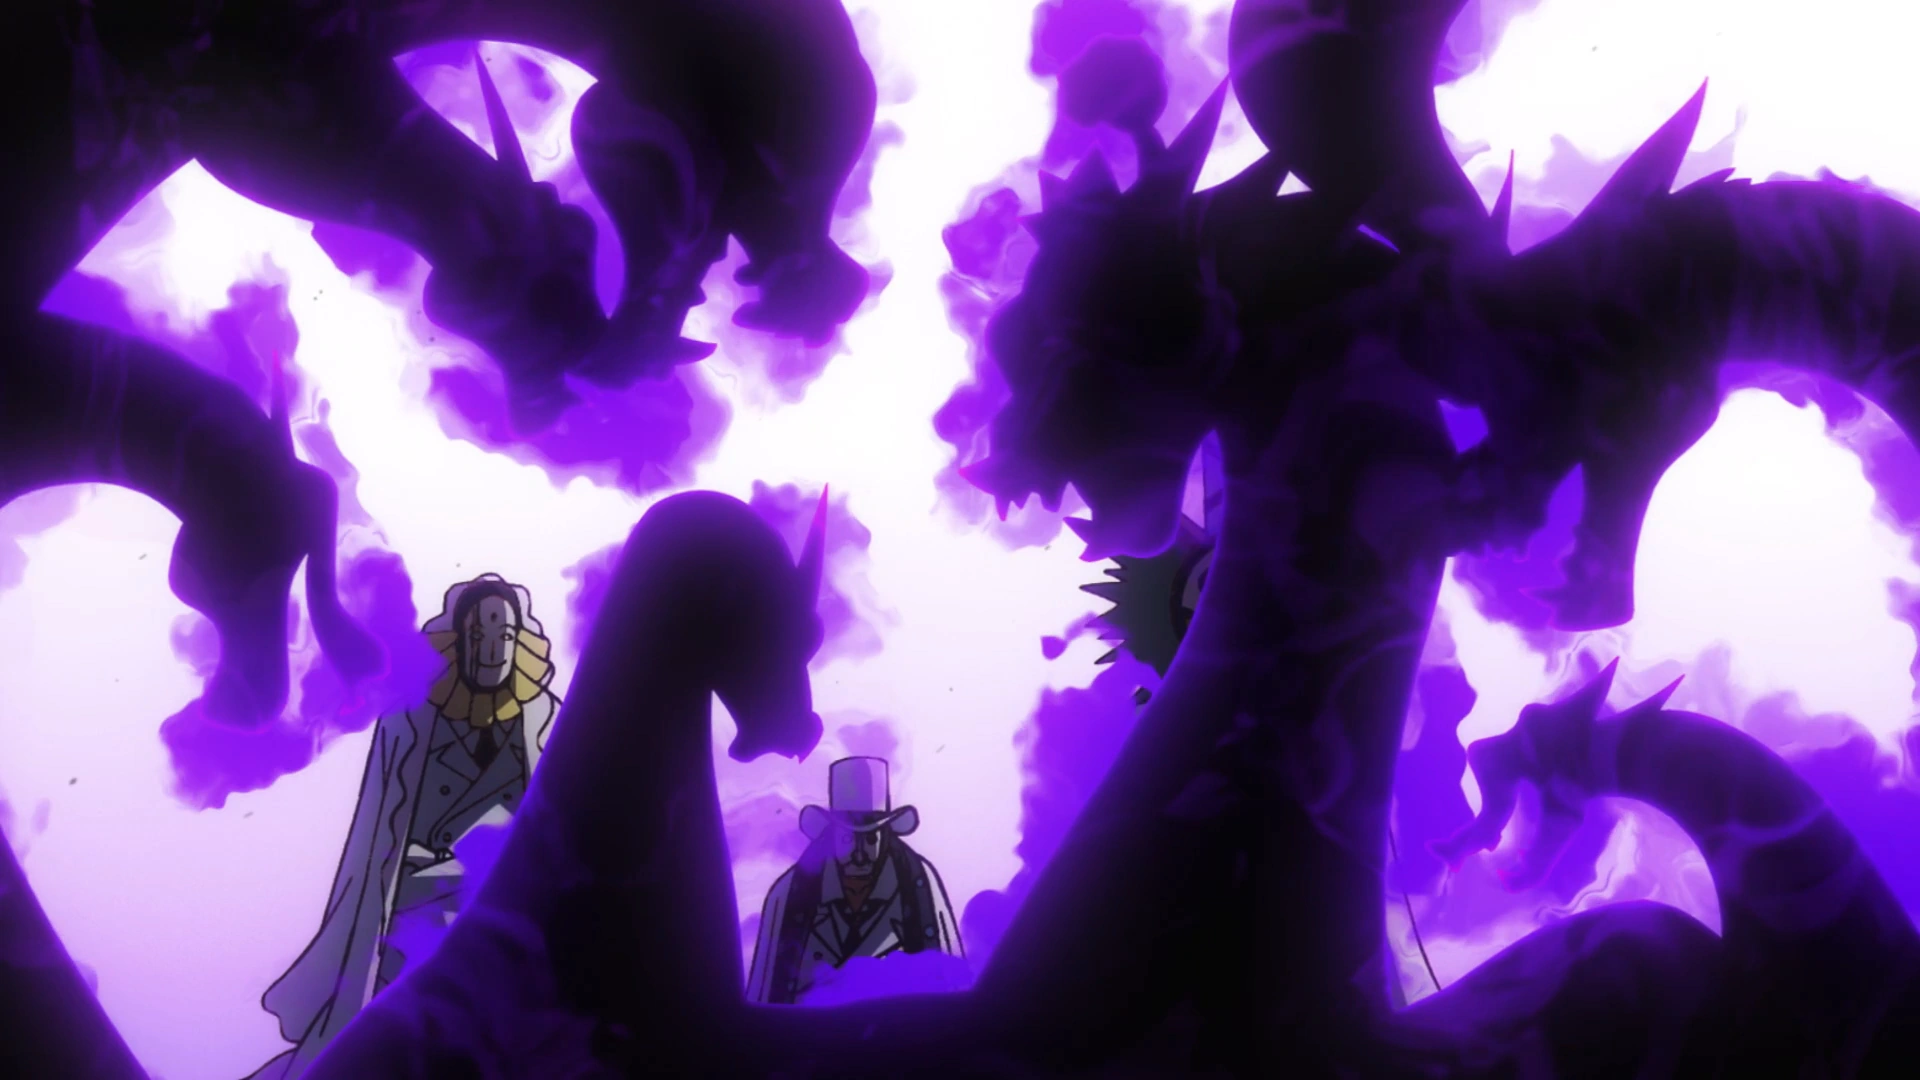
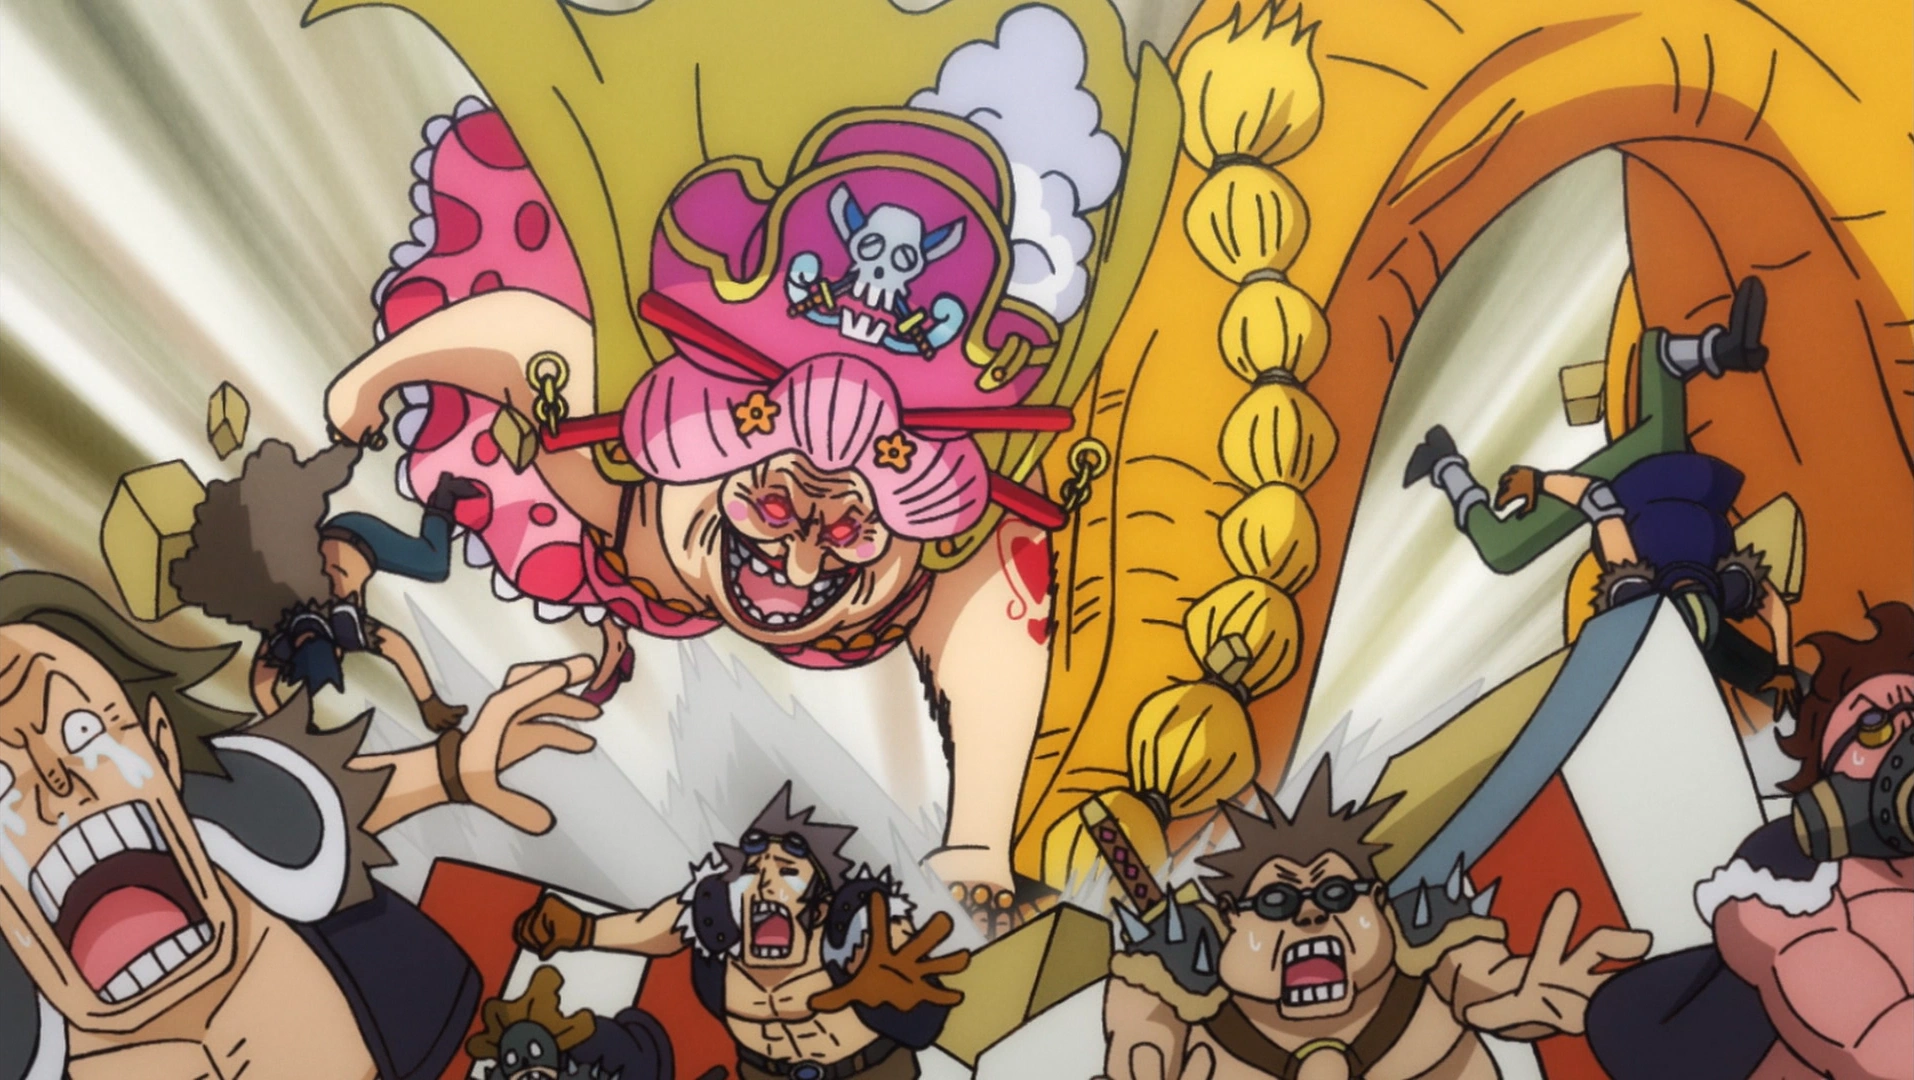
members of the alliance including Zoro, Sanji, Robin, Brook, Momonosuke, Kanjuro, Raizo, Inuarashi, Kikunojo, Kawamatsu, Ashura Doji, and Shinobu also gathered in the village for a strategy meeting. Apoo and a group called the Numbers also returned to Wano for the Fire Festival. At Onigashima, Kaido and Big Mom stopped their fight and formed an alliance, deciding to take over the world together before trying to kill each other again.[46]
Story Impact
- Several characters make their first appearances in the manga after the timeskip. The characters (in the order they were reintroduced) are: Marco,[1] Gecko Moria, Avalo Pizarro, Catarina Devon, and Marshall D. Teach.[17]
- Nekomamushi has found Marco, who works as a doctor at Whitebeard's home island.
- Because of the threat of Edward Weevil likely coming to the island Marco refuses to go to Wano Country, but gives Nekomamushi a message to pass on to Luffy.[1]
- It is revealed that Bakkin and Whitebeard used to be on the same ship some 40 years prior to the present time.[1]
- Basil Hawkins is revealed to be Kaido's subordinate.[3]
- Hitetsu reveals that Tama had met Ace four years ago.[3]
- Nidai Kitetsu is shown to be in the possession of Hitetsu and is taken by Luffy.[4]
- The Beasts Pirates have conquered Wano Country completely, turning most of it into wasteland.[4]
- The Kozuki Family once ruled Wano Country over 20 years ago.[6]
- Jack is revealed to be the ruler of the country's Kuri region. He was also saved from his shipwreck after his failed attack on Zou.[9]
- A prophecy from Oden's wife states that nine figures who worked under Oden would take Orochi's life and open the borders of Wano Country in 20 years.[11]
- Kin'emon revealed that Momonosuke, Kanjuro, Raizo, Kiku, and himself have time traveled 20 years from the past due to Kozuki Toki's Toki Toki no Mi.[11][12]
- Hiyori was not included in the plan to travel to the future with the others as part of a failsafe should this plan fail so the Kozuki bloodline would not die out. Instead, Kawamatsu helped her escape Oden Castle, and Hiyori would use the alias Komurasaki to hide her identity for 20 years until being "killed" by Kyoshiro at Orochi's banquet.[25][30][31]
- Hawkins reveals that Seastone originates in Wano Country.[16]
- It is revealed that Eustass Kid can use Haoshoku Haki and the late Oden possessed this power as well.[16]
- The world finds out that Gecko Moria is still alive. Perona decides to leave Kuraigana Island to rejoin him.[17]
- The Blackbeard Pirates killed Absalom and stole his Devil Fruit power, which is now used by Shiryu, and Blackbeard offers for Moria to join him.[17]
- The Revolutionaries clash with Fujitora and Ryokugyu on the fourth day of the Levely, with the outcome being currently unknown.[17]
- Caribou is a prisoner at Udon.[18]
- Eustass Kid reveals that he lost his left arm in a battle with the Red Hair Pirates.[20]
- Orochi has a meeting with CP-0, who wants to broker a new trade agreement with Wano Country due to the downfall of their intermediary Doflamingo at the hands of Luffy. In exchange, Orochi demands that CP-0 brings Vegapunk to Wano.[21]
- Sanji's Raid Suit, Stealth Black, is introduced and it grants him the power of invisibility.[22][23]
- Big Mom and Kaido are revealed to be former comrades.[26]
- A Road Poneglyph is hidden in Onigashima, base of the Beast Pirates.[26]
- Wano Country is revealed to use their own kind of Den Den Mushi, which is called Tanishi.[26]
- More information about Haki is revealed.
- Devil Fruit users can't use Haki while in contact with Seastone.[27]
- An advanced application of Busoshoku Haki allows the user to emit the armament a short distance and attack the opponent's body from within.[29][39]
- Luffy has awakened the advanced version of this Haki. It is revealed that Luffy has gained a higher version of advanced Busoshoku Haki, where the user's Haki can reach inside the opponent's body and destroy it from the inside.[39]
- According to Hyogoro, Haki is a concept used by foreigners outside Wano while within the country, Haki is referred simply as Ryuo, the will of a samurai.[31][32]
- Wano Country was once known as the country of gold and was targeted by pirates and nobles who wanted to bring it under their control. This ended when Ryuma slayed a dragon.[29]
- Gyukimaru states that Shusui turned into a black blade after Ryuma's many battles.[29]
- More information on the SMILE fruits is revealed.
- There is only a 10% success rate to obtain an ability after eating a SMILE fruit. Those who did not obtain an ability will lose the expressions of sorrow and anger and can only smile.[35]
- Just like with Devil Fruits, the SMILE fruits take away a user's ability to swim.[35]
- Even after bitten, the fruits still retain their side effects.[35]
- Killer's fate after the encounter with Kaido has been revealed.[36]
- Kid states that his alliance with Hawkins and Apoo is over due to their betrayal, and due to that, along with the tragic fate that befell Killer, he will never trust anybody outside his crew again.[42]
- It is revealed that Apoo had been working for Kaido since before the confrontation at Kid's hideout.[46]
- King is revealed to be from an unknown race that was thought to be extinct.[43]
- It is revealed that Oden's sword Enma was the only weapon that was able to injure Kaido.[45] It later falls into Zoro's possession after accepting Hiyori's offer to return Shusui in exchange.[46]
References
- ↑ 1.0 1.1 1.2 1.3 1.4 One Piece Manga and Anime — Vol. 90 Chapter 909 and Episodes 890–892.
- ↑ 2.0 2.1 One Piece Manga and Anime — Vol. 90 Chapter 910 and Episodes 891–892.
- ↑ 3.0 3.1 3.2 3.3 3.4 3.5 One Piece Manga and Anime — Vol. 91 Chapter 911 and Episodes 893–894.
- ↑ 4.0 4.1 4.2 4.3 4.4 One Piece Manga and Anime — Vol. 91 Chapter 912 and Episodes 894–897.
- ↑ 5.0 5.1 5.2 One Piece Manga and Anime — Vol. 91 Chapter 913 and Episode 898.
- ↑ 6.0 6.1 6.2 6.3 One Piece Manga — Vol. 91 Chapter 914.
- ↑ One Piece Manga — Vol. 91 Chapter 915.
- ↑ One Piece Manga — Vol. 91 Chapter 916.
- ↑ 9.0 9.1 9.2 One Piece Manga — Vol. 91 Chapter 917.
- ↑ 10.0 10.1 One Piece Manga — Vol. 91 Chapter 918.
- ↑ 11.0 11.1 11.2 11.3 One Piece Manga — Vol. 91 Chapter 919.
- ↑ 12.0 12.1 12.2 One Piece Manga — Vol. 91 Chapter 920.
- ↑ 13.0 13.1 One Piece Manga — Vol. 91 Chapter 921.
- ↑ One Piece Manga — Vol. 92 Chapter 922.
- ↑ One Piece Manga — Vol. 92 Chapter 923.
- ↑ 16.0 16.1 16.2 16.3 One Piece Manga — Vol. 92 Chapter 924.
- ↑ 17.0 17.1 17.2 17.3 17.4 17.5 One Piece Manga — Vol. 92 Chapter 925.
- ↑ 18.0 18.1 18.2 One Piece Manga — Vol. 92 Chapter 926.
- ↑ 19.0 19.1 One Piece Manga — Vol. 92 Chapter 927.
- ↑ 20.0 20.1 20.2 One Piece Manga — Vol. 92 Chapter 928.
- ↑ 21.0 21.1 21.2 21.3 One Piece Manga — Vol. 92 Chapter 929.
- ↑ 22.0 22.1 22.2 22.3 One Piece Manga — Vol. 92 Chapter 930.
- ↑ 23.0 23.1 23.2 One Piece Manga — Vol. 92 Chapter 931.
- ↑ One Piece Manga — Vol. 93 Chapter 932.
- ↑ 25.0 25.1 25.2 One Piece Manga — Vol. 93 Chapter 933.
- ↑ 26.0 26.1 26.2 26.3 26.4 One Piece Manga — Vol. 93 Chapter 934.
- ↑ 27.0 27.1 27.2 27.3 One Piece Manga — Vol. 93 Chapter 935.
- ↑ 28.0 28.1 28.2 One Piece Manga — Vol. 93 Chapter 936.
- ↑ 29.0 29.1 29.2 29.3 One Piece Manga — Vol. 93 Chapter 937.
- ↑ 30.0 30.1 30.2 One Piece Manga — Vol. 93 Chapter 938.
- ↑ 31.0 31.1 31.2 31.3 31.4 One Piece Manga — Vol. 93 Chapter 939.
- ↑ 32.0 32.1 32.2 One Piece Manga — Vol. 93 Chapter 940.
- ↑ One Piece Manga — Vol. 93 Chapter 941.
- ↑ One Piece Manga — Vol. 93 Chapter 942.
- ↑ 35.0 35.1 35.2 35.3 One Piece Manga — Vol. 94 Chapter 943.
- ↑ 36.0 36.1 36.2 One Piece Manga — Vol. 94 Chapter 944.
- ↑ One Piece Manga — Vol. 94 Chapter 945.
- ↑ One Piece Manga — Vol. 94 Chapter 946.
- ↑ 39.0 39.1 39.2 One Piece Manga — Vol. 94 Chapter 947.
- ↑ One Piece Manga — Vol. 94 Chapter 948.
- ↑ One Piece Manga — Vol. 94 Chapter 949.
- ↑ 42.0 42.1 One Piece Manga — Vol. 94 Chapter 950.
- ↑ 43.0 43.1 43.2 One Piece Manga — Vol. 94 Chapter 951.
- ↑ One Piece Manga — Vol. 94 Chapter 952.
- ↑ 45.0 45.1 One Piece Manga — Vol. 94 Chapter 953.
- ↑ 46.0 46.1 46.2 46.3 One Piece Manga — Vol. 95 Chapter 954.
Template:Yonko Navibox
| |||||||||||
| |||||||||||
| |||||||||||
| |||||||||||||
| |||||||||||||
| |||||||||||||
| |||||||||||||||||
| |||||||||||||||||
| |||||||||||||||||
| |||||||||||||||||
| |||||||||||||||||
| |||||||||||||||||
| |||||||||||||||||
| |||||||||||||||||
| |||||||||||||||||||||||||
| |||||||||||||||||||||||||
| |||||||||||||||||||||||||
| |||||||||||
| |||||||||||
| |||||||||||
| |||||||||||||||
| |||||||||||||||
| |||||||||||||||
| |||||||||||||||
| |||||||||||
| |||||||||||
| |||||||||||
| |||||||||||||
| |||||||||||||
| |||||||||||||
| |||||||||||||||||
| |||||||||||||||||
| |||||||||||||||||
| |||||||||||
| |||||||||||
| |||||||||||
| |||||||
| |||||||
| |||||||
| |||||||||
| |||||||||
| |||||||||
| |||||||||
| |||||||||||||||
| |||||||||||||||
| |||||||||||||||
| |||||||||||||||||||
| |||||||||||||||||||
| |||||||||||||||||||
| |||||||||||
| |||||||||||
| |||||||||||