The Wano Country Arc (ワノ国編, Wano Kuni Hen?) is the thirty-first story arc in the series and the fourth in the Yonko Saga of One Piece, continuing from the Levely Arc.
The Ninja-Pirate-Mink-Samurai Alliance sets their plan in motion to recruit allies within Wano Country to liberate it from the control of the shogun Kurozumi Orochi and his allies, Kaido of the Yonko and his crew the Beasts Pirates. Meanwhile, the Big Mom Pirates also head to Wano to get revenge on the Straw Hats for the previous events back on Totto Land.
Summary
First Act
Arriving at Wano: Remnants of a Land in Ruins
As the Levely took place, Nekomamushi and the Guardians came to an island in the New World. Nekomamushi went to a secret village behind a waterfall, where he found Marco healing the wounds of its citizens. Marco revealed that this place was not a part of the World Government due to being too poor to pay the Heavenly Tribute, and Whitebeard had built it up and maintained it as a sanctuary, with his crew now protecting it after his death. Marco then mentioned Edward Weevil, believing that the Shichibukai would go after this place in his search for Whitebeard's inheritance. Because of this, Marco decided to stay rather than go to Wano Country, and told Nekomamushi to give Luffy a message from him.[1]
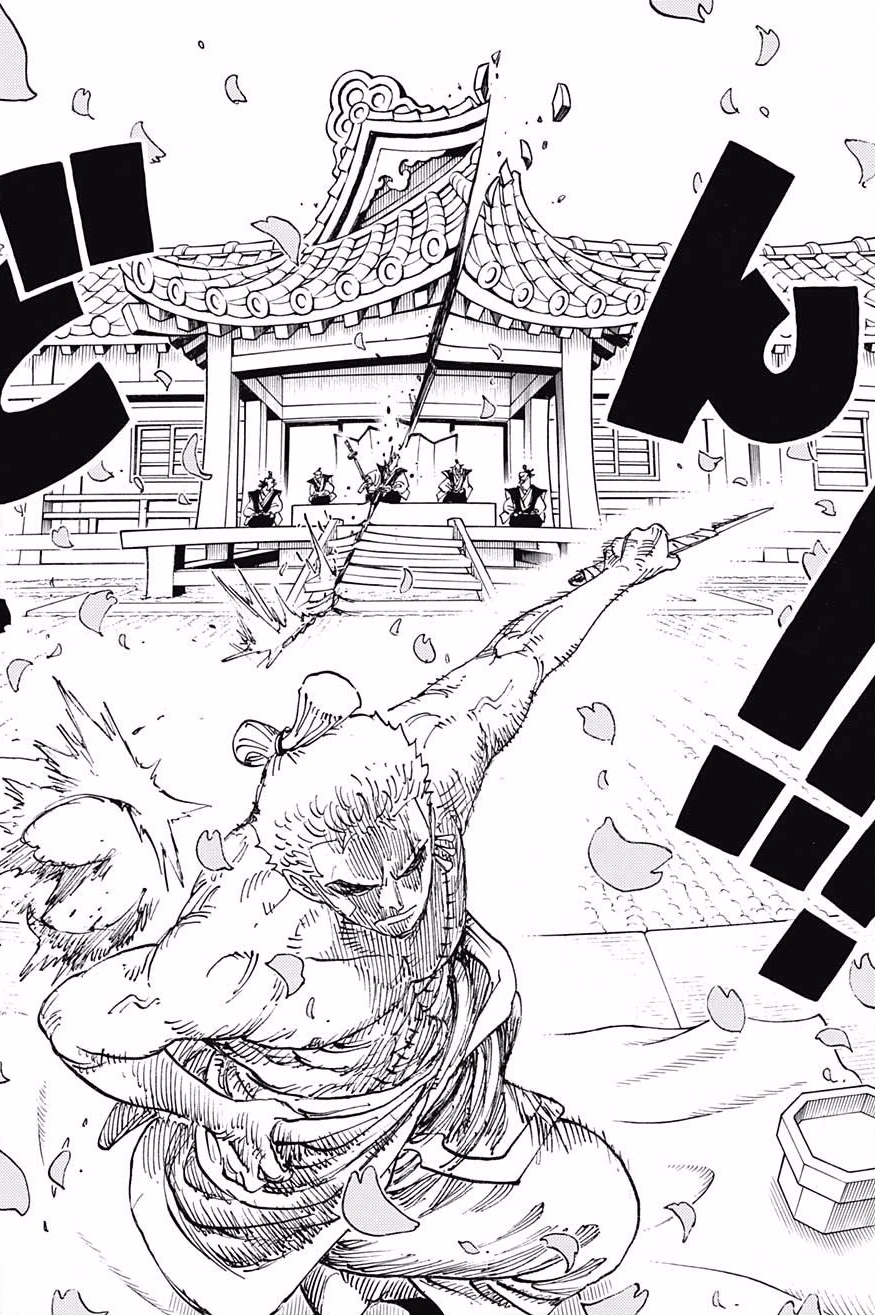
Zoro cuts down the magistrate after being sentenced to seppuku.
Meanwhile, Zoro's group reached Wano Country, and Kin'emon instructed the Straw Hats to blend in while they rallied people to their cause. If they laid a hand against the shogun Kurozumi Orochi or his subordinates, Kaido would hear about it. Franky, Usopp, and Nico Robin adopted new names and trades to blend in, but Zoro became a rōnin and was accused of cutting people down in the streets at night. He was caught and forced to commit seppuku, being also charged with grave robbing when the magistrate discovered Ryuma's Shusui in his possession. The magistrate took Shusui, and the executioner prepared to finish Zoro off once he committed seppuku. However, Zoro smelled blood on the magistrate and instead used the seppuku blade to attack him from a good distance away, before apologizing to Kin'emon.[1]
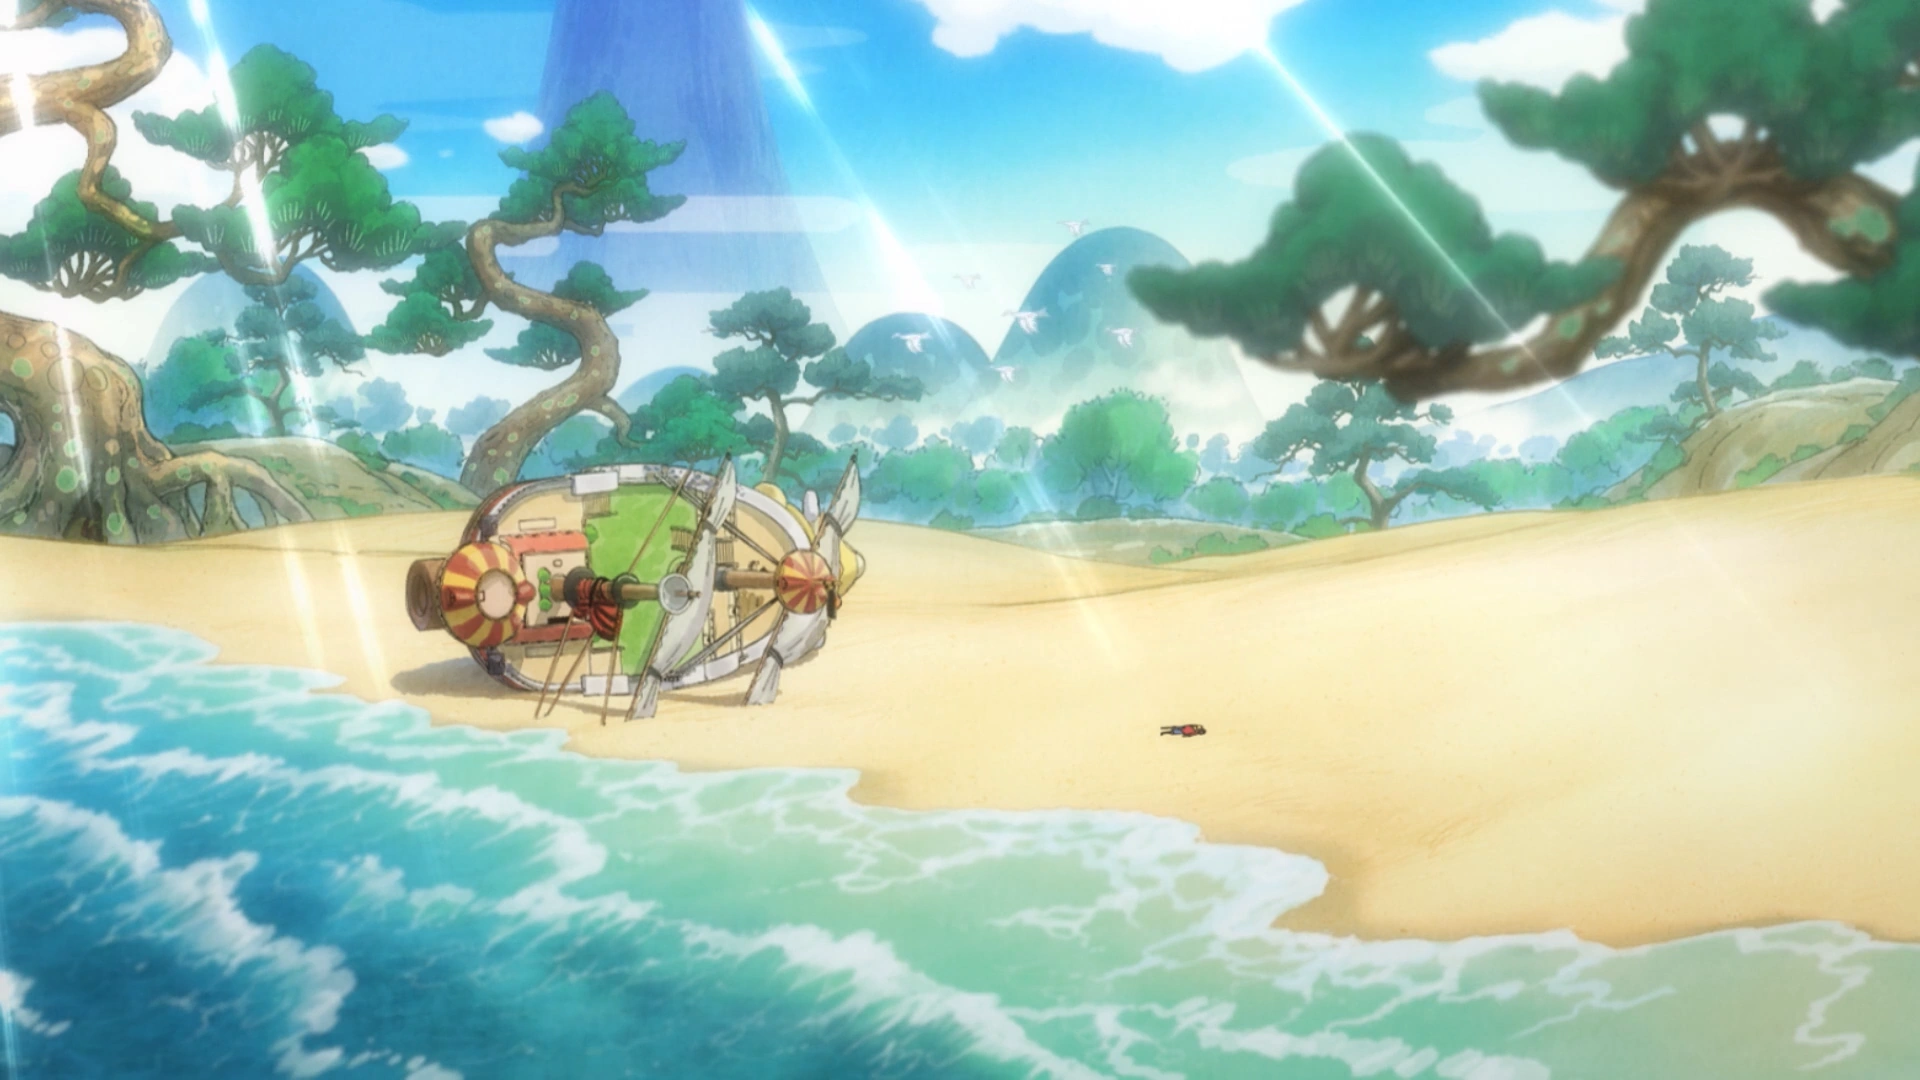
Luffy and the Sunny wash up on Wano.
Luffy's group was sailing when they read the news about the Levely, and they were excited to see photos of people that they knew. However, Chopper prevented Nami from reading an article about Kaido and Big Mom when he cut out a picture of Kureha. The crew was unable to contact the others, and as they approached a big storm, Nami remembered that Kin'emon had said that the weather was one of the barriers to entering Wano. An octopus then boarded their ship as they became surrounded by a school of giant koi, and they followed the koi through the current. They came to a waterfall which the koi were climbing, and Luffy grabbed onto some of them to pull the Sunny up. However, there was a whirlpool at the top,[2] and Sanji decided to fly everyone to land. Luffy had Sanji use him as a trampoline, but before he could escape, the octopus held him back and sent him into the whirlpool with the ship.[3]
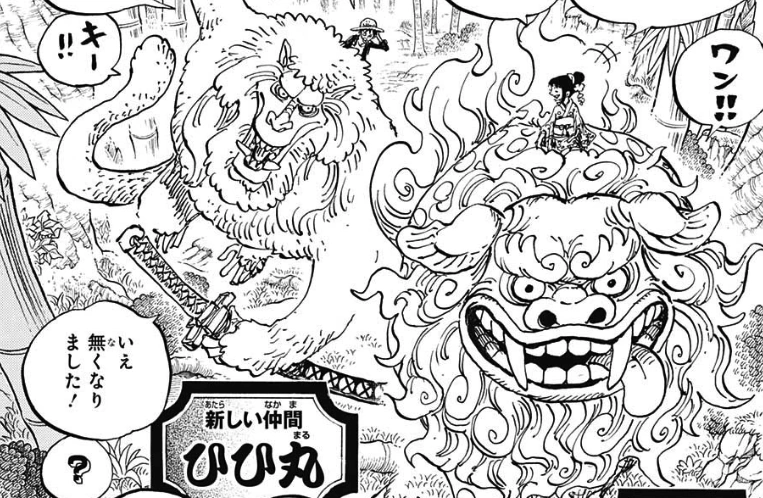
O-Tama takes Luffy to her house after he saves her from the Beasts Pirates.
Luffy woke up on the beach in the Kuri region of Wano Country after being washed ashore with the Sunny. He witnessed a baboon wielding a sword named Hihimaru attacking a komainu named Komachiyo,[2] while a couple of Beasts Pirates scouts were riding nearby. They had captured a young girl named Tama, who had mentioned the Kozuki Family in their presence, when they spotted Luffy and the Sunny. They tried to attack Luffy, only for the pirate to quickly dispatch them. One of the pirates ordered Hihimaru to attack Luffy, but the latter stopped the baboon with a glare. O-Tama then knocked out the enemy pirate, and the girl managed to tame Hihimaru by feeding him kibi-dango created from her own body. Tama explained to Luffy where he was and what had happened to her, and after taking the Sunny to a secure location, she offered to feed him as thanks. She took him to her master's house, where she made some rice dishes. After he ate, Luffy was confronted by Tama's master Tenguyama Hitetsu, who was angered that he ate the rice that she rarely got to have due to spending her life weaving kasas every day. Tama explained to Hitetsu that she gave Luffy the rice to thank him, but she then got sick due to having drank some river water that was contaminated by Kaido's factories. Hitetsu revealed that she had decided to continue living in Kuri to wait for Ace, who had promised to return there.[3]
Luffy comes to a massive wasteland created by Kaido's factories.
Meanwhile, Basil Hawkins, now a headliner in the Beasts Pirates, heard about the incident on the beach. Rather than report this to Kaido, he decided to deal with the situation himself.[3] Luffy told Tama that Ace was dead, and she was so shocked that she passed out. Hitetsu revealed that this was once a place called Amigasa Village, and around four years ago, it was going through a famine. When the people were on the verge of starving to death, Ace's ship washed up onshore, and they tied up him and his crew and stole their food. Ace befriended them and grew especially close to Tama, agreeing to take her out to sea when he returned. However, Amigasa Village was destroyed a few years later by Beasts Pirates Headliner X Drake. Luffy decided to take Tama to the nearest town to find a doctor for her, and wanted to take Hitetsu's cursed sword Nidai Kitetsu, whom his ancestor Kotetsu had forged, with him. Hitetsu protested due to fearing the sword's curse, but Luffy ran off with Tama. Komachiyo gave them a ride, and they came to a barren wasteland with one of Kaido's quarries and weapons factories in the distance. Luffy spotted several animals, but Tama told him that they were poisonous due to drinking the contaminated water. Luffy then saw Zoro saving a woman from two Beasts Pirates, and reunited with his crewmate. However, they were then confronted by Hawkins, and prepared to fight him.[4]
Hawkins facing Luffy and Zoro.
After a brief conversation, Hawkins' men quickly attacked Luffy and Zoro, initiating a battle. When Zoro tried attacking Hawkins with an air slash, the latter used his Devil Fruit power to redirect the damage to one of his men. After Hawkins conjured a giant straw entity, Komachiyo intervened and dragged the two Straw Hats away from the battle. Hawkins' straw figure pursued them until Zoro sliced it in two. After they got away from Hawkins, the woman that Zoro saved earlier introduced herself as Tsuru. Seeing Tama's critical condition, Tsuru asked Luffy and Zoro to bring Tama to her tea shop so she could make medicine for her. They later arrived at Okobore Town, where a tea house poster girl named Kiku was turning down a marriage proposal by the sumo wrestling yokozuna Urashima. Luffy and Zoro were then spotted by Bepo, Shachi, and Penguin, who were hiding on the top of a mountain.[5]
Tama recovers after being fed at Okobore Town.
Thanks to Tsuru's medicine, Tama was able to recover. After feeding Tama some delicious foods, Tsuru explained to Luffy and Zoro about the history of Okobore Town. A Gifter known as Batman then fired an arrow at Tsuru, but Zoro blocked it. Batman fired more arrows, and Zoro deflected them. During the confusion, another Gifter named Gazelleman abducted Tama. Luffy, Zoro, Kiku, and Komachiyo pursued the Gifter to the Bakura Town. Meanwhile, Bepo, Shachi, and Penguin informed Law of the situation. Alarmed, Law planned to stop Luffy and Zoro from causing trouble.[6] Tama was brought before the headliner Holdem, a lion SMILE user with a lion's head named Kamijiro on his waist. Holdem wanted to know how Tama had tamed Hihimaru, and Tama tried to play dumb, but Holdem had heard about her pulling food out of her cheek and decided to try it for himself.[7]

Luffy defeats the renowned yokozuna Urashima in a sumo wrestling match.
Meanwhile, Urashima was eating with the Gifter Mouseman in Bakura Town as he talked about his intention to make Kiku his wife. Mouseman told him that he should set an example by using his high status to take away everything Kiku held dear and force her to marry him, which pleased Urashima. He then took part in the sumo wrestling tournament, and was dominating every opponent he faced when Kiku, Luffy, and Zoro came into town. Urashima saw Kiku and had her brought before him, silencing the spectators who were disgusted at Kiku due to her low status. However, Kiku was disgusted by Urashima and cut off his topknot.[7] Urashima immediately became enraged and attempted to attack Kiku to preserve his honor, but Luffy stopped him. Luffy challenged Urashima to a sumo wrestling match, and dodged all of Urashima's attacks before activating Gear Third and hitting him with a massive open palm, sending him flying out of the ring and through several buildings.[8]
Luffy punches Holdem and frees Tama.
After finding out Luffy, Zoro, and Kiku's intentions to rescue Tama, the Gifters and samurai working under Holdem went on attack, but the trio easily overpowered them. Holdem then confronted Luffy with Tama in his lion's mouth, being annoyed that Luffy had sent Urashima crashing into his house and threatening to crush Tama with his lion's jaws if Luffy moved.[8] As Holdem's fellow headliner Speed arrived on the scene with a supply of food from Orochi's farm, Kiku warned Luffy that if he attacked Holdem, then Jack, who had been rescued after his defeat at Zou, would be called in to intervene. However, as Holdem decided to execute Kiku, Luffy attacked Kamijiro in the blink of an eye and freed Tama. After finding out that Holdem had used pliers to pull on Tama's cheek, Luffy turned around and struck Holdem with a powerful Red Hawk punch.[9]

Luffy and Zoro deliver a cart of clean food to the citizens of Okobore Town.
Meanwhile, Hawkins and his men headed into Bakura Town, and the Heart Pirates saw the chaos taking place as Bepo got sick from eating a poisoned fish.[8] Law arrived at Bakura Town and confronted Hawkins while hiding his face in order to stop his fellow Supernova.[9] Hawkins quickly deduced who Law was and used his abilities to avoid Law's cuts, and as they clashed, he exposed Law's identity and revealed he knew about his alliance with Luffy. Law then overheard a call to Hawkins revealing that Jack had heard about Holdem's defeat. Meanwhile, Luffy, Zoro, Tama, Kiku, and Komachiyo ran toward the town's entrance, taking Speed's food provisions cart with them. Tama managed to tame Speed with her Devil Fruit power due to Speed eating a horse SMILE, and Law boarded the provisions cart when it passed by him, expressing his rage at Zoro for getting them into deep trouble. Luffy, Zoro, and their allies went to Okobore Town, where they gave the citizens great quantities of clean food and water to consume.[10]
Ghosts of Wano Country: The Travails of the Kozuki Family
In the Flower Capital, students there were taught that the Kozuki Family had attempted to commit a great evil by opening the borders of Wano, but were all killed by Orochi 20 years ago. A money changer named Kyoshiro reflected that Kozuki Oden's wife had cursed Orochi to meet his downfall in 20 years, and Orochi was now living in fear since the stated time had passed.[11]
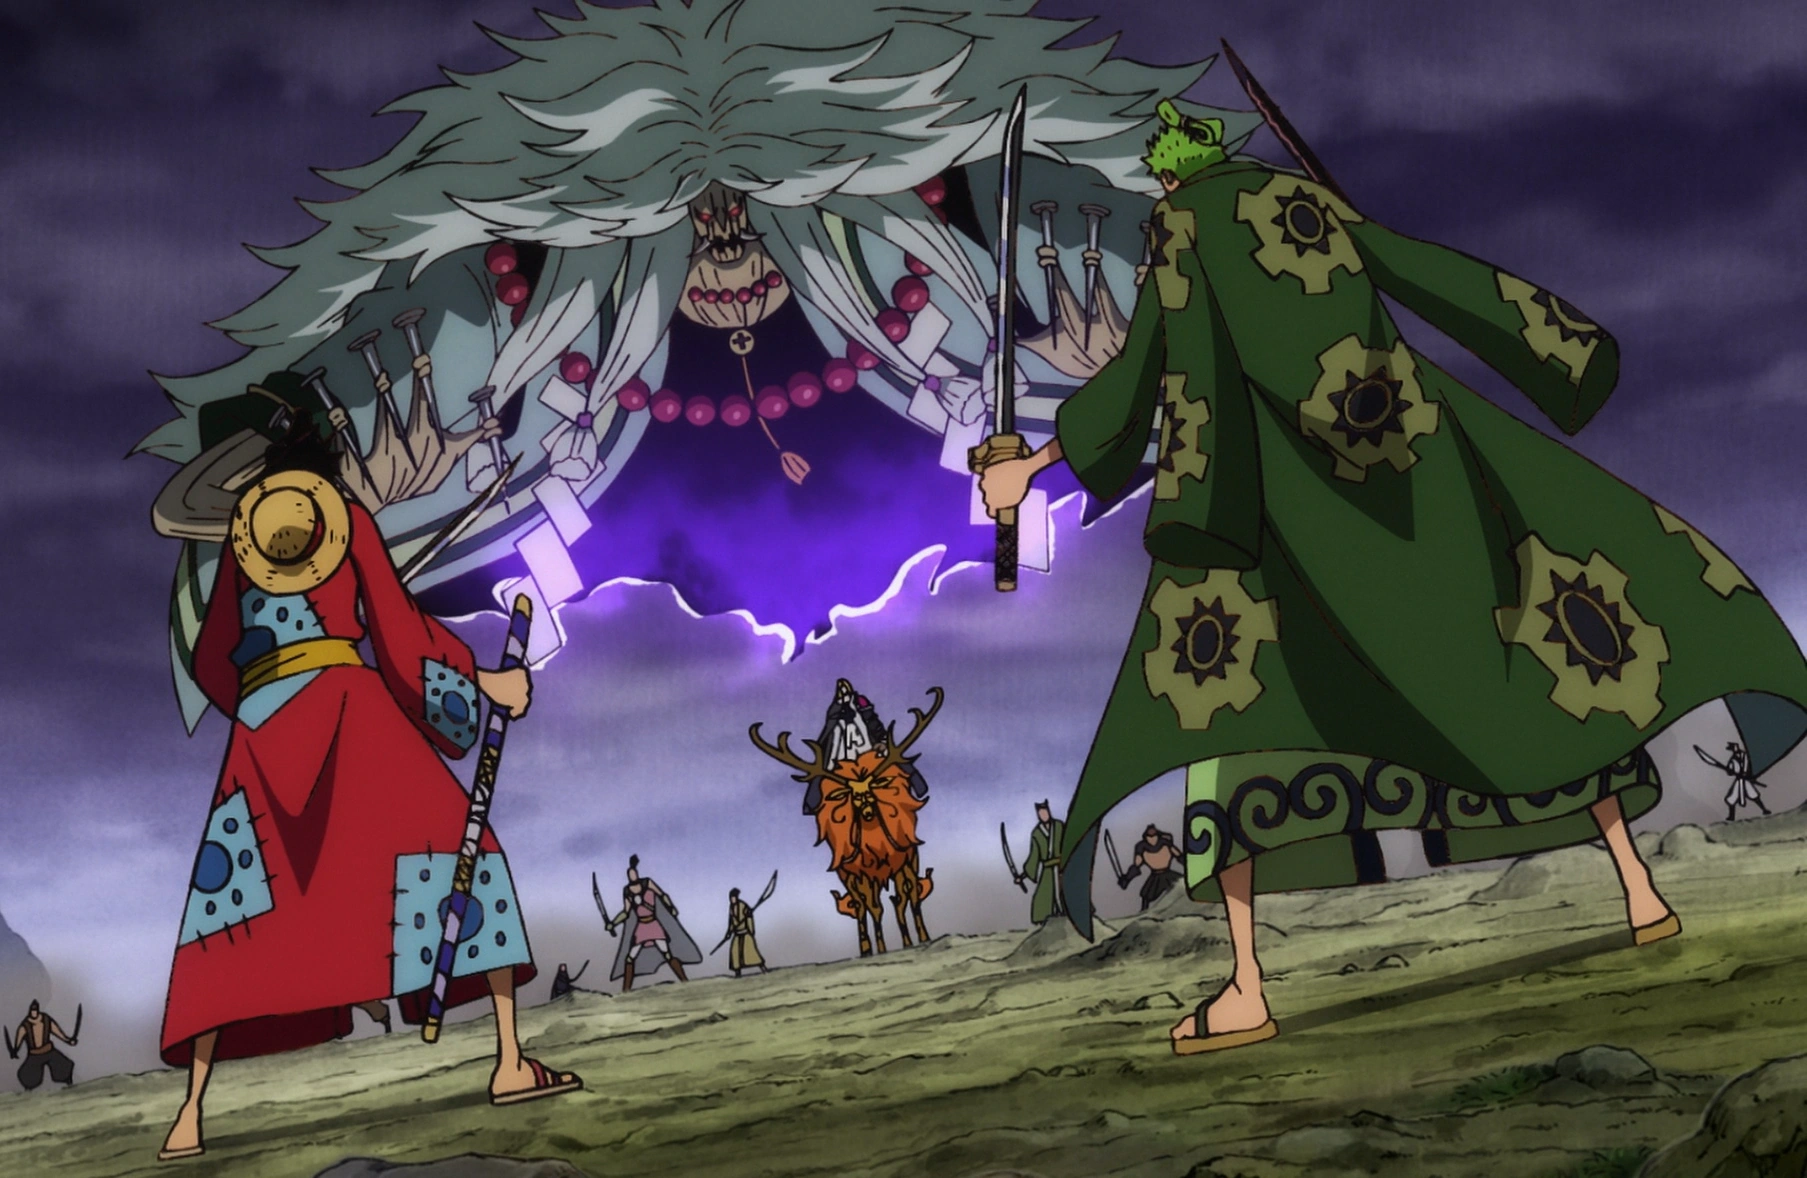
Law decided to take Luffy and Zoro to the ruins of Oden Castle atop a nearby mountain, and planned to show Luffy the "ghosts" of Wano Country.[10] Speed took Tama back to Hitetsu while Luffy, Zoro, Law, and Kiku rode Komachiyo up to the castle ruins, but Zoro went off somewhere along the way. When they reached the top of the mountain, Law showed Luffy the gravestones for the Kozuki Family, including Kin'emon, Momonosuke, Kanjuro, and Raizo. Luffy initially thought they were dead, but Kin'emon and Momonosuke then came out to meet him. Kiku embraced Kin'emon right as the group that had sailed to Wano with Luffy arrived at the ruins as well, and Law took them inside to talk.[11]

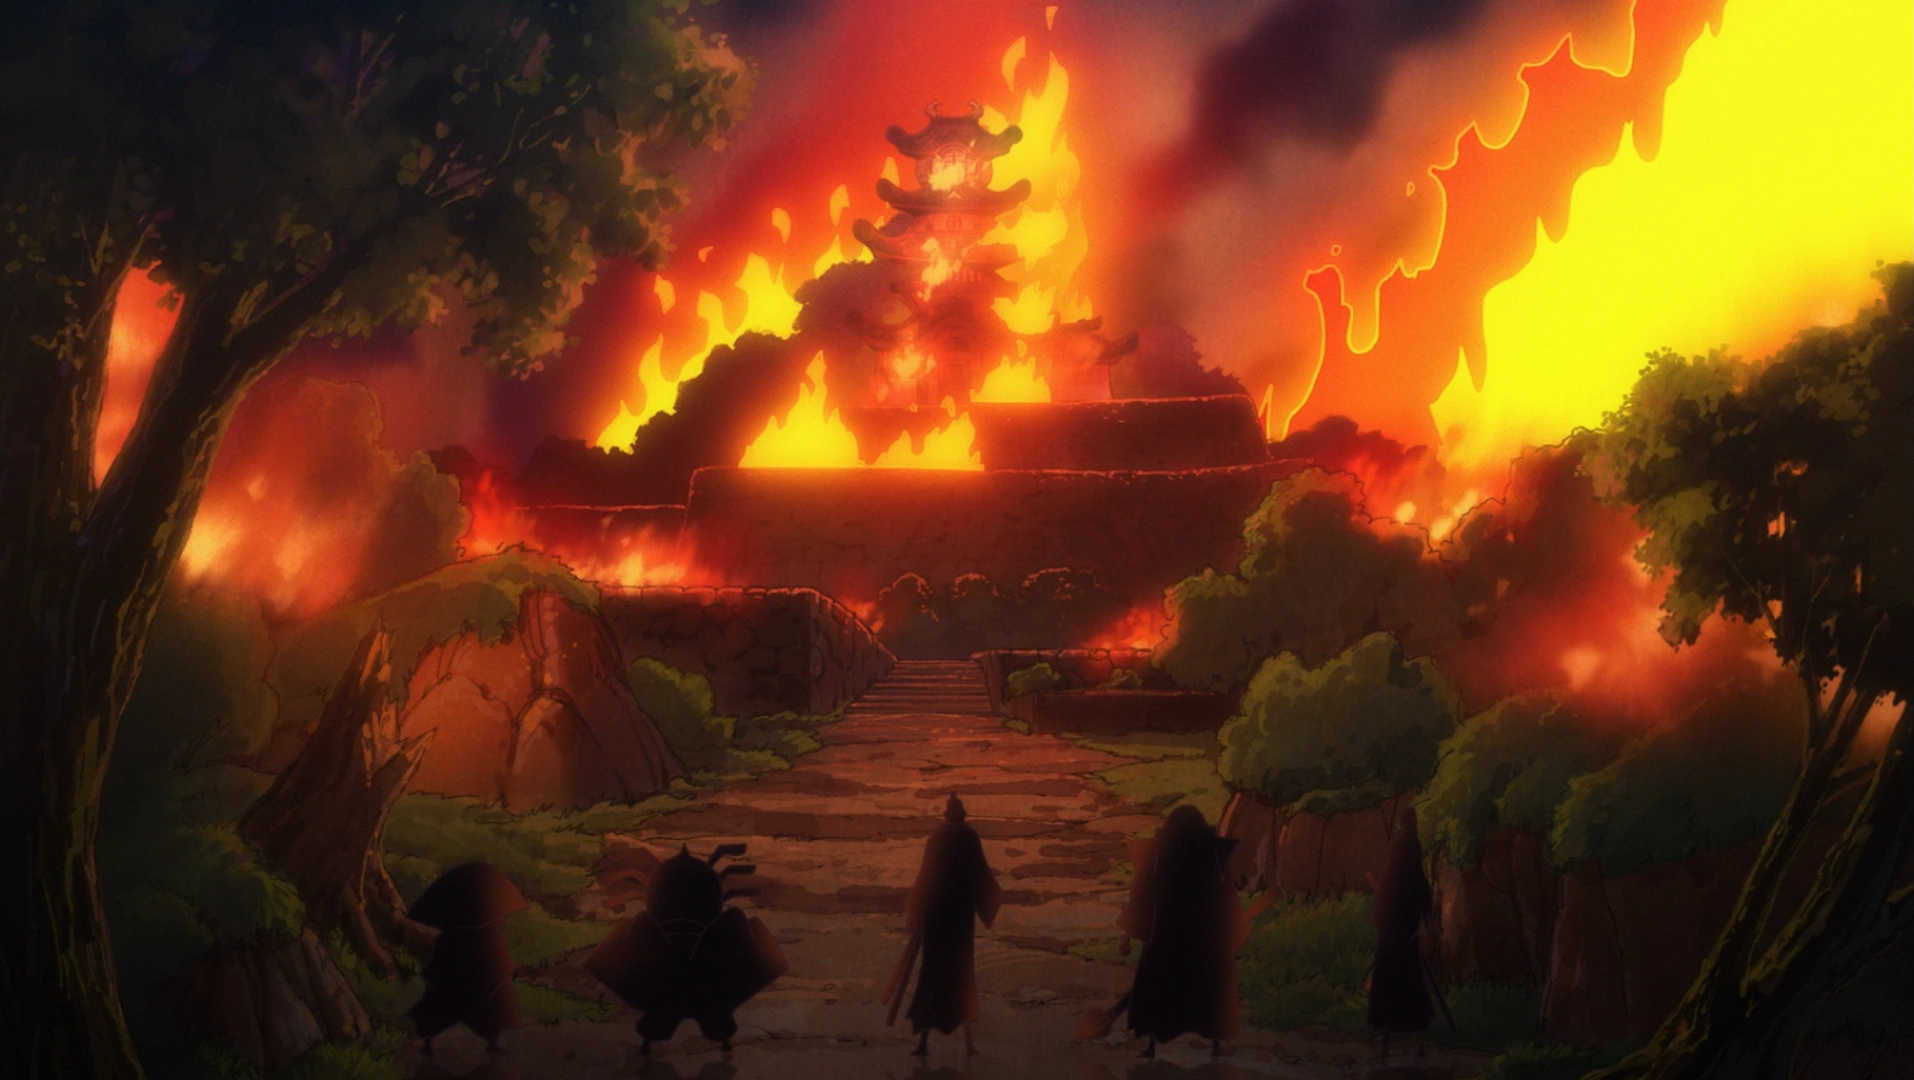
Kaido burning down Oden Castle 20 years ago.
There, Kin'emon revealed that he, Momonosuke, Kanjuro, and Raizo had escaped from Orochi's takeover by traveling 20 years forward in time.[11] Back then, Oden had been beloved among the residents of Kuri, as he had brought order to what was once a dangerous, lawless region. As he sat on a beach in the present, Inuarashi remembered when Oden had taken in him and Nekomamushi after the two of them had washed ashore and everyone else feared them. However, after Oden left Wano to sail with the Whitebeard Pirates and Roger Pirates and later returned, he was executed by Orochi. Kin'emon, Kanjuro, Raizo, Kiku, and another retainer saw this and attempted to return to Oden Castle, but Kaido had set it ablaze. They managed to find Oden's wife Kozuki Toki with Momonosuke and his sister Hiyori, and Toki used her Toki Toki no Mi abilities to send her son and retainers forward in time, while Toki chose to stay behind in the castle to die. Momonosuke and his retainers later found themselves in the present-day polluted Wano, but managed to find samurai who were still faithful to the Kozuki Family. They then went to sea to find allies, and with these allies now gathered, Kin'emon planned to stage a raid on Kaido's home island Onigashima on the night of the Fire Festival in two weeks.[12]
Kin'emon and Kiku explained about the Fire Festival and how the decisive battle would play out. Kin'emon then gave Luffy's group specific tasks to do, provided them new clothes, and summoned the kunoichi Shinobu to guide them. Meanwhile in Okobore Town, Shutenmaru and his gang were taking food from the citizens and they were soon confronted by Jack, who told Shutenmaru to become Kaido's subordinate. The thief responded by cutting Jack, initiating a fight. The battle was interrupted when Kaido, appearing in the form of a dragon, arrived. As Kaido ordered Jack to capture Law and Luffy, Law alerted the group in Oden Castle to his presence.[13]
A Terrifying Force: Kaido Appears
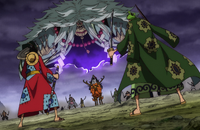
Kaido comes to Kuri and obliterates Oden Castle.
Since Kaido was only going after him and Luffy, and the incident in Bakura Town would not change that, Law decided to go and deal with Kaido without exposing the rest of the alliance's presence, although he had to chase after Luffy who had gone to protect Okobore Town. As he flew over Okobore Town, Kaido confronted Shutenmaru, revealing himself to be drunk in the process. Jack feared that Kaido would decimate Kuri in his drunken rampage, and Hawkins came in and stated that Law and Luffy were in the ruins of Oden Castle, not knowing that they were actually there. Kaido flew right toward Oden Castle and instantly destroyed it with a single blast of fiery breath as the terrified alliance attempted to flee from it. Enraged at seeing his friends being potentially hurt, Luffy jumped over Kaido and hit him on the head with Elephant Gun.[14]
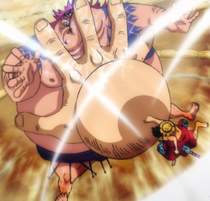
Kaido defeats Luffy.
After Kaido was sent crashing into the ground, Luffy rushed back to the mountain to check on his friends. He came across an injured Speed, who told him that Kaido attacked her and Tama. Law tried to tell Luffy to flee, but Luffy instead chose to fight Kaido. The Yonko tried to attack Luffy with his fire breath, but Luffy dodged and used Elephant Gatling. Kaido turned to his human form and Luffy activated Gear Fourth and assaulted Kaido with Kong Organ. Luffy's attacks were ineffective and Kaido struck Luffy with his club (Kanabō), rendering him unconscious with a single blow.[15] Kaido ordered his subordinates to throw Luffy in a prison. Law attempted to rescue Luffy but was shot with a Seastone nail by Hawkins and was forced to flee. As Kaido's subordinates moved toward Luffy, they were suddenly knocked out by his Haoshoku Haki, and Shutenmaru recognized it as an ability that Oden used. Kaido noted that Kid also used this Haki, and transformed back to his dragon form and flew off to get drunk again. In Okobore Town, Kin'emon spied on Tsuru tending to a citizen named Gorobe. He commented that his wife is still beautiful, but had no intention of reuniting with her until after Oden's wishes were fulfilled. He then spotted Shutenmaru riding off and recognized him as Ashura Doji.[16]
At the ruins of Oden's Castle, Sanji saved the ladies from Kaido's attack and the males were saved by Shinobu's Devil Fruit abilities. Kiku prepared to tell the alliance members about the current situation. Meanwhile, Inuarashi and the Musketeers discovered the injured Tama and headed into the forest to treat her immediately. The news about Luffy and Kaido's fight circulated through Wano, and Franky, Robin, Usopp, and Zoro were completely aghast when they heard it.[16]
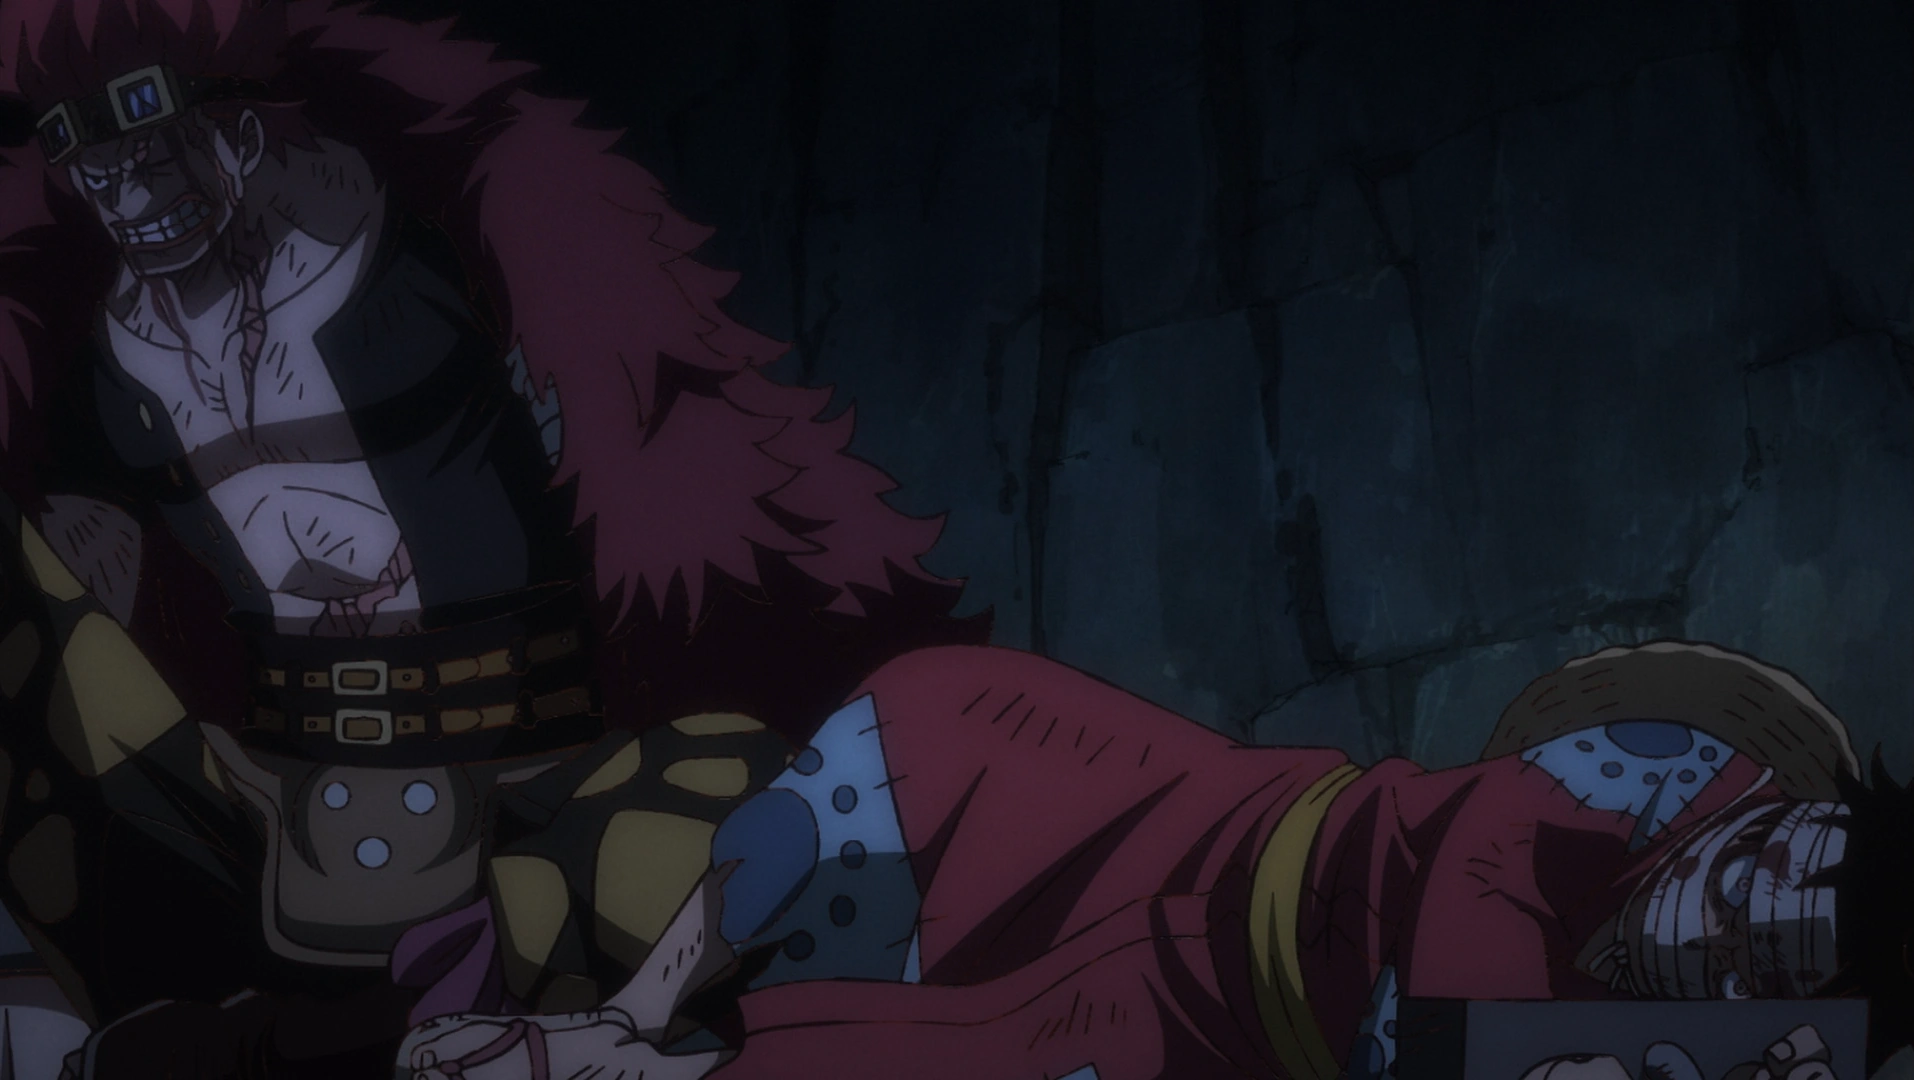

Luffy imprisoned alongside Kid.
Luffy was imprisoned in one of Kaido's factories in Wano Country's Udon region. One of the Beasts Pirates delivered a poisonous fish to a certain cell. Their orders were to give a poisonous and boneless fish to feed the prisoner inside, who seemed to be still alive in spite of the poison. The Beasts Pirates guards taunted Luffy and Luffy glared back at them. When one of them tried to attack Luffy with a sword, the mysterious prisoner spit out the fish skeleton at the guard and struck him in the neck. Luffy was thrown into a cell next to Kid and both of them swore revenge against Kaido, which caused them to notice each other as the curtains are drawn on the First Act of the Wano Country Arc.[16]
Second Act
Making News Inside and Outside Wano: The Alliance Gets to Work

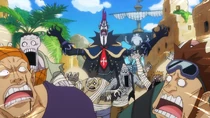
Moria attacks the Blackbeard Pirates to look for Absalom.
On Kuraigana Island, Perona was elated to see news of Gecko Moria being alive. She decided to go find him, which Mihawk stated might be for the best because of some developments at the Levely. Meanwhile, Moria invaded Pirate Island with his zombie army to confront Blackbeard and find the missing Absalom, who had come to the island a few days ago. However, Moria found out that Absalom had been killed after Catarina Devon impersonated him with the Inu Inu no Mi, Model: Kyubi no Kitsune, allowing Shiryu to use the Suke Suke no Mi power he had stolen from Absalom to attack Moria and his army. Blackbeard then called out to Moria from his hideout, inviting the former Shichibukai to join his crew and revealing recent earth-shaking events including the executives of the Revolutionary Army fighting Fujitora and Ryokugyu during the Levely and the Straw Hats' arrival at Wano Country.[17]
Back on Wano, Tama made a full recovery thanks to Chopper and the mink doctors. On Mt. Atamayama, Inuarashi and Shutenmaru briefly sparred before Kin'emon ended the fight. Shutenmaru refused to rejoin the Kozuki Family, saying the 20 years that they had abandoned Wano could never be filled. On Onigashima, Jack was reprimanded by his fellow All-Stars King and Queen for the low tribute amounts from Kuri.[17] A few days after Luffy's capture, the Straw Hats in the Flower Capital passed along the Kozuki Family's secret messages in the newspapers. Meanwhile, Shinobu trained Nami to be a ninja by having her spy on government officials, and Sanji opened a soba stand.[18]

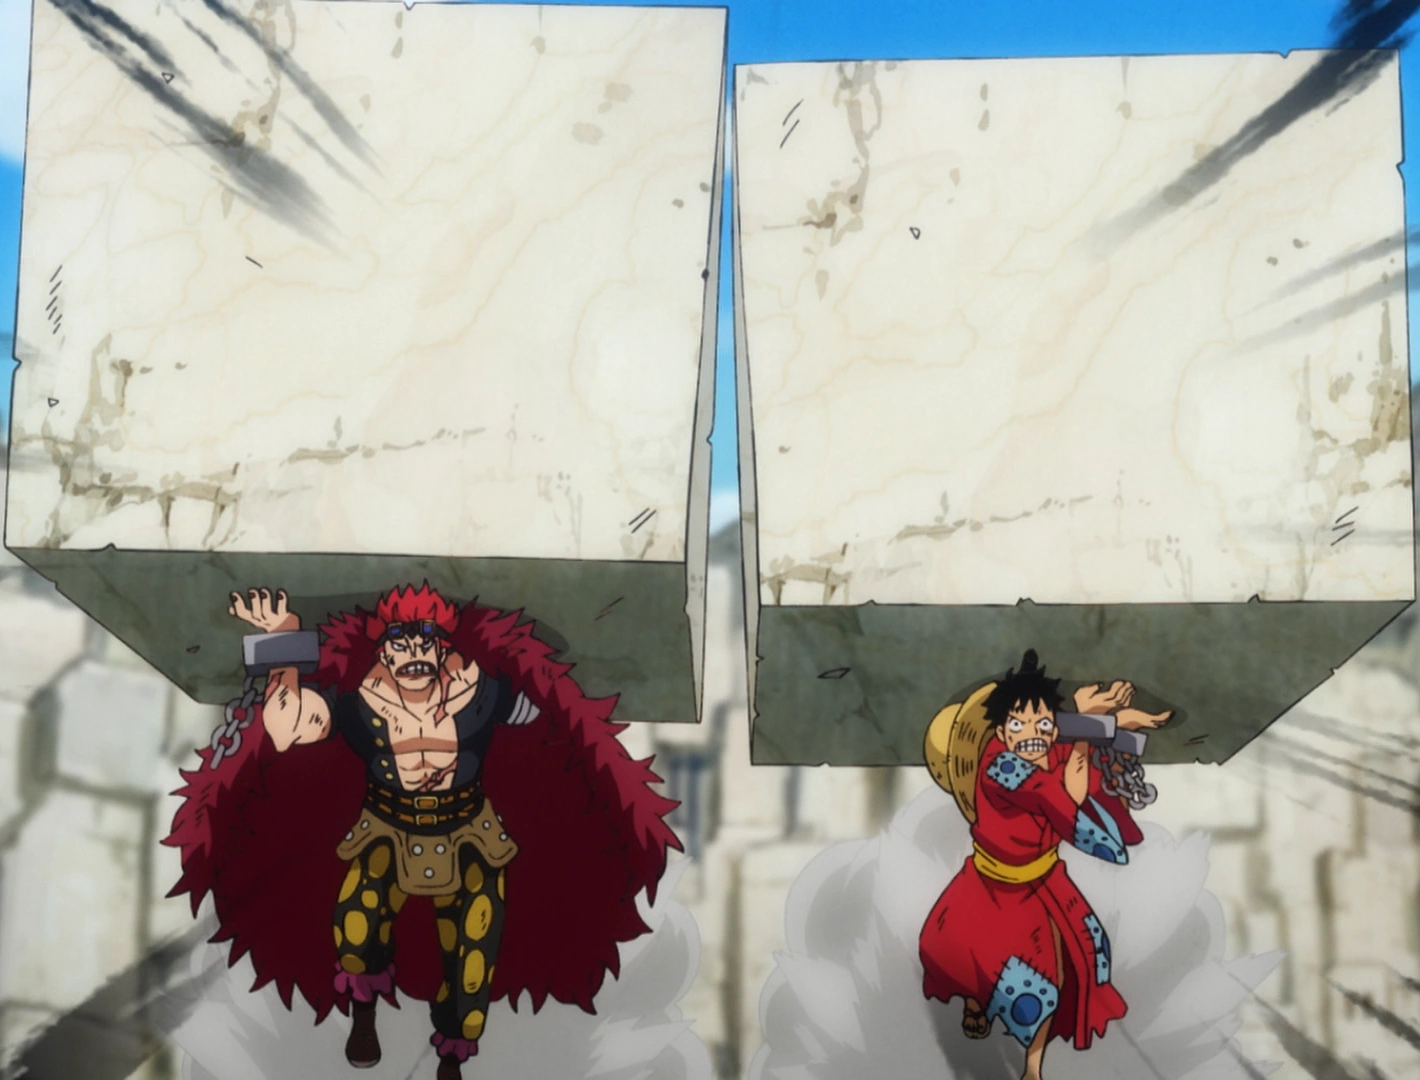
Luffy and Kid become standout workers in the Prisoner Mines.
In the Prisoner Mines, the prisoners were forced to work for their food and given inhuman workloads, but Luffy and Eustass Kid completed their tasks with ease despite having Seastone handcuffs on. This led to a rivalry forming between them as they each earned heaping bowls of kibi dango for their efforts. This attracted the ire of the deputy warden Dobon due to taking away from his food supply, and he attempted to discipline Luffy and Kid. However, they swiftly defeated him and were hailed as heroes by the other prisoners.[18]
In the Flower Capital, Usopp, Robin, and Franky reunited with Sanji at his soba stand, which was very popular. However, Sanji was confronted by three members of the Kyoshiro Family - Kaku, Kuni, and Suke - who attempted to get him to pay them to keep his stand running. When Sanji refused, they attacked him, but Kuni and Kaku were swiftly defeated by Sanji and Franky. Suke ran off to report this to Kyoshiro, who told him to contact Queen to send assassins to help him. After the skirmish, a girl named Toko came out to try Sanji's soba again after Kaku had destroyed her first bowl, and after eating, she ran off to join the courtesan Komurasaki, whom she worked for as a kamuro.[19]

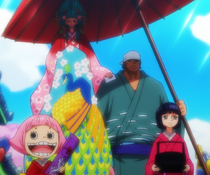
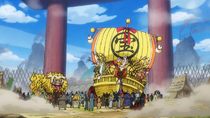
The oiran Komurasaki heads to Orochi's banquet.
Komurasaki was proceeding through the town to take part in a banquet held by Orochi, and in his palace, Orochi expressed his desire to make the courtesan his.[19] Three men approached Komurasaki and attempted to kill her, but were quickly dispatched by a guard. One of them, Bingo, remembered how Komurasaki had asked him to purchase her freedom, promising to be with him forever if he paid the high price. Bingo sold everything he had, even his family, to raise the money, only to find out that she had spent all of it and had no intention of leaving with him. With his and the other victims' attempt at revenge foiled, they were exiled from the Flower Capital for having no money.[20]
Raizo successfully infiltrated the Udon prison and planned with Luffy to free him. However, he discovered that the key to Luffy's Seastone handcuffs was kept in a heavily guarded Seastone box. Caribou then approached Luffy and offered to help him with his prison break, but Luffy refused and told him to work with Kid, who was acting on his own in competition with Luffy. At Amigasa Village, Momonosuke told Tama he had a sister named Hiyori whom he believed was still alive, but he said he could not reunite with her until after the war in order to protect her.[20]
In the Flower Capital, Franky asked his boss Minatomo for him to see the blueprints to Kaido's fortress, but Minatomo revealed that he had pawned them off ten years ago. An angry Franky attacked Minatomo and was promptly fired, and he traced the blueprints' whereabouts from the pawn shop through everybody it had been passed on to. Eventually, a man named Rakuda told him that a masked man from Kuri had stolen it from him, and Franky contacted Kin'emon to tell him about this. Meanwhile in the region of Kibi, a man named Tonoyasu tagged along with Zoro, and the two of them headed to a leftovers town near the Flower Capital.[21]

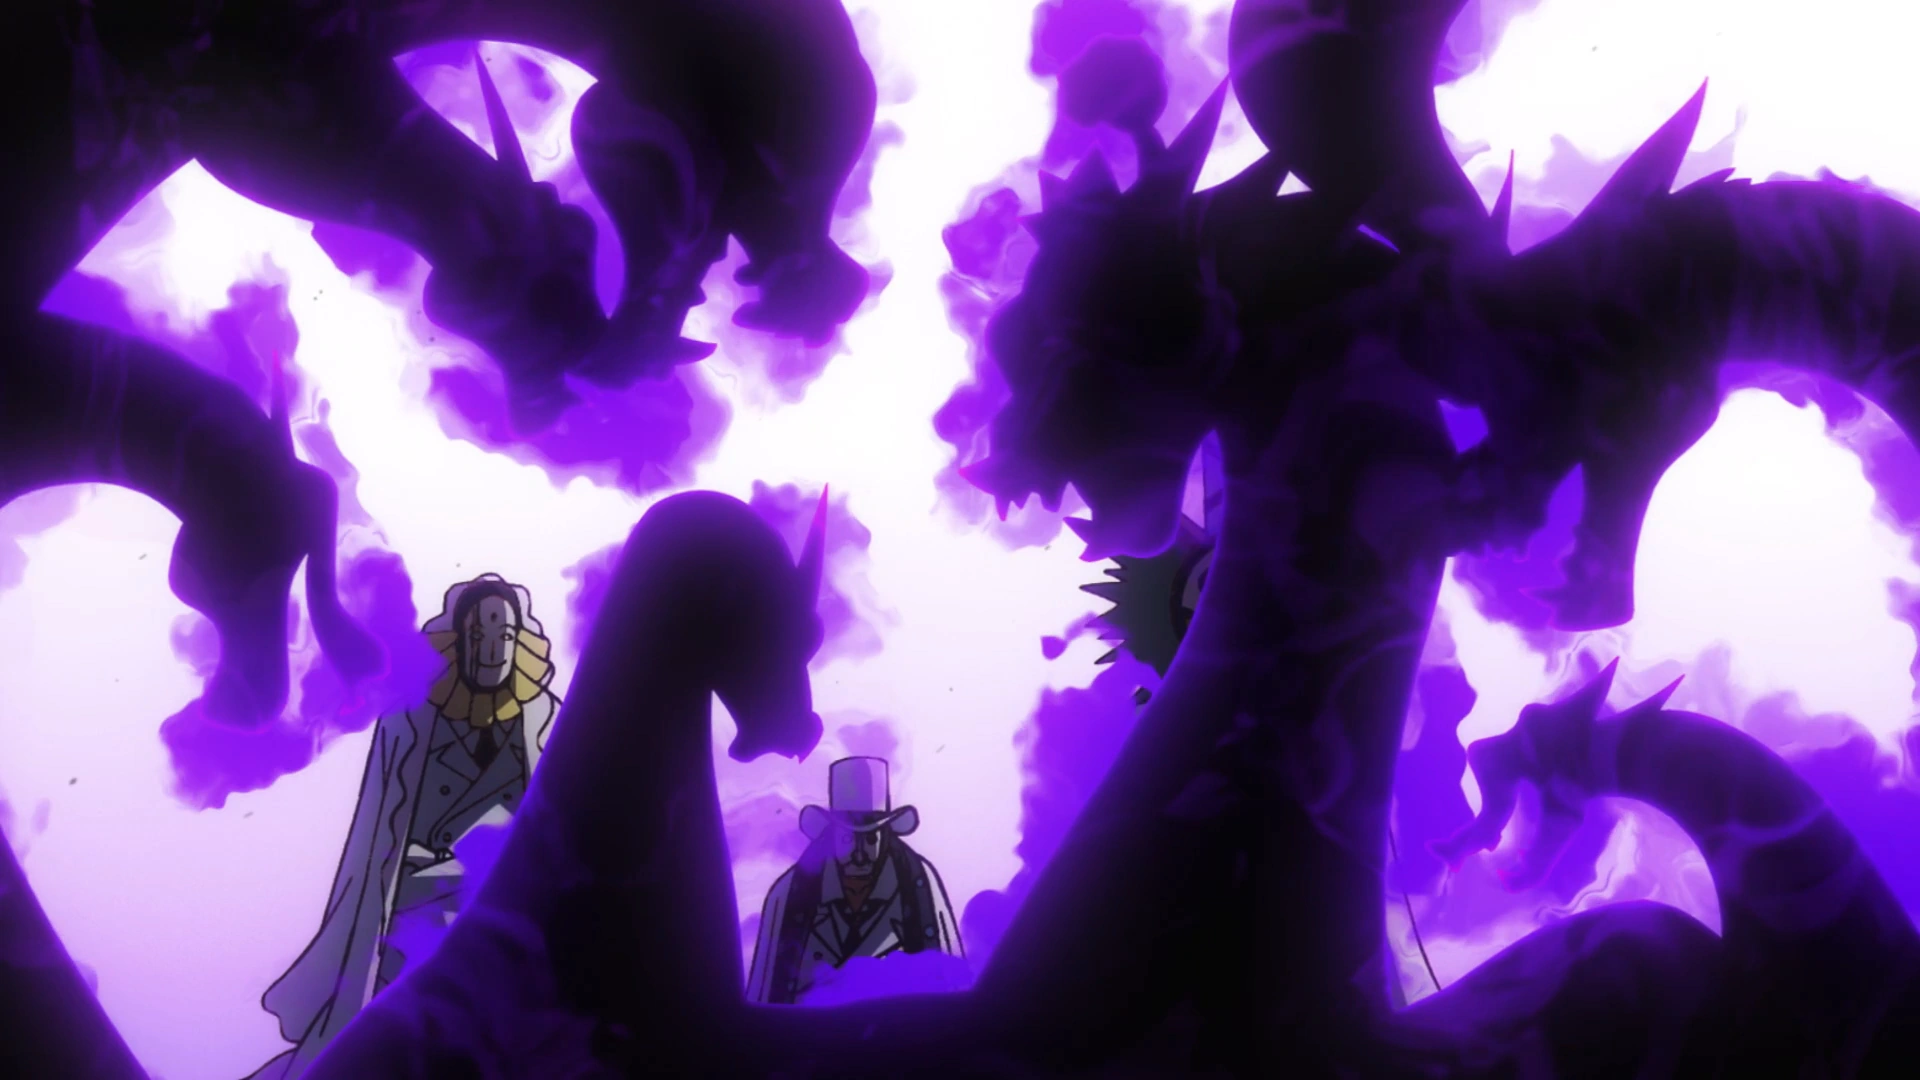
Orochi meets with CP-0 to broker a trade agreement with the World Government.
In Orochi's castle, the shogun met with agents from CP-0, who wished to broker a trade agreement with the Beasts Pirates through him now that their intermediary Doflamingo had been taken down. Orochi laughed at their desperation and demanded that Vegapunk be brought to him in exchange for a deal, having no fear of the World Government and Marines due to Kaido's backup. He then headed to his banquet, where he partied with Komurasaki by his side.[21]
Chaos Reigns: Trouble Brewing in the Flower Capital
X Drake and Page One of the Beasts Pirates' six strongest Headliners, the Flying Six, arrived at the Flower Capital to kill Sanji, and they were joined by Hawkins. Law came up to Sanji and warned him to run away, as Drake and Hawkins knew their identities.[21] The two of them ran off with Usopp and Franky, but Page One started rampaging and attacking every soba shop he could find to look for Sanji. Despite Law heavily warning against it, Sanji went into action and attacked Page One, intending to take down the pirate who did not recognize him before Drake and Hawkins arrived.[22]
Tonoyasu brought Zoro to his home, the leftovers town of Ebisu, where everyone acted happy.[22]

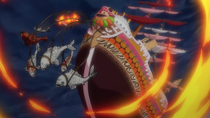
King prevents the Big Mom Pirates from reaching Wano.
On Onigashima, Kaido received a report that the Big Mom Pirates were approaching Wano. Big Mom and her crew took out the preliminary defenses as they prepared to scale the waterfall surrounding Wano on the Queen Mama Chanter, and Big Mom was looking forward to getting Zeus back as Kaido desperately ordered his men to stop her. King then flew in and attacked the Chanter, causing it to fall back down the waterfall and send Big Mom into the ocean.[22] Back at Kuri, Momonuske, Kiku, Chopper, and Tama went to Kuri Beach and found the washed-up Big Mom unconscious. Chopper suggested killing her before she woke up, but he was too late as she regained consciousness. To Chopper's surprise, Big Mom lost her memories.[23]

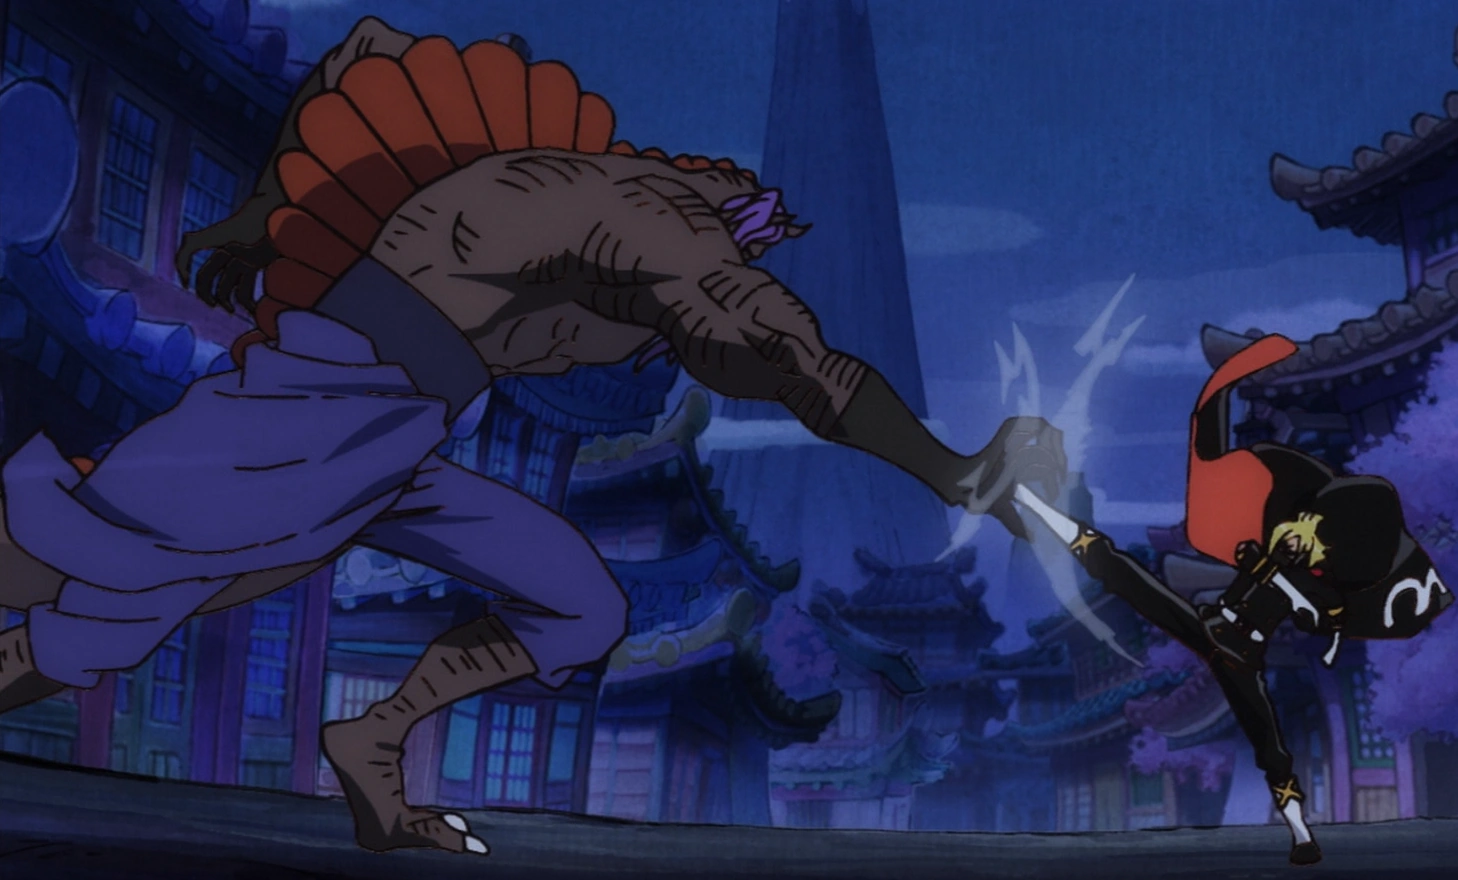
Sanji uses his Raid Suit to battle Page One.
In the Flower Capital, Sanji stood in front of Page One, with Law, Franky, and Usopp hiding behind him, questioning his choices. Sanji replied that he would have to swallow his pride if he wants to protect anyone. He activated his Raid Suit while Franky and Usopp marveled at the transformation. Law recognized the suit, as he is from North Blue and read the "Sora, Warrior of the Sea" comic. Sanji then attacked Page One and learned that his suit grants him the power of invisibility that he sought for years. Page One struck back, knocking Sanji away, but Sanji remained mostly unharmed thanks to the suit's protection and continued the fight while Law, Franky, and Usopp fled to Ebisu Town. At Orochi's castle, as the party went on, Robin searched for information about the location of the Poneglyph, but she was found and interrogated by the Orochi Oniwabanshu.[23]
The Orochi Oniwabanshu tried to capture Robin, but the Robin they attacked was a duplicate created by her Devil Fruit powers. Robin then contacted Nami and Shinobu through Den Den Mushi and warned them about the ninjas before returning to the banquet. Orochi cautioned his guests about the prophesied resurrection of Oden's Nine Red Scabbards, but none of the guests took his word seriously. Toko then started laughing, and Orochi quickly became enraged as he moved to attack her. Komurasaki then slapped him, and Orochi was infuriated by her actions and transformed into his Yamata no Orochi form. As the chaos in the castle began, Robin carried Toko away.[24]


Kyoshiro strikes down Komurasaki.
Orochi gave Komurasaki one chance to beg for mercy, but she firmly refused, causing him to go beserk and attack the other guests. One of Orochi's heads also grabbed Komurasaki. Meanwhile, Robin was once again confronted by the Orochi Oniwabanshu. Toko begged Robin to help Komurasaki, but Robin was more preoccupied with protecting Toko. Brook arrived in his spirit form and assisted Robin in getting past the ninjas. While spying on the banquet hall from over the ceiling, Shinobu and Nami were confronted by one of Orochi's ninjas, but Shinobu incapacitated him before collapsing the ceiling onto Orochi, freeing Komurasaki from his grip. Kyoshiro approached Komurasaki and struck her down with his sword, shocking everyone in the banquet hall. Orochi questioned Kyoshiro, who explained that he was giving a samurai's mercy. Orochi turned his attention to Toko and pursued her and Robin as Nami unleashed Zeus and used a lightning attack on the shogun.[25]
Echoes of the Past: Uprising in Udon

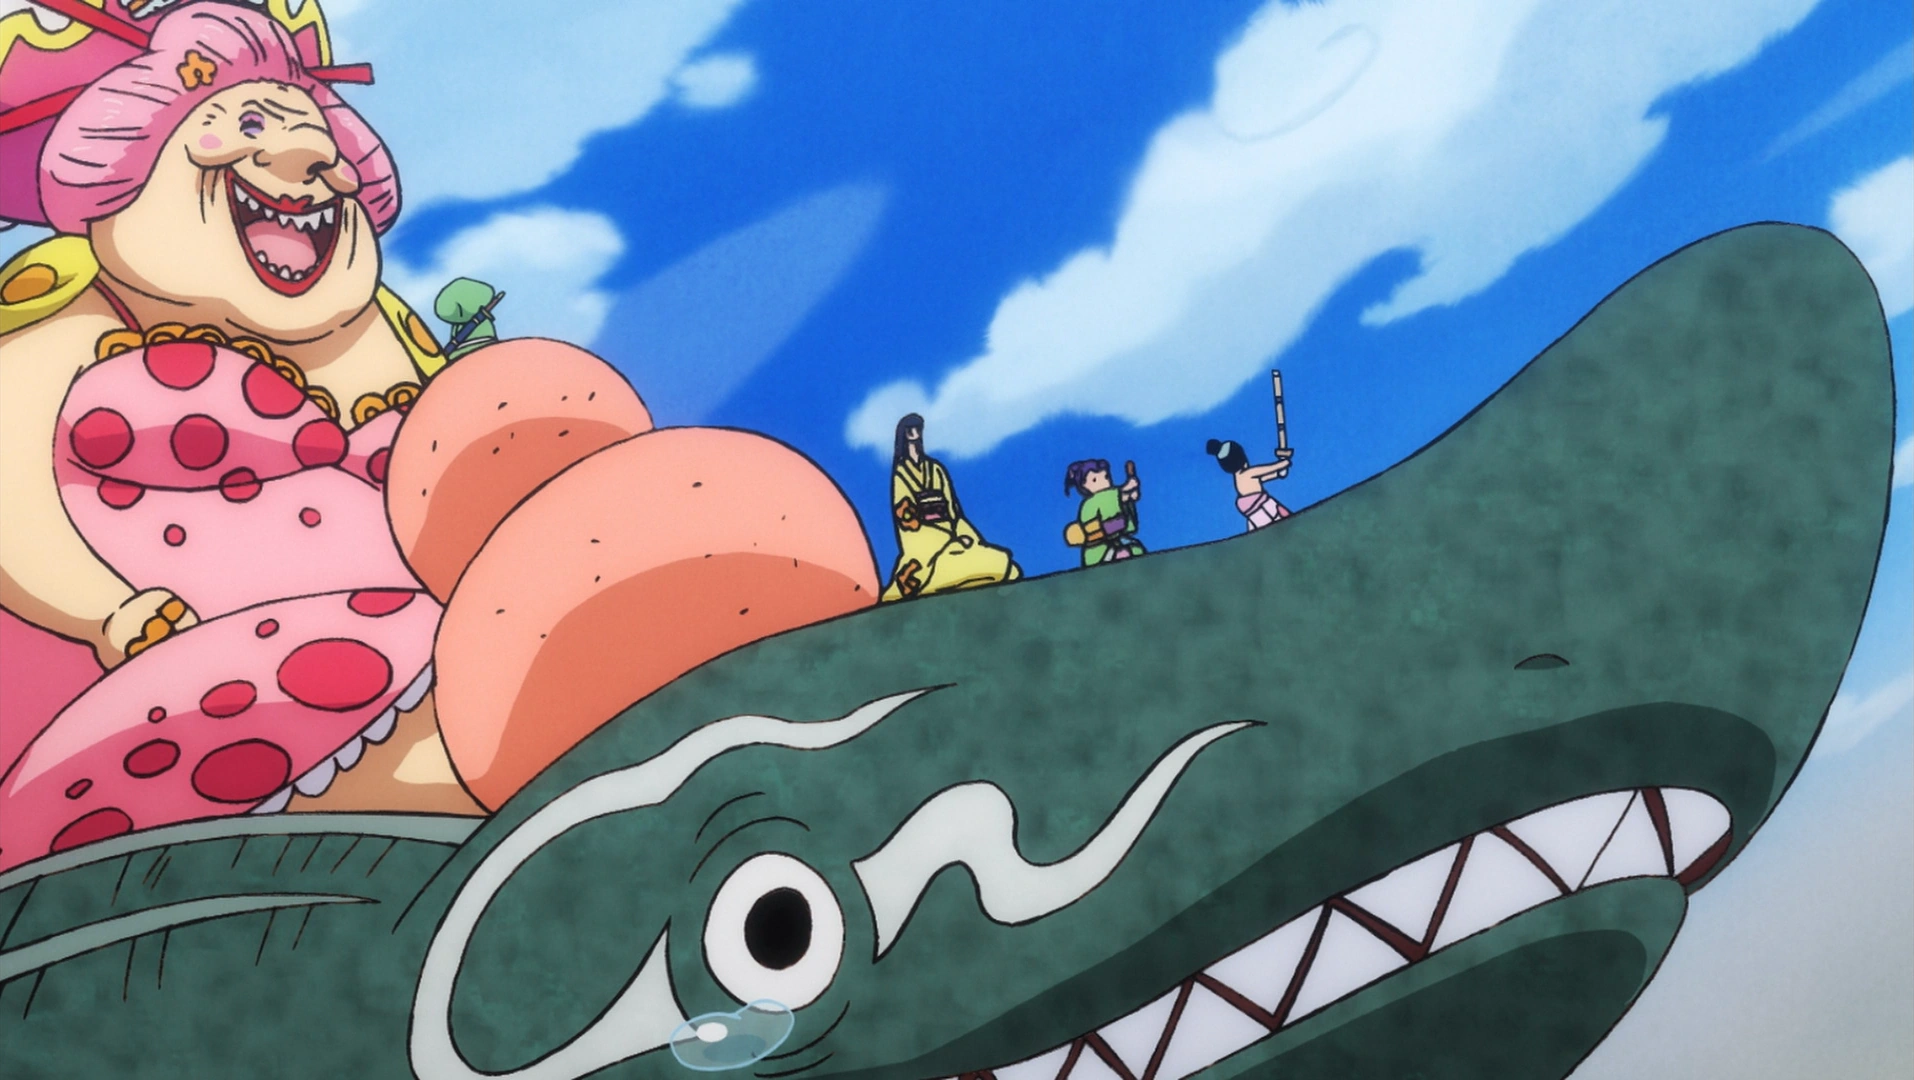
An amnesiac Big Mom accompanies Chopper, Momonosuke, Tama, and Kiku to Udon.
The next morning, Chopper, Momonosuke, Kiku, and Tama brought Big Mom to Okobore Town, where Tsuru gave her some food. On Tama's urging, Chopper convinced Big Mom to go to Udon with them.[25] On the sea outside of Wano, the Big Mom Pirates sailed, knowing Big Mom was alive but not knowing what she was doing. Chopper's group rode to Udon on a crocodile-shark that Big Mom tamed, and Tama contacted Hitetsu, who was very opposed to their mission, while Momonosuke continued training.[26]
The group that infiltrated Orochi Castle, along with Kanjuro, hid in the Northern Cemetery. Robin shared all of the information that she acquired, and Brook revealed that there was a Poneglyph in the basement of Orochi Castle. The group, save for Brook, then headed to the bathhouses. At the bathhouse, they overheard conversation about Kyoshiro, and Shinobu wished that the yakuza boss Hyogoro was still around. He was charismatic enough for all the other yakuza bosses to serve under him, and would have surely helped their current recruitment, but he was presumed to have died after refusing to submit to Orochi 20 years ago.[27] In Ebisu Town, Sanji's group read the news of Komurasaki's death, and Law also saw that Kid had escaped from the Prisoner Mine. In the mine, as everyone was on high alert due to the escape, Grandpa Hyo was being attacked by the vice warden Daifugo, who knew he did not earn all the meal tickets he had. However, Hyo, who was once the famous yakuza boss Hyogoro, accepted his death because he had been fulfilled by Luffy's display of nobility. Before he could be killed, though, Luffy rushed in and attacked Daifugo, and as this was going on, Queen arrived at the mine.[26]

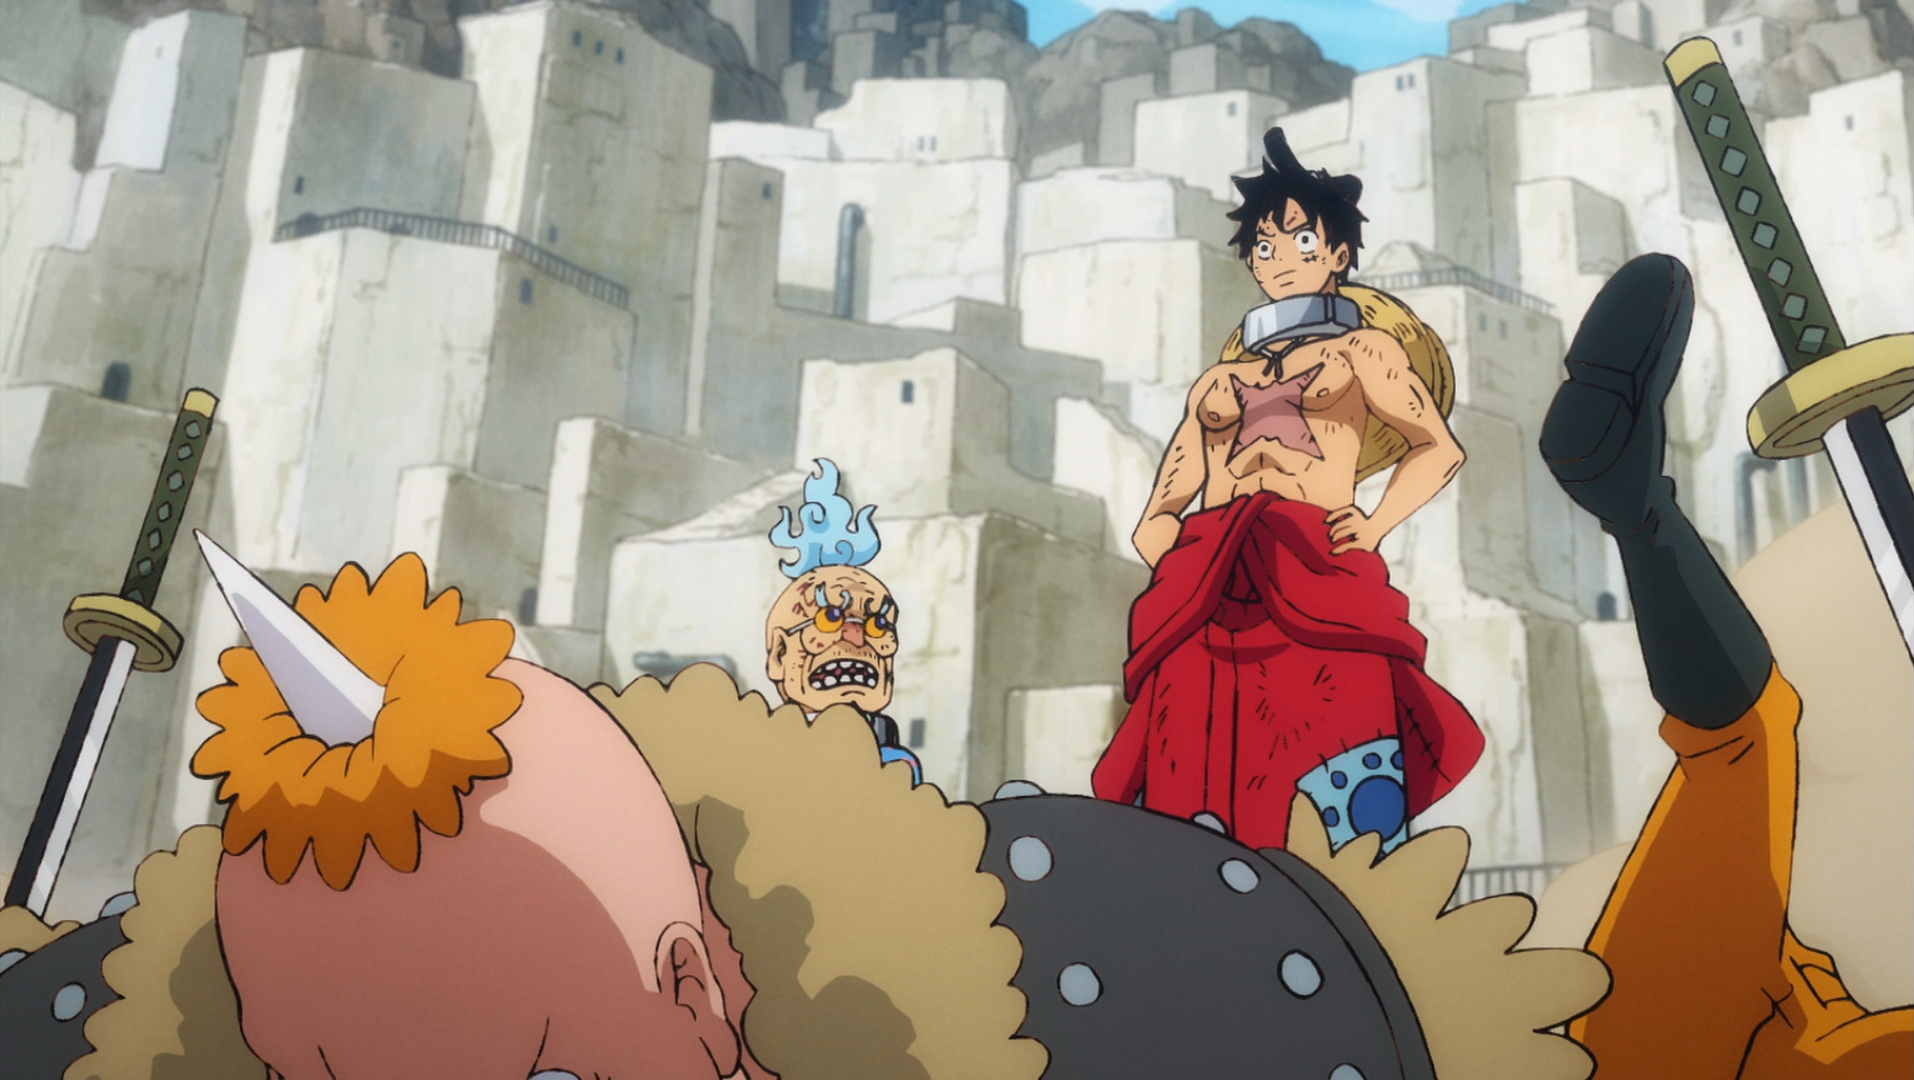
Luffy tests his strength in Queen's Sumo Inferno.
In the Prisoner Mine Executive Tower, Vice Warden and Headliner Solitaire was alerted after Raizo successfully stole the keys to the Seastone handcuffs. After kicking Daifugo, Luffy was subdued by the warden Babanuki, and after a failed escape attempt, he and Hyo were brought before Queen. As Raizo spied on Luffy, the mysterious prisoner who had been fed the poisoned fish called out to him, revealing himself to be Kawamatsu.[27] Raizo attempted to free Kawamatsu, but had to flee after his presence was exposed. Queen put Luffy and Hyogoro into a sumo ring and put special collars on them that would slice their heads off if they were knocked out. He gave a concession to Luffy by having his Seastone handcuffs removed, and with his restraints gone, Luffy quickly knocked out the first group of assailants with Haoshoku Haki.[28]
Meanwhile, Hawkins and Drake led a group into the Flower Capital bathhouse to round everyone up and see if anyone possessed the Kozuki Family's crescent moon symbol. Hawkins noticed Nami hiding behind Shinobu and tried drawing her out, disrobing her. This caused Sanji to reveal his presence, and he, Nami, Robin, and Shinobu then escaped through the air. Sanji revealed that the Heart Pirates had been captured to lure Law out, and they needed to tell him.[28]
Zoro strikes down Kamazo.
Law's group met Tonoyasu, who revealed that Zoro had left to go after someone who had stolen his sword.[27] Some time later, Zoro confronted the thief, Gyukimaru, in Ringo. Gyukimaru had returned Shusui to Ryuma's grave, refusing to believe Zoro had earned the sword.[28] The two then sparred for the weapons in each other's possession, when Toko and a woman suddenly came in running for their lives from Kamazo. Kamazo was secretly an assassin working for Orochi who was tasked with killing Toko, and he was ready to kill anyone standing in his way. Zoro agreed to help the woman and Toko in return for food and alcohol, but as he clashed with Kamazo, Gyukimaru continued trying to attack him. This ended up distracting Zoro enough for Kamazo to impale him with one of his scythes, but Zoro managed to disarm the scythe from him and strike him down.[29]
Story Impact
- Several characters make their first appearances in the manga after the timeskip. The characters (in the order they were reintroduced) are: Marco,[1] Gecko Moria, Avalo Pizarro, Catarina Devon, and Marshall D. Teach.[17]
- Nekomamushi has found Marco, who works as a doctor at Whitebeard's home island.
- Because of the threat of Edward Weevil likely coming to the island Marco refuses to go to Wano Country, but gives Nekomamushi a message to pass on to Luffy.[1]
- It is revealed that Bakkin and Whitebeard used to be on the same ship some 40 years prior to the present time.[1]
- Basil Hawkins is revealed to be Kaido's subordinate.[3]
- Hitetsu reveals that Tama had met Ace four years ago.[3]
- Nidai Kitetsu is shown to be in the possession of Hitetsu and is taken by Luffy.[4]
- The Beasts Pirates have conquered Wano Country completely, turning most of it into wasteland.[4]
- The Kozuki Family once ruled Wano Country over 20 years ago.[6]
- Jack is revealed to be the ruler of the country's Kuri region. He was also saved from his shipwreck after his failed attack on Zou.[9]
- A prophecy from Oden's wife states that nine figures who worked under Oden would take Orochi's life and open the borders of Wano Country in 20 years.[11]
- Kin'emon revealed that Momonosuke, Kanjuro, Raizo, Kiku, and himself have time traveled 20 years from the past due to Kozuki Toki's Toki Toki no Mi.[11][12]
- Hawkins reveals that Seastone originates in Wano Country and that only there smiths can forge it into several items .[16]
- It is revealed that Eustass Kid can use Haoshoku Haki and the late Oden possessed this power as well.[16]
- The world finds out that Gecko Moria is still alive. Perona decides to leave Kuraigana Island to rejoin him.[17]
- The Blackbeard Pirates kill Absalom and steal his Devil Fruit power, and Blackbeard offers for Moria to join him.[17]
- The Revolutionaries clash with Fujitora and Ryokugyu on the fourth day of the Levely, with the outcome being currently unknown.[17]
- Caribou is a prisoner at Udon.[18]
- Eustass Kid reveals that he has lost his arm in a battle with the Red Hair Pirates.[20]
- Orochi has a meeting with CP-0, who wants to broker a new trade agreement with Wano Country due to the downfall of their intermediary Doflamingo at the hands of Luffy. In exchange, Orochi demands that CP-0 brings Vegapunk to Wano.[21]
- The Big Mom Pirates arrive at Wano Country.[22] However, following an attack by King, Big Mom is stricken with amnesia.[23]
- Sanji uses his Raid Suit, Stealth Black, and it grants him the power of invisibility.[22][23]
- Big Mom and Kaido are revealed to be former comrades.[26]
- A Road Poneglyph is hidden in Onigashima, base of the Beast Pirates.[26]
- More information about Haki is revealed.
- It is revealed that Devil Fruit users can't use Haki while in contact with Seastone.[27]
- It is revealed that an advanced application of Busoshoku Haki allows the user to emit the armament a short distance.[29]
- It is revealed that Wano Country was known as the country of gold and was targeted by pirates and nobles who wanted to bring it under their control. This ended when Ryuma slayed a dragon.[29]
- It is revealed by Gyukimaru that Shusui turned into a black blade after Ryuma's many battles.[29]
References
- ↑ 1.0 1.1 1.2 1.3 1.4 One Piece Manga — Vol. 90 Chapter 909.
- ↑ 2.0 2.1 One Piece Manga — Vol. 90 Chapter 910.
- ↑ 3.0 3.1 3.2 3.3 3.4 One Piece Manga — Vol. 91 Chapter 911.
- ↑ 4.0 4.1 4.2 4.3 One Piece Manga — Vol. 91 Chapter 912.
- ↑ One Piece Manga — Vol. 91 Chapter 913.
- ↑ 6.0 6.1 One Piece Manga — Vol. 91 Chapter 914.
- ↑ 7.0 7.1 One Piece Manga — Vol. 91 Chapter 915.
- ↑ 8.0 8.1 8.2 One Piece Manga — Vol. 91 Chapter 916.
- ↑ 9.0 9.1 9.2 One Piece Manga — Vol. 91 Chapter 917.
- ↑ 10.0 10.1 One Piece Manga — Vol. 91 Chapter 918.
- ↑ 11.0 11.1 11.2 11.3 11.4 One Piece Manga — Vol. 91 Chapter 919.
- ↑ 12.0 12.1 One Piece Manga — Vol. 91 Chapter 920.
- ↑ One Piece Manga — Vol. 91 Chapter 921.
- ↑ One Piece Manga — Vol. 92 Chapter 922.
- ↑ One Piece Manga — Vol. 92 Chapter 923.
- ↑ 16.0 16.1 16.2 16.3 16.4 One Piece Manga — Vol. 92 Chapter 924.
- ↑ 17.0 17.1 17.2 17.3 17.4 17.5 One Piece Manga — Vol. 92 Chapter 925.
- ↑ 18.0 18.1 18.2 One Piece Manga — Vol. 92 Chapter 926.
- ↑ 19.0 19.1 One Piece Manga — Vol. 92 Chapter 927.
- ↑ 20.0 20.1 20.2 One Piece Manga — Vol. 92 Chapter 928.
- ↑ 21.0 21.1 21.2 21.3 One Piece Manga — Vol. 92 Chapter 929.
- ↑ 22.0 22.1 22.2 22.3 22.4 One Piece Manga — Vol. 92 Chapter 930.
- ↑ 23.0 23.1 23.2 23.3 One Piece Manga — Vol. 92 Chapter 931.
- ↑ One Piece Manga — Vol. 93 Chapter 932.
- ↑ 25.0 25.1 One Piece Manga — Vol. 93 Chapter 933.
- ↑ 26.0 26.1 26.2 26.3 One Piece Manga — Vol. 93 Chapter 934.
- ↑ 27.0 27.1 27.2 27.3 One Piece Manga — Vol. 93 Chapter 935.
- ↑ 28.0 28.1 28.2 One Piece Manga — Vol. 93 Chapter 936.
- ↑ 29.0 29.1 29.2 29.3 One Piece Manga — Vol. 93 Chapter 937.
Template:Yonko Navibox
| |||||||||||
| |||||||||||
| |||||||||||
| |||||||||||||
| |||||||||||||
| |||||||||||||
| |||||||||||||||||
| |||||||||||||||||
| |||||||||||||||||
| |||||||||||||||||
| |||||||||||||||||
| |||||||||||||||||
| |||||||||||||||||
| |||||||||||||||||
| |||||||||||||||||||||||||
| |||||||||||||||||||||||||
| |||||||||||||||||||||||||
| |||||||||||
| |||||||||||
| |||||||||||
| |||||||||||||||
| |||||||||||||||
| |||||||||||||||
| |||||||||||||||
| |||||||||||
| |||||||||||
| |||||||||||
| |||||||||||||||||
| |||||||||||||||||
| |||||||||||||||||
| |||||||||||
| |||||||||||
| |||||||||||
| |||||||
| |||||||
| |||||||
| |||||||||
| |||||||||
| |||||||||
| |||||||||
| |||||||||||||||
| |||||||||||||||
| |||||||||||||||
| |||||||||||||||||||
| |||||||||||||||||||
| |||||||||||||||||||
| |||||||||||
| |||||||||||
| |||||||||||