The Wano Country Arc (ワノ国編, Wano Kuni Hen?) is the thirty-first story arc in the series and the fourth in the Yonko Saga of One Piece, continuing from the Levely Arc.
The Ninja-Pirate-Mink-Samurai Alliance sets their plan into motion to recruit allies within the Wano Country to liberate it from the control of the shogun Kurozumi Orochi and his allies, Kaido of the Yonko and his crew the Beasts Pirates. Meanwhile, the Big Mom Pirates, who followed the Straw Hats to Wano to get revenge for the previous events back on Totto Land, decide to form an alliance with the Beasts Pirates in order to conquer the world.
Summary
Prologue: Getting to Wano
Nekomamushi and the Guardians arrived on Sphinx, where Marco resided and worked as a doctor. Marco revealed that Sphinx was Whitebeard's homeland and his last keepsake. With Edward Weevil and Bakkin hunting for Whitebeard's inheritance, Marco anticipated that they would attack this place, and so elected to stay behind and protect it instead of joining the Ninja-Pirate-Mink-Samurai Alliance against Kaido. However, he told Nekomamushi to give Luffy a message from him once he arrived at Wano Country.[1]
Some time later, Luffy's group read about the Levely while sailing to Wano. Nami noticed an article about Kaido and Big Mom, but was unable to read it due to Sanji and Chopper cutting pictures out. The crew then came to a stormy area that looked like Wano, and as they sailed through it, they encountered a school of giant carp. They then came to the bottom of a massive waterfall, and Luffy grabbed onto two of the jumping carp to pull themselves up. At the top of the waterfall was a whirlpool,[2] and Luffy had Sanji fly the others to land. When he tried to follow them, an octopus that had boarded the Sunny held him back, causing him to go down into the whirlpool.[3]
First Act
Arrival at Wano: The Plight of O-Tama and the Leftovers Citizens
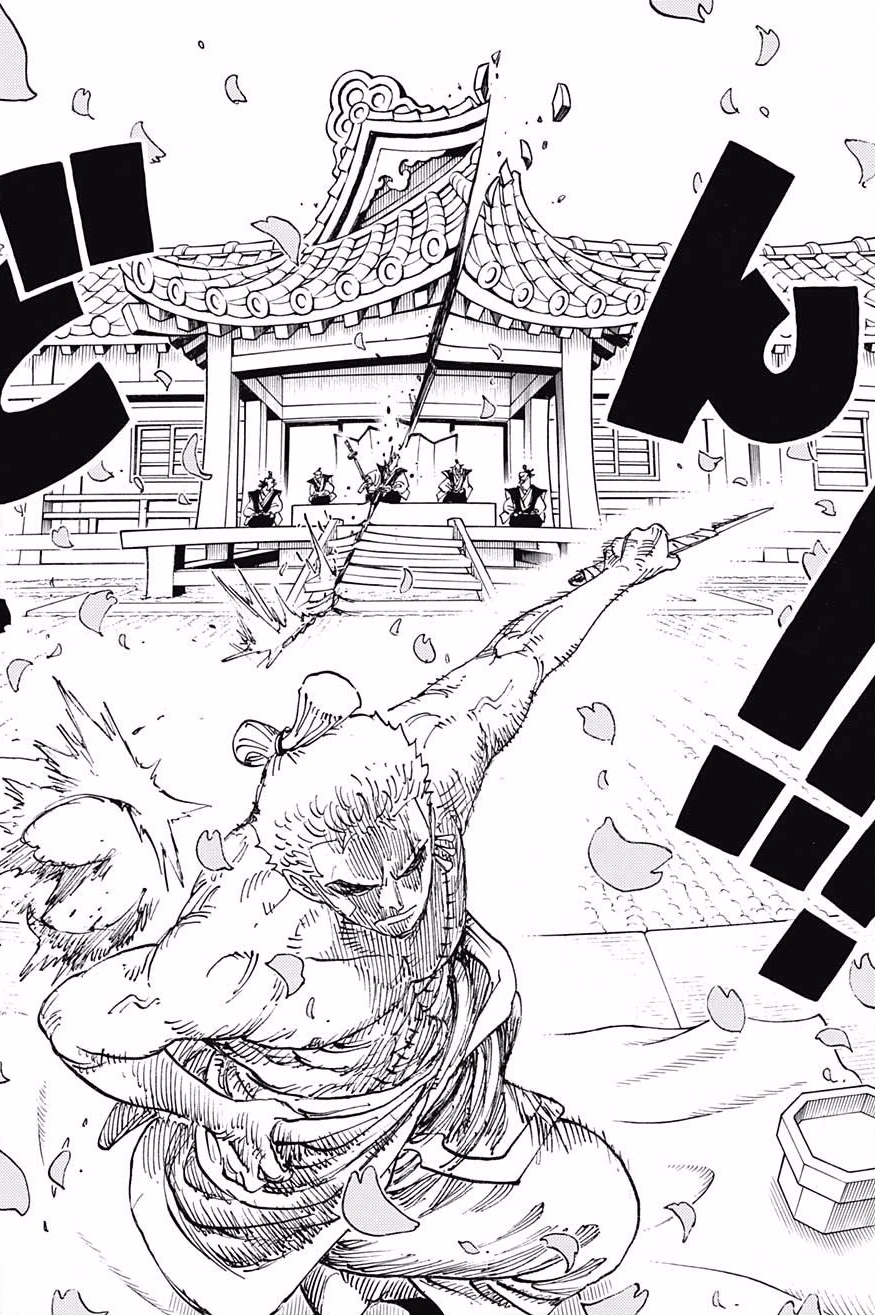
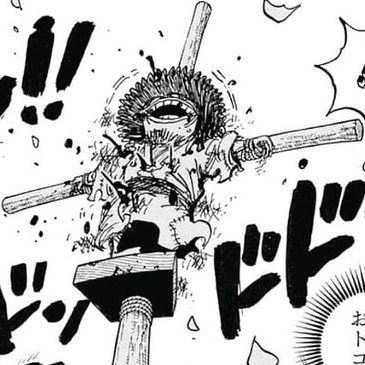
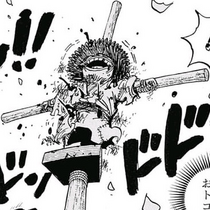
Zoro cuts down a magistrate after being framed for a crime he didn't commit.
Meanwhile, Kin'emon, Law, Zoro, Usopp, Robin, and Franky had snuck into Wano's Flower Capital. Kin'emon warned the group that the shogun, Kurozumi Orochi, had agents lurking around every corner, so they would need to disguise their identities and assimilate into the populace. Franky became an apprentice carpenter under Minatomo, Usopp sold toad oil on the streets, and Robin trained to become a geisha performing for Orochi. Zoro, however, became a ronin, and was framed for several street murders. The magistrate sentenced him to seppuku and gleefully apprehended the stolen Shusui, but Zoro sensed that he was the one who actually committed the murders. With the short seppuku blade, he cut down the magistrate from a considerable distance.[1]
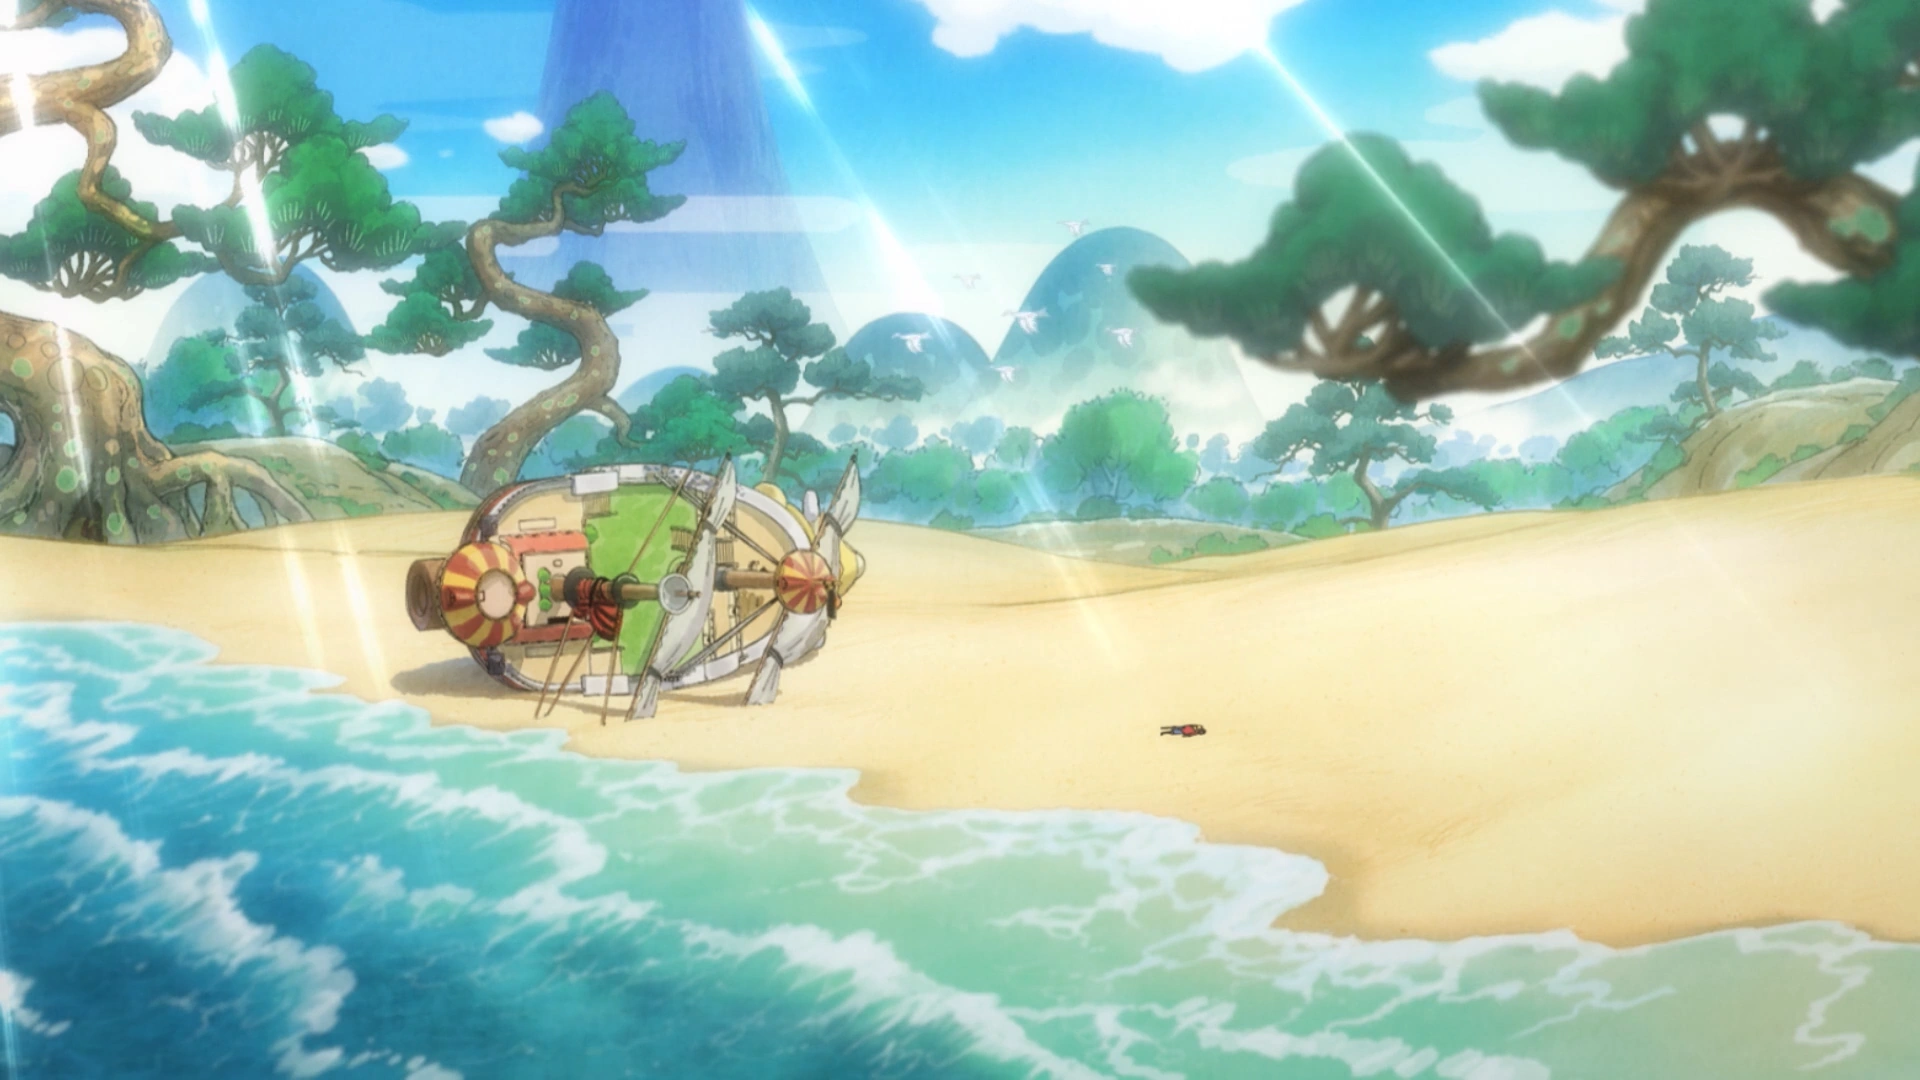
Luffy and the Sunny wash up on Wano.
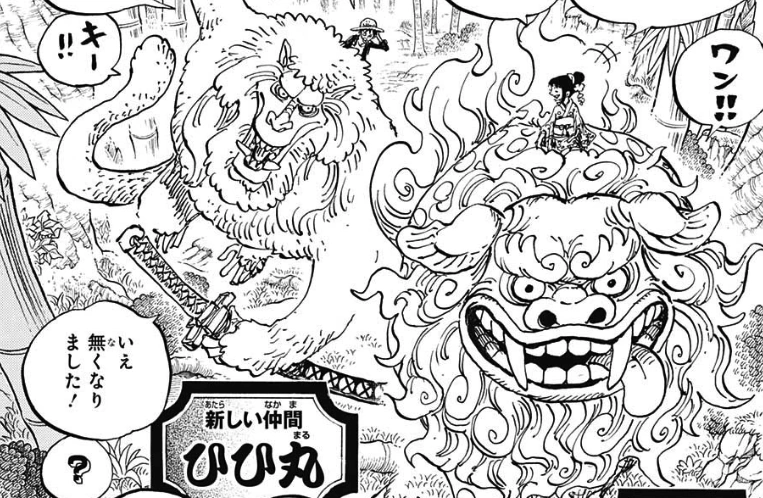
Luffy and the Sunny washed up on Kuri Beach, and after coming to, Luffy immediately encountered a baboon with a sword named Hihimaru battling a komainu named Komachiyo.[2] Close by, a group of Beasts Pirates scouts were riding to shore with a young captive girl named Tama, whom they had captured after she mentioned the Kozuki Family when they were harassing her at the market. They attempted to take out Luffy for illegally entering the country, but Luffy quickly brought them down. One of them was still conscious and told Hihimaru to take down Luffy, but it quickly backed down due to Luffy's Haoshoku Haki. Tama then knocked out the scout and submitted herself to Luffy, and in his confusion she managed to pull a piece of kibi dango from her cheek and feed it to Hihimaru, instantly taming him.[3]
O-Tama takes Luffy to her house after he saves her from the Beasts Pirates.
To thank Luffy, Tama helped him dock the Sunny in a hidden cave before taking him to her home to feed him. When they got to her place, she made a small meal for him out of the little rice she had. She then went out, and Luffy was suddenly confronted by her master Tenguyama Hitetsu, who thought he had stolen her small rations. Tama then came back and revealed what happened, but she then fell ill due to drinking contaminated river water to suppress her hunger.[3] Hitetsu said that much of the country was turned into a polluted wasteland by Kaido and his factories, and this place, Amigasa Village, had been destroyed by the Headliner X Drake a year ago. Tama continued living here, however, in order to wait for Portgas D. Ace, who had come during a famine four years ago and helped feed everyone. Before he left, he had promised to take Tama along with him the next time he came. Luffy revealed that Ace had died, causing Tama to faint. He then decided to go out to the nearest town to get Tama treated by a doctor, and donned a kimono. He also chose to take the cursed sword Nidai Kitetsu despite Hitetsu's protests, and set off with Tama.[4]
Hawkins facing Luffy and Zoro.
Somewhere in Kuri, Beasts Pirates Headliner Basil Hawkins received a report that they had lost contact with their men on Kuri Beach, and Hawkins decided to deal with this himself.[3] On the way to town, Komachiyo arrived to give Luffy and Tama a ride. They emerged from the forest into a massive wasteland, and Tama told Luffy more about the pollution in the country. Luffy then saw a woman being chased by some Beasts Pirates, only for the pirates to be cut down by someone. Luffy saw that the attacker was in fact Zoro, and quickly went to reunite with his crewmate. However, the two of them were soon confronted by Hawkins and his men.[4] The two sides began battling, and Luffy and Zoro went after Hawkins, but he shrugged off their attacks with his Wara Wara no Mi abilities. Komachiyo then ran in and grabbed Luffy and Zoro to make sure Tama got to treatment, and Hawkins pursued them with a giant straw avatar for a bit until Zoro managed to cut down the avatar.[5]


Gazelleman kidnaps Tama and takes her to Bakura Town.
As Luffy, Zoro, and Tama headed to town, they were suddenly greeted by Tsuru, who was the woman Zoro had saved. Tsuru offered to repay them for helping her by taking them to her tea house and brewing an herb to cure Tama. At Okobore Town, the leftovers town, the tea house's poster girl Kiku was courted by the Flower Capital's strongest sumo wrestler Urashima, but she declined his marriage proposal. Luffy's group then arrived, and Tsuru told Kikunojo to make the healing brew.[5] Tama was healed after drinking it, and Tsuru gave her some porridge to eat. After very reluctantly accepting it, Tama was brought to tears by its taste. Kikunojo bandaged Zoro's wounds, and Tsuru explained that all of them in the leftovers towns lived with barely any food to eat. Kozuki Oden once had a farm to feed everyone, but that farm was now used to feed Orochi and the wealthy citizens in the nearby Bakura Town; everything Okobore Town got were castoffs and leftovers from there. Suddenly, the group found themselves under attack from the Gifter Batman, who with his Bat SMILE had overheard their conversation. While they dealt with Batman's attacks, Gazelleman came in and kidnapped Tama to bring her to Bakura Town, which the Headliner Holdem had planned in order to find out about Hihimaru's taming.[6]

Luffy defeats the renowned yokozuna Urashima in a sumo wrestling match.
Kikunojo immediately mounted Komachiyo to go rescue Tama, and Luffy and Zoro joined her. She explained to them the situation in Bakura Town, and revealed that she was a samurai.[6] On top of the mountain where Oden Castle was located, Bepo, Shachi, and Penguin spotted Luffy and Zoro from afar.[5] When they saw the duo heading to Bakura Town, they told Law, who quickly became worried and planned to stop them.[6] In Bakura Town, Gazelleman brought Tama to Holdem, who decided to try testing her abilities by pulling on her cheek with pliers. Elsewhere, Urashima told the Gifter Mouseman about Kikunojo while eating, and Mouseman encouraged him to use his high status to take her by force. Luffy, Zoro, and Kikunojo later arrived at Bakura Town, and while racing down the street, they were suddenly hit by a sumo wrestler who had been knocked out of the ring by Urashima. As Urashima was dominating his opponents, he saw Kikunojo and became ecstatic, thinking she had come to accept his proposal. He had his men bring her to him, but when he silenced and degraded the lower-class spectators, Kikunojo became mad and cut off his topknot with her sword.[7]
One of Holdem's men told him that Urashima's topknot had been cut off, while Hawkins and his men warned the Bakura Town forces about Luffy as they headed there themselves. Back at the sumo ring, Urashima decided to attack Kikunojo for her actions, but his attack was met by Luffy. Luffy challenged him to a sumo match for Kiku, and the two of them began fighting. Luffy was able to effortlessly dodge Urashima's attacks, and knocked him out of the ring with a single Gear Third-enhanced Harite, destroying several buildings. The Beasts Pirates guards then attacked Luffy, Zoro, and Kiku, causing a fight to break out as the latter trio searched for Holdem. Holdem then appeared on a rooftop with Tama, angry that Luffy had sent Urashima flying into his house, and said he would kill Tama if he made a move. Law was still on the mountain when Shachi saw that a fire had broken out and Hawkins had arrived at Bakura Town, leaving him aghast.[8]
Luffy punches Holdem and frees Tama.
Deep within Bakura Town, the Headliner and Horse SMILE user Speed collected a cart full of clean food from the Paradise Farm. She saw the fire and destruction around Holdem's house as she went into town, and wondered what was going on. As Holdem threatened Tama with Kamijiro, the lion head growing from his stomach, Kikunojo warned Luffy that going against Holdem would attract the wrath of the All-Star and ruler of Kuri Jack. However, Luffy decided to take action after seeing Speed bring the food provisions cart onto the scene, and in the blink of an eye punched Kamijiro and freed Tama. Zoro attacked the pirates around the provisions cart, and Komachiyo pulled it away. When Luffy saw that Holdem had hurt Tama's cheek, he turned around to attack the Headliner. Holdem had Kamijiro breathe fire at Luffy, but it was to no avail as Luffy took him out with Gomu Gomu no Red Hawk.[9]

Luffy and Zoro deliver a cart of clean food to Okobore Town.
As Hawkins entered Bakura Town, he was confronted by a masked Law, who intended to take him out before the fellow Supernova could recognize him.[9] However, Hawkins quickly recognized Law by his Devil Fruit power and tattoos, and after a brief clash, he removed Law's mask. He revealed to Law that he had figured out that his and Luffy's alliance had infiltrated Wano, and Law's panic only grew as Hawkins received a call that Holdem had been taken out and Jack had been notified. Nearby, Luffy and Tama immediately started running away, and Luffy saw Speed's horse body and jumped on her. She quickly became angry, and Luffy told Tama to feed her a kibi dango, which she did. Although the dango was not supposed work on humans, it did work on Speed due to her Devil Fruit, and she happily carried Luffy and Tama away. Zoro and Kikunojo rode the provisions cart out of town, and Law hitched a ride with them in order to yell at Zoro for his actions. They took the provisions cart to Okobore Town, where they offered it to the delighted citizens. Some Gifters attempted to stop this, but they were then crushed by a massive tub of clean water that Luffy brought. As Tama ate an apple, Luffy promised her that by the time he left Wano, she would be able to eat until she is full every day, and this caused Tama to start crying as Ace had said the exact same thing.[10]
Ghosts of the Past: The Truth About the Kozuki Family
In the Flower Capital, a teacher taught some students that Kozuki Oden and his Nine Red Scabbards had tried to commit the evil act of opening Wano's borders, but their hero, the shogun Orochi, had defeated and killed them 20 years ago. Elsewhere in the capital, Orochi's money changer Kyoshiro brought up the night Oden was killed, recalling how his wife Kozuki Toki had sworn a curse on him. Orochi believed this was a prophecy that the Kozuki Family would return for vengeance in 20 years, with this year being the year of prophecy, but Kyoshiro was derisive of the shogun's paranoia, believing the Kozukis and their scabbards were all dead.[11]
Law then told Luffy and Zoro he would take them to the ruins of Oden Castle on top of the nearby mountain.[10] Tama bid farewell to Luffy as Speed took her back to Amigasa Village, and the villagers thanked Luffy for his actions. Kikunojo joined Law's group on the way to Oden Castle, and Luffy wondered why she wanted to go there. Zoro wandered off along the way, and when they reached the ruins, Luffy spotted graves for Kin'emon, Kanjuro, Raizo, and Momonosuke, and was led to believe they were dead. However, Kin'emon then appeared, queasy but very alive, and Luffy also reunited with Momonosuke and his crew from Whole Cake Island while Kikunojo excitedly greeted Kin'emon. Law and Kin'emon then took the Straw Hats inside to eat, and there, Kin'emon revealed that his group had come here by traveling 20 years forward in time.[11] Meanwhile, a lost Zoro decided to head toward a wharf, where he took a ride on a boat.[12]
Kin'emon talked about Oden's history, explaining that he was the son of shogun Kozuki Sukiyaki, but had been exiled from the Flower Capital for participating in violent fights. While in exile, he went to Kuri, which was then the most lawless region in Wano, and defeated its most dangerous criminal Ashura Doji. After rounding up the other criminals, Oden was granted the title of daimyo of Kuri by his father. He gathered many of his followers during that time, including Inuarashi and Nekomamushi after they had drifted ashore. However, he felt confined by Wano's borders and so illegally set off to sea, first sailing with the Whitebeard Pirates before joining the Pirate King Gol D. Roger and the Roger Pirates.

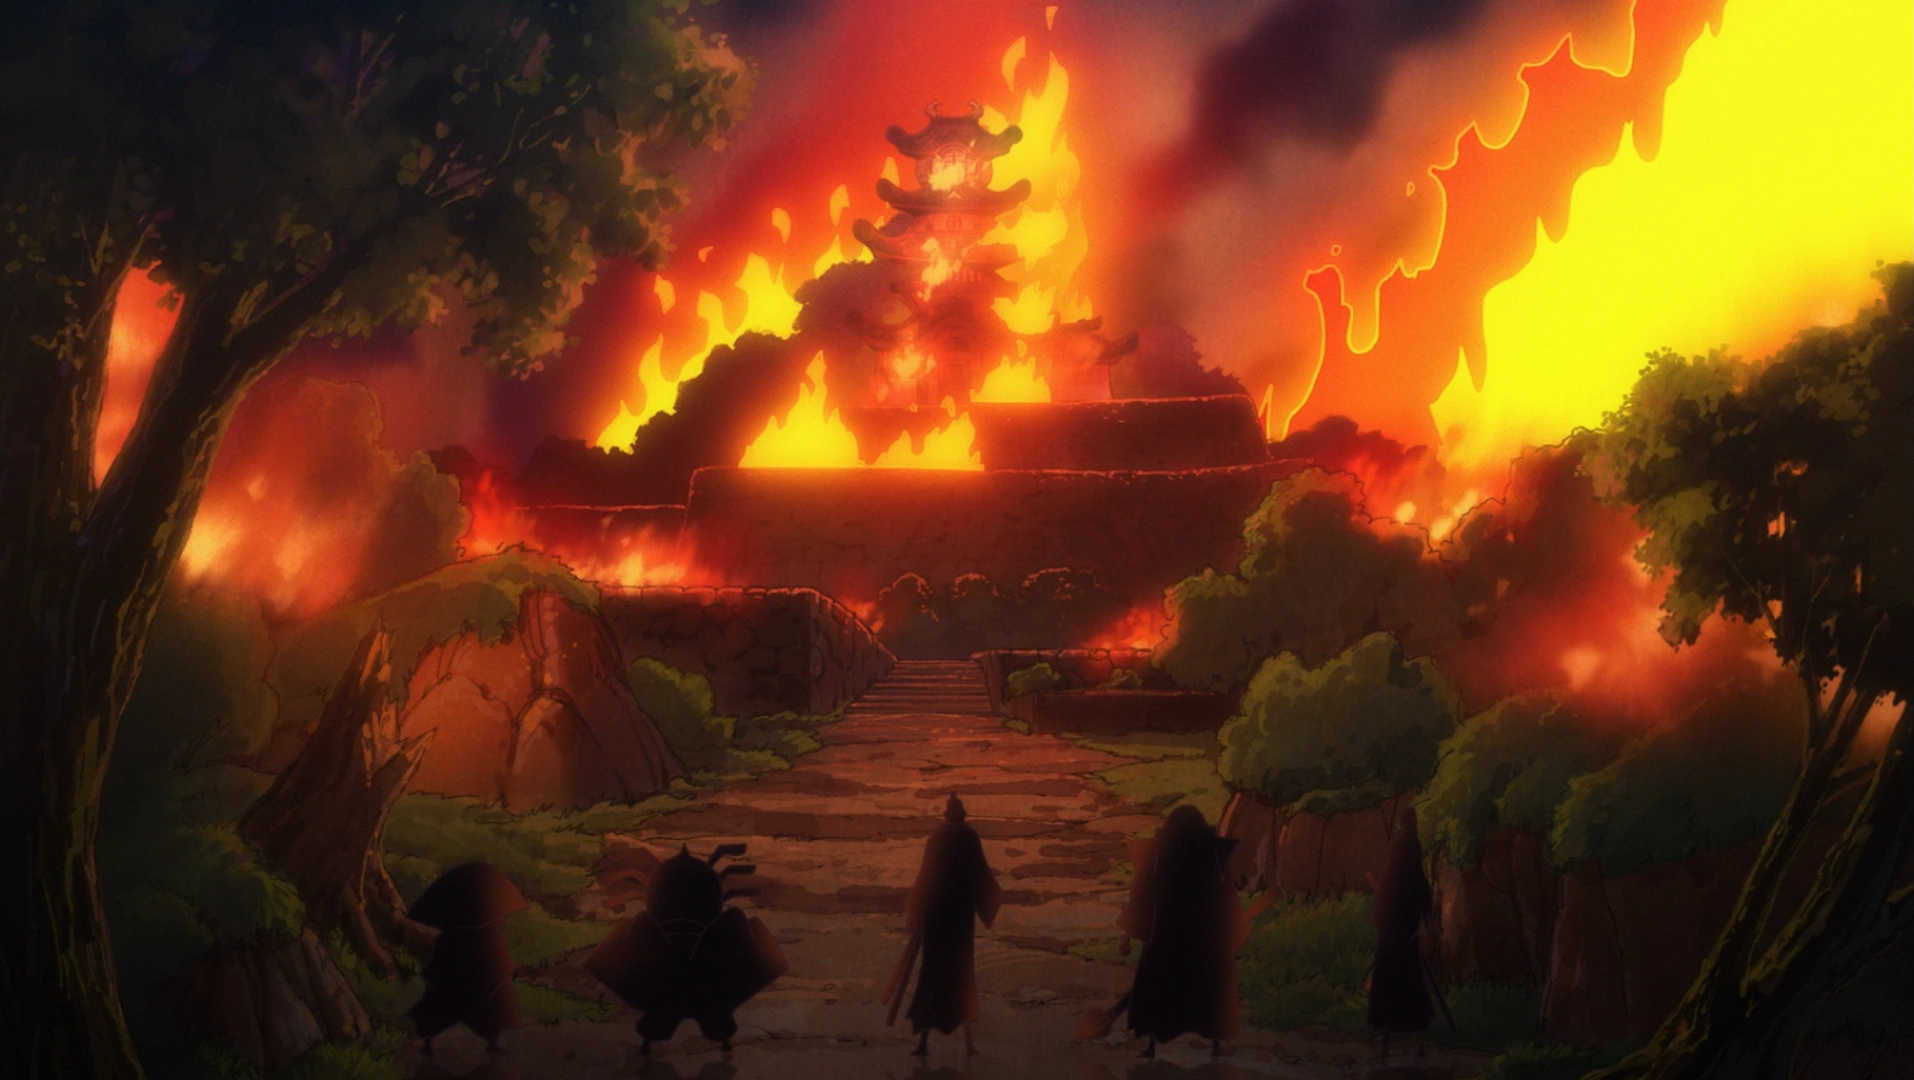
Kaido burning down Oden Castle 20 years ago.
However, this ultimately led to his execution 20 years ago. After Oden's execution, Kin'emon, Kanjuro, Raizo, Kiku, and another retainer managed to escape and head for Oden's wife and two children, Momonosuke and Hiyori, in Oden Castle, but Kaido had set it ablaze. After getting into the burning castle and finding Oden's family, Toki decided to send Momonosuke, Kin'emon, Kanjuro, Raizo, and Kikunojo forward in time with her Toki Toki no Mi ability while she would die here, and Kin'emon promised to fulfill Oden's wishes. They were then sent 20 years into the future, where they saw gravestones with their names on it. They traveled through the new Wano and initially despaired, but they were able to find people who were still loyal to the Kozuki Family, and set off to sea to find more allies to fight Orochi and Kaido, which led to them finding the Straw Hats and Law.[12]
With the alliance now formed, Kin'emon revealed that their goal was not to wage a full-scale war, but to conduct a raid on Kaido's home of Onigashima during the Fire Festival two weeks from now. He presented a secret message to tell recipients to meet at the Habu Port at the appointed time, which they would pass out to their allies, who were marked by a crescent moon symbol on their ankles. Zoro's group was already working to gain intel in the Flower Capital, and the rest of the Straw Hats would do the same. Kin'emon had Nami train to be a kunoichi, and summoned the master kunoichi Shinobu to train her. Finally, he told the alliance that there were three samurai they particularly needed to find, as they were each worth 100 men: Ashura Doji, Kawamatsu, and Denjiro.[13]
A Terrifying Force: Kaido Appears
Kaido comes to Kuri and obliterates Oden Castle.
Back in Okobore Town, the citizens found themselves under attack by Shutenmaru and the Mt. Atama Thieves. The thieves took their food, and Shutenmaru felt no pity for the citizens, believing that there were no heroes who would really feed and protect them. Jack then rode into town looking for Luffy and confronted Shutenmaru, saying that his crew would only let the thief live if he joined Kaido. Shutenmaru refused and attacked Jack, and the two sparred. However, their fight was soon interrupted when Kaido suddenly came flying in as a dragon, wanting to know where Luffy and Law were.[13] Kin'emon's group was shocked to see Kaido, and Law revealed why he had come, saying that he and Luffy needed to deal with this alone to keep the rest of them from being exposed. Kaido drunkenly flew around Okobore Town, dealing lots of destruction in the process, and to stop the destruction, Hawkins raced in and claimed without knowing that Luffy and Law were at the ruins of Oden Castle. Kaido immediately flew toward the ruins and instantly blew them apart with fire breath, and this caused Luffy to become extremely angry and attack him.[14]
Kaido defeats Luffy.
After the attack, Luffy raced back toward the ruins when he encountered a heavily injured Speed, who revealed that Kaido had attacked her and Tama on the way to Amigasa Village. With no idea if any of his allies were safe, Luffy decided to try ending the plan immediately and confronted Kaido. He spared no time in pummeling the Yonko with his most powerful attacks, bringing him back into his human form. After Luffy's onslaught, however, Kaido got back up without any signs of damage and knocked him out with one swing of his mace.[15]
Law attempted to bring Luffy to him, but was hit with a Seastone nail and attacked by Hawkins, forcing him to flee. Luffy knocked out several pirates with Haoshoku Haki when they tried to apprehend them, and Kaido decided to have him thrown in prison to break his spirit and make him a subordinate. Now that he was sober, Kaido decided to go after Law later and flew off to Onigashima to drink. Meanwhile, Kin'emon had gone to Okobore Town to check on his wife Tsuru, and was happy to find her alive and well, but did not intend on reuniting with her until after their mission had been accomplished. He then spotted Shutenmaru riding away, and recognized him as Ashura Doji. In the now-destroyed castle ruins, the alliance was able to survive the blast due to Shinobu rotting the ground away with her Juku Juku no Mi abilities, and after getting out of the hole, Kikunojo prepared to tell them about the current situation in Wano. In the wastelands of Kuri, Inuarashi and his Musketeers found the injured Tama and took her to receive treatment.[16]

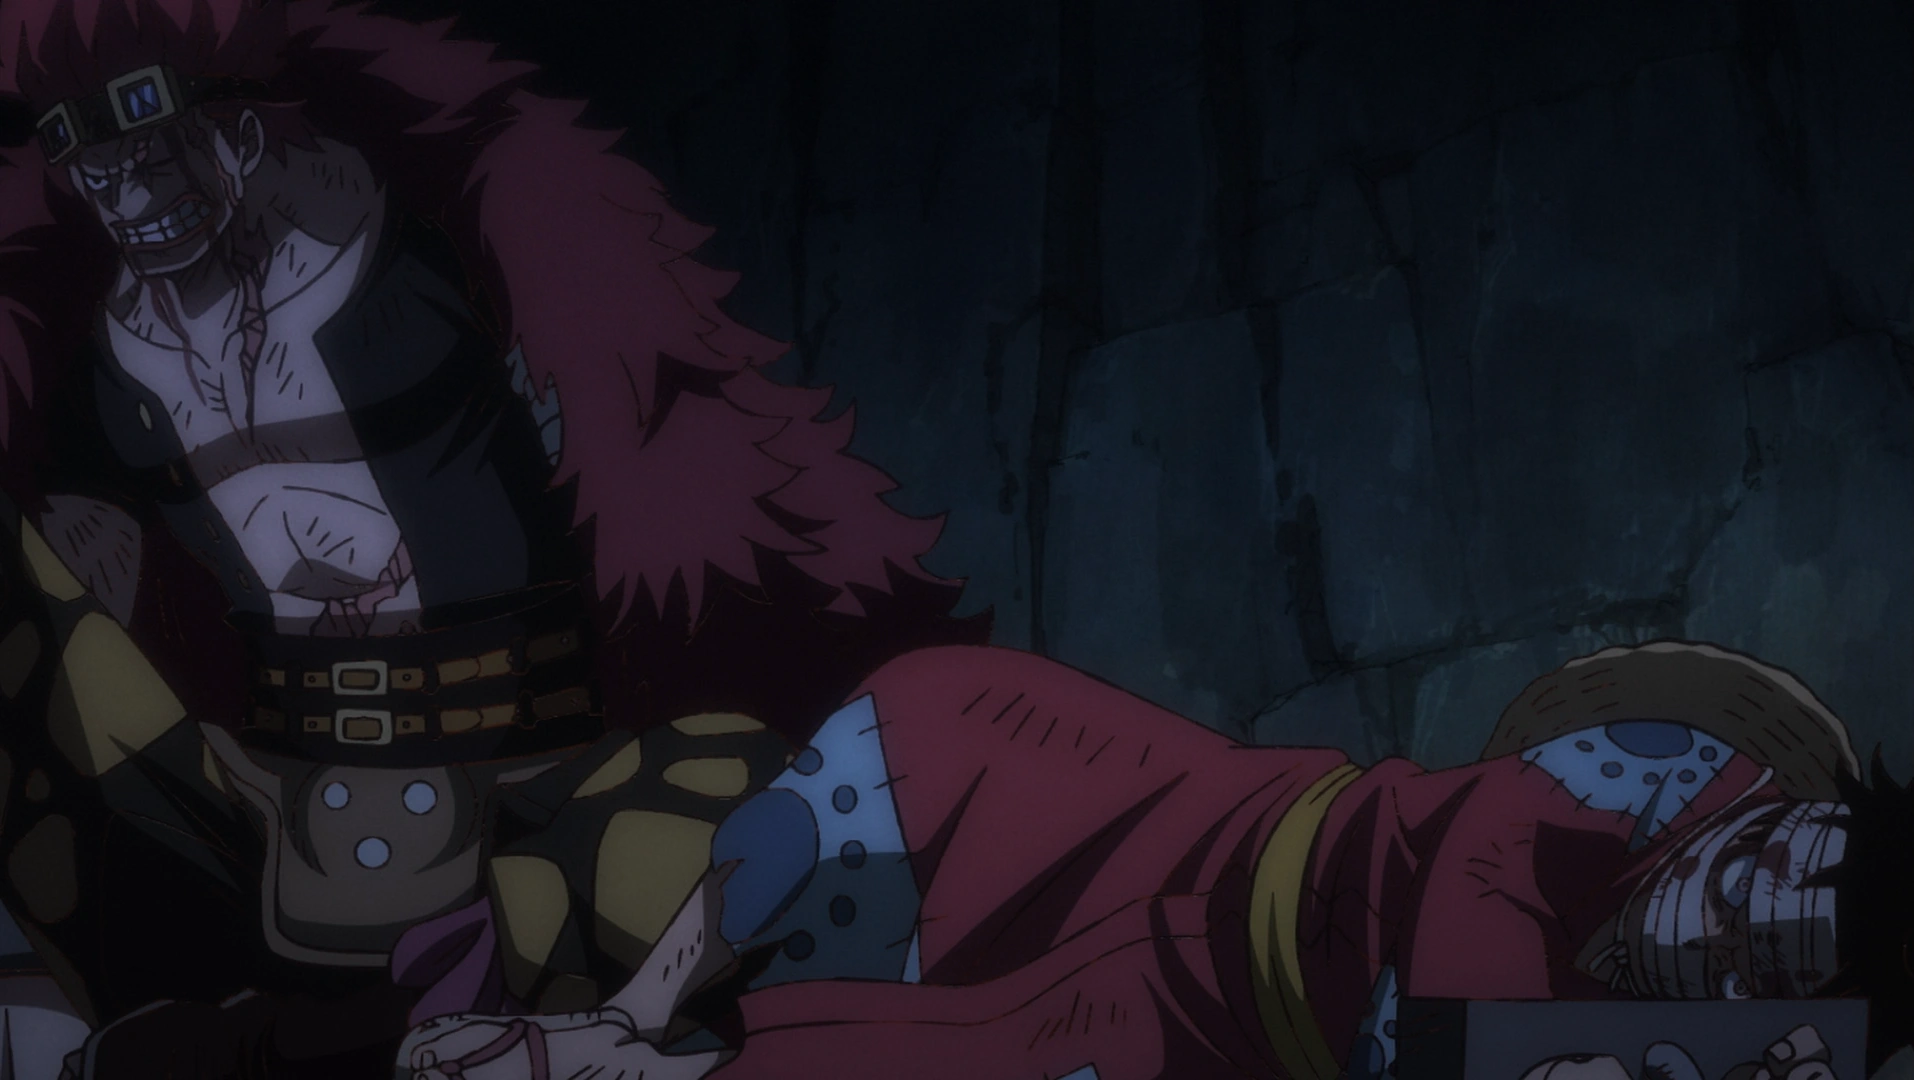
Luffy imprisoned alongside Kid.
An extra edition of the newspaper covering the fight was printed out, and Usopp, Franky, Robin, and Zoro were appalled when they read it. The next day, Luffy was taken to the Prisoner Mines in Udon, where prisoners tirelessly worked to build weapons for Kaido. One mysterious prisoner was fed a poisoned fish that was supposed to be boneless, and when Luffy was brought inside the prison, a guard attempted to attack him for glaring at him. However, the mysterious prisoner spit the fish bones at the guard, taking him out. The guards threw Luffy into a cell, saying that starting tomorrow they would break his spirit by working him to death. Luffy's cell was next to Eustass Kid's, and they both swore revenge against Kaido, causing them to realize the other's presence.[16]
Interlude: Gecko Moria vs. Blackbeard

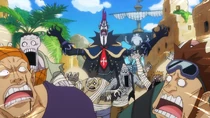
Moria attacks the Blackbeard Pirates to look for Absalom.
On Kuraigana Island, Perona was elated to see news of Gecko Moria being alive. She decided to go find him, which Mihawk stated might be for the best because of some developments at the Levely. Meanwhile, Moria invaded Pirate Island with his zombie army to confront Blackbeard and find the missing Absalom, who had come to the island a few days ago. However, Moria found out that Absalom had been killed after Catarina Devon impersonated him with the Inu Inu no Mi, Model: Kyubi no Kitsune, allowing Shiryu to use the Suke Suke no Mi power he had stolen from Absalom to attack Moria and his army. Blackbeard then called out to Moria from his hideout, inviting the former Shichibukai to join his crew and revealing recent earth-shaking events including the executives of the Revolutionary Army fighting Fujitora and Ryokugyu during the Levely and the Straw Hats' arrival at Wano Country.[17]
Second Act
The Oiran Komurasaki Arrives: An Eventful Banquet

Inuarashi clashes with Ashura Doji, who refuses to rejoin the Kozuki Family.
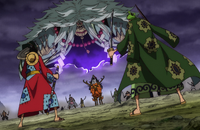
On Mt. Atama, Inuarashi clashed with Ashura Doji as Kin'emon, Momonosuke, Kiku, the minks, and Ashura's men looked on. Kin'emon stopped the fight, and Ashura refused to rejoin the Kozuki Family, saying he was only loyal to Oden and the rest of his followers' absences the past 20 years left a hole too large to be filled. In Amigasa Village, Tama recovered from her injuries, and on Onigashima, Jack was berated by his fellow All-Stars King and Queen for the low offerings from Kuri.[17]
In the Flower Capital, among news about the thief Ushimitsu Kozo and street murderer Kamazo, the Kozuki Family's allies received Kin'emon's secret message and understood it. As this happened, Nami and Shinobu infiltrated a high-ranking official's house to spy on a covert weapons trade deal, though were caught and forced to flee. While gliding away, Nami saw that Sanji had opened a soba stand on the street.[18] Usopp, Robin, and Franky reunited with Sanji as they ate his soba, but trouble quickly arose when three thugs from the Kyoshiro Family came to try extorting money from him. When Sanji refused, they hit a little girl's bowl out of her hands, resulting in Sanji and Franky beating two of them to the ground. The third one ran off to report this to Kyoshiro, who told him to contact Queen to send assassins after Sanji.[19]

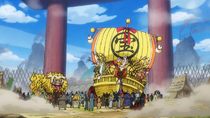
The oiran Komurasaki makes her way to Orochi's banquet.
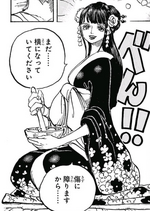
In the aftermath, Sanji gave the little girl another bowl of soba, and she introduced herself as Toko, laughing whenever she spoke. After eating, Toko raced off to join the oiran Komurasaki, whom she worked for as a kamuro. Robin's master came in and revealed that Komurasaki was the greatest of all oiran in Wano, and that Robin would be accompanying her to Orochi's banquet. As Komurasaki paraded through the street, she left many men incapacitated in her wake,[19] she was attacked by a group of men whom she had swindled after tricking them into giving her money to purchase her freedom. The men were quickly taken out by a guard and exiled, and Komurasaki coldly looked down on them. In Amigasa Village, Tama asked Momonosuke about his sister Hiyori, and he replied that he believed that she was still alive and now 26 years old. However, he did not intend to reunite with her until after the war to prevent Orochi from targeting her.[20]
In Orochi Castle, Orochi met with agents from CP-0, who were trying to broker a new deal for Kaido's weapons after Doflamingo's downfall. Orochi decided to use the immense amount of leverage he had to demand that they bring him Vegapunk to continue their trade. When one of the agents protested, Orochi shot him, saying he was untouchable due to Kaido backing him. Orochi then went to partake in his banquet, where he celebrated with Komurasaki, Robin, and many others.[21] As the banquet progressed, Robin snuck off to try to gather information. However, she was caught by Orochi's ninja squad, the Orochi Oniwabanshu.[22] The ninja moved to restrain her, only to find out it was a body double. As Robin ran back to the banquet hall, their leader Fukurokuju ordered them to sneak around and find her. Robin reported her situation to Nami, Shinobu, and Brook, who had also infiltrated the castle.[23]

Komurasaki attacks Orochi after he attacks her kamuro Toko.
After Robin returned to the banquet hall, Orochi overheard Kyoshiro talking about avenging his comrades and used the opportunity to warn everyone about Toki's prophecy and the impending return of the Kozuki Family. The guests all believed Orochi's paranoia to be lunacy, but kept quiet. However, Toko was unable to prevent herself from bursting into laughter, resulting in Orochi becoming enraged. He attempted to attack Toko with a sword, resulting in Komurasaki slapping him. Despite the grave consequences of such an action, she stood her ground and refused to apologize.[23]


Kyoshiro strikes down Komurasaki to give her mercy.
Orochi transformed into the Yamata no Orochi and tried to avoid attacking her, but his anger eventually overcame his attraction and he wrested her into his mouth. Meanwhile, the Orochi Oniwabanshu spotted Robin running away with Toko and chased her, although she managed to overpower them with Brook's help. One of the Oniwabanshu, Hanzo, crawled into the attic and discovered Nami and Shinobu hiding out there. Shinobu incapacitated him before destroying the floor, sending it crashing down onto Orochi below and freeing Komurasaki from his grasp. The oiran then stood in front of Kyoshiro and let him strike her down in order to give her a samurai's mercy. Orochi was distraught to see Komurasaki be killed, and he started chasing after Robin and Toko. However, Nami summoned Zeus and brought him down onto the shogun, striking him with a massive thunderbolt.[24]
Chaos in the Capital: Straw Hats on the Move
As Franky was working, Minatomo revealed to him that he had pawned off the blueprints to Kaido's mansion, leaving Franky enraged. He ran off to the pawn shop, and worked to trace the passage of the blueprints from person to person. The trail went cold after a man named Rakuda revealed that a man from Kuri had stolen them from him, and Franky reported this to Kin'emon. Kin'emon took over looking for the blueprints as the minks brought in food and weapons they stole from the Beasts Pirates; they had forged a note to make the pirates think that the Mt. Atama Thieves had stolen it.[21]

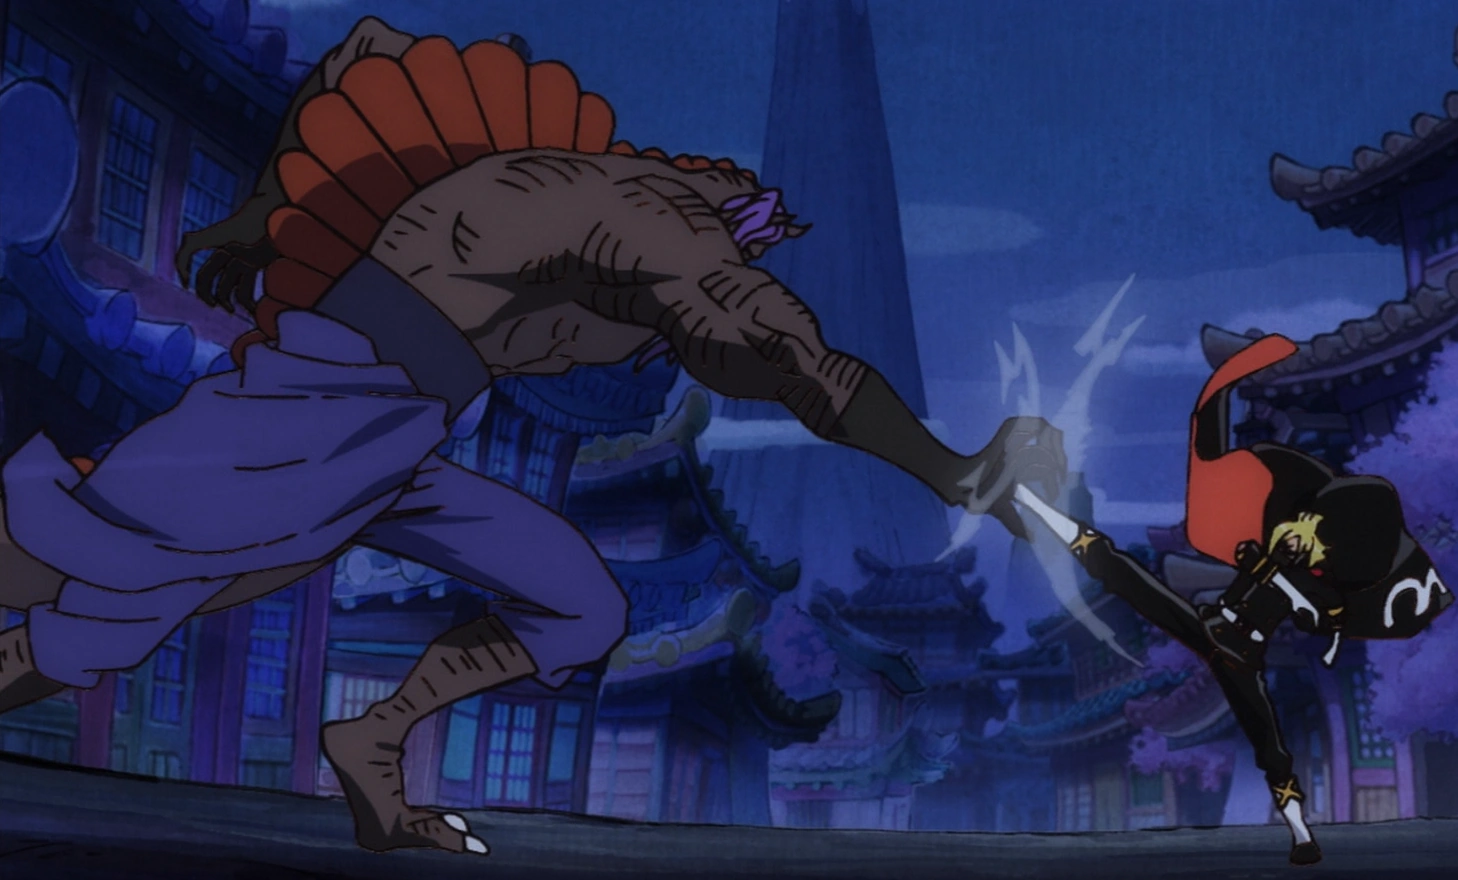
Sanji dons his Raid Suit and battles the Headliner Page One.
Meanwhile, X Drake and Page One, two of the strongest six headliners known as the Tobiroppo, went through the Flower Capital to look for Sanji. Law snuck up to Sanji and told him to go hide, and they along with Usopp and Sanji ran off.[21] However, Page One started rampaging in his spinosaurus form and attacked citizens to draw Sanji out. This worked as Sanji attacked Page One, and as Page One called X Drake for backup, Sanji assured his comrades that he would finish this quickly without being spotted as he pulled out his Raid Suit.[25] Sanji donned the Raid Suit, and Law recognized him as the character Stealth Black from Sora, Warrior of the Sea. Sanji became invisible and attacked Page One by surprise, sending him crashing into a building. Page One transformed into his hybrid form and hit Sanji through multiple buildings with his immense strength. However, Sanji was barely hurt and attacked Page One from above, and Law, Usopp, and Franky fled the Flower Capital and headed toward Ebisu Town.[22]

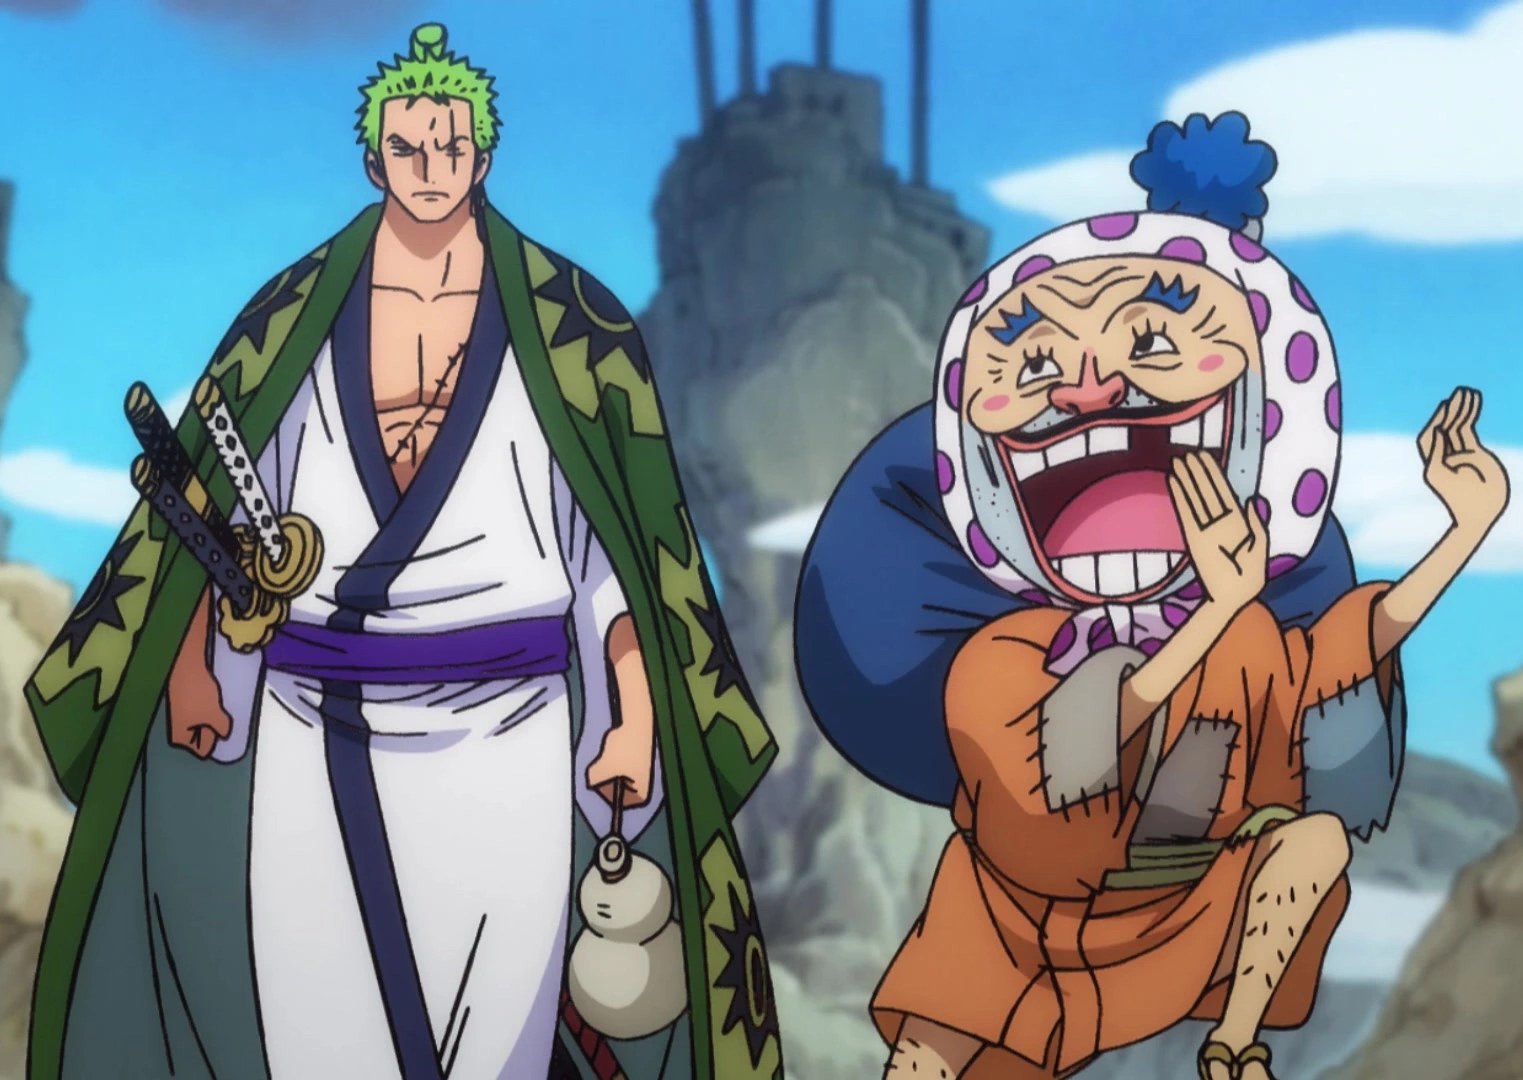
Zoro meets a taikomochi named Tonoyasu.
Meanwhile, Zoro walked through the region of Kibi with a taikomochi named Tonoyasu. Tonoyasu was enamored with him and stuck along after Zoro had saved him from some yakuza thugs. The two of them headed toward Ebisu Town, which was where Tonoyasu originated.[21] At Ebisu Town, Zoro met its citizens, who all laughed constantly and refused to let their extreme poverty and hunger bring them down.[25]
Robin, Nami, Brook, and Shinobu escaped from Orochi Castle, and after dropping Toko off in the Red-Light District went with Kanjuro to the Northern Cemetery in Ringo. There, they talked about Kyoshiro's actions, and Kanjuro wondered what to make of him, as in his time Wano's top yakuza boss was a man named Hyogoro of the Flower. Brook revealed that there was a Poneglyph in the basement of Orochi Castle, but it was not the Road Poneglyph, which was likely on Onigashima. Nami, Robin, and Shinobu then headed back to the Flower Capital to go to a bathhouse.[26]
Sumo Inferno: Luffy Takes on the Prisoner Mine

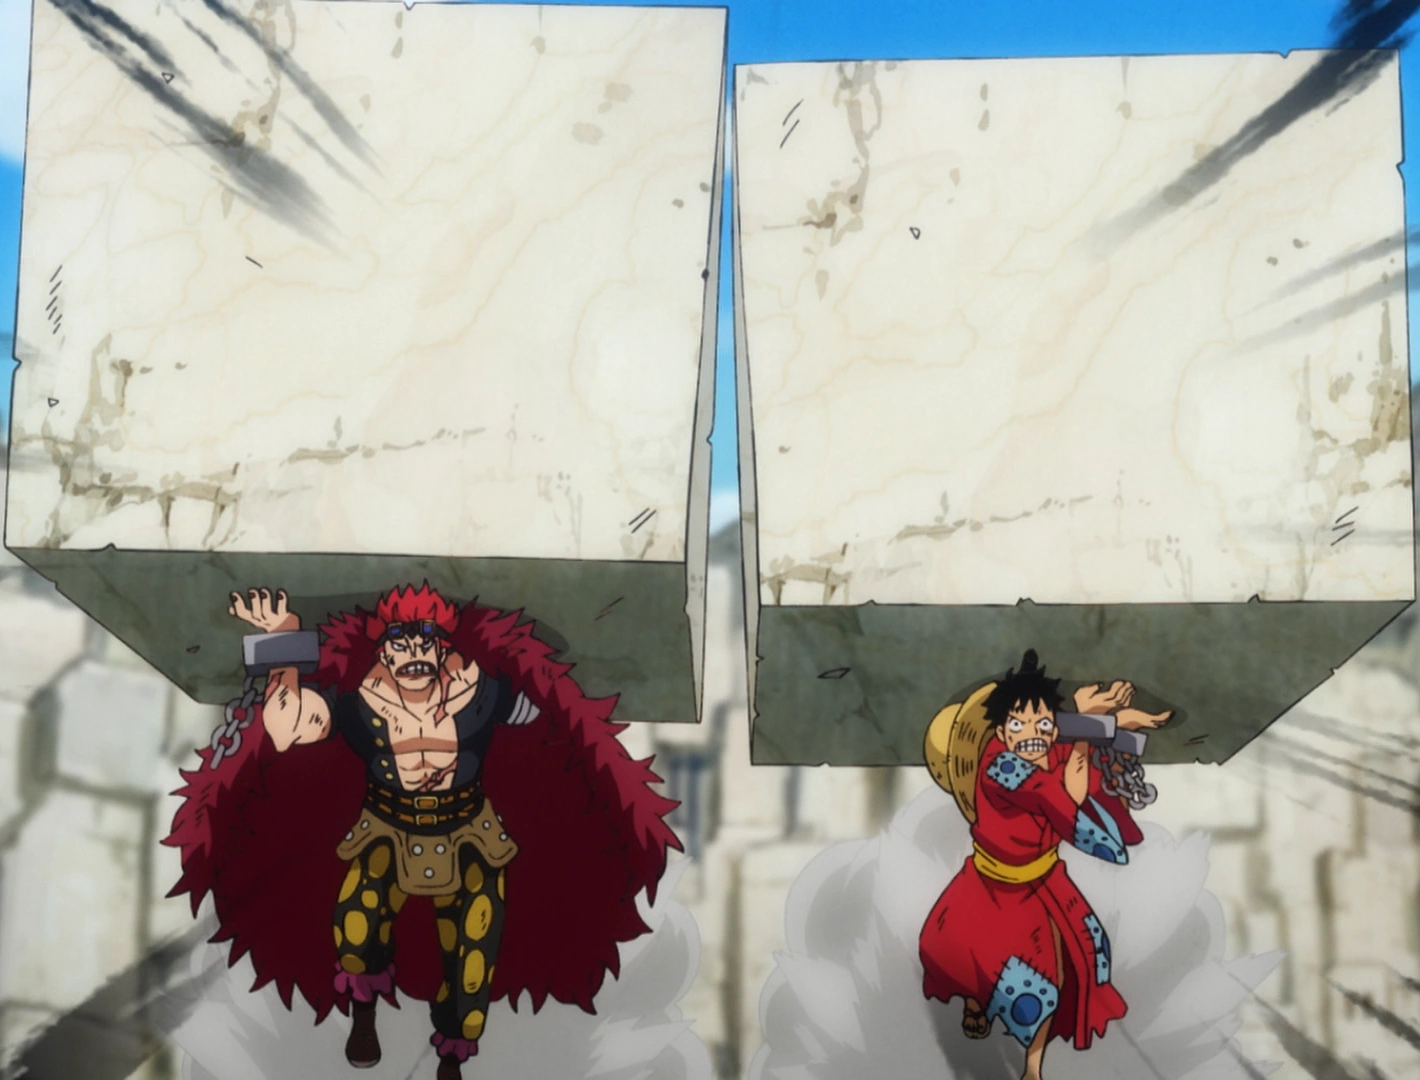
Luffy and Kid become standout workers in the Prisoner Mine.
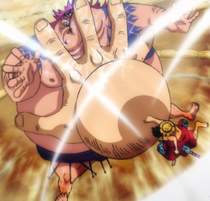
In the Prisoner Mine in Udon, while an elderly prisoner named Grandpa Hyo collapsed under the back-breaking work, Luffy and Kid moved large blocks at a rapid rate and were rewarded with large amounts of kibi dango to eat. This caused the vice warden Dobon to go on a rampage due to his food reserves running out, and he stepped on Hyo as he attempted to kill Luffy and Kid in his hippopotamus mouth. Luffy and Kid quickly took him out, and although attacking a warden would result in execution, they avoided punishment due to no one seeing them inside Dobon's hippo, and they became heroes among the prisoners as Luffy carried Hyo off.[18] The next day, Hyo thanked Luffy for saving him, and Luffy gave him some meal tickets to keep his energy up. Raizo, having infiltrated the prison, came up to Luffy to tell him that he located the keys to his Seastone handcuffs, but they were in a heavily guarded room. Caribou then went to Luffy to ask for meal tickets, offering to become his subordinate if given some, but Luffy refused.[20]
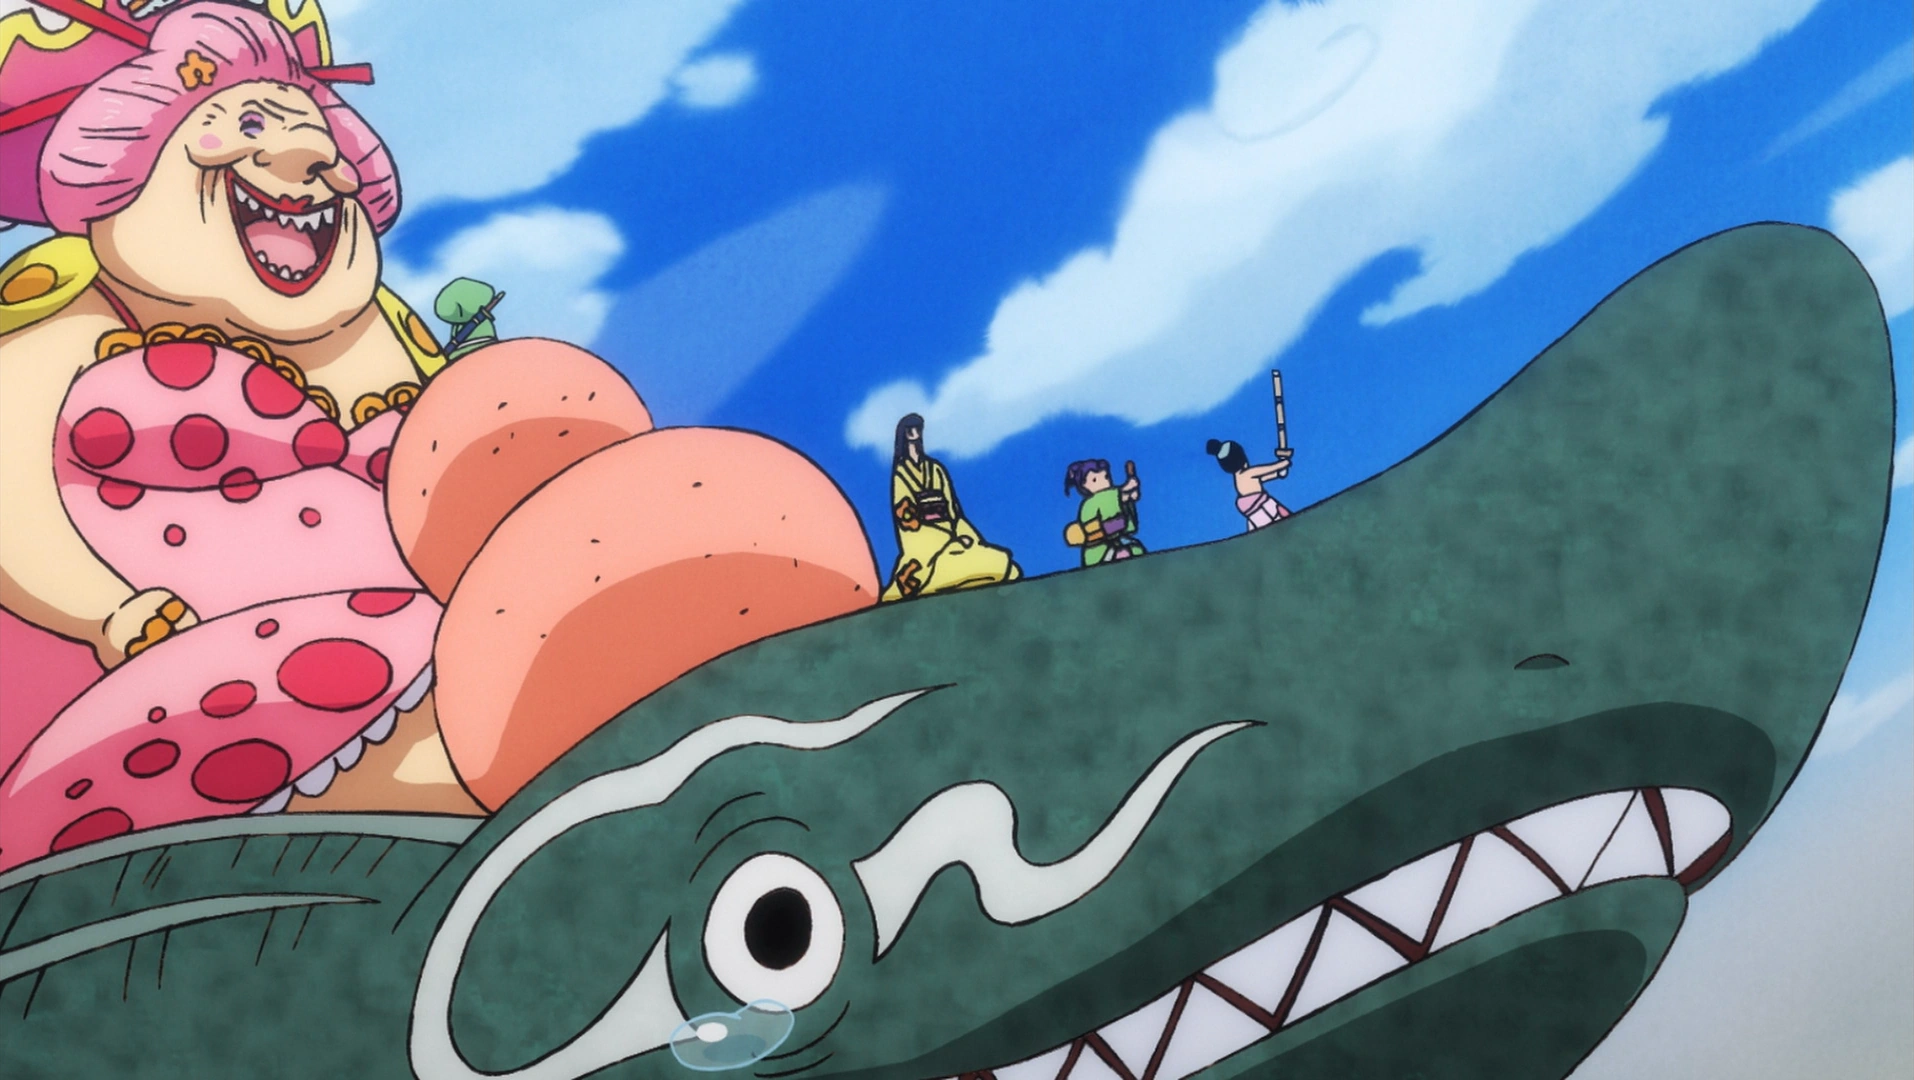
On Onigashima, Kaido and the Beasts Pirates were on high alert as the Big Mom Pirates were approaching Wano Country on the Queen Mama Chanter. They had attached the Chanter to the giant carp to pull them up the waterfall. However, King then flew in with the power of the Ryu Ryu no Mi, Model: Pteranodon and crashed into the ship, sending it falling back down the waterfall, with Big Mom falling into the ocean in the process.[25] The rest of the Big Mom Pirates landed safely on the Chanter, and they wondered what would become of Big Mom. Some of them were worried that Kaido would kill her, as the two Yonko hated each other after once being crewmates.[26]

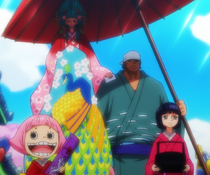
Chopper, Momonosuke, Kiku, and Tama take an amnesiac Big Mom to Udon.
That morning, Chopper, Momonosuke, Tama, and Kiku walked down to Kuri Beach when they saw Big Mom washed ashore. Chopper became frantic while the other three wondered who she was. However, Big Mom revealed herself to have no memory of who she was.[22] A day later, Chopper's group brought Big Mom to Okobore Town, where Tsuru served her some oshiruko. Big Mom took a liking to the oshiruko, and Chopper told her that there was lots of it in Udon to get her to go there.[24] Big Mom tamed a wanizame by hitting it, and the group rode it on their long journey to save Luffy. Momonosuke resumed practicing his sportsmanship, and shouted "sunacchi" after having heard Zoro tell him about it being used in his homeland. Kiku told him not to say it, as it was a cry used by past generations in Kuri that was unbefitting of someone of his status.[26]

Luffy attacks vice warden Daifugo to save former yakuza boss Hyogoro.
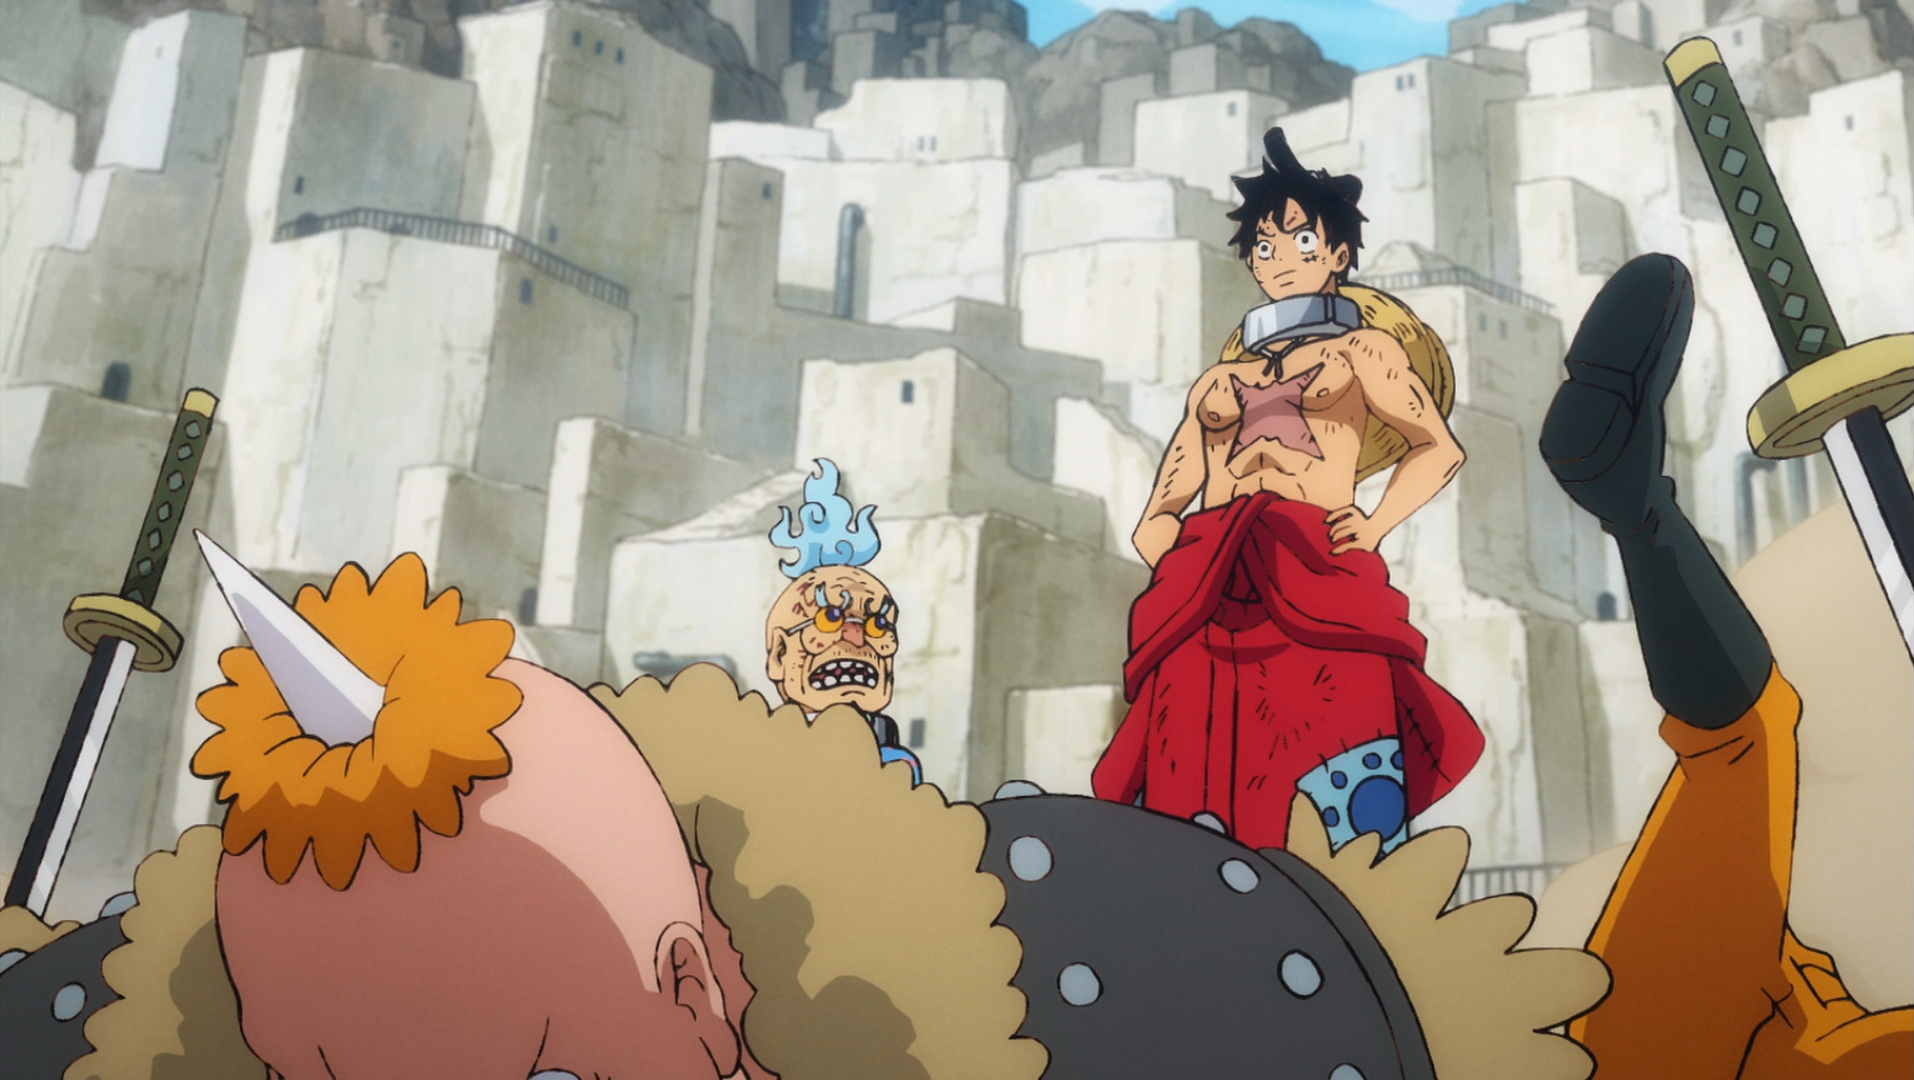
In the Prisoner Mine, the guards were set on high alert as Kid had managed to escape, and Raizo had successfully stolen the handcuff keys. As Luffy was prodded for information, Hyo was attacked by the warden Babanuki and vice warden Daifugo, as they did not believe he earned all his meal tickets. Hyo accepted his death, as he was now happy after witnessing Luffy's act of kindness, which he had not seen in the country since before Kaido's takeover when he was Hyogoro of the Flower. However, Luffy then rushed in and kicked Daifugo, which was seen by everyone around him. Right as Luffy made his attack, Queen arrived at the Prisoner Mine.[26] Luffy managed to injure Daifugo despite being weakened by his handcuffs, but was quickly overwhelmed by Babanuki after the warden shot an explosive blast from his elephant SMILE's trunk. Queen then made his entrance, and Babanuki told him what was going on. Luffy and Hyogoro were brought before Queen, who decided to make their execution entertaining. Meanwhile, as Raizo drew closer to Luffy, he heard the mysterious prisoner calling out to him, and was shocked to realize that this prisoner was his comrade Kawamatsu.[27]

Luffy tests his strength in Queen's Sumo Inferno.
Raizo had to leave Kawamatsu after being spotted, and Queen put Luffy and Hyogoro into a sumo ring. He had special collars affixed to their necks, saying that if they were forced out of the ring, the collars would go off and decapitate them. To decrease their disadvantage, he had Luffy's handcuffs removed, much to Raizo's bewilderment. A group of Waiters then charged into the ring, but Luffy quickly knocked all of them out with his Haoshoku Haki.[28] He then easily beat the Pleasures, and tried to hit them by projecting Haki from his palm like he had seen Rayleigh do, but was unsuccessful.[29] The Gifters Alpacaman and Madilloman entered the ring, and Luffy used his advanced Kenbunshoku Haki to help Hyo avoid their attacks, but continued to fail at advancing his Busoshoku Haki. Hyogoro eventually recognized what he was trying to do, revealing that people from Wano know it as Ryuo. He then ran up toward Alpacaman and hit him with a burst of projected Haki, and offered to train Luffy in its usage.[30]
The Message Exposed: Orochi's Unexpected Crackdown
Sanji, Usopp, Franky, and Law reached Ebisu Town, where they heard the news about Komurasaki's death and met Tonoyasu. Yasu revealed that Zoro had left to chase after a thief who took his sword, and during their interaction, the group realized that Sanji had left as well. Meanwhile, Nami, Robin, and Shinobu made it to the bathhouse, and as they bathed, Shinobu told them about Hyogoro, whom she knew would corral enough respect to substantially increase their numbers. However, she believed him to be dead.[27] Suddenly, Hawkins and Drake commenced a raid on the bathhouse, and rounded up everyone with a crescent moon on their ankle, which they knew to be a symbol of loyalty to the Kozuki Family. Nami tried hiding behind Shinobu, and Hawkins spotted her and tried to draw her out, unwittingly disrobing her. This caused Sanji to inadvertently deactivate his Raid Suit power and reveal his presence, and Hawkins and Drake recognized him as he quickly flew his three comrades out of the bathhouse. As they fled, Sanji revealed that in addition to Orochi knowing about the ankle tattoo, he had also captured Law's crewmates to lure him out.[28]
Zoro strikes down Kamazo to save Komurasaki and Toko.
Meanwhile, Zoro chased the sword thief, a warrior monk named Gyukimaru, to Oihagi Bridge in Ringo. Gyukimaru had already returned Shusui to Ryuma's grave, and Zoro clashed blades with him to try and get it back.[28] After fighting for a bit, they were suddenly interrupted as Komurasaki and Toko raced onto the scene, pursued by Kamazo the Manslayer. Zoro intercepted Kamazo, who unbeknownst to the public was an assassin in Orochi's service, and was sent by the shogun to kill Toko. Komurasaki begged Zoro to help them, and he agreed in exchange for food and alcohol. Zoro and Kamazo then commenced an intense duel, and were even until Gyukimaru decided to attack Zoro again. With Zoro turning his focus to the monk, Kamazo was able to pierce him through the shoulder with one of his scythes. However, Kamazo was unable to pull it out, allowing Zoro to take it and put it into his mouth. Zoro then attacked Kamazo with Rengoku Oni Giri, striking him down.[29] Immediately afterwards, Gyukimaru departed as Zoro lost consciousness from his wound.[31]

Komurasaki reveals herself to be Momonosuke's sister Hiyori.
Zoro woke up in a house in the Northern Cemetery, where he found himself being tended to by Komurasaki. She thanked him and told him about her and Toko's situation, and revealed that she was actually Momonosuke's younger sister Hiyori.[31] Hiyori told Zoro about how she stayed behind in the past to ensure the Kozuki Family bloodline kept going, and was taken care of by Kawamatsu. Zoro wondered about the alliance's next course of action now that Orochi had gained an advantage on them, but went to sleep to help himself heal.[30]

The Kozuki Family's supporters are rounded up and put in a large prison.
Meanwhile, Kin'emon's group found out that Orochi had discovered the meaning of their secret messages, and in the Flower Capital, hundreds of Kozuki Family supporters were rounded up and put into a large prison in Rasetsu Town.[30] After Sanji's group came to Ebisu, Shinobu blamed Law's crewmates for revealing the secret, causing Law to get into an argument with her,[31] and Law then left in anger to save his crewmates himself. Tonoyasu came up with the secret message, and asked that Shinobu's group tell Kin'emon that he would be participating in the final battle. Though he spoke to them like a familiar, Kanjuro and Shinobu were unsure of who he was. Yasu then went around helping various townspeople, and an old woman said that although his daughter, Toko, sent him money from the Flower Capital, he gave most of it away and was considered a saint by the townspeople.[32]
Turning the Tables: A Former Daimyo's Sacrifice
In the Prisoner Mine, Luffy continued hitting opponents out of the sumo ring, but was still unable to progress his Haki. Night fell and the Beasts Pirates all retired, leaving Luffy and Hyogoro in the ring. After Luffy knocked out the guards around them with Haoshoku Haki, he and Hyogoro were approached by Raizo and Caribou, whose handcuffs were the ones Raizo got the key for. Raizo was happy to see Hyogoro and told Luffy who he really was, and Hyogoro said they possessed a great opportunity in this prison, as many people were sent here for rebellion against Orochi. Winning these people to their side, including the regional yakuza bosses and Kawamatsu, would substantially increase their allies.[32] Raizo and Caribou then acquired Queen's oshiruko stash and gave it to Luffy and Hyogoro, who ate all of it. When morning came, Queen noticed that they had grown fat, though did not suspect they had eaten his oshiruko and his subordinates were too afraid to tell him.[33]

Tonoyasu is revealed to be the former daimyo of Hakumai, Shimotsuki Yasuie.
In the Flower Capital, Fukurokuju reported to Orochi that Ushimitsu Kozo had been caught, and Orochi was surprised to find out his identity. The shogun ordered that the thief be publicly crucified, and had it broadcast along with Komurasaki's funeral. Meanwhile, Brook found Zoro, Hiyori, and Toko in the Northern Cemetery, and he told them about the development with Ushimitsu Kozo, revealing that he was Tonoyasu. Toko immediately ran off to save her father, forcing Zoro and Hiyori to chase after her. As they watched the broadcast of Yasu's crucifixion, Kanjuro and Shinobu finally recognized him as Shimotsuki Yasuie, the former daimyo of Hakumai.[33] Many years ago, Oden had hung around Hakumai after being exiled by Sukiyaki, and was cavalier about becoming shogun as he believed Yasuie to be better suited for succeeding his father. However, Yasuie had none of that, as he was intent on Oden living up to his father's challenge.[34] Some time later, Yasuie had caught the Nine Red Scabbards stealing money to give to Oden. To their surprise, he let them take the money, with the command to serve Oden well on his way to becoming the next shogun.[35]
Yasuie is executed by Orochi.
Meanwhile, one of Holdem's men set fire to Mt. Atama to get revenge on the thefts that were committed by Kin'emon's group under the guise of the Mt. Atama Thieves, and Ashura Doji led his men to attack Bakura Town. With them heading out, Kin'emon and Inuarashi raced toward Bakura Town to intercept them.[33] As they reached Bakura Town, they watched the broadcast of Yasuie's execution. Yasuie revealed to the crowd that he was actually not Ushimitsu Kozo, and only claimed to be him to get a public execution. He then claimed that he created the Kozuki Family's secret message as a joke, and that the crescent moon tattoo was just a popular symbol from the past. This caused Orochi's subordinates to start having doubts, and as Orochi was being brought to the execution platform, he became enraged after hearing Yasuie curse him. Orochi and his men then shot Yasuie multiple times, and Yasuie accepted his death as he had managed to change the alliance's meeting place for the final battle and tell all the Rasetsu Town prisoners about it.[34]
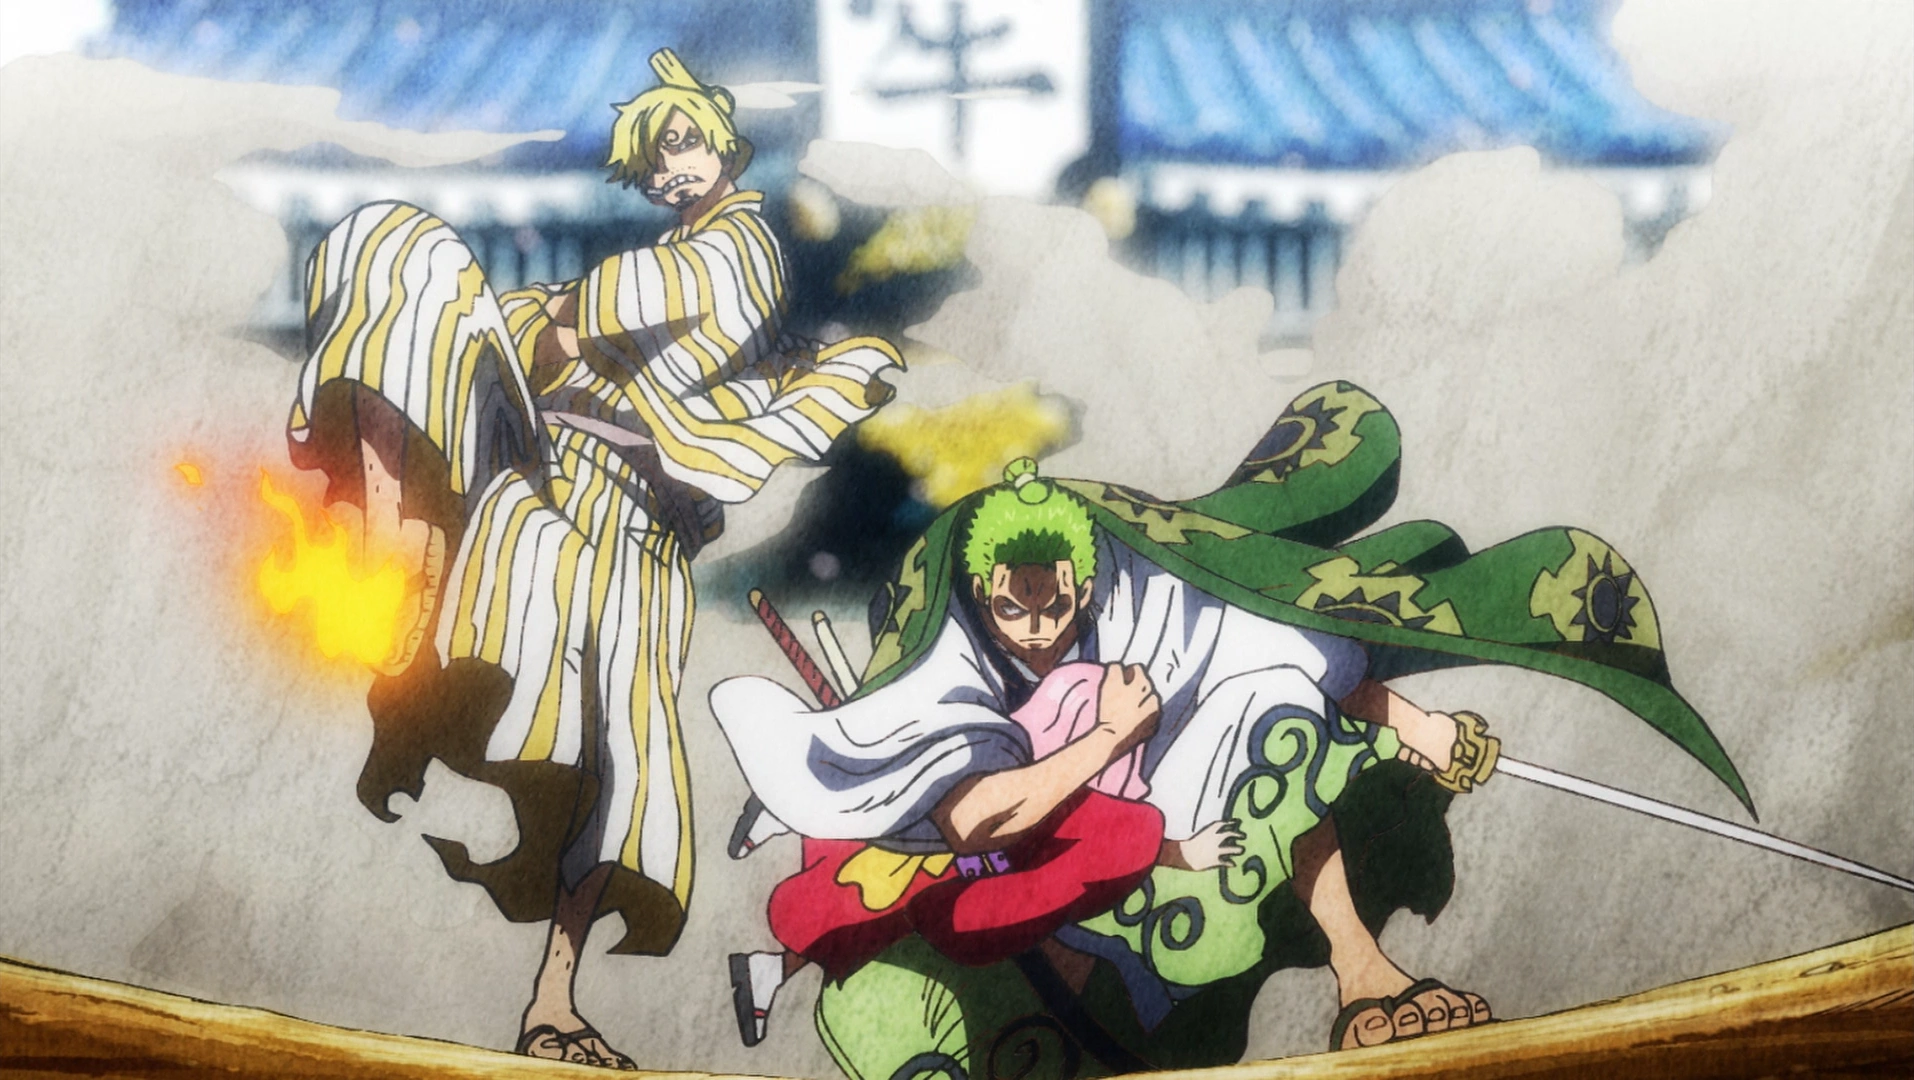

Zoro and Sanji protect Toko from Orochi.
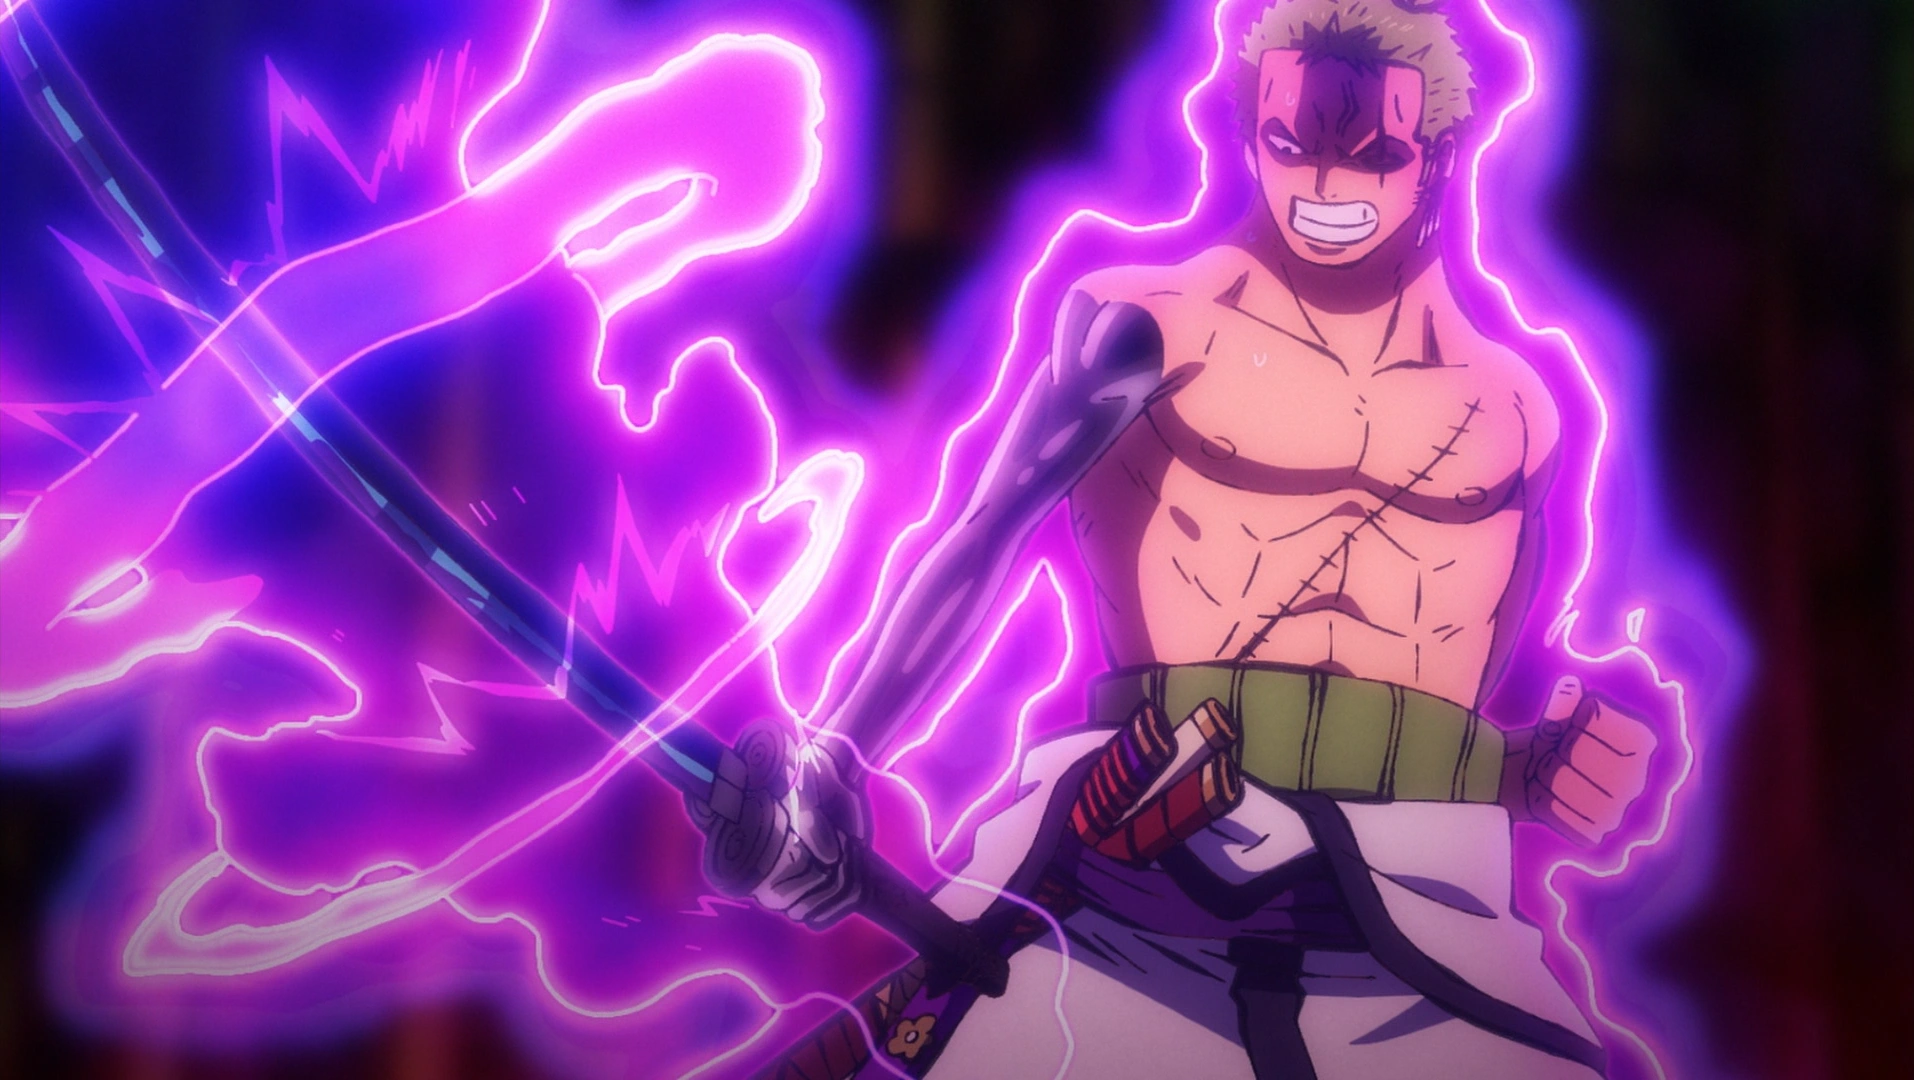
As Yasuie fell down to the ground dead, the Ebisu Town citizens who had made their way to the capital started laughing profusely, and Zoro was appalled at this.[34] However, Hiyori revealed to him that they were forced to laugh due to consuming SMILEs. She explained that only one out of ten SMILEs grant animal transformation powers, and the rest forced their consumers to only express positive emotions. The Pleasures were the Beasts Pirates who ate these defective SMILEs. However, Orochi had decided to decrease the amount of suffering he saw in the country by mixing the leftover defective SMILEs in with the food that the leftovers town citizens ate, resulting in them receiving the side effects and only being able to laugh. Several of the Straw Hats and Kin'emon also learned this as they watched the broadcast, and in the Flower Capital, Orochi reveled in the laughter. He then saw Toko at the execution platform trying to revive her father with toad oil, and prepared to shoot her. However, Zoro and Sanji both came in at the same time to protect Toko.[35]
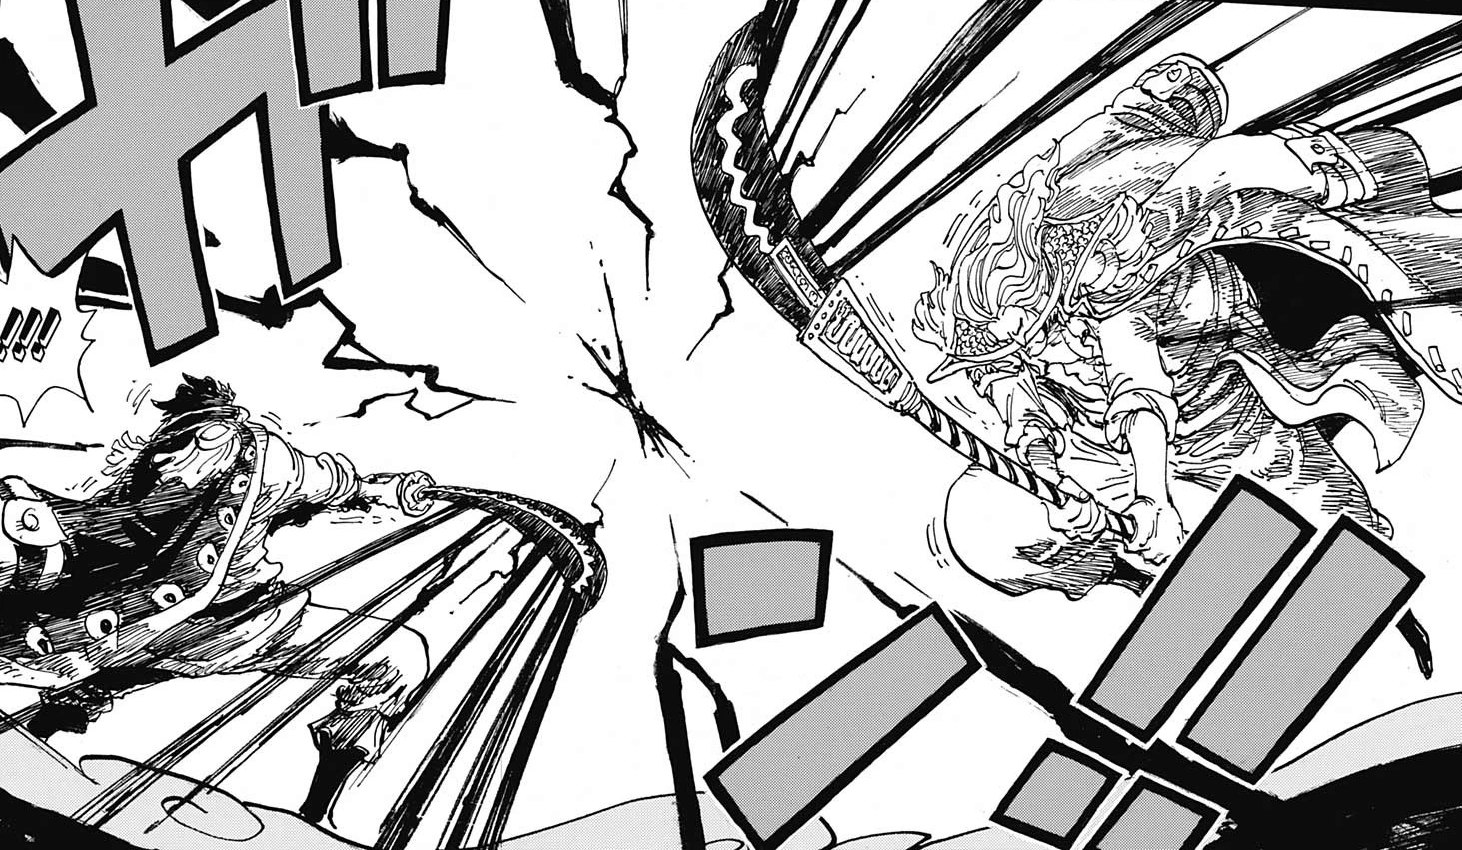
Zoro attacks Orochi.
Zoro unleashed a flying slash attack on Orochi, and the shogun froze in fear, but the attack was intercepted by Kyoshiro. As Zoro clashed with Kyoshiro, Sanji found himself under attack from X Drake. Usopp, Franky, Nami, and Robin then came in to attack Orochi's men, and chaos erupted in the city as Orochi was carried away to safety.[36] A short time later, the Orochi Oniwabanshu joined the fight, seeking to capture just one of the Straw Hats. Meanwhile, Law snuck up to the Rasetsu prison but was caught by Hawkins. Hawkins revealed that he had tied his life force to Law's captured crewmates, so Law would have to kill them to get to him.[37]
Big Mom Arrives: Uprising in Udon
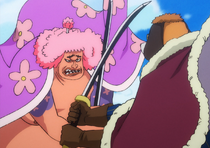
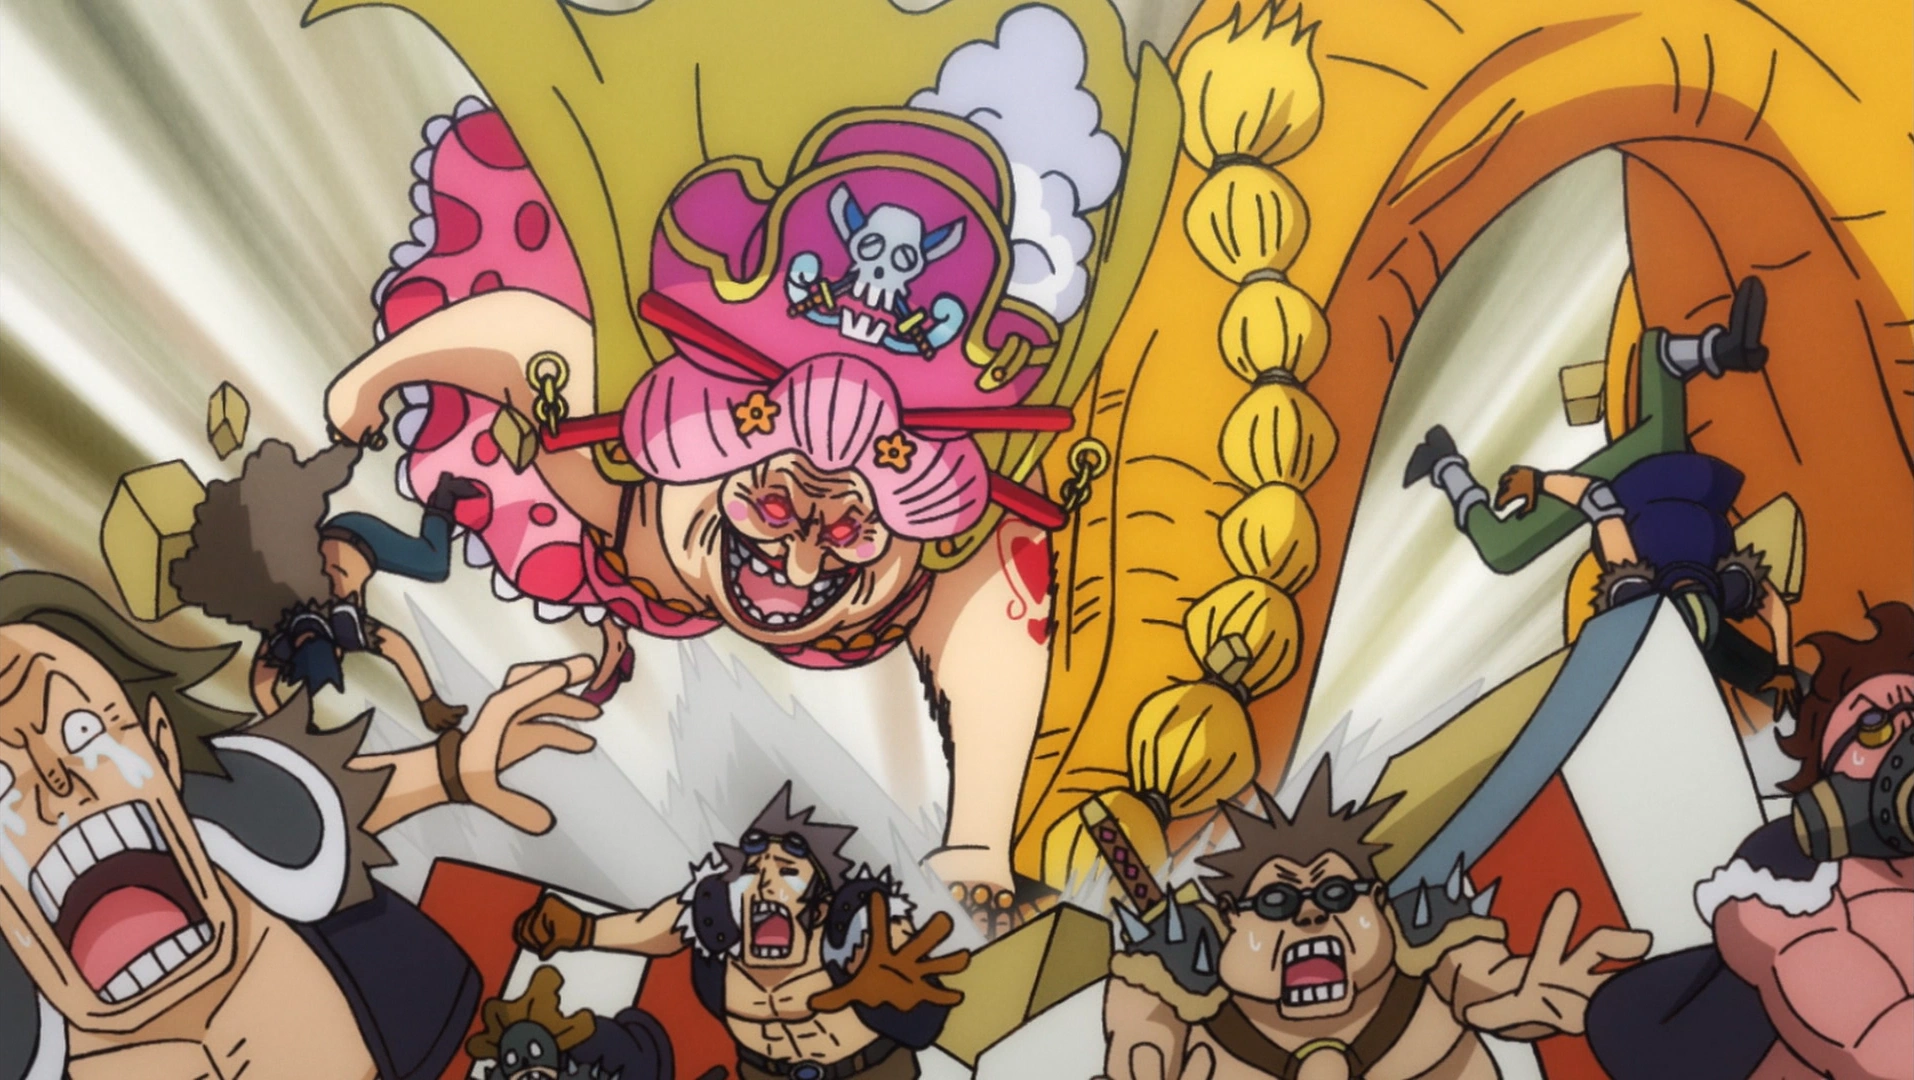
Big Mom breaks into the Prisoner Mine and attacks Queen.
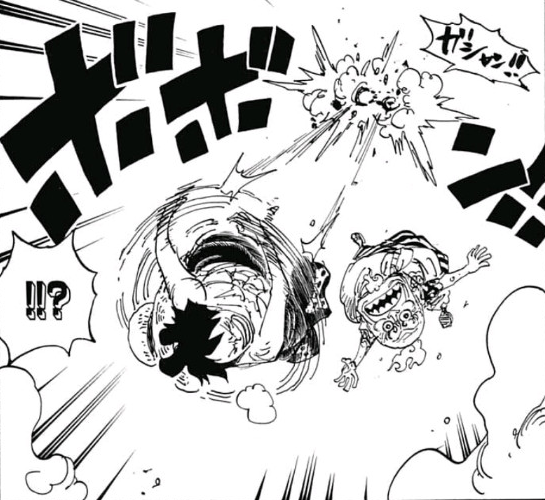
After Luffy, Hyogoro, and the Prisoner Mine guards watched the execution broadcast, Babanuki reported to Queen that two criminals had just been brought in. Kid and Kamazo were then brought in, and Kid was distraught to see Kamazo's state, revealing that he was Killer and was now forced to laugh all the time after eating a defective SMILE. Queen then had Kid and Killer submerged into a tub and resumed the Sumo Inferno, telling Luffy that they would stay in there until he and Hyogoro died. Luffy tried to attack Queen, but to no avail.[36] However, Big Mom then broke into the mine, looking for oshiruko. Queen was immediately angered about her wanting to take his favorite food, and transformed into a brachiosaurus to confront her. However, Big Mom slammed his head into the ground[37] before swinging him around by the neck and throwing him into the wall with monstrous force, leaving him defeated. As Queen flew into the wall, he knocked over the contraption holding Kid and Killer, freeing them, and also broke Kawamatsu's cell door.[38]
Luffy manages to rip off his and Hyogoro's death collars.
The Beasts Pirates tried to contact Kaido, but could not get a signal, as Caribou had gotten the idea to smother the Boss Tanishi that facilitated communication outside of Udon. Big Mom found Queen's oshiruko container, only to become depressed as she found it empty. Luffy then unwittingly revealed that he and Hyogoro had eaten all of it, causing Big Mom to attack them in a fit of rage as she had wanted to take the oshiruko back to Okobore town and share it with the people there. Big Mom's attacks pushed Luffy and Hyo toward the edge of the sumo ring, and they were eventually forced out. However, right before their collars went off, Luffy managed to rip them off.[38]
Luffy recognized that he had done what Rayleigh had done to Camie on the Sabaody Archipelago, and Hyogoro stated that he had gone beyond projecting his Haki and went a step further to using Haki to destroy objects from the inside. Hyo decided to have Luffy continue training with his life on the line by ordering him to protect him from Big Mom. Luffy tried projecting his Haki to block Big Mom's attack, but was unsuccessful and Big Mom hit him into the wall before chasing him around the entire Prisoner Mine. While Big Mom was chasing Luffy, Queen came up with a plan to try to stop her. When they returned to the clearing, Queen dove on Big Mom in his brachiosaurus form and hit her on the head with immense force. Rather than harming her, though, it restored her memories, and she recognized Queen. However, she then fell asleep, and Queen immediately took action to have her restrained with Seastone and he took her to Onigashima, leaving Babanuki in charge of restoring order. With the chaos dying, Luffy decided to take over the prison.[39]

Luffy and his comrades team up to take over Udon.
Babanuki ordered the prisoners to subdue Luffy, and to Luffy's surprise they did so, as they told him that they had no wish to suffer further by rebelling against Kaido. Daifugo started shooting the prisoners with Excite Bullets made by Queen that transmitted a contagious virus known as Mummy, and some of the guards went into Kawamatsu's cell to kill him. However, Raizo came in and threw the key to Kawamatsu's handcuffs as well as his sword Soto Muso into his cell, allowing Kawamatsu to free himself and repel his enemies. He, Raizo, Kikunojo, and Chopper then joined Luffy and Hyogoro in standing against the Beasts Pirates, while Momonosuke and Tama, who were ordered to stay outside, snuck inside the mine unseen.[40] They were able to easily overpower their enemies, but were threatened by the prisoners, who could transmit Mummy to them with just a touch. However, Luffy then grabbed all the prisoners, pointing out that they were still suffering even when helping Kaido's crew, and said that joining his alliance's revolt would be their only shot at changing that. This won over the prisoners, and Babanuki attempted to shoot them with a powerful Excite Shell, but Luffy foresaw this and tied up his elephant trunk, resulting in Babanuki being engulfed in the explosion. The prisoners then attacked Daifugo, and Udon was successfully liberated.[41]
In the aftermath, Kid and Killer departed from the Prisoner Mine, with Kid being finished with pirate alliances and going to look for the rest of his crew. As Chopper treated Luffy's virus, Hyogoro, Raizo, Kiku, and Kawamatsu talked to the prisoners, who despite seeing them were still skeptical that they had come from 20 years in the past. Momonosuke was then called out while he was talking to Luffy, and when the prisoners saw him, they all bowed and expressed their relief, gaining confidence at seeing a member of the Kozuki Family still alive. Kawamatsu then headed off on his own to attend to some business, promising to reunite with everyone before the final battle.[42] Within a day, Chopper had cured all the prisoners of the Mummy virus, and Hyogoro reunited with the four regional yakuza bosses: Omasa, Tsunagoro, Cho, and Yatappe, who nearly killed Luffy after he referred to Hyogoro casually. The yakuza bosses then declared they would go around the country and recruit the remaining rebels scattered around.[43]
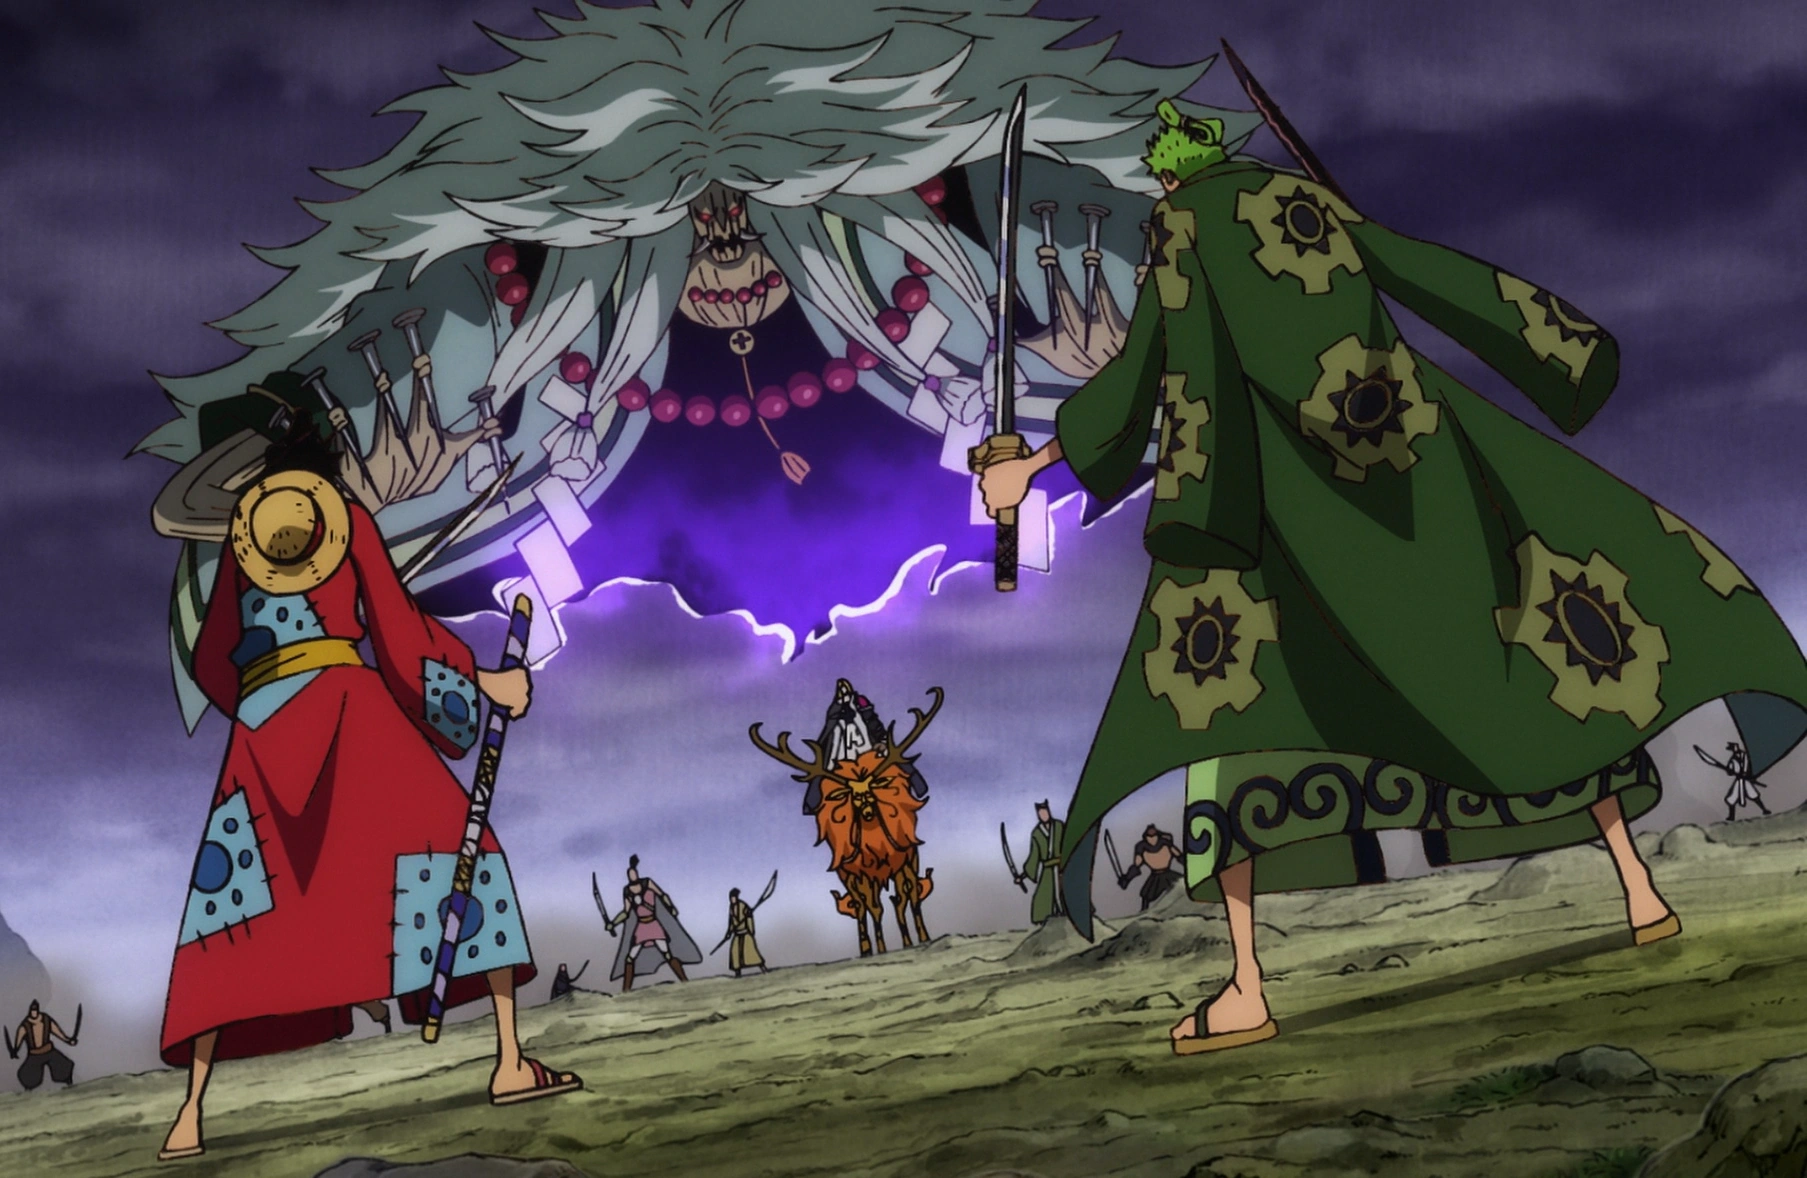
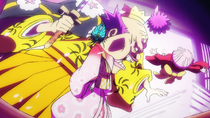
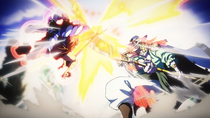
Kaido clashes with Big Mom on Onigashima.
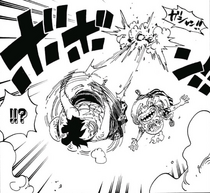
On Onigashima, the Beasts Pirates worked nonstop to feed Big Mom as the All-Stars squabbled among themselves about what to do with her. Big Mom asked King to join her crew, as his race was one of the three not present in Totto Land, but he refused. Kaido then came and ordered for Big Mom's chains to be removed, and after his subordinates reluctantly obliged, he and Big Mom brought out their weapons and engaged in a clash so powerful it split the heavens.[44] The two of them fought nonstop all night, and the Beasts Pirates were terrified at what might happen to Onigashima. Queen pondered escaping to return to Udon, but received a call from Babanuki. Babanuki reported that all had been settled in the Prisoner Mine, as he had been tamed with Tama's kibi dango and was now her servant.[43]
Pieces Falling into Place: The War Approaches
Ashura Doji shows Kin'emon a fleet of ships to use for the raid.
At Bakura Town, Ashura Doji attacked Kin'emon for setting him up. Kin'emon gave a sincere apology, though pointed out that there was still hope to avenge Oden due to Yasuie's final actions. Ashura then took him and Inuarashi to show them something.[37] He brought them to a massive graveyard in Kuri, and explained that ten years ago, these samurai had all grown tired of waiting for the Kozuki Family to return and, despite his wishes, had set out to Onigashima to fight, where they all lost their lives. Deciding not to doubt the Kozuki Family's reasoning for waiting 20 years, Ashura and his thieves brigade joined Kin'emon's alliance.[42] Ashura then took Kin'emon and Inuarashi to Port Itachi, where he showed them many old ships that could be used to sail to Onigashima. Kin'emon was ecstatic to see this, planning for Franky to get the ships in working condition.[44] Kin'emon was further overjoyed to find that Ashura also had the blueprints to Kaido's mansion in his possession, and soon afterward received a call from Raizo about the fighters they had recruited in the Prisoner Mine. However, Raizo did note that they lacked weapons to arm all their allies with.[43]
In the Flower Capital, Orochi was enraged to hear that the Straw Hats had escaped, though Fukurokuju assured him that the Oniwabanshu and the shogun's samurai squad the Mimawarigumi were patrolling the city. Sanji and Shinobu watched the Rasetsu Town prison, whose occupants had not been freed even as the guards continued to doubt Orochi thanks to Yasuie. Meanwhile, Law had been brought into the prison after offering himself in exchange for his crewmates, threatening to sacrifice them to kill Hawkins otherwise. Bepo, Shachi, and Penguin found Nami in Ebisu Town, and gave her a copy of the secret message that had been altered by Yasuie. Nami noticed that he had drawn lines through the snake drawing, and said she would show it to Kin'emon as she departed for Amigasa Village with Franky and Kanjuro, who had Yasuie's body in his possession.[44]
Meanwhile, at the Enma Shrine in the forest, Zoro managed to cut down all the Oniwabanshu ninja who pursued him and Hiyori. He and Hiyori then decided to head back to Ringo, with Zoro wanting to reclaim Shusui from Gyukimaru and wishing to kill Orochi with his own hands.[42] The next day, Zoro returned to Oihagi Bridge and clashed with Gyukimaru again, but their fight was interrupted by the arrival of Kawamatsu. Hiyori tearfully reunited with Kawamatsu, but they were interrupted again as some Beasts Pirates shot Gyukimaru to try to get their weapons back. Zoro and Kawamatsu quickly started attacking the pirates, and Gyukimaru ran away as he expressed joy seeing Kawamatsu again.[43]

Kawamatsu finds the weapons that he and Onimaru collected.
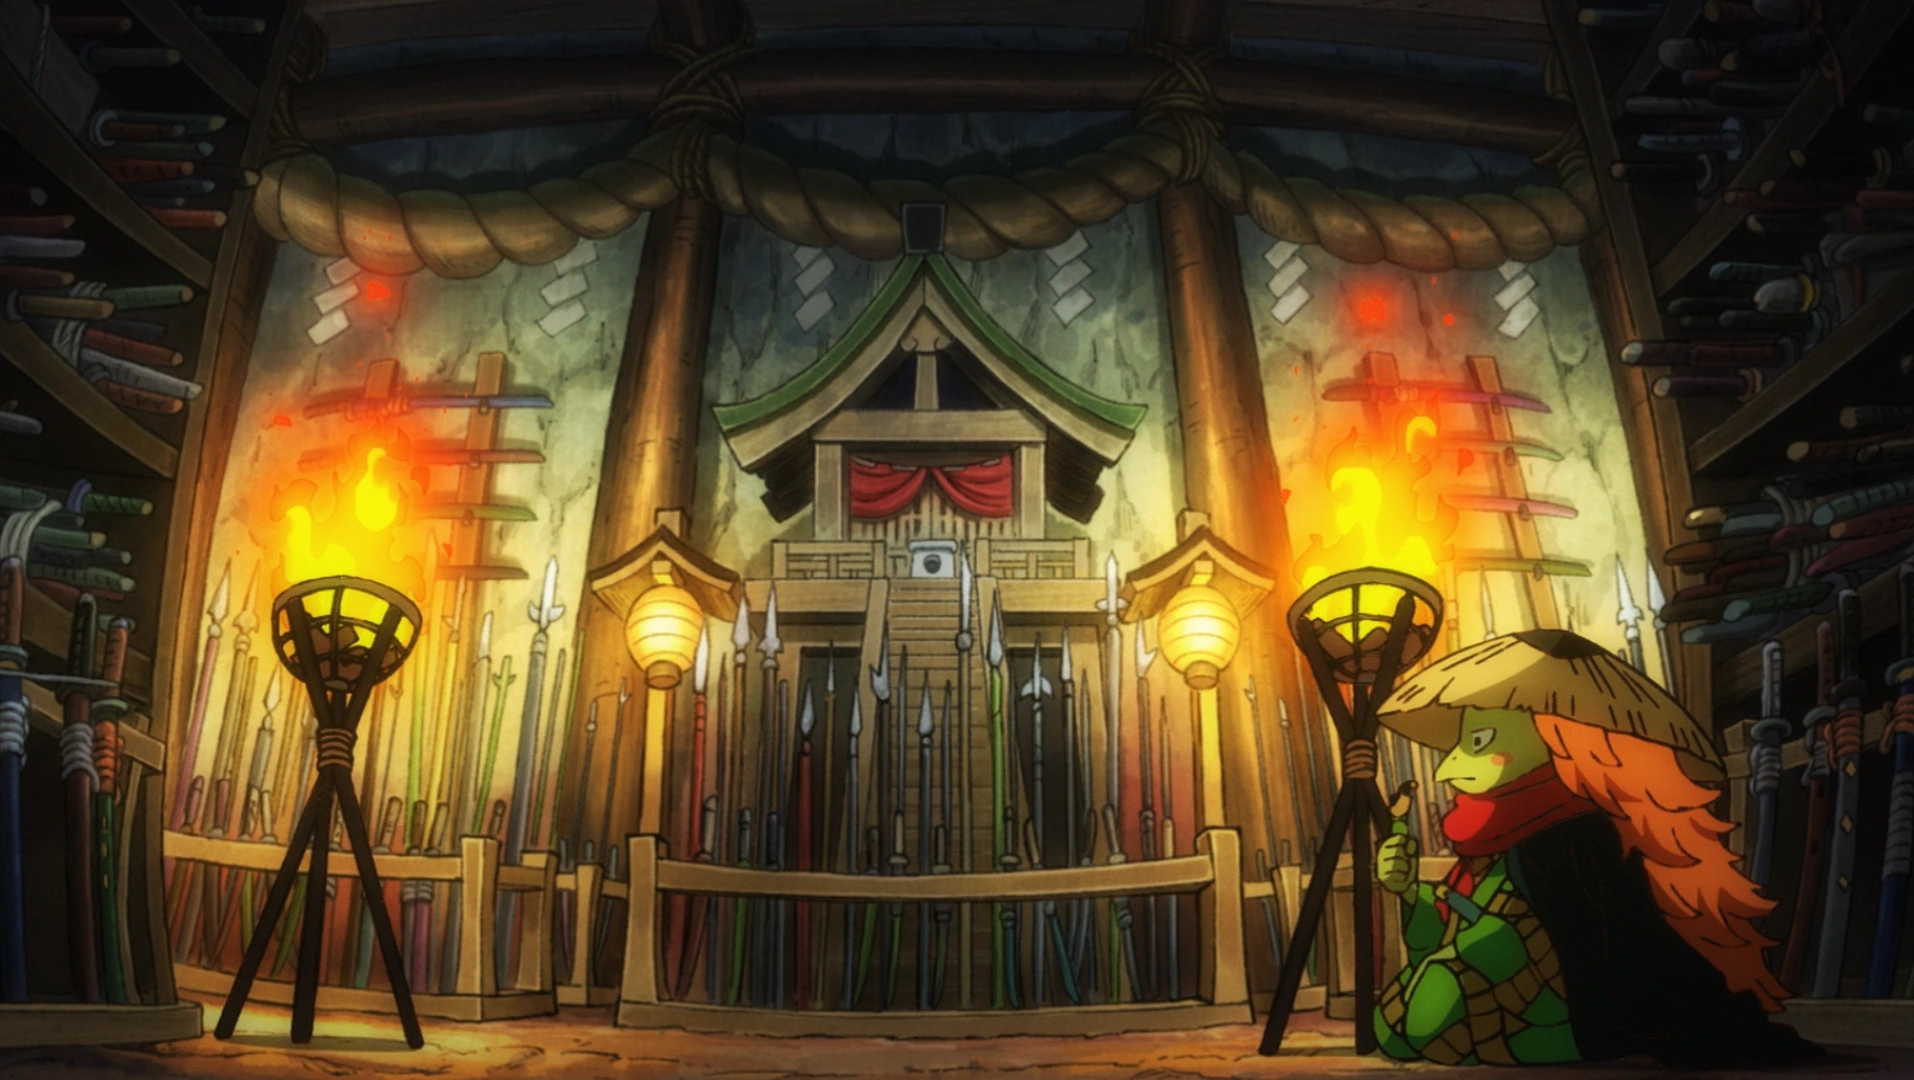
Zoro chased after him, and Kawamatsu and Hiyori talked. Hiyori told Kawamatsu that she had left him so he would stop giving all his food to her, and Kawamatsu revealed that after she left him 13 years ago, he had gone to Ringo to collect the weapons left on the graves there. While there, he had met the komagitsune Onimaru, who was the companion of the late daimyo of Ringo Shimotsuki Ushimaru. Onimaru initially opposed his effort to collect the weapons, but eventually relented due to Kawamatsu's willingness to sacrifice himself for it. Onimaru became Kawamatsu's companion and helped him stockpile the weapons, and Kawamatsu donned the alias of "Gyukimaru" to chase away grave robbers. Kawamatsu was later caught in the Flower Capital and imprisoned in Udon, and in the present, he did not expect to see Onimaru still here. He and Hiyori caught up to Zoro, who revealed that Gyukimaru had opened up a secret chamber before heading off. The trio went into the chamber, where they found all the weapons from the graves ornately collected. Kawamatsu contacted Kin'emon to tell him that they now had weapons to arm their allies with for the final battle, and outside the chamber, Gyukimaru transformed into Onimaru.[45]

Law confronts and interrogates Hawkins.
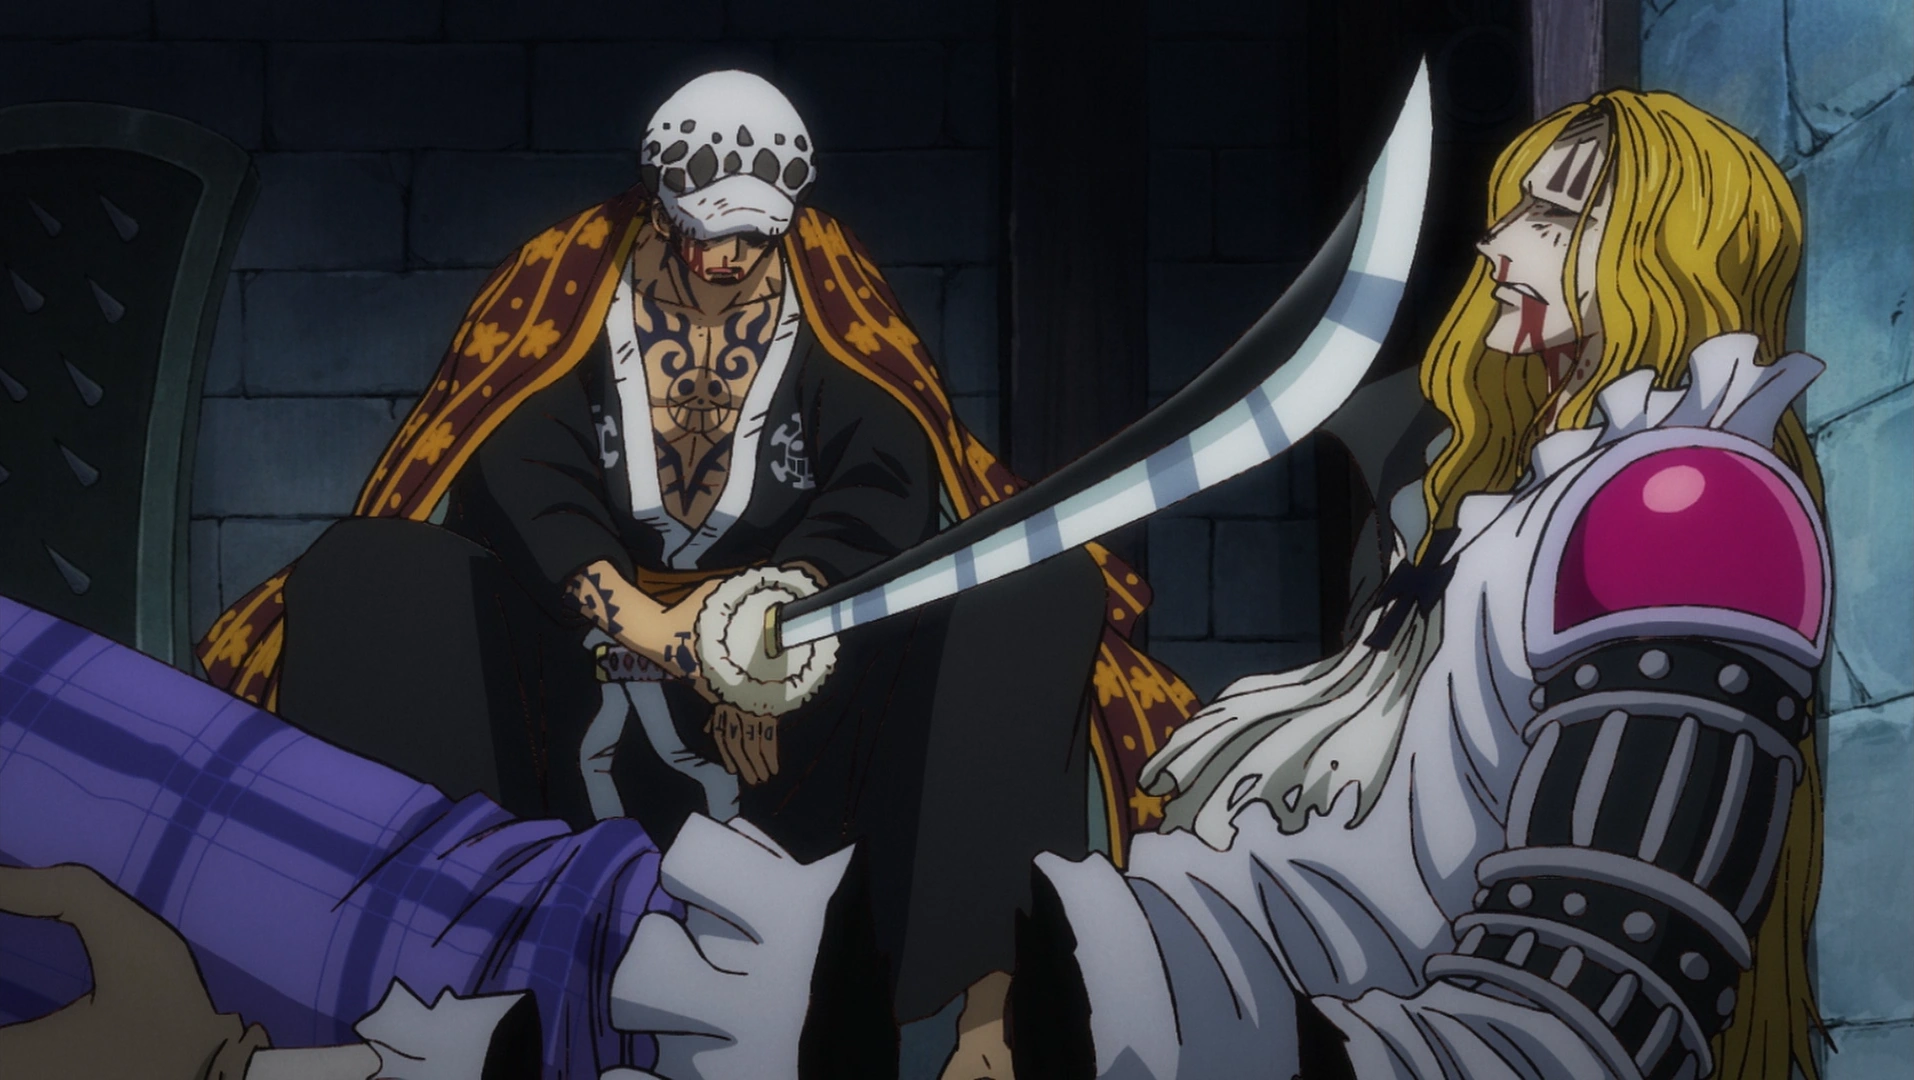
Hiyori told Zoro that he should leave Shusui with Ryuma's grave and offered to replace it with Enma, a Meito that Oden had passed down to her which was the only weapon to have wounded Kaido.[45] Zoro reluctantly agreed, though Kawamatsu had many reservations. In the Rasetsu Town prison, Law had overwhelmed Hawkins and cut him up, and told him to reveal what happened to his alliance with Kid and Scratchmen Apoo. Hawkins stated that Apoo had been working for Kaido since the beginning, and Kaido wanted to recruit him, Kid, and Killer to join his crew. He had obliged due to having no chance of survival otherwise, but Kid and Killer had fought until they collapsed. Hawkins wondered if Law had any doubts about his alliance with Luffy now that they were in Wano, but Law gave no answer as he headed out of his cell. Law told a mysterious person nearby that if their plan involved facilitating his escape, he would go along with it.[46]

Zoro tries to control his new sword, Enma.
As Luffy trained in the Prisoner Mine to improve his Haki and Franky, Usopp, and the minks worked to repair the ships, the rest of the Straw Hats and Nine Red Scabbards met to discuss the strategy for the final battle. Nami brought up Yasuie's message alteration to Kin'emon, and he deduced that the lines on the snake represented legs, meaning the snake was now a lizard and thus their new meeting spot was to be Port Tokage in Udon.[46] Zoro and Kawamatsu then revealed that Hiyori was alive, which overjoyed Momonosuke and the Scabbards. Hitetsu then arrived to present Enma and the sword Oden gave to Momonosuke, Ame no Habakiri. Momonosuke declined to take Ame no Habakiri at the moment, and Zoro took Enma, but quickly found that it instantly drained much of his Haki. Zoro managed to get his Haki back, successfully bringing Enma under his control. In the next four days, the yakuza bosses recruited 200 more people, bringing the alliance's total numbers to 4200, which was still well short of Kaido and Orochi's forces which were projected to number around 30,000; the alliance was also unable to find a way to free the Rasetsu Town prisoners. By the culmination of those remaining days, Luffy had managed to successfully project his Haki, and Zoro continued improving his skill with Enma. Hitetsu revealed to him that Enma and Wado Ichimonji were made by the same person, a man named Shimotsuki Kozaburo who had illegally left Wano over five decades ago.[47]
Kaido and Big Mom form a pirate alliance.
On the day before the final battle, Momonosuke and Shinobu joined the Nine Red Scabbards, save for Nekomamushi and the still-missing Denjiro, on a trek to Port Tokage to get ready for the raid, and Kin'emon bid farewell to Luffy after the latter arrived at Amigasa Village. Kin'emon's group then set off through the wasteland as many workers across the country spread rumors about their potential resurgence.[47] However, at Hakumai, Apoo arrived at Wano via a gondola accessible through a cave under the waterfall surrounding the country. Accompanying him were the Numbers, a group of large, monstrous people from Onigashima, and Apoo looked forward to the upcoming Fire Festival. On Onigashima, King reported to Queen that the Numbers were coming back, and Kaido and Big Mom were partying happily. They then announced that they had formed a pirate alliance, and would resume trying to kill each other after taking over the world; this announcement was met with great shock.[46] Meanwhile, on the cusp of the Fire Festival, Orochi received a report that revealed that the alliance's new meeting place was Port Tokage, and that Hiyori was alive and hiding in Ringo.[47]
Interlude: Big News From Levely
After the Levely ended, most of the royalty return to their countries, including the Neptune Family. However, at the World Economic News Paper headquarters, Morgans oversaw his workers frantically covering the massive events that had reportedly happened at the conference, including a death and assassination attempt. Attach handed Morgans a letter from the World Government containing bribe money to keep him from printing certain news, but Morgans refused to censor anything. Attach then pulled off his face to reveal that he was actually a Cipher Pol agent in disguise, and he attempted to silence Morgans by force, but Morgans quickly defeated him.[48]
The news was printed out, and the Revolutionaries, Sterry, Makino, and the Dadan Family were aghast after reading a news story about Sabo. At the same time, people found out that the Shichibukai system had been abolished after Nefertari Cobra and Riku Doldo III proposed it and the majority of the world leaders supported it. As a result of this, large Marine fleets and forces were sent after Mihawk, Hancock, Buggy, and Weevil. On the way to Amazon Lily, Captain Koby received a report from X Drake, who was secretly an undercover Marine and captain of their SWORD unit. Drake revealed to him that Kaido and Big Mom had formed an alliance and that he had seen CP-0 in Wano.[48]
On New Marineford, Sakazuki reported to Fujitora about Kaido and Big Mom's alliance, and Brannew and Sengoku briefed a room of Marines about the situation. Sengoku explained that 40 years ago, powerful pirates gathered on Hachinosu to band together to take over the world, forming the Rocks Pirates. Kaido, Big Mom, and Whitebeard were all part of this crew, and they were led by Rocks D. Xebec. The Rocks Pirates met their downfall 38 years ago during the God Valley Incident, where, unbeknownst to the public, Garp teamed up with Gol D. Roger to stop Rocks from threatening the World Nobles and their slaves. Big Mom and Kaido's alliance would be the greatest threat to the world since that, as they had grown much stronger since their time with Rocks, and their combined bounties were greater than even Roger and Whitebeard's bounties of over ![]() 5 billion. Sakazuki then arrived and said that they could not take action on Wano at the moment, as they did not have enough forces to mount such a venture. Sengoku understood, though pointed out that the unaffiliated country was unusually important in all of this, especially since Oden, the former Whitebeard Pirate and Roger Pirate, came from there.[49]
5 billion. Sakazuki then arrived and said that they could not take action on Wano at the moment, as they did not have enough forces to mount such a venture. Sengoku understood, though pointed out that the unaffiliated country was unusually important in all of this, especially since Oden, the former Whitebeard Pirate and Roger Pirate, came from there.[49]
Third Act
Oden's Log: The Great Samurai's Legacy

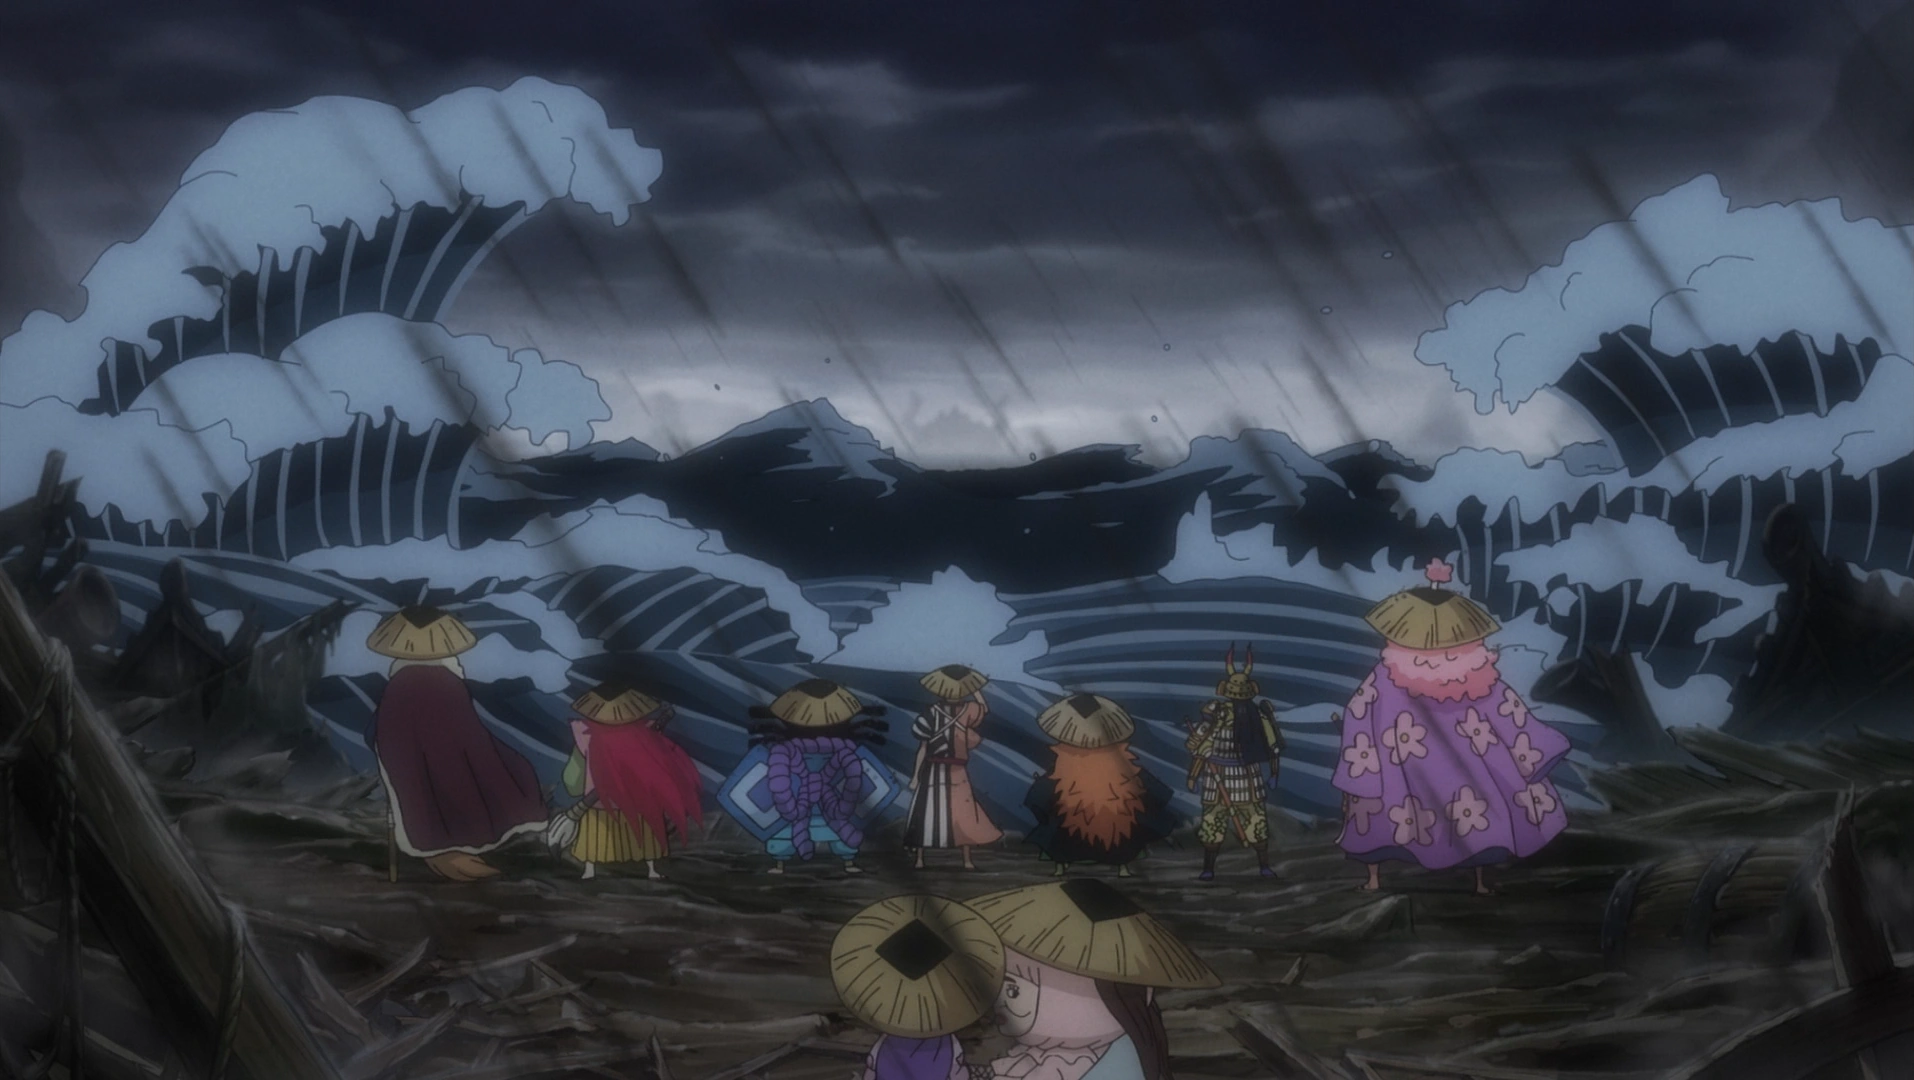
The Scabbards at port Tokage.
On the day of the Fire Festival, Wano Country began its celebration. Orochi set sail toward Onigashima with Fukurokuju, leaving Kyoshiro and the Mimawarigumi in charge of the capital. Meanwhile, Kin'emon's group reached Port Tokage, only to find the place wrecked and their allies nowhere to be found and unable to contact them. Desperate, they cursed their luck as they planned to have the small group depart alone, questioning what could have happened on the night before.[50]
Two days before the Festival, as Kin'emon rallied his allies, Orochi made plans of his own, sending men to destroy several bridges that connect the Wano regions and the hiding spot of the Thousand Sunny, cutting off the alliance from the Scabbards. Meanwhile, Holdem discovered the recent theft from the farm and confronted the residents of Okobore Town. After the citizens took the blame, the town was burned down. Despite Momonosuke's pleas, the Scabbards decided to follow their plan, knowing that they would not get another chance. Momonosuke then asked them what would he do without them, and they told him that his father also started out alone, before finding and inspiring the Scabbards to became samurai.[51]
41 years ago, in a brimming and flourishing Wano, the former Shogun Kozuki Sukiyaki prepares to disown his 18-year old son Kozuki Oden due to his outrageous actions he commited during his life. Oden, who returned from one of his failed attempts to go to sea, meanwhile enrages some citizen people when he cooks a pot of oden over a man's cremate remains. A young Kin'emon steals a valuable white boar from a gang and flees to the Flower Capital. Denjiro, however, tells him that the wrath of his parents, known as the Mountain God, would await those who won't return it. Just as the Mountain God attacked the capital, Oden overheard their conversation and told them to give him the boar.[52]
Oden cuts the Mountain God in half.
The Mountain God then attacked the capital and Kin'emon tried to attack the God in vain, after finding out it ate Tsuru. Oden then approached the Mountain God with his offspring and cut the Mountain God in half with his Nitoryu. Since he possessed the white boar, he took the blame for it. He then received a message from his father Sukiyaki, telling him he has been disowned and exiled from the capital. When Oden happily set off, Kine'mon and Denjiro became his followers. The trio went to Hakumai to meet the daimyo Shimotsuki Yasuie, who introduced them to his new servant.[53]
Oden defeats the crime boss Ashura Doji.
Within two years after he has been exiled, Oden, Kin'emon, and Denjiro parted ways with Yasuie started touring through Wano Country, with Oden wanting to explore the lawless Kuri. They were joined by the siblings Izo and Kikunojo, as well as the homeless Kanjuro and Raizo. One day, Oden went off to confront the criminals in Kuri, where he defeated all criminals and their boss, the most dangerous criminal in Wano, Ashura Doji. He then decided to take over the region, and together with his followers he worked to round up the criminals and restore order. Once he accomplished this, Sukiyaki reinstated him as his son, as well making him daimyo of Kuri. Oden, needing retainers as a daimyo, then decided to grant his followers the position of retainers.[54]
Six years later, as the former members of the Rocks Pirates started forming their own crews in the outside world, Kawamatsu discovered Inuarashi and Nekomamushi, who were washed up on Kuri Beach.[54] They left Zou 33 years ago to find Wano Country. After they washed up on Kuri Beach and were found by Kawamatsu, they were bullied by some citizens, believed to be demons. But they were saved by Oden, who stopped the citizens, and the three of them became his followers. Oden then started to run out of money, so his followers went out to steal money from Yasuie. They were caught, but to their surprise he gave them his money with the order to improve their social standing to increase Oden's respectability. They were successful in it, and three years later they were able to create a formal procession during Oden's visit to Sukiyaki in the Flower Capital.[55]

Oden and Whitebeard clash with a burst of Haoshoku Haki.
Later that year, Oden discovered that the Whitebeard Pirates had washed ashore on Wano. He raced toward them and clashed with Whitebeard, with the intention to join his crew.[55]
Whitebeard however, refused to let Oden join his crew, due to being concerned about his character. However, when he tried to covertly set sail at night, both Oden and Izo stowed away by riding on a chain. Whitebeard agreed on letting Oden join his crew if he could ride the chain for three days, but Oden, when there were only ten minutes left, ended up drifting away. He then washed ashore on an island, scaring away a band of human traffickers who had tried to kidnap a woman named Amatsuki Toki with the promise to take her to Wano. After she treated his wounds, Oden protected her when the traffickers returned with their leader Karma. However, Whitebeard then came and took out Karma when he offered Oden to join his crew, as he was impressed by Oden's willingness to protect Toki.[56]

Oden explores new places with the Whitebeard Pirates.
Oden, Toki, Izo, and the stowaways Inuarashi and Nekomamushi then sailed and adventured with the Whitebeard Pirates and one day, Toki revealed she was a time traveler who was born 800 years ago. Meanwhile, Gol D. Roger read the news of Oden joining Whitebeard and expressed his desire to meet Oden.[56] As they sailed with the Whitebeard Pirates for four years and learned more about the world, Oden and Toki fell in love and Toki gave birth to Momonosuke and Hiyori.[57]
However, several years ago in Wano, Orochi met an old woman who could change her appearance. She told him how the Kurozumi Family came close to seizing power before falling and offered him to help him to take the title of shogun. Orochi had amassed wealth by stealing and borrowing from Oden and Yasuie, and the old woman posed as Oden to get him a job in the shogun's castle by lying that he and Orochi were like brothers. As Sukiyaki started to ail, the old woman posed as him and she decreed that Orochi would become temporary successor as shogun until Oden returned.[57]
Roger's and Whitebeard's Haoshoku Haki clashes.
Meanwhile, the Whitebeard Pirates headed towards an island where a ruckus was going on. This ruckus was because of the Roger Pirates and Roger looked forward to battling Whitebeard on his final journey.[57] The Whitebeard Pirates are then discovered by the Roger Pirates and a excited Oden the rushes and attacks several Roger Pirates before being attacked by Roger himself. Roger and Whitebeard both prefer to battle each other, imbuing their blades with Haki and then clash with a burst of Haki, shaking everything around and even the island. The Whitebeard Pirates and Roger Pirates clash for three days and three nights. On the fourth day however, they end their battle and they split the loot equally between both crews. Roger then told Whitebeard about his dream of becoming Pirate King and travel the world, asking the latter he'll need to borrow Oden for a year and gave all his treasure to the Whitebeard Pirates. The Roger Pirates later reach Skypiea and Oden writes Roger's message beside the Shandora Poneglyph.[58]
After leaving Skypiea, the crew eventually traveled to Fish-Man Island, and encounter Neptune, who showed Shyarly prophesies future events, after correct predict past one before they happened. Neptune then took the Roger Pirates to the Poneglyphs at the Sea Forest: a Road Poneglyph and Joy Boy's apology, but they were surprised to not find the one of the Ancient Weapons, Poseidon there as Skypiea's Poneglyph had said. Neptune revealed another prophecy about a mermaid who could talk to Sea Kings that would soon be born, and assumed it is his daughter that was also prophesied. Shyarly then told Roger per his request that the Mermaid Princess would be born in 10 years, much after Roger's death.[59]

After finding Joy Boy's treasure, Roger laughs.
While adventuring in the New World, Toki came down with a fever and collapsed. Crocus stated that she could not continue sailing in that state, and the crew decide to dock at Wano for Toki to stay there. Upon arrival, Oden's family were greeted by his retainers who asked him to stay as well and rule Wano, but Toki demanded he Mustn't abandoned his journey for her sake, and Oden rejoined the Roger Pirates on his own. The crew then departed and headed to Zou to find the final Road Poneglyph.[59]
With the transcripts of all four Road Poneglyphs, the Roger Pirates charted course to the final island, and conquered the Grand Line, with Roger becoming the Pirate King. Oden wrote of this experience, recounting that they had discovered the truths about the Void Century, the meaning of D., and the Ancient Weapons, and he learned that Wano had once been connected to the outside world. He continue to describe Roger finding Joy Boy's treasure, prompting Roger to name this island "Laugh Tale".[59]
Sometime after that, the Roger Pirates were disbanded. Roger ordered the crew to sail to someplace where the Marines aren't waiting, saying he will be the first one to leave the Oro Jackson. After reaching an island, Roger stepped off the ship with a tearful sendoff from his crew. Afterwards, the crew's headed to Wano to drop off Oden, who claim his intention to open the borders of Wano before the day that Joy Boy appears.[60]
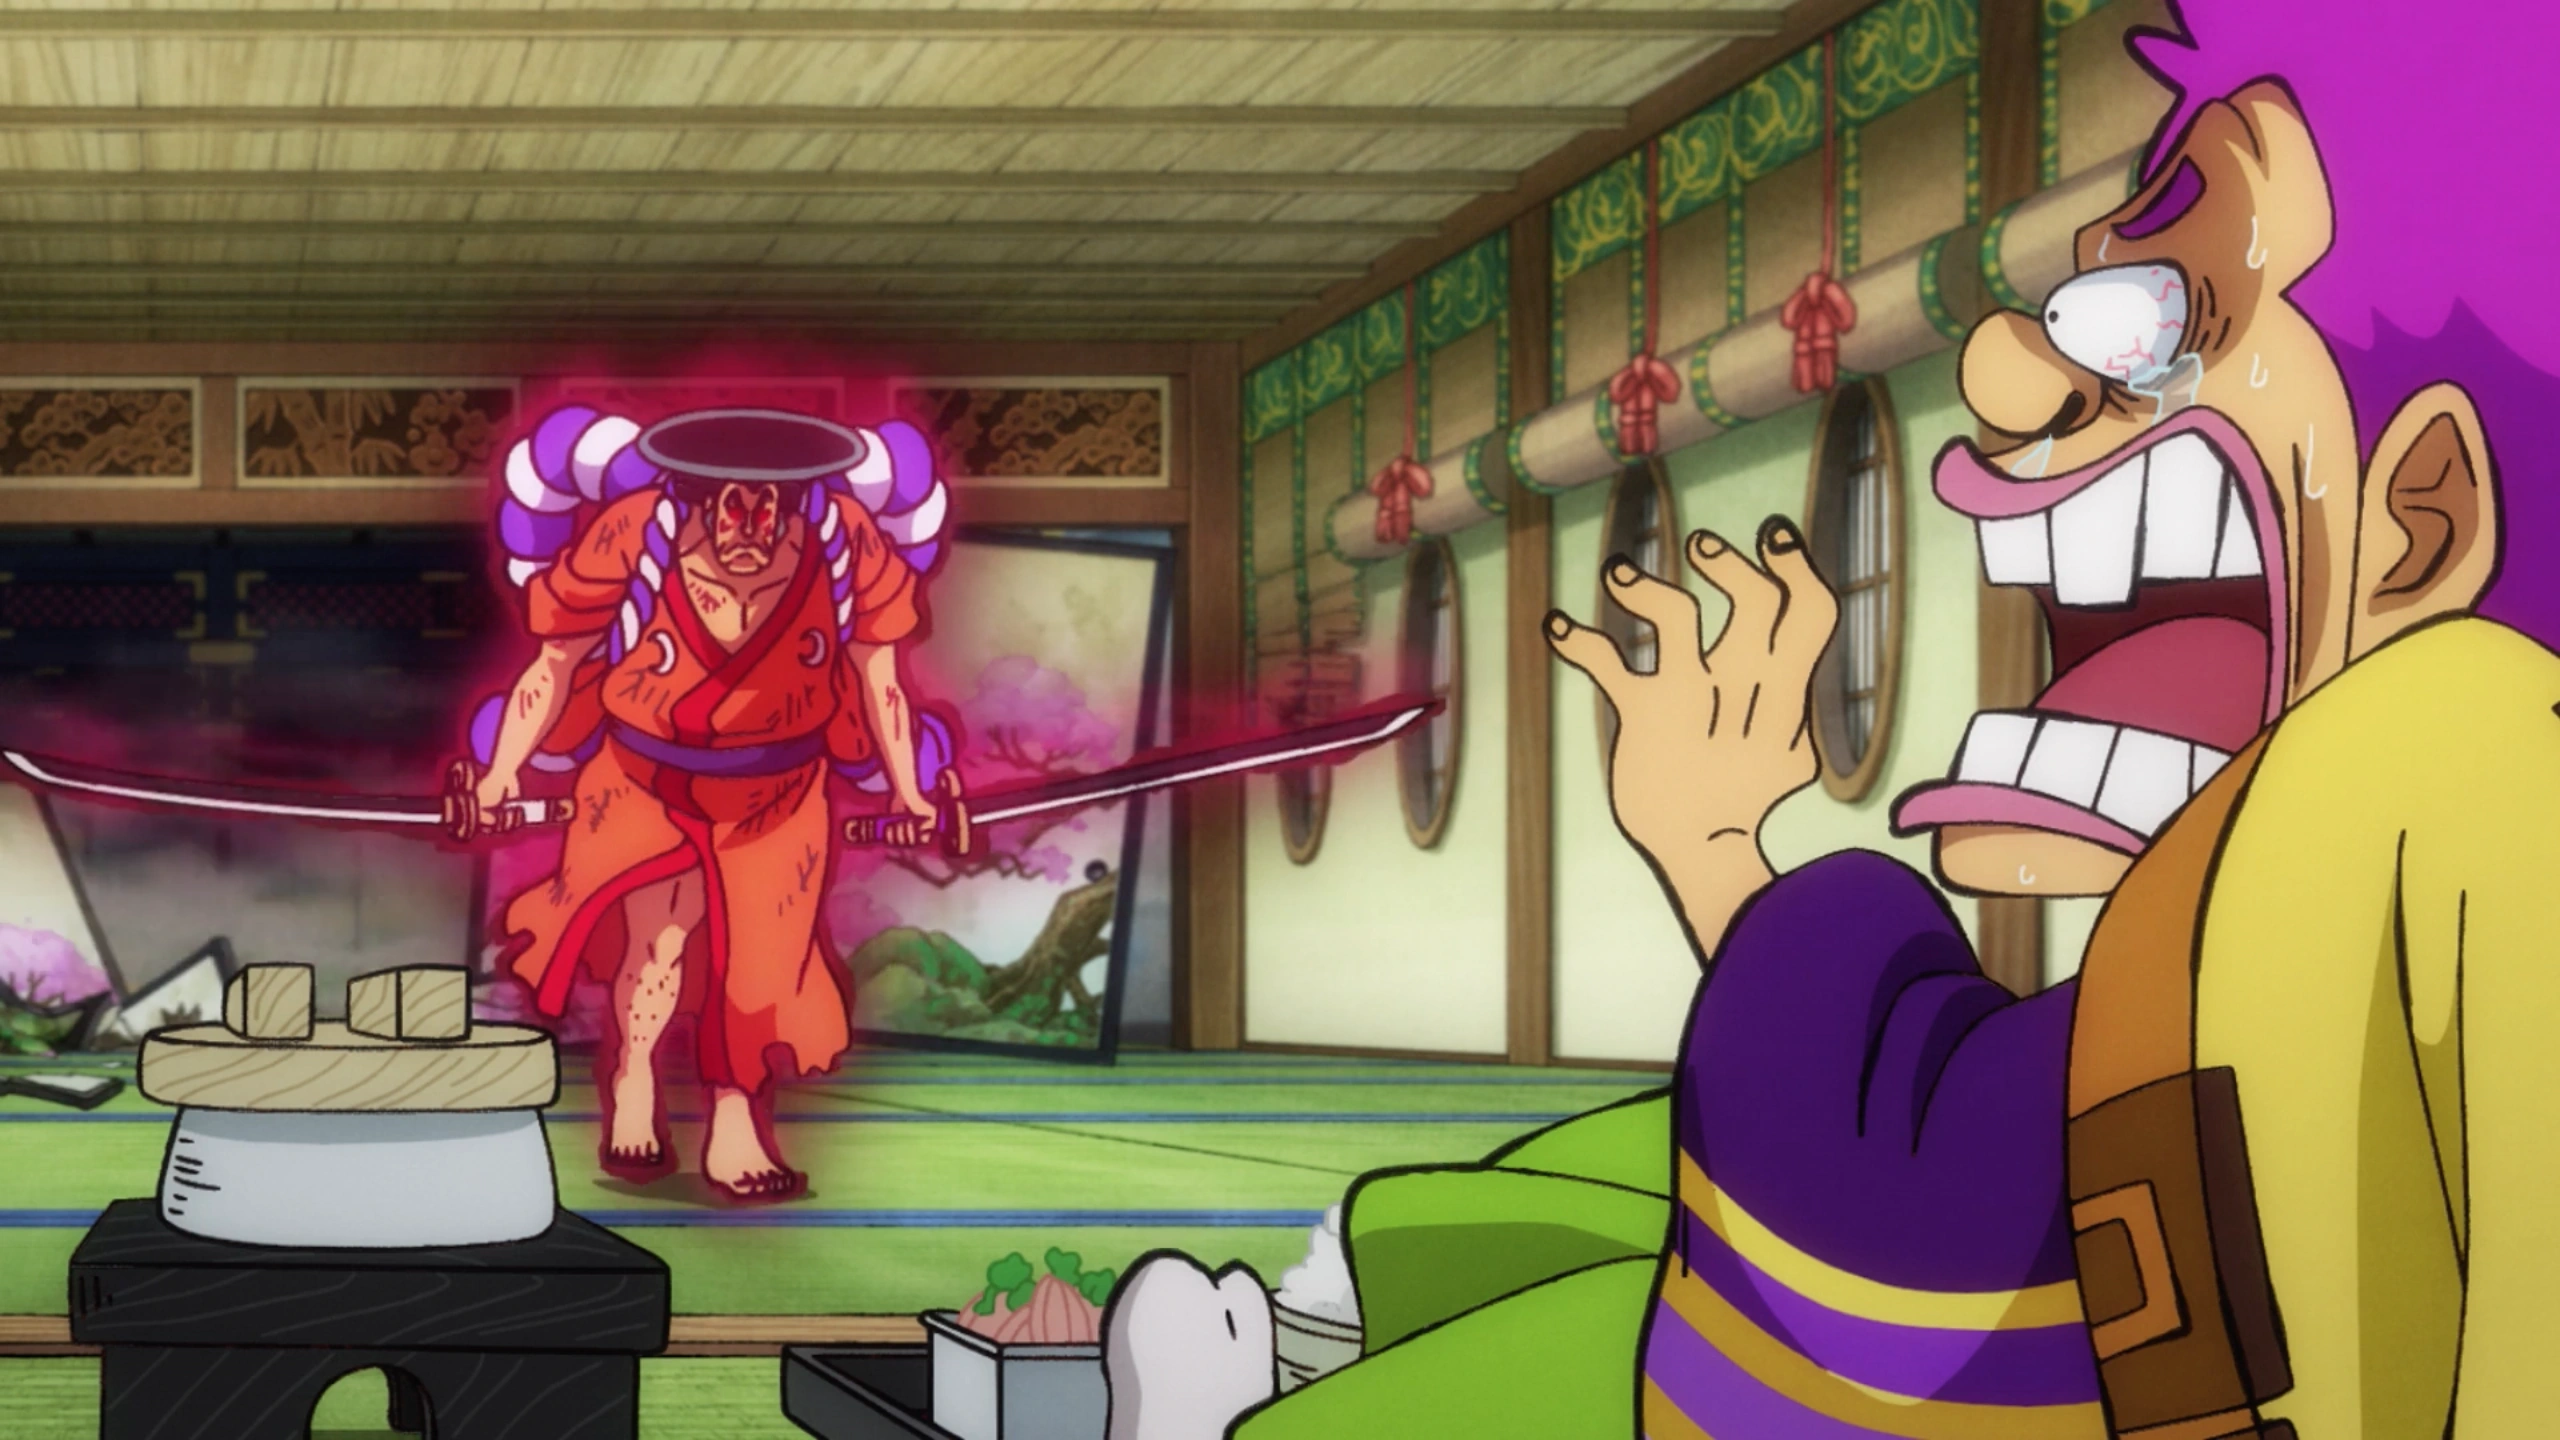
An outraged Oden attempts to kill Orochi, after learning of his atrocities as shogun.
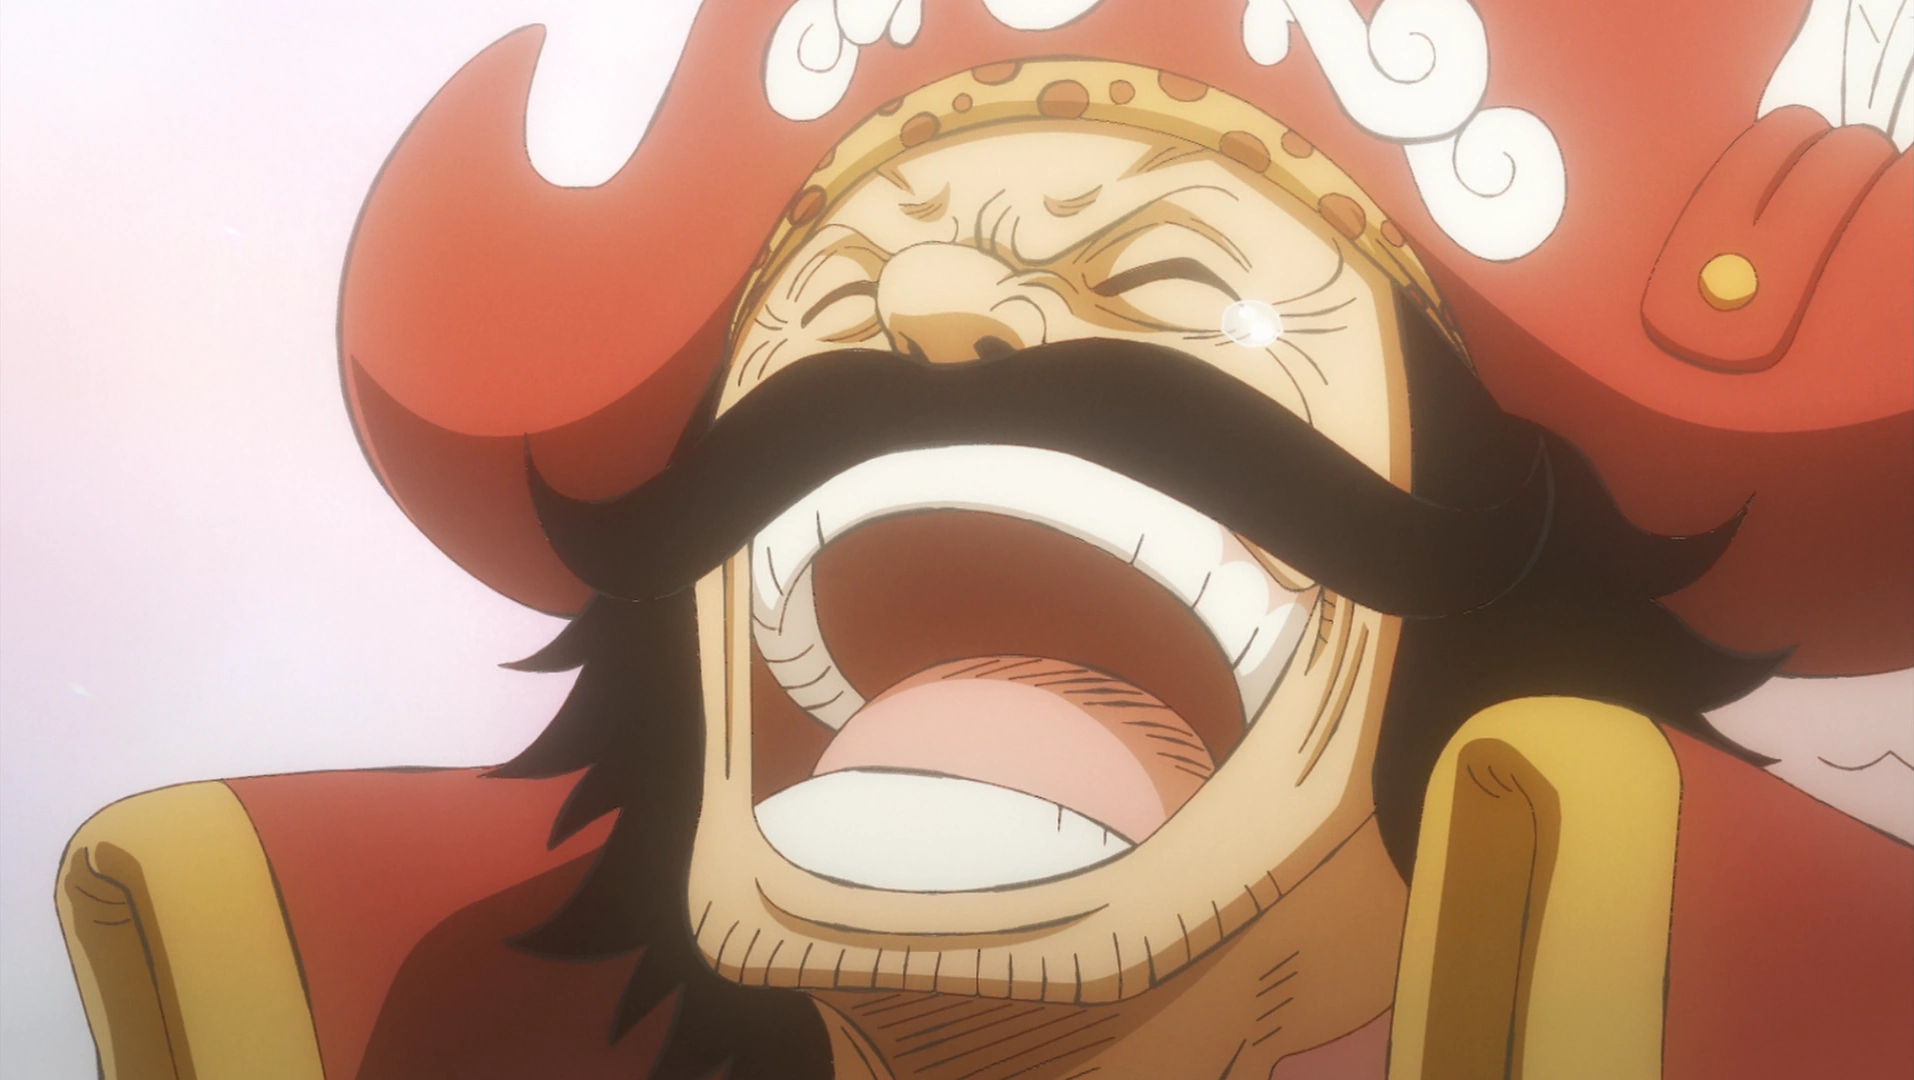
In Wano, Oden reunited with his family and retainers, surprised by the love and happiness the citizen show towards him, although he left Wano. The retainers told him about Orochi becoming shogun and how he had been oppressing the citizens with the aid of Kaido. After hearing about how his family was threatened, a furious Oden head to the Flower Capital. After taking out all Orochi's guards, Oden prepare to attack Orochi, who in fear warns Oden about Kaido's revenge, but Oden continue his assault.[60] Oden was prevented from killing Orochi by Kurozumi Semimaru, who protected Orochi with his Devil Fruit and Oden then learned the truth about Orochi's uprising from Higurashi, who posed as Oden's father. His actions then resulted in Orochi's allies attacking the citizens outside and Kaido appearing at the Flower Capital. Thus, Oden started dancing naked in the Flower Capital for five years due to a contract he made with Orochi and Kaido, losing all the faith and trust the people of Wano had for him, until he learns that Kaido and Orochi had deceived him. After a year, he was given the news of Roger's execution, where he both cried and laughed while reading the news. 20 years before the present day, he learned from Orochi that Kaido had captured Hyogoro on Orochi's orders and killed the yakuza boss' wife as well as 16 of his men and also about Orochi's plans to make Wano a producer of weapons. This spurred Oden to take action, and he and his retainers set out to defeat Kaido, when his retainers where given their group name, Nine Red Scabbards.[61]
Oden injures Kaido.
After they set out, Oden and his retainers were joined by Shinobu, who always wanted to serve the Kozuki Family. Oden then learned from Kaido, that he placed a spy in the Flower Capital and that they purposely made Oden dance, because he was too strong at that time for Kaido and his allies, thus weakening him and increasing their chances of victory. Oden and the Scabbards then fought a ferocious battle against Kaido and his crew in the Udon region. In the battle, Oden was able to inflict a scar on Kaido's chest, but before he could take Kaido out, he was tricked by Higurashi who transformed into Momonosuke and thus Oden was struck down by Kaido. Soon after, all of his retainers were taken down as well and the battle ended with Oden and his retainers defeated. They were then all imprisoned in the Flower Capital and sentenced to execution in three days by being boiled alive.[62]
Three days later, the citizens approach the execution site, and see a large pot of boiling oil, and Oden and his Scabbards are being assured towards it. Oden stops and turn to face Orochi and Kaido who are watching the event from a stage, and asks for a chance for him and his men to live. Kaido agree and says that if they survived an hour inside the pot they are free to go. Oden then enter the pot, holding his retainers above his head on a platform, saving them from the torture. The watchers then ridicule Oden for his actions five years to late, and about how long it takes him to die. Angered, Shinobu reveal the truth behind the deal Oden made with Orochi five years ago, that involves Oden dancing naked in order to stop Orochi from kidnapping and sell the citizens, and for him and Kaido to leave Wano in five years.[63]
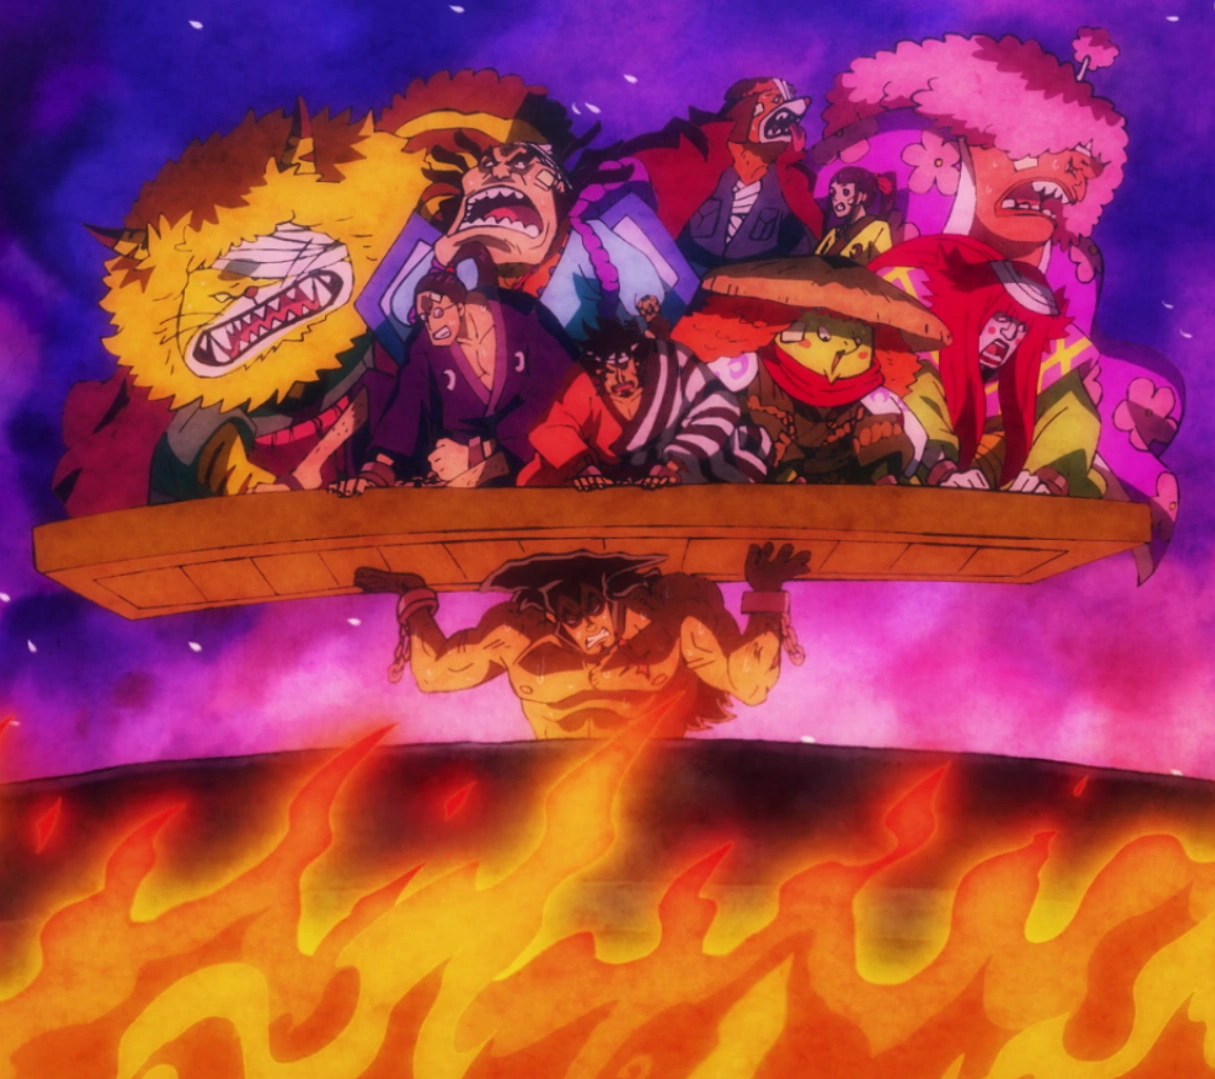

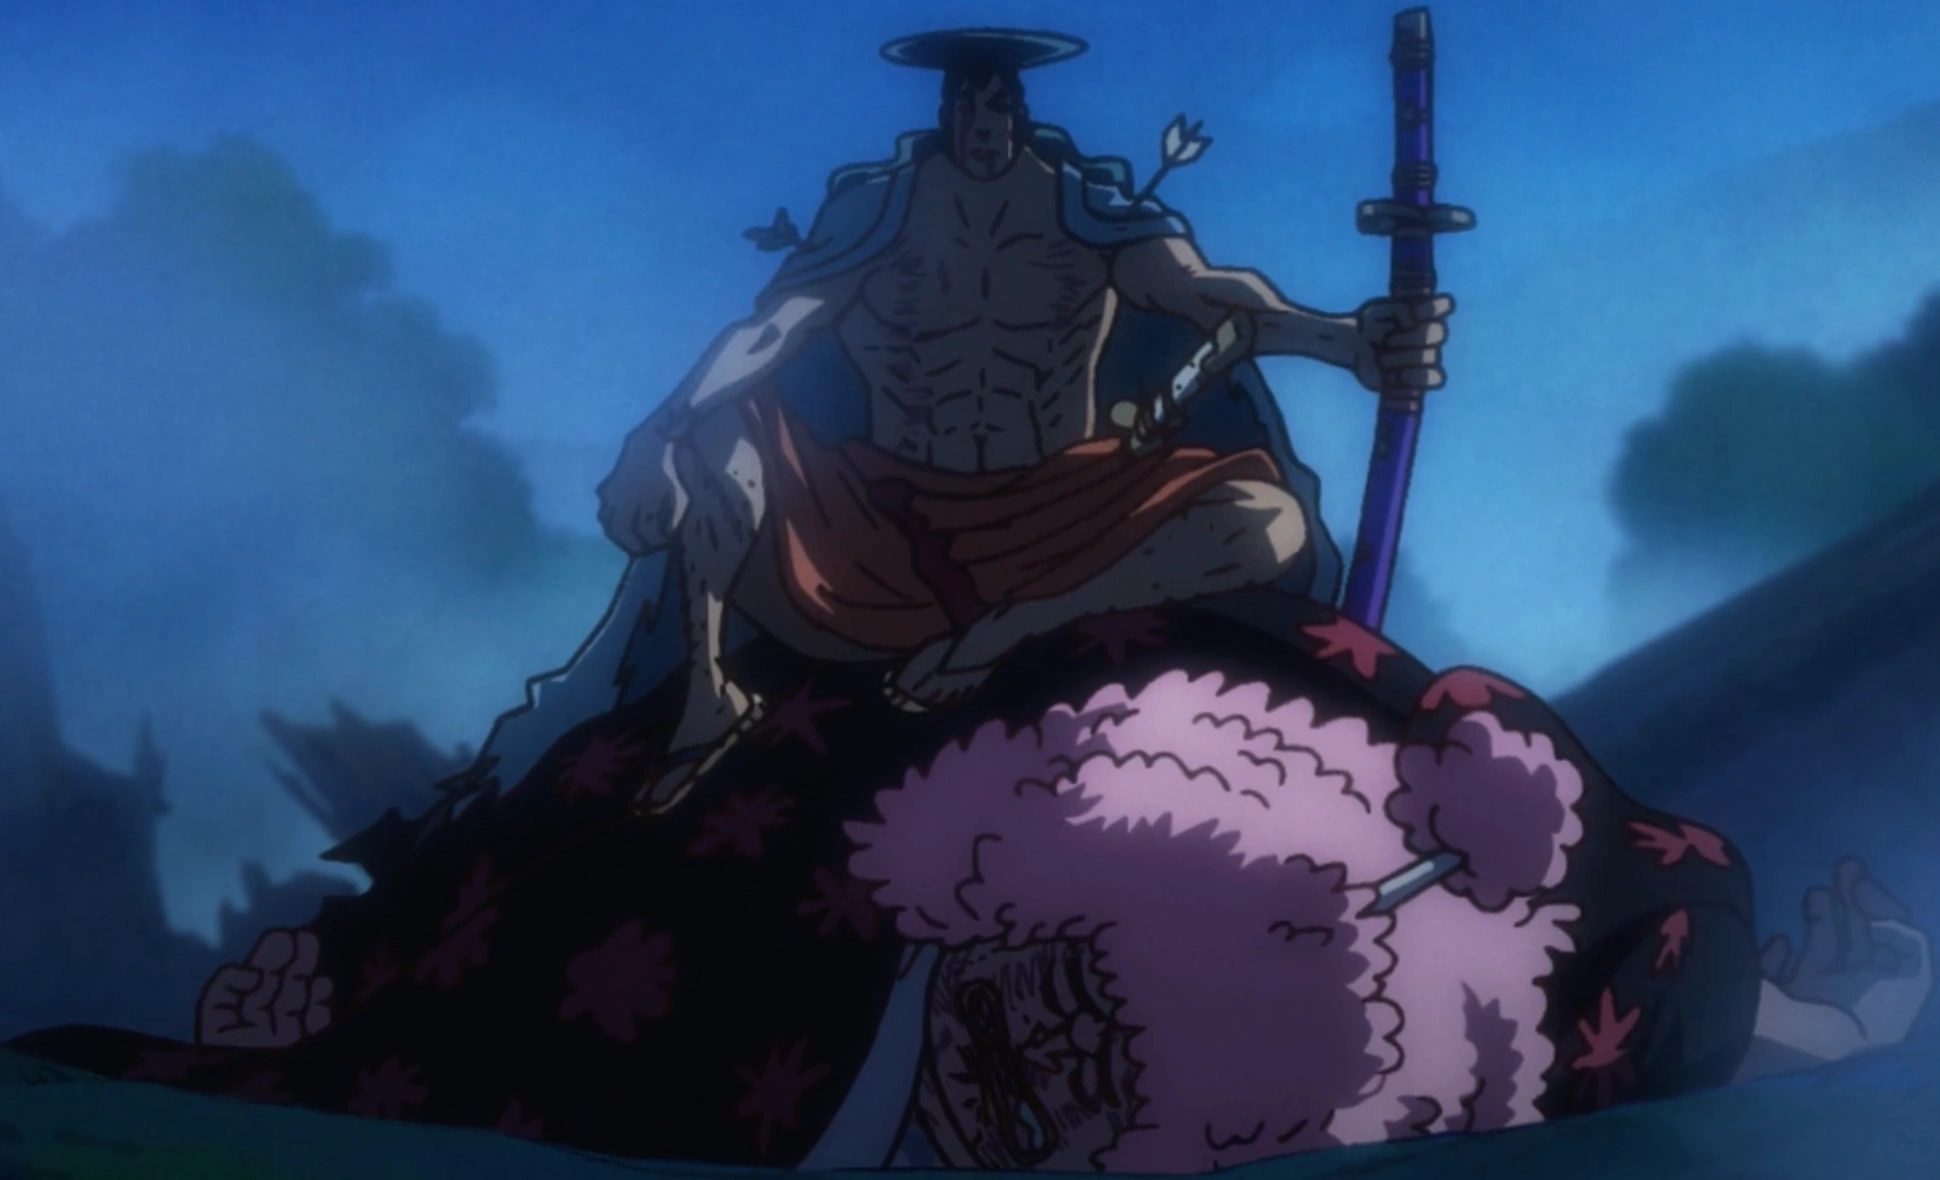
Oden and his retainers during their execution
Shocked by the reveal, the citizens change their behaviors and starts to cheer for Oden, discovering they are surrounded by Orochi's men. Nearing the end of the set time, the citizens count down and an hour passed, Orochi have Oden and his men held at gun point, still in the pot, claiming he changed the sentence a minute prior. Oden tosses his men above the crowd, saving them, and leave them with his wish to open the boarders of Wano to the world as Kaido shoots him and the samurai body disappear in the oil. Back in Kuri, news arrive to Toki and she recalls Oden in prison, giving her his swords for their children, and the letter he left to her before he left, asking her to use her power in preparation for a great war in 20 years time.[64]
Following Oden's execution, the Nine Red Scabbards raced to rescue his family in Oden Castle, which Kaido had set ablaze as he confronted Momonosuke. Toki sent Momonosuke with Kin'emon, Kanjuro, Raizo, and Kikunojo 20 years forward in time while Kawamatsu took Hiyori to safety. Shortly after that, she appeared in front of the onlooking citizens and gave her prophecy before she died. Denjiro went to a hut, and after a long period of time emerged with his appearance having changed due to his rage. He went to the Flower Capital and started attracting followers, calling himself "Kyoshiro". As Kyoshiro, Denjiro rose to become a yakuza boss and entered Orochi's service as his bodyguard. Seven years after Oden's death, after finding Hiyori on the street, he took her in and raised her to become Komurasaki as they prepared for the day of the final battle.[65] As Komurasaki became popular, she attract Orochi attention, causing Denjiro to fear for her safety and had her carry bags of fake blood on her person in preparation of faking her death to avoid the tyrant. Years later, when Kin'emon's group reach the present, Orochi and Kaido received words of their arrival, and prepare for their counter attack, based on the intel from Orochi trusted spy, who he recruited to be his informant while preparing to live and die as a Kozuki.[66]
Friends and Foes: The War Begins

Kanjuro reveals himself as Orochi's spy.
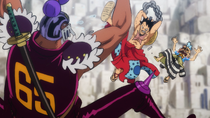
As the Scabbards left Momonosuke with Shinobu, they talk about the unavoidable conclusion that there is a traitor among them, who then reveal himself to be Kanjuro. Kanjuro reveal his reasoning behind his actions, as he is a member of the Kurozumi Family, and while he has no malice towards the Scabbards, his loyalty is to Orochi. At that moment, the Scabbards boat is confronted with vestals of the Beasts Pirates, who plan to sink the Scabbards. Angered at the revelation, Kin'emon slash Kanjuro, only to realize it is a drawing, and that the real Kanjuro has taken Momonosuke, and plans on delivering him to Orochi. Just then, to everyone's shock, the Beasts Pirates ships are attacked by the Thousand Sunny and the Victoria Punk, while the Scabbards are picked up by the Polar Tang, as the allies ships' captains prepare to strike back in a sea battle befitting pirates.[66] Just as Luffy, Law, and Kid strike a devastating blow against the Beasts Pirates, Denjiro appears. He cuts off a large portion of the Beasts Pirates ship and asks to bring his family to join the Nine Red Scabbards forces, revealing himself in the process. He reveals that he released the 1000 samurai trapped in the Rasetsu town prison and brought them with him. Finally, he applauds Kin'emon's "plan". The two lines in Yasuie's message were not legs, they were cutting lines signifying cutting the center part out. When you remove the center kana of はぶみなと the result is はと or "wharf". In other words, the true meeting place was a wharf hidden in a forest of Port Habu where the other 4200 soldiers were waiting. Kin'emon, however, was unaware of such a deception.[67]
Shocked by their arrival, Kanjuro took Momonosuke and headed to Onigashima to report to Orochi, and faced off against Kawamatsu who tried to free his lord. Kanjuro then conjured a crane with his devil fruit ability, and attacked the alliance with a cloud that rained arrows. Momonosuke then ordered the alliance to stay away and proceed to Onigashima. Meanwhile, the Beasts Pirates' ship distanced themselves and attacked the alliance as well with long range cannons, destroying several of the alliances' ships. The alliance was saved with the sinking of the ship by the hand of the newly arrived Jinbe, who introduced himself as a member of the Straw Hat Pirates.[68]
Jinbe then boarded the Sunny, and as the crew prepared to celebrate his return, the Scabbards were joined by Shishilian and Hyogoro as leaders of the alliance's forces to form a plan of attack. Law then suggested that they would split into four groups: One that would attack Onigashima from the front, two from each of its side, and one aboard the Polar Tang to submerge and attack Kaido's castle at the back of the island head on. Law stated the the Straw Hat and Kid Pirates would not listen to the plan and strike from the front, making up the first group. Kin'emon and Denjiro volunteered to be heading the groups to attack from each side, with the rest of the Scabbards on board the submarine. Law then noticed the Straw Hats were nowhere to be found, and an explosion was heard from afar, causing Denjiro to remember the guards in front of Onigashima. However, the Straw Hats were already fighting the guards, defeating them easily and looting them for the celebration of Jinbe arrival, but Luffy stopped the party, wanting to celebrate with the entire alliance once Kaido was defeated. The Kid Pirates then sailed past them aiming for Kaido's head, and Luffy ordered Jinbe to catch up to them. Meanwhile, on Onigashima, The festival had commenced as Orochi, Queen, Kaido, and Big Mom celebrated when the Tobiroppo arrived.[69]
Into the Dragon's Den: Entering Onigashima

The Ninja-Pirate-Mink-Samurai Alliance arrives at Onigashima
As Law and the Scabbards submerge, the rest of the alliance reach the entrance of Onigashima. After knocking out the guards, the Straw Hats wonder where to hide their ships as the samurai disembark, and Luffy sees the Samurai ship began to sink, with Kin'emon stating that it done since they won't need ships for the return trip, showing his determination. As the alliance crosses a bridge, they are given disguises by Kin'emon to appear like members of the Beasts Pirates in order to blend in and avoid unnecessary battles.
Meanwhile, inland, the Beasts Pirates celebration, the Golden Kagura, is starting with Apoo playing music and Queen performing and introducing the attendees, including the unseen Big Mom Pirates. Unimpressed by his show, the Tobiroppo sit in a booth waiting Kaido and began to argue among themselves about who would became Queen's replacement if he would die, causing Ulti to lash out at her comrades.[70] They then have their meeting with Kaido, with Kaido confessing it was not him who summoned them, but King then declares it was him who called them. Kaido then has one of his headliners, Bao Guang, reveal his schedule, including Big Mom's crew's arrival in Wano and their alliance with the Beasts Pirates, with Kaido revealing a very important annoucenment. Kaido then tells the Tobiroppo, it is their job to find his son, Yamato, who's been missing since the beginning of the festival. Who's Who then asks what their reward will be if they bring him back, with Kaido answering they have the right to fight an All-Star.
Meanwhile, the Straw Hat Pirates seperate into smaller groups, but after hearing from Jinbe, that Luffy wanted to stop Kid, since they do not know the plan, and Zoro declaring he'd find Luffy to prevent them from being spotted, Usopp, Nami, Sanji and Chopper are then worried both will be lost and spotted. Outside the castle, Luffy then asks some Beasts Pirates if they have seen Kid around, with them explaining, they never heard his name. He would then notice the massive amount of food gathered there, but then sees some Beasts Pirates spill Oshiroko and making jokes about giving it to the people of Okobore Town. Luffy, however, is left enraged after seeing the spilled food, remembering how happy Tama was when she was given Oshiroko on her birthday.[71]
The First Strike: Supernovas Clash
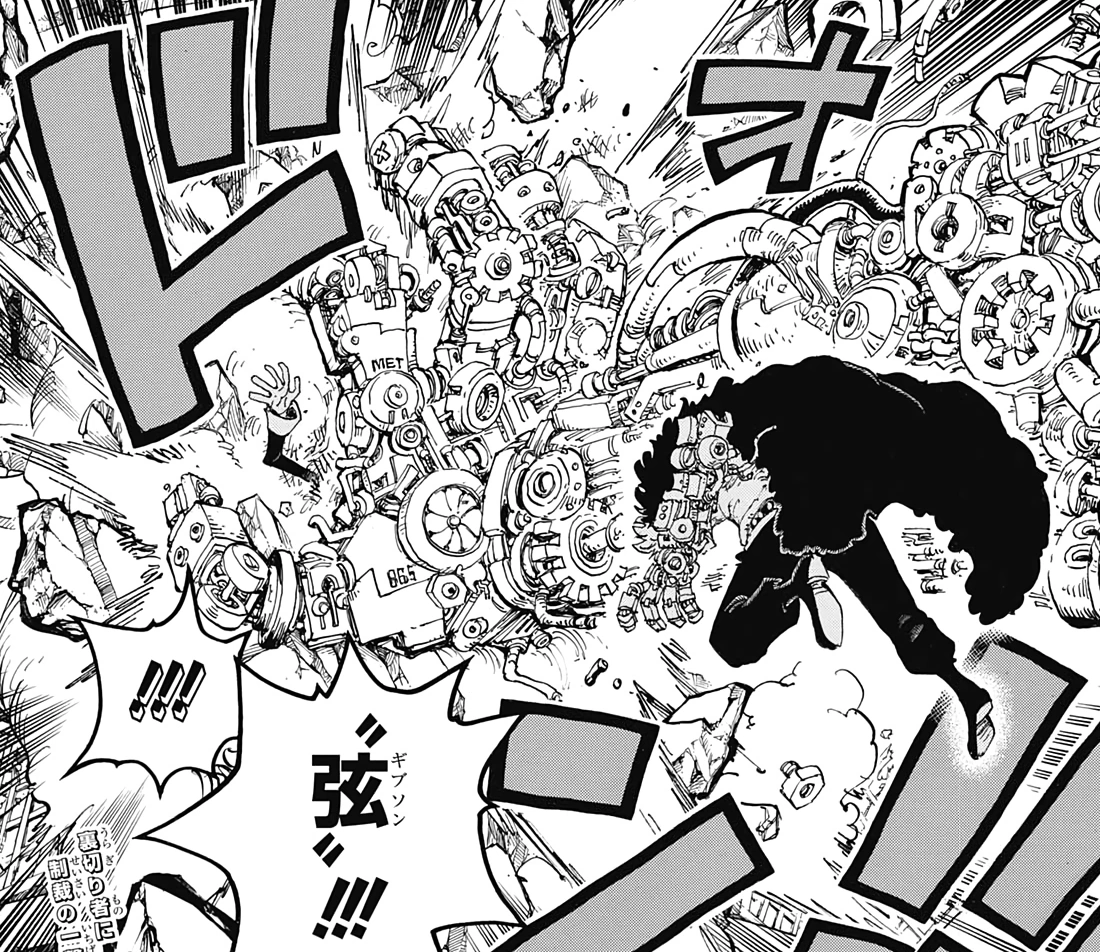
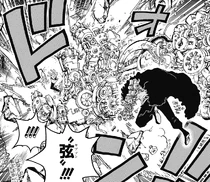
Kid attacks Apoo.
Furious, Luffy attacks the Beasts Pirates, drawing the attention from those around him. Zoro then arrives to lecture Luffy, and in the process draws even more attention by slicing off a building, however after hearing Luffy's reason, join him in rage. On the stage, Queen and Apoo figure out the identity of the invaders, and Queen offers the Beasts Pirates a chance to became one of the Tobiroppo, claiming there is someone he wants dead and a spot will be open, if they mange to capture the Straw Hats. With an army of Gifters approaching them, Luffy and Zoro are attacked by Apoo, unable to identify or evade his sound based attack. The two try to escape but are surrounded and Apoo prepare to strike again, when Kid steps in to attack Apoo for his treacherous actions.[72]
With Kid's sudden appearance, the Beasts Pirates are surprised while Queen is shocked to learn another one of Babanuki false report. Kid confronts Apoo about their alliance, and Apoo ridicules Kid's nativity on the concept of Pirate Alliance and attacks Kid. Queen then grants the Beasts Pirates permission to kill the intruders. Hatcha of the Numbers join the fight, knocking out some of his crew members as Kid is blown away, and is about to be attacked, but is saved by Luffy, who is angered at Kid's causing a riot. As the Supernovas try to get away from the horde of enemies, they are targeted by Apoo, but thanks to Killer's intel about Apoo's powers, mange to avoid being hit by covering their ears. Above the fight, Who's Who is talking with his men about finding Yamato, remembering Queen's saying he wishes to get rid of one of the Tobiroppo, and mirror his desires himself.
Meanwhile, Kin'emon's Eastern Forces reach the lake side Woman Trouble, a brothel under Black Maria rule, and decide to split their forces, with half entering the castle to corner Kaido and Orochi, with Shinobu suggesting they will also look for Momonosuke inside. As Kin'emon leads some of his men across a bridge next to the brothel, a shadow appear in one of the windows and the samurai hid in the water, however the Brachio Tank V led by Chopper is spotted by Big Mom. At the same time, the Big Mom Pirates learn about their alliance with the Beasts Pirates, but are unaware of the hidden port, as they try to re-enter Wano trough the Waterfall. As they reach the top, they are once again targeted by a flying individual, who they initially believe to be King, but is revealed to be Marco, who pushes the Queen Mama Chanter, sending them down the falls again, and across the Guardians ship with Nekomamushi and Izo onboard.[73]
Story Impact
- Several characters make their first appearances in the manga after the timeskip. The characters (in the order they were reintroduced) are: Marco,[1] Gecko Moria, Avalo Pizarro, Catarina Devon, Marshall D. Teach,[17] Stainless,[48] and Izo.[73]
- It is revealed that the Kozuki Family once made up the Wano Country shogunate, meaning that Momonosuke is the rightful heir to the shogunate.[12]
- It is revealed that Kozuki Oden's execution and Orochi and Kaido's takeover of Wano occurred two decades ago; Momonosuke, Kin'emon, Kanjuro, and Raizo, along with Kikunojo, were sent 20 years forward in time and Momonosuke's group immediately set out from Wano to find allies, with Wano having long since become a polluted wasteland.[12]
- Kanjuro is revealed to be a member of the Kurozumi Family and an undercover operative for Orochi who has provided him information about the Kozuki Family's actions, explaining how Jack found Zou twice and confirming Inuarashi's suspicion that someone with them was giving the enemy information.[66]
- The voyage of the Roger Pirates to Laugh Tale is shown.[58][59]
- It is revealed that Oden's wife Kozuki Toki was born during the Void Century, and traveled to his time with her Devil Fruit.[56] This explains and proves Momonosuke's statement in the Zou Arc that he had met Gol D. Roger.[74]
- The final island in the New World accessible by Log Pose is revealed to be Lodestar Island.[58]
- During his voyage with Roger, Oden was the one who wrote Roger's message on the Poneglyph in Skypiea.[58]
- A Road Poneglyph was once located in the Sea Forest next to the one with Joy Boy's apology.[59]
- Joy Boy left behind a treasure at Laugh Tale. Roger and his crew's reaction upon stumbling into Joy Boy's treasure was simply laughter. This led Roger to name the island after what he considered a "funny story", referring to whatever happened to Joy Boy.[59]
- The world referred to every treasure Roger gained as "One Piece".[60]
- Oden decided to open Wano's borders because he believed it would create a massive change in the world,[50] and his specific purpose for doing so is to welcome a specific person to the country.[64]
- The Levely comes to an end.[48]
- Fujitora and kings Nefertari Cobra and Riku Doldo III are successful in their campaign to dissolve the Shichibukai system. Dracule Mihawk, Boa Hancock, Buggy, Edward Weevil, and Bartholomew Kuma are stripped of their titles and protection, and the Marines attempt to arrest the former four.[48]
- The World Government intends for the newfound SSG to replace the Shichibukai among the Three Great Powers.[48]
- Sabo's group attacks Mary Geoise on the fourth day of the Levely. Something major happens to them, the news of which leaves the Revolutionary Army in an uproar.[48]
- Fujitora and kings Nefertari Cobra and Riku Doldo III are successful in their campaign to dissolve the Shichibukai system. Dracule Mihawk, Boa Hancock, Buggy, Edward Weevil, and Bartholomew Kuma are stripped of their titles and protection, and the Marines attempt to arrest the former four.[48]
- The "Rocks" first mentioned in the Levely Arc are explained in full. They are revealed to be a former pirate crew led by Rocks D. Xebec called the Rocks Pirates, which included Whitebeard, Kaido, and Big Mom in their ranks.[49]
- The crew was dissolved 38 years ago because Monkey D. Garp and Roger teamed up to stop them.[49]
- Big Mom meets with Kaido for the first time in 38 years. They decide to temporarily rekindle their old comradeship and pursue their former crew's goal of taking over the world.[44]
- It is revealed that there are two advanced applications of Busoshoku Haki that one can achieve:
- The ability to project Haki from the body, allowing the user to strike objects without making physical contact with them. This was first seen being used by Sentomaru in the Sabaody Archipelago Arc.[30]
- The ability to destroy objects from the inside by grabbing them. This was first seen when Silvers Rayleigh destroyed Camie's slave collar in the Sabaody Archipelago Arc.[39]
- Shusui is stolen and returned to Ryuma's grave, and at the behest of Kozuki Hiyori, Zoro leaves it there in exchange for receiving Enma, an O Wazamono sword that once belonged to Hiyori's father Oden.[45]
- Sanji decides to utilize the Raid Suit that his family gave him in the Whole Cake Island Arc. With the suit's power, he achieves his dream of being able to turn invisible.[22]
- Brook finds a Poneglyph in the basement of Orochi Castle.[26]
- The dissolution of the alliance between the Kid Pirates, Hawkins Pirates, and On Air Pirates is explained. Scratchmen Apoo is revealed to have been working for Kaido since before the alliance's formation, and set up Kaido to confront the other two crews.[46]
- X Drake is revealed to be an undercover member of the secret Marine unit SWORD, of which Koby is also a member.[48]
- Gecko Moria is revealed to the world to be alive, and Perona leaves Mihawk to reunite with him.[17]
- The Blackbeard Pirates have killed Absalom, resulting in Shiryu receiving the powers of the Suke Suke no Mi.[17]
- When Moria attacks the Blackbeard Pirates to find Absalom, Blackbeard invites Moria to join his organization.[17]
- Izo's early life is seen, and it is shown how he came to leave Wano and join the Whitebeard Pirates.[55][56][58]
- Jinbe is revealed to be alive and joins the raid on Onigashima. He is also confirmed to be the Straw Hat Pirates' official helmsman.[68]
- Kaido is revealed to a daughter named Yamato who intends to fulfill Oden's wish after witnessing the Legendary Hour and discovering his journal.[69][75]
References
- ↑ 1.0 1.1 1.2 One Piece Manga and Anime — Vol. 90 Chapter 909 and Episodes 890–892.
- ↑ 2.0 2.1 One Piece Manga and Anime — Vol. 90 Chapter 910 and Episodes 891–892.
- ↑ 3.0 3.1 3.2 3.3 One Piece Manga and Anime — Vol. 91 Chapter 911 and Episodes 893–894.
- ↑ 4.0 4.1 One Piece Manga and Anime — Vol. 91 Chapter 912 and Episodes 894–897.
- ↑ 5.0 5.1 5.2 One Piece Manga and Anime — Vol. 91 Chapter 913 and Episodes 898–899.
- ↑ 6.0 6.1 6.2 One Piece Manga and Anime — Vol. 91 Chapter 914 and Episodes 900–901.
- ↑ One Piece Manga and Anime — Vol. 91 Chapter 915 and Episodes 901–902.
- ↑ One Piece Manga and Anime — Vol. 91 Chapter 916 and Episodes 902–904.
- ↑ 9.0 9.1 One Piece Manga and Anime — Vol. 91 Chapter 917 and Episodes 904–905.
- ↑ 10.0 10.1 One Piece Manga and Anime — Vol. 91 Chapter 918 and Episodes 906–908.
- ↑ 11.0 11.1 One Piece Manga and Anime — Vol. 91 Chapter 919 and Episodes 908–909.
- ↑ 12.0 12.1 12.2 12.3 One Piece Manga and Anime — Vol. 91 Chapter 920 and Episodes 910–911.
- ↑ 13.0 13.1 One Piece Manga and Anime — Vol. 91 Chapter 921 and Episodes 911–912.
- ↑ One Piece Manga and Anime — Vol. 92 Chapter 922 and Episodes 912–914.
- ↑ One Piece Manga and Anime — Vol. 92 Chapter 923 and Episodes 914–915.
- ↑ 16.0 16.1 One Piece Manga and Anime — Vol. 92 Chapter 924 and Episodes 915–916.
- ↑ 17.0 17.1 17.2 17.3 17.4 17.5 One Piece Manga and Anime — Vol. 92 Chapter 925 and Episodes 917–918.
- ↑ 18.0 18.1 One Piece Manga and Anime — Vol. 92 Chapter 926 and Episodes 918–919.
- ↑ 19.0 19.1 One Piece Manga and Anime — Vol. 92 Chapter 927 and Episodes 920–921.
- ↑ 20.0 20.1 One Piece Manga and Anime — Vol. 92 Chapter 928 and Episodes 920–923.
- ↑ 21.0 21.1 21.2 21.3 One Piece Manga and Anime — Vol. 92 Chapter 929 and Episodes 922–923.
- ↑ 22.0 22.1 22.2 22.3 One Piece Manga and Anime — Vol. 92 Chapter 931 and Episodes 925–926.
- ↑ 23.0 23.1 One Piece Manga and Anime — Vol. 93 Chapter 932 and Episodes 926–927.
- ↑ 24.0 24.1 One Piece Manga and Anime — Vol. 93 Chapter 933 and Episodes 927–928.
- ↑ 25.0 25.1 25.2 One Piece Manga and Anime — Vol. 92 Chapter 930 and Episodes 923–924.
- ↑ 26.0 26.1 26.2 26.3 26.4 One Piece Manga and Anime — Vol. 93 Chapter 934 and Episodes 929–930.
- ↑ 27.0 27.1 One Piece Manga and Anime — Vol. 93 Chapter 935 and Episodes 930–931.
- ↑ 28.0 28.1 28.2 One Piece Manga and Anime — Vol. 93 Chapter 936 and Episode 931.
- ↑ 29.0 29.1 One Piece Manga — Vol. 93 Chapter 937.
- ↑ 30.0 30.1 30.2 30.3 One Piece Manga — Vol. 93 Chapter 939.
- ↑ 31.0 31.1 31.2 One Piece Manga — Vol. 93 Chapter 938.
- ↑ 32.0 32.1 One Piece Manga — Vol. 93 Chapter 940.
- ↑ 33.0 33.1 33.2 One Piece Manga — Vol. 93 Chapter 941.
- ↑ 34.0 34.1 34.2 One Piece Manga — Vol. 93 Chapter 942.
- ↑ 35.0 35.1 One Piece Manga — Vol. 94 Chapter 943.
- ↑ 36.0 36.1 36.2 One Piece Manga — Vol. 94 Chapter 944.
- ↑ 37.0 37.1 37.2 One Piece Manga — Vol. 94 Chapter 945.
- ↑ 38.0 38.1 One Piece Manga — Vol. 94 Chapter 946.
- ↑ 39.0 39.1 39.2 One Piece Manga — Vol. 94 Chapter 947.
- ↑ One Piece Manga — Vol. 94 Chapter 948.
- ↑ One Piece Manga — Vol. 94 Chapter 949.
- ↑ 42.0 42.1 42.2 One Piece Manga — Vol. 94 Chapter 950.
- ↑ 43.0 43.1 43.2 43.3 One Piece Manga — Vol. 94 Chapter 952.
- ↑ 44.0 44.1 44.2 44.3 One Piece Manga — Vol. 94 Chapter 951.
- ↑ 45.0 45.1 45.2 One Piece Manga — Vol. 94 Chapter 953.
- ↑ 46.0 46.1 46.2 46.3 One Piece Manga — Vol. 95 Chapter 954.
- ↑ 47.0 47.1 47.2 47.3 One Piece Manga — Vol. 95 Chapter 955.
- ↑ 48.0 48.1 48.2 48.3 48.4 48.5 48.6 48.7 One Piece Manga — Vol. 95 Chapter 956.
- ↑ 49.0 49.1 49.2 One Piece Manga — Vol. 95 Chapter 957.
- ↑ 50.0 50.1 One Piece Manga — Vol. 95 Chapter 958.
- ↑ One Piece Manga — Vol. 95 Chapter 959.
- ↑ One Piece Manga — Vol. 95 Chapter 960.
- ↑ One Piece Manga — Vol. 95 Chapter 961.
- ↑ 54.0 54.1 One Piece Manga — Vol. 95 Chapter 962.
- ↑ 55.0 55.1 55.2 One Piece Manga — Vol. 95 Chapter 963.
- ↑ 56.0 56.1 56.2 56.3 One Piece Manga — Vol. 95 Chapter 964.
- ↑ 57.0 57.1 57.2 One Piece Manga — Vol. 96 Chapter 965.
- ↑ 58.0 58.1 58.2 58.3 58.4 One Piece Manga — Vol. 96 Chapter 966.
- ↑ 59.0 59.1 59.2 59.3 59.4 59.5 One Piece Manga — Vol. 96 Chapter 967.
- ↑ 60.0 60.1 60.2 One Piece Manga — Vol. 96 Chapter 968.
- ↑ One Piece Manga — Vol. 96 Chapter 969.
- ↑ One Piece Manga — Vol. 96 Chapter 970.
- ↑ One Piece Manga — Vol. 96 Chapter 971.
- ↑ 64.0 64.1 One Piece Manga — Vol. 96 Chapter 972.
- ↑ One Piece Manga — Vol. 96 Chapter 973.
- ↑ 66.0 66.1 66.2 One Piece Manga — Vol. 96 Chapter 974.
- ↑ One Piece Manga — Vol. 97 Chapter 975.
- ↑ 68.0 68.1 One Piece Manga — Vol. 97 Chapter 976.
- ↑ 69.0 69.1 One Piece Manga — Vol. 97 Chapter 977.
- ↑ One Piece Manga — Vol. 97 Chapter 978.
- ↑ One Piece Manga — Vol. 97 Chapter 979.
- ↑ One Piece Manga — Vol. 97 Chapter 980.
- ↑ 73.0 73.1 73.2 One Piece Manga — Vol. 97 Chapter 981.
- ↑ One Piece Manga and Anime — Vol. 82 Chapter 820 and Episodes 772–773.
- ↑ Cite error: Invalid
<ref>tag; no text was provided for refs namedc984
| |||||||||||||||||
| |||||||||||||||||
| |||||||||||||||||
| |||||||||||||||||
| |||||||||||||||||
| |||||||||||
| |||||||||||
| |||||||||||
| |||||||||||||
| |||||||||||||
| |||||||||||||
| |||||||||
| |||||||||
| |||||||||
| |||||||||
| |||||||||
| |||||||||
| |||||||||||||||||
| |||||||||||||||||
| |||||||||||||||||
| |||||||||||
| |||||||||||
| |||||||||||
Template:Yonko Navibox
| |||||||||||||||||
| |||||||||||||||||
| |||||||||||||||||
| |||||||||||||||||||||||||
| |||||||||||||||||||||||||
| |||||||||||||||||||||||||
| |||||||||||
| |||||||||||
| |||||||||||
| |||||||||||||
| |||||||||||||
| |||||||||||||
| |||||||||||
| |||||||||||
| |||||||||||
| |||||||||||||||||||
| |||||||||||||||||||
| |||||||||||||||||||
| |||||||||||
| |||||||||||
| |||||||||||
| |||||||||||||||
| |||||||||||||||
| |||||||||||||||
| |||||||||
| |||||||||
| |||||||||
| |||||||||
| |||||||||||||||
| |||||||||||||||
| |||||||||||||||
| |||||||||||||||
| |||||||||||||||
| |||||||||||||||
| |||||||||||||||
| |||||||||||
| |||||||||||
| |||||||||||
| |||||||||||||||||||||
| |||||||||||||||||||||
| |||||||||||||||||||||
| |||||||||||||||||||||
| |||||||||||||||||||||
| |||||||
| |||||||
| |||||||||||||||
| |||||||||||||||
| |||||||||||||||
Template:Shichibukai Navibox
| |||||||||||||
| |||||||||||||
| |||||||||||||
| |||||||
| |||||||
| |||||||
| |||||||||||||
| |||||||||||||
| |||||||||||||
| |||||||||
| |||||||||
| |||||||||
| |||||||||
| |||||||||
| |||||||||
| |||||||||||||||||
| |||||||||||||||||
| |||||||||||||||||
| |||||||||||||||||||
| |||||||||||||||||||
| |||||||||||||||||||
| |||||||||||||||||||